

1⁄35Cosmetic Damage
Introduction
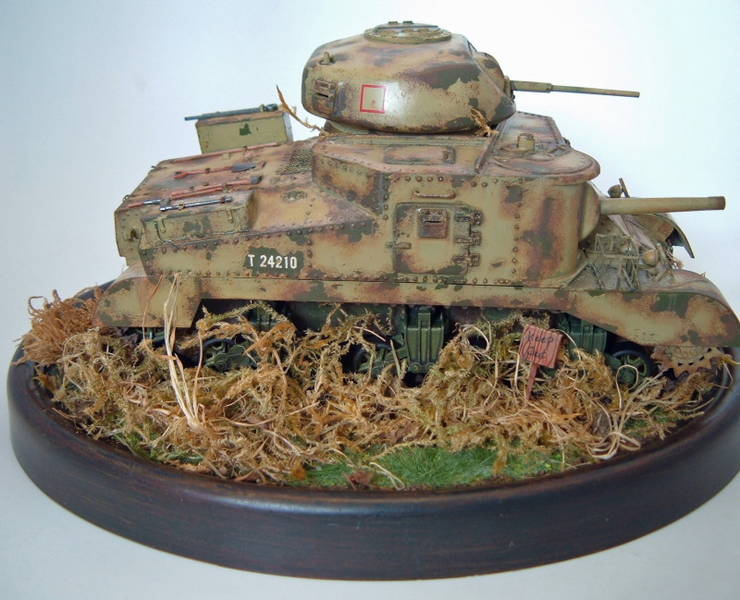
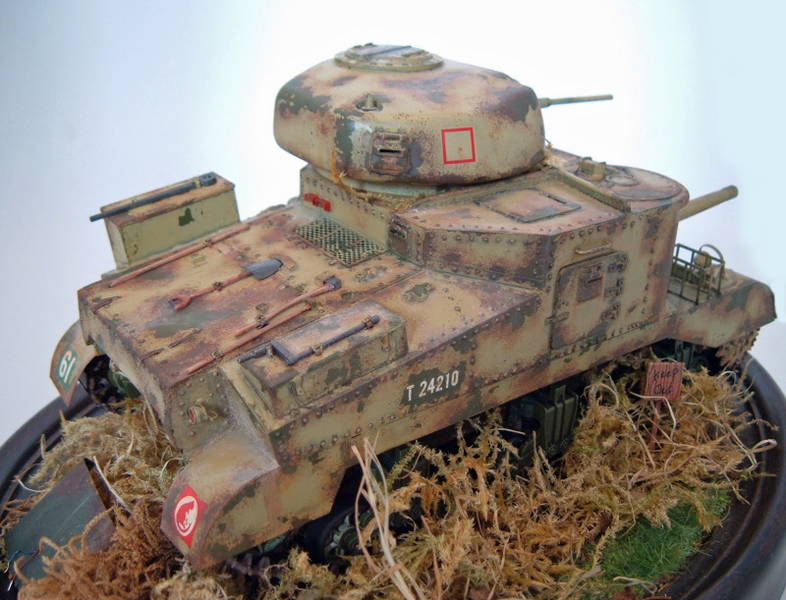
I intended this build to be have a fairly light-hearted approach, exploring the possibilities of using readily available skin-care and cosmetics products when finishing my models. It struck me that we frequently use household cleaning products, such as turpentine and Future floor polish, so what's to stop me from using other mediums such as cosmetics? In this build I am going to depict a vehicle in a rather exaggerated state of distress. I usually finish my models with close attention to reference pictures depicting vehicles in a slightly less distraught state than this project however I found an interesting example of a Grant at the Brussels Tank Museum as a basis. This Grant was not as battered as my example, but its original color was Olive Drab later over painted in dark yellow.Base-coat and masking
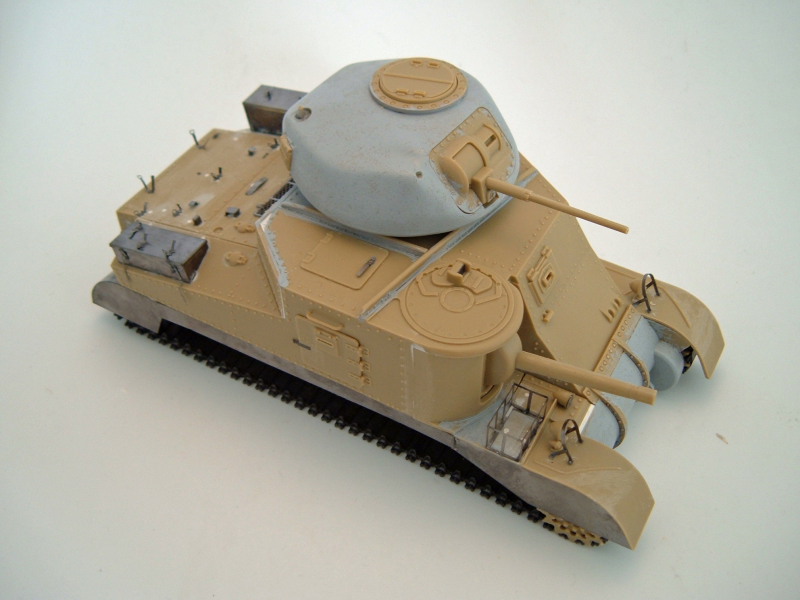
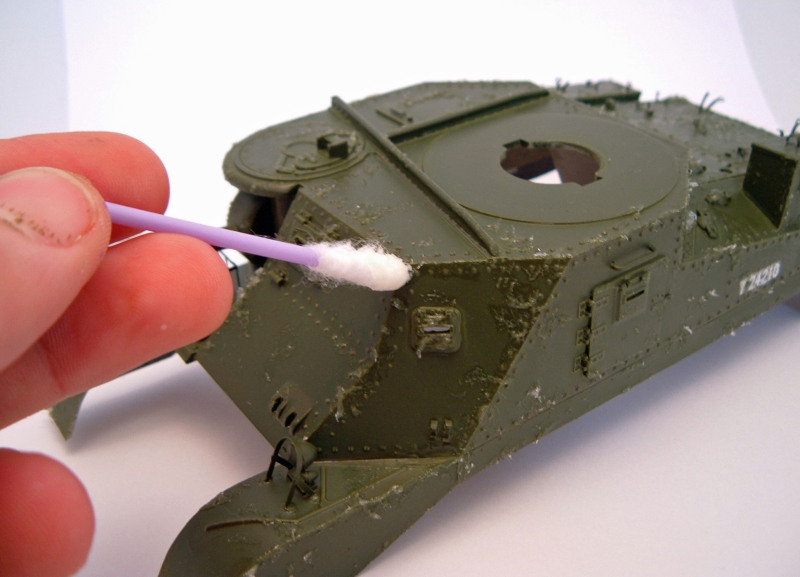
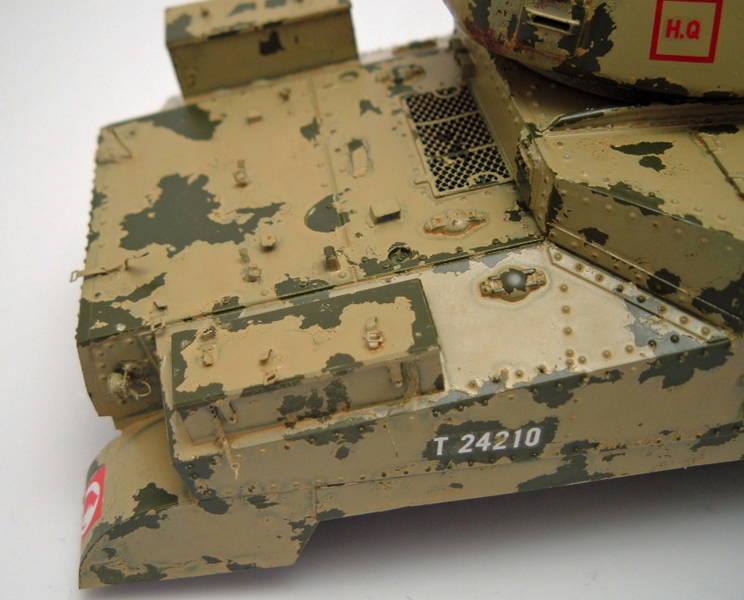
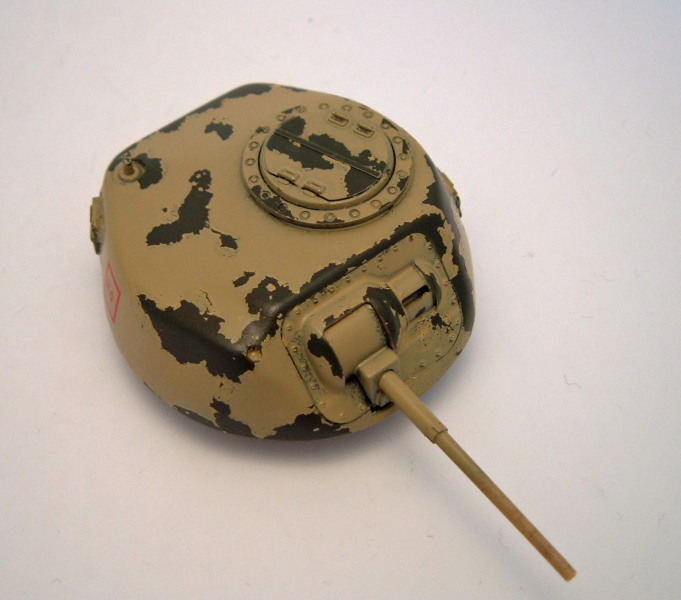
An application of Tamiya Color 100ml spray can Olive Drab 2 TS-28 was the first step of the painting process. In this first step, I applied paint to the whole of the model. This coat had to be fully dried before moving onto the next step. I took a cotton bud and scooped out a decent amount of Vaseline onto the end. The Vaseline acted as my masking agent with covered areas protected from any paint sprayed onto it. With that in mind, I took the cotton bud and stippled the Vaseline onto areas of the model which would be exposed to a high degree of knocks and dents, concentrating on areas such as corners and edges. Application of the spray can TS-3 dark yellow top coat was applied as soon as possible after the Vaseline had gone on. I found that the Vaseline evaporated/dried after about five minutes or so which can negatively effect the end result if not careful. Unfortunately, I did find criticism with the Tamiya sprays at this point, discovering that the paint can come out very thickly with broad, splattered, uneven coverage. For large areas I would definitely use these cans again, however, for more compact pieces, I fear a lot of the surface detail would be submerged under an overflow of paint. Lesson learned, it was time to move onto the final stage of the main paint scheme and remove the masking solution using alcohol free facial cleansing wipes. I use these because they are designed to remove waterproof makeup and Vaseline which if not removed properly would leave a greasy residue. At this point the model looked a total mess, but its just a step in the process so not to worry! I removed the Vaseline as soon as the paint was dry enough, around half an hour to an hour, checking to see if the paint was still soft or tacky, which meant more time was needed to dry before removal.Markings and weathering
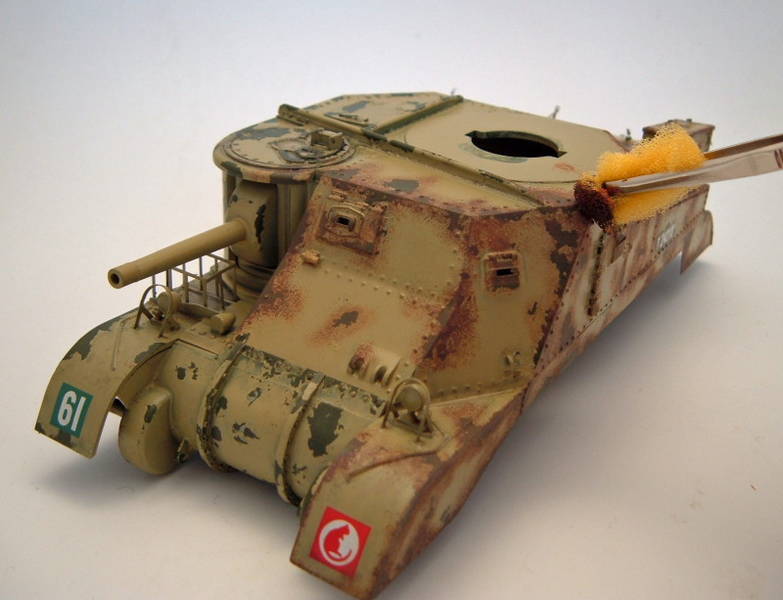
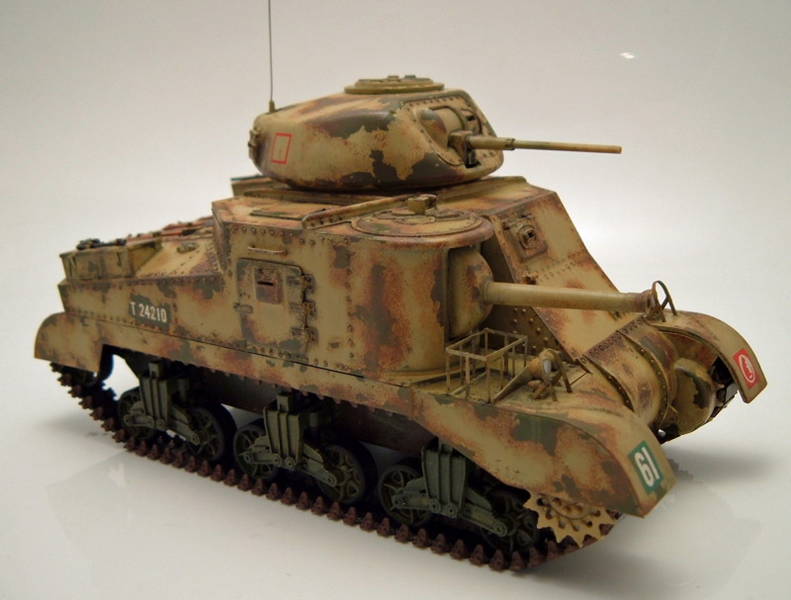
Decals were applied at this stage before any further painting or washing was done. I wanted the marking to appear as though they have been painted onto the vehicle whilst it was still in a respectable condition, and as such, any weathering of the paintwork would also have equally effected the field markings. Washes combined with some rusting effects brought all these elements onto one level making the bodywork look more natural. The application of rust to this model had to be carefully considered. I wanted this model to be portrayed as if it were an old forgotten relic, in a museum or private collection and I had to imagine what weather conditions it had endured. To create the rust, I lightly stippled Tamiya red brown onto areas of peeling with a sponge. The key to this technique is to build the effect up very slowly, wiping off 90% of the paint onto a piece of paper before you introduce it to the model. Another essential was to vary the shade of the brown. To alternate the shades, I mixed red brown with a little orange and built up the rust in thin, multi-tonal layers, aiming in the next stage to blend everything together. I applied a pin wash of lamp black to the raised bolt heads instead of applying the wash over the entire model, concentrating on pooling a small drop of the black wash around each individual bolt to simulate the collection of dirt around it. Not a quick job, but worth it. Similarly, on the lower hull, I used the lamp black wash vs. a wash of burnt sienna applied to the upper hull to better compliment the olive drab. I find that burnt sienna works best with grays and yellows and that lamp blacks tends to compliment green and brown tones. To create the streaking effect, I first chose three earthy enamel colors. I took a small brush and applied a tiny amount to the area I wanted the streak to originate from. I concentrated on areas such as bolt heads and panel lines in moderation to avoid it being overdone. Finally, I took a brush dampened with turpentine and drew the paint in an even down-wards motion away from the blob of paint, going over the streak again with the brush to lighten the effect as needed. Not much time was spent on the pigment aspect of this build. I mainly used the product as a flattener to dissipate some of the sheen the finish had acquired. The mixture was made from a combination of Mig Pigments, 50% brick dust and 50% dry mud. Carrying on from the skincare theme, I also used a little mascara on the ends of the gun barrels. The product has a thick, jet black quality that lent itself very well to modeling when applied with a cotton bud.Base and Finish
All that was left was to set the scene for my model. As mentioned earlier, I was attempting to recreate an old vestige of the past, left to decay hundreds of miles away from where it served. This required a bit of experimentation as far as the base was concerned. To recreate this environment properly, I had to find something a little wilder than the normal grass flock I've used in the past. Whilst practicing with the band that I play with, I noticed a dried flower arrangement bordered with moss in the corner of the room. This looked just right for the type of foliage I wanted for the base and a sample was whisked away for experimenting with and I was very pleased with the results. This was then glued rather randomly to an old base I had used for another model a few months back and the base was complete. It is nice sometimes to break away from the hyper accurate and produce something simply for the joy of it and experiment and this build did that for me despite the dangers of using my girlfriend's cosmetics in the process!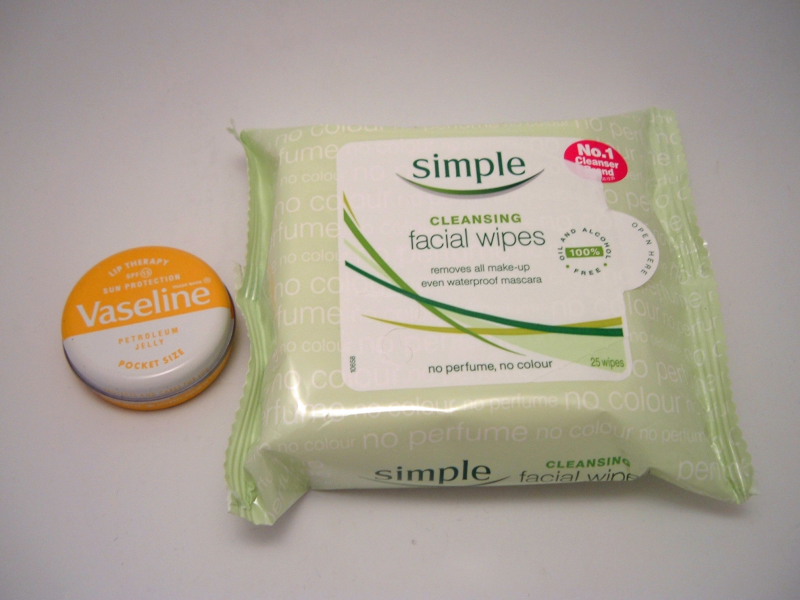


About the Author


FROM: ENGLAND - WEST MIDLANDS, UNITED KINGDOM
Like many, I got back into modelling only recently after a long spell away from the hobby, I started when I was about 13 exclusively building winged things before becoming distracted by other interests; girls beer etc... However, I am back now with avengance and seriously looking to break into ...
Copyright ©2021 by Stuart Taylor. Images and/or videos also by copyright holder unless otherwise noted. The views and opinions expressed herein are solely the views and opinions of the authors and/or contributors to this Web site and do not necessarily represent the views and/or opinions of Armorama, KitMaker Network, or Silver Star Enterrpises. All rights reserved. Originally published on: 2007-08-05 00:00:00. Unique Reads: 17637

WEB HOSTING BY


Copyright ©2021 Armorama and Kitmaker Network, a subsidiary of Silver Star Enterprises
All Rights Reserved. Please read our Conditions of Use and Privacy Policy.
All Rights Reserved. Please read our Conditions of Use and Privacy Policy.