

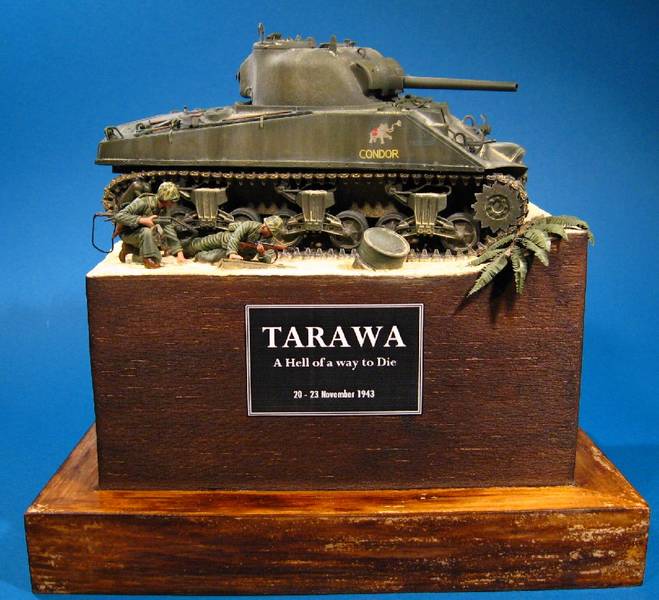
1⁄35A Hell of a Way To Die
26
Comments
Introduction
The subjects that I model are not really pre-planned; its just what takes my fancy at the time. I never had any interest in the war for the Pacific and had never modelled anything from that theatre either . well that was until I won Dragons M4A2 Tarawa Sherman kit in a previous months Dragon Model f the Month competition. I quickly found some Internet reference material to guide me; Terry Ashleys Review on PMMS and the Tarawa on the Web site. I also scored Derrick Wrights Tarawa, A Hell of a Way to Die quite cheaply on E-bay, which has woken a new found interest in the Pacific theatre and especially the marines who fought there. I enjoyed this book so much, and couldnt think of a better name for the scene, so I used the book title!Historical Background
Operation Galvanic the invasion of the Gilbert Islands by the US Marine Corps and Army units of the V Amphibious Corps, began in the early morning of 20th November 1943, with a huge naval bombardment of the tiny island of Betio on the western edge of the Tarawa atoll. It marked the beginning of Americas island-hopping advances across the Pacific, and would have ended with the invasion of the Japanese mainland if it were not for the atomic bombs dropped on Hiroshima and Nagasaki. On the 20th of November 1943, the Japanese garrison was 4,836 men. 76 hours later the survivors, 17 Japanese soldiers and 129 Korean labourers were taken as prisoners of war. 837 Marines were killed in action, 153 died later from wounds or were missing and presumed dead, and 2296 were wounded.M4A2 Construction: Suspension and hull
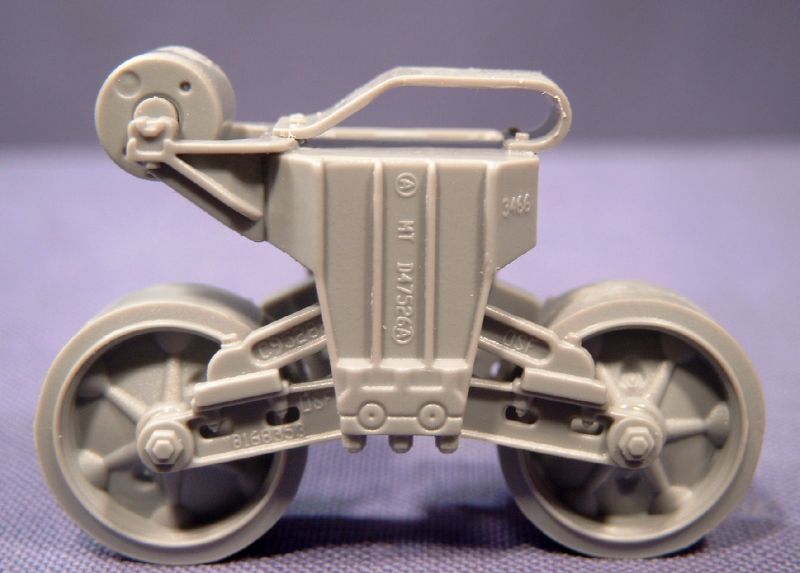
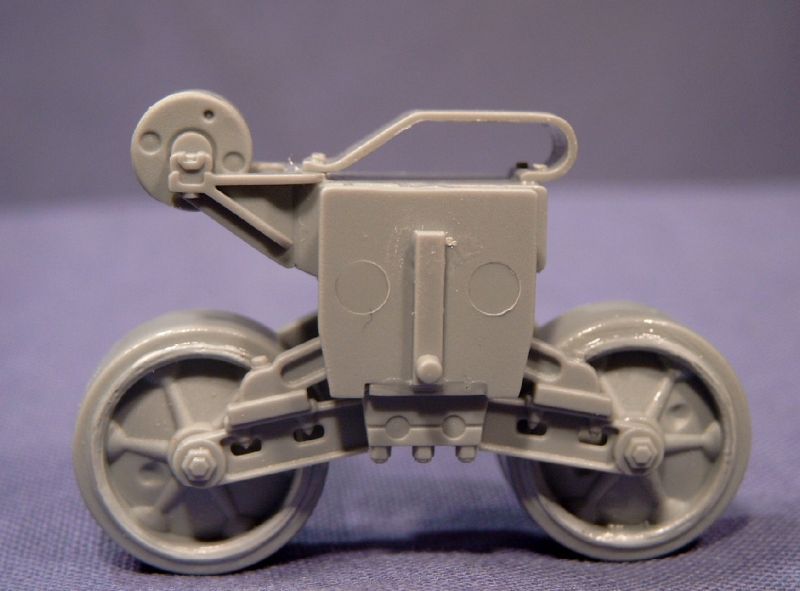
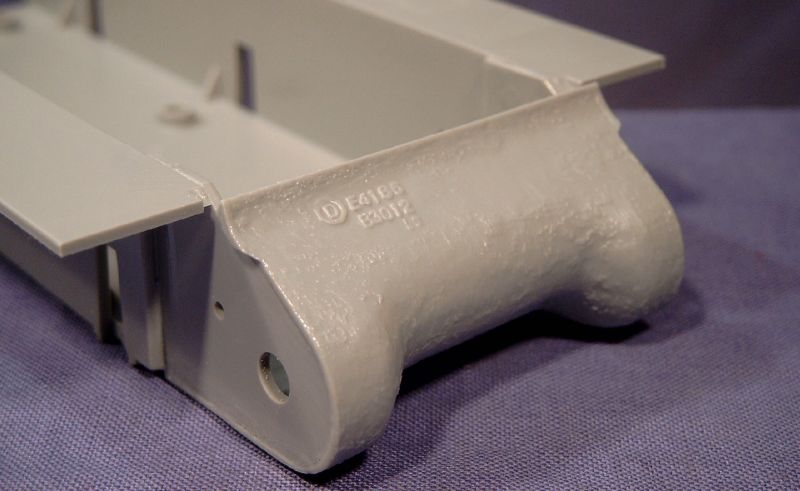
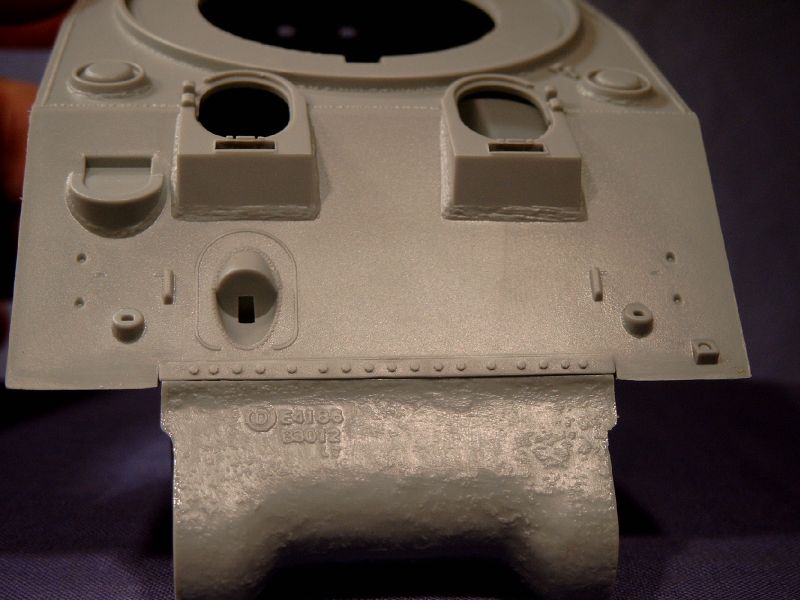
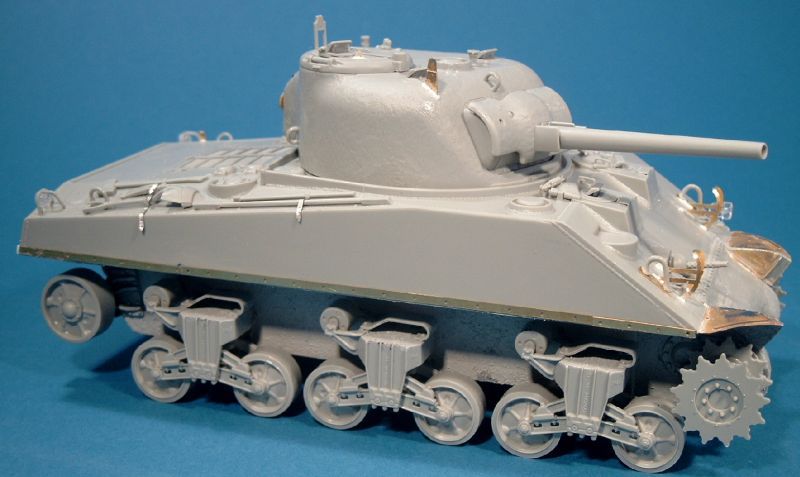
The kit construction begins in step one with assembly of all the bogeys, drive wheels and idlers. There are 2 choices of drive-wheel offered with the "fancy (V30)" or the solid plate type (V31) with V31 being correct for the Tarawa version. To complete the bogey assemblies there are bolt-heads on the V sprue for the track guides but these are not mentioned on the instructions. A sharp scalpel was used to slice them off and they were carefully placed with pincers. Each bogey-wheel has a back insert with full detail but they are slightly smaller in diameter than the hollow receiving side and result in a visible gap, which may not be seen on the finished model, but I filled these in roughly with Mr.Surfacer 500 just in case. A quick swipe with some sand paper cleaned up the idlers. Because of reports of a poor fit with the transmission cover and the final drive covers (A13 and A14), I cemented both connecting sides and pushed them together as best I could. Extruding soft plastic appears to have filled the small gaps. I decided to leave the kit instruction-sequence at this point and join the top and bottom hull, allowing any major joining-work to be taken care off without details getting in the way. The bolted bar that sits between the top hull and the transmission cover was fixed to the top hull. This meant a pretty neat join to the top hull but some Mr.Surfacer will take care of the very little gaps when joining this assembly to the bottom hull. All of this now meant that there was a slight gap under the hull backside. I took care of this by squeezing 0.5mm plastic strip in and then cutting it back when the cement had dried, using a little Humbrol putty to tidy up the joint seems. The remaining triangle-shaped hole is where the idler mounts will be fixed. All that was left was to cut off a nib as called out on Step 6. The fixed scopes in front of the driver and machine gunner will be modelled closed, so there was no need to insert them before joining the top and bottom hull assemblies. I then went back and completed the remains of steps 2, 3 and 4 once the hull was secured.Stowage and Details
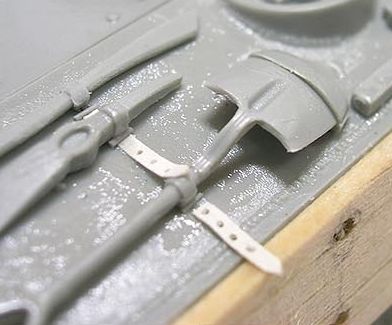
Steps 5, 6, 7 and 8, deal with adding the hull and stowage details in a pretty straight forward assembly with just some minor clean up. I managed to get the Military Modelling magazine issue from December 2006 which features Steve Zaloga´s build of this model, and according to Mr. Zaloga, the Tarawa Shermans did not have their headlights fitted. I had originally decided to keep mine separate to ease painting, but now could skip this altogether. I punched 2 discs from sheet styrene to act as plugs and cemented these in place. To complete the lower hull details, the front mudguards were to be added and these are included only as photo etched items. Well the day had to come .... Id been putting it off for ages .... and its been bugging me for some time ... I had to try soldering! The fenders and turret vane were soldered at the same time. Swedish Modeller Pål Björkman sent me a link to Soldering Basics By John Robinson which proved to be very helpful. In addition to the soldering, two neat tips I read about at this time were incorporated into the build. Tip #1 was from Dinesh Ned´s excellent Pacific Sherman, where he used some thin plastic for straps on the pioneer tools, and tip #2 was S. Zaloga´s method of attaching thin etched items to the tank using putty and marking it to look like weld seams.Turret
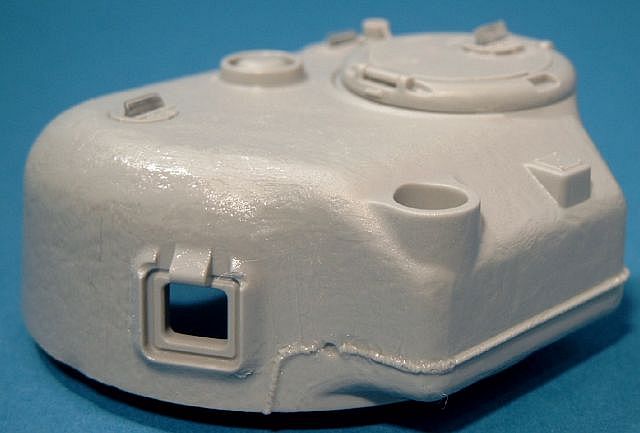
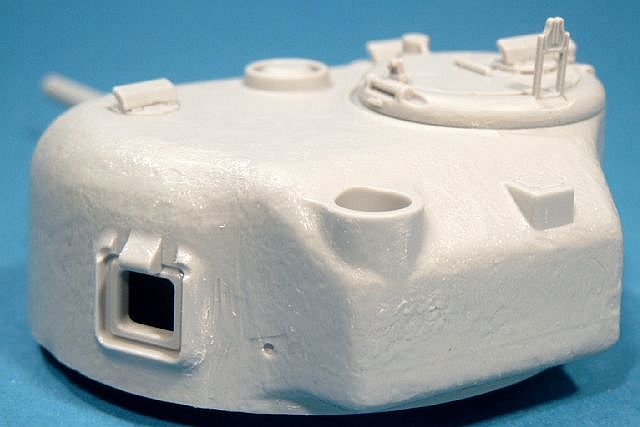
Steps 9 and 10, deal with the turret assembly. Again I choose to join the two halves, before adding details, so that any gaps could be eliminated. There was quite a significant gap between the top and bottom pieces, so I stretched some sprue and cemented it in place much like adding a weld seam. When dry, I removed the "weld" with a rounded blade and sanded it flat. Then more Humbrol polly cement was stippled over the whole area to re-create the cast texture. The remaining turret details presented no problems, but I used lead foil and Aber buckles instead of the stiff kit-supplied belts for the back of the turret and added a shovel from the spare box for visual interest. To finish, the etched sand-guard attachment strip was added to the sides and completed on the backside with some plastic strip, as they are not included in the kit. Painting was mostly done with Tamiya acrylics, but small details were painted using Humbrol enamels, and washes were made with oil paints. Pastels were used to give a dusty appearance, as sand would stick to a wet vehicle having just come from the water.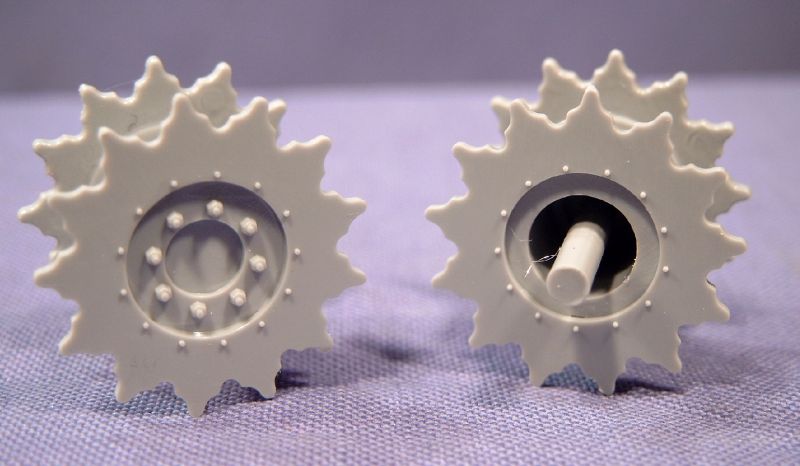


About the Author


Comments

Once again ... thanks very much guys. All your fine comments are very much appreciated. Im glad you like it. Cheers.
AUG 19, 2007 - 12:15 AM

it was really a minor nitpick frank. and like everybody said, the dio really is amazing. i guess i only noticed because i come from the philippines and, coconuts being our top export, were quite intimately familiar with it
LOL!
AUG 20, 2007 - 03:20 PM

Nice work, Frank. I'd like more info on using thin plastic for the tie downs on the pioneer tools. I hate PE, maybe this will work for me. Again, really nice work on this one.
Patrick
AUG 20, 2007 - 03:37 PM

Frank I have seen many piece of yours and your attention to detail and colours always impress me - lovely piece from an Artist's eye view because I do not know tanks or marine's info so know nothing say nothing
Ian
AUG 20, 2007 - 04:38 PM

Outstanding Frank.
Pity you can't be a master modeller and a palm tree expert.
AUG 24, 2007 - 06:00 PM
Thanks to all you guys who took the time to post .. thanks a million for your very kind comments! They are very much appreciated.
I must say its the sort of nit-pick I like and want. Little details like this are always great to get (just wish I had it earlier ) so dont ever apologise for offering suggestions. When building scenes from the pacific, and Asia, input from people like yourself Steelskin is always appreciated.
Hi Patrick. The right piece of PE in the right place, is great, but PE is not always the perfect solution. I got the idea for the tie downs from an excellent Pacific sherman by Dinesh Ned. He used very thin plastic sheet. The image below is one I saved from his images on ML.
 I dont have any plastic so thin, but I use lead foil and have been very happy with it. Easy to work with, easy to shape and holds its shape well, and takes paint easily. The buckles are from Aber, whohave a full set with different buckles and are perfect to use with the foil.

 Belts painted
 If theres anything else that you need to know, just ask.
Thanks Ian. Im quite lazy when coming to lot of details ... some guys really go to town with small details and add loads of them ... but I try to make the few that I use, stand out. Colour on the other hand, is something I love playing with. When finished, my models are usually quite vibrant .. maybe too vibrant .. but its what "comes naturally", nothing I set out to achieve.
Working on it mate, working on it
If theres anything else that you need to know, just ask.
Thanks Ian. Im quite lazy when coming to lot of details ... some guys really go to town with small details and add loads of them ... but I try to make the few that I use, stand out. Colour on the other hand, is something I love playing with. When finished, my models are usually quite vibrant .. maybe too vibrant .. but its what "comes naturally", nothing I set out to achieve.
Working on it mate, working on it
I dont have any plastic so thin, but I use lead foil and have been very happy with it. Easy to work with, easy to shape and holds its shape well, and takes paint easily. The buckles are from Aber, whohave a full set with different buckles and are perfect to use with the foil.
Belts painted
If theres anything else that you need to know, just ask.
Thanks Ian. Im quite lazy when coming to lot of details ... some guys really go to town with small details and add loads of them ... but I try to make the few that I use, stand out. Colour on the other hand, is something I love playing with. When finished, my models are usually quite vibrant .. maybe too vibrant .. but its what "comes naturally", nothing I set out to achieve.
Working on it mate, working on it
AUG 25, 2007 - 04:27 AM

wow i hope you dont mind copying some of your ideas .... ive been building for 2 years ,oh and i lived in the tropics and there were a couple of trees that match yours perfectly !!,palm trees come in all kinds of shapes and sizes.. thanks again
FEB 27, 2008 - 03:24 AM

Hi Frank, I came across your post on the soviet ww2 board and checked out your "hell of a way to die" article. Nice Sherman and I really enjoy the south pacifc vignettes...nice work!
Charlie
MAR 23, 2008 - 03:05 AM

Copyright ©2021 by Frank Glackin. Images and/or videos also by copyright holder unless otherwise noted. The views and opinions expressed herein are solely the views and opinions of the authors and/or contributors to this Web site and do not necessarily represent the views and/or opinions of Armorama, KitMaker Network, or Silver Star Enterrpises. All rights reserved. Originally published on: 2007-08-17 00:00:00. Unique Reads: 34009

WEB HOSTING BY


Copyright ©2021 Armorama and Kitmaker Network, a subsidiary of Silver Star Enterprises
All Rights Reserved. Please read our Conditions of Use and Privacy Policy.
All Rights Reserved. Please read our Conditions of Use and Privacy Policy.