

1⁄35A Complete M60A1
41
Comments
Exterior details
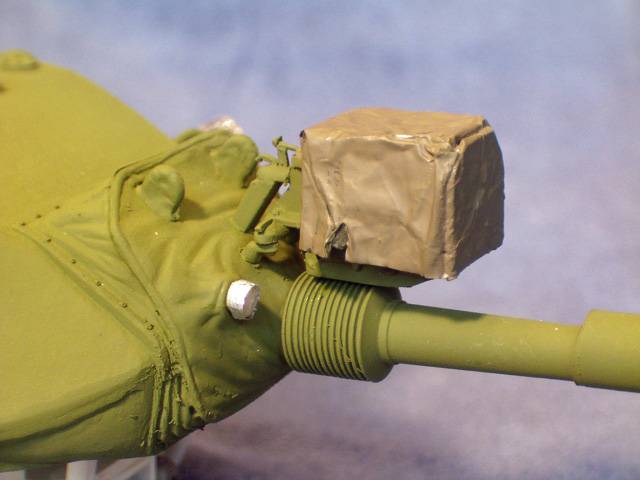
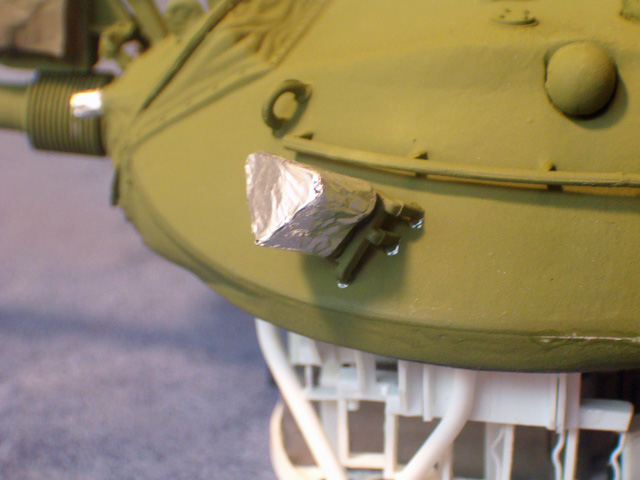
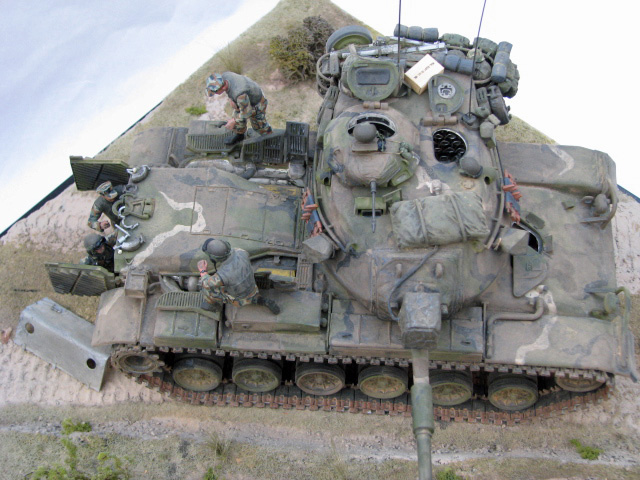
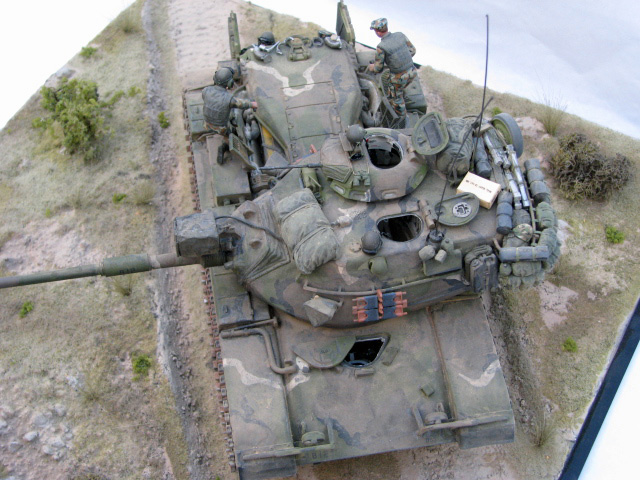
With the inside done, I started finishing the turret. The Barrel Depot main gun went on with no problem and I scratch built the searchlight bracket and mounts. Then I built the stowage bracket for the searchlight. This part is actually an oddity for it was no longer used since the bustle rack had been extended, but the rebuild depot had failed to remove it from my subject tank during one of the many refurbishments that these tanks went through. The searchlight was built with aluminum foil for a cover, leaving an opening for the power/ control cable. The 105D sight and the M60E2 coaxial gun both received dust covers. The grenade launchers received its canvas (aluminum foil) covers.Finish
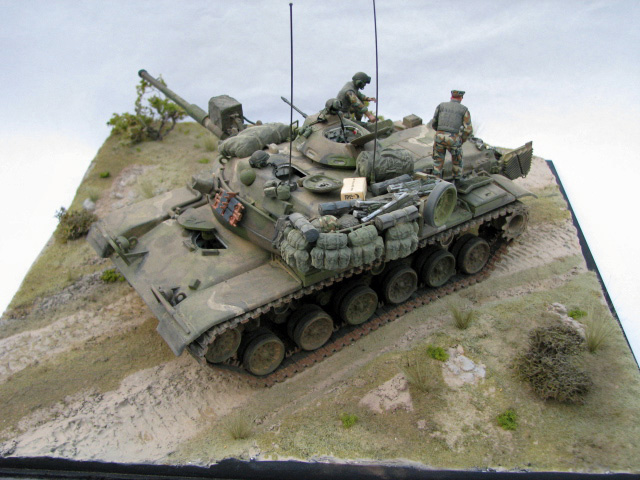
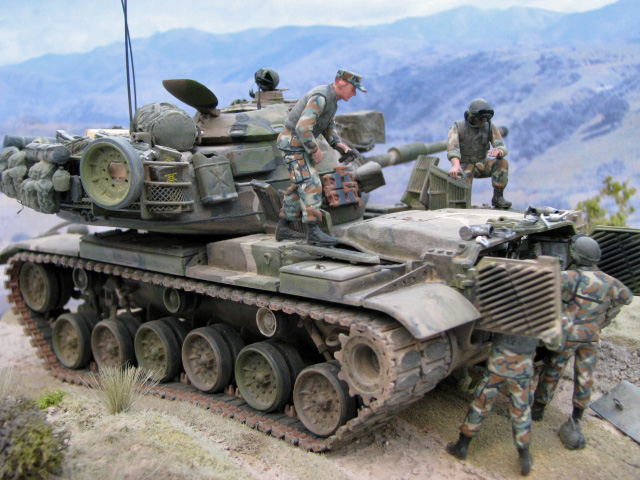
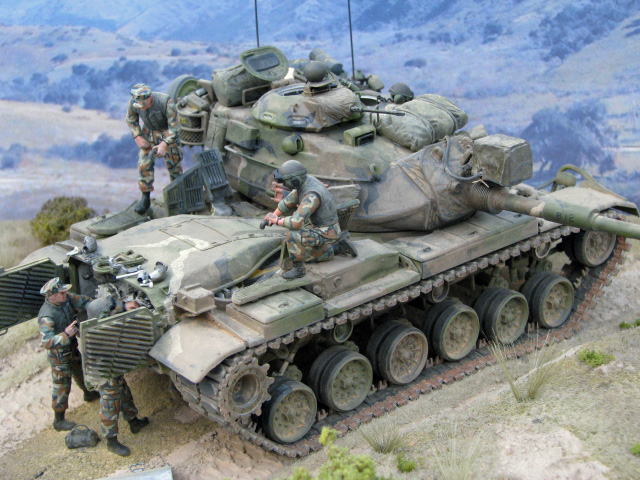
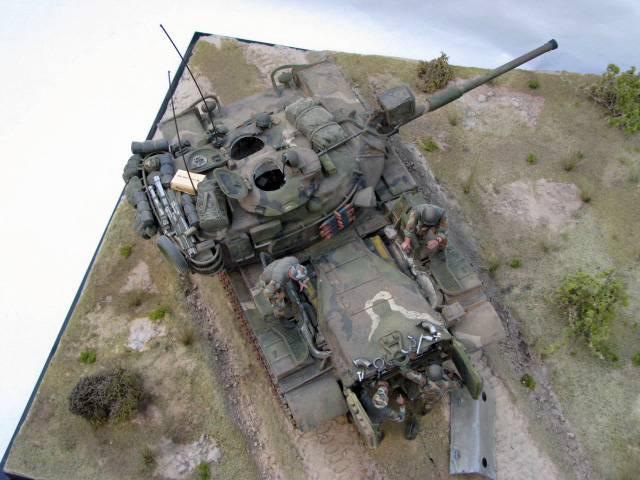
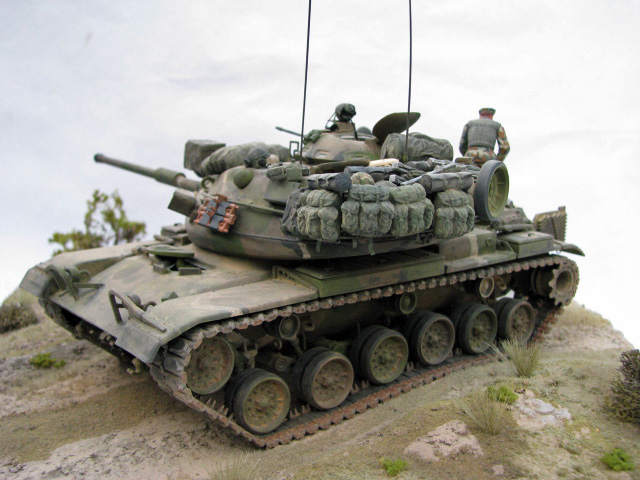
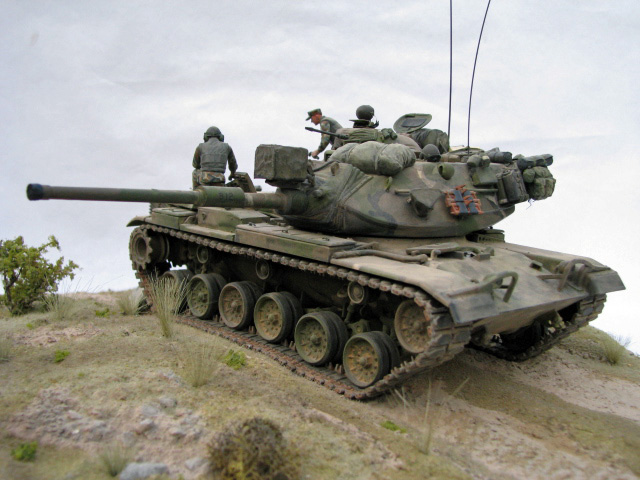
The lower hull was completed and the torsion bars for the road wheel repositioned to demonstrate movement. The tank then received an overall coat of forest green paint in preparation of the MERDC camouflage pattern. Most Marine tanks of this period where kept in good condition through constant maintenance and painting. The crews would paint the tanks by hand in most cases rather than wait for the battalion maintenance personnel and their air guns. Therefore I decided to hand paint the camouflage with dark earth, sand, and flat black over the forest green that the tanks came to the unit in. After painting future was applied to where decals would go to help the decals blend in better. Decals were then applied with decal set and, after drying, the whole model received a coat of Dull Coat. Weathering was done with a black wash, followed by pastel chalks. The AFV Club tracks were assembled and then painted with Testors jet exhaust paint. The rubber insides and track pads were then painted dark gray. The metal part of the tracks outside was painted Testors jet exhaust while the insides are painted rust. Parts of the end connectors and sprockets are painted steel to represent the metal to metal wear from the sprocket. To finish the model I added accessories from Tamiyas Modern U.S. accessory set and Modern U.S. military equipment set. The figures are from three different Dragon kits with scratch built soft covers (caps to most people) and flashlights. In the early 1980s the Marines still had the flak jacket that is so often associated with Vietnam. The transmission cover or heat shield (on the ground), and the exhaust stack elbows (on the armor plate deck), are made with plastic sheet and tubing. The TI (troop interface) phone was repositioned and an opening latch was made for the face of it. The lifting eyes on the armor plate and air cleaners were cut off and replaced by wire. The air filter dirty indicators and opening hinges on the rear of the air cleaners was also added.The story
This scene depicts a Marine Tank crew searching for a fuel link. When one of the torsion bars broke and ruptured a fuel cell, it required a major maintenance effort to fix it. The road wheels for the torsion bars that ran under the engine had to be removed then the torsion bars themselves had to be removed. The armor plate had to be removed then the engine (power pack) was removed. Thats when you could finally get at the offending fuel cell. I was the tank commander for Bravo one-two in 1982 and building a COMPLETE M60A1 has been one of my goals ever since. Now that its done Im glad to share it with you.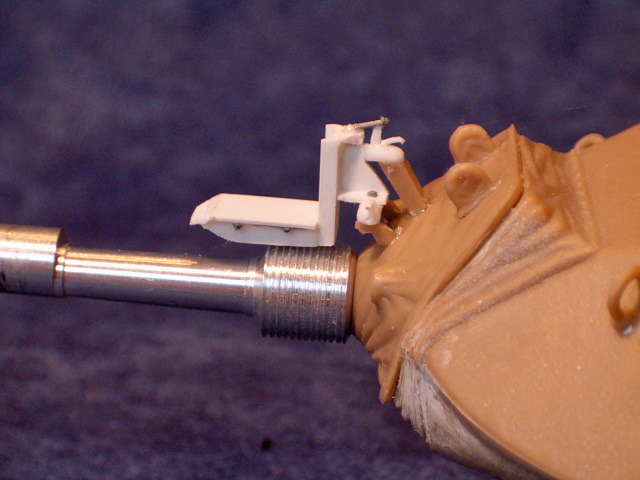


About the Author


FROM: CALIFORNIA, UNITED STATES
USMC retired 1979-2001. I was an 0351(Anti-tank/assualtman), 1811 M60A1 Tankcrewman, 5963/79 Tactical Data Systems Tech. Now work for the FAA as a NAVAIDS/COMM tech. Modeling semi seriously since 1995. I mainly do 1/35 USA armor and 1/72 scale USMC aircraft.
Comments

Wow, man...simply outstanding! A real "Pro" job! Congratulations!
This should be used as a "master" to be copied and sold for all us other schlubs out there who have empty M-60 models just crying to be "full-filled" like this one! AMAZING!!!
SEP 14, 2007 - 02:09 AM

Karl,
My sentiments exactly. Gunny's work is a real inspiration. Consider me a longtime fellow shlub!
In researching an M60a3 interior build, I'm finding a few aftermarket bits and pieces to get started, like the site I identified above. That kit has a nice breechblock, gun tube, gun shield, plus fire control system pieces.
I'm using Revell's M60a3 kit as a starting point- I hope to fix the main gun to the lower turret so I can show off more with the upper turret removed. I'm also looking into casting the turret in transparent plastic!
Even with the Operator's Manual and a cache of photos from my tanking days, this baby is going to take a lot of time and effort. But I do not care!
Wayne
SEP 16, 2007 - 05:49 AM

Wayne,
If you need any help or advice I'll be glad to share what worked and didn't work for me. As far as mounting the breech to the lower hull, I found that pretty hard to do since the gun mantle for the most part is attached to the top. If you could remove the top of the turret from just aft of the hatches to just behind the gunners periscope, then you could get a real good look inside and not have to mees with to much inside. The range finder on the M60A3 only goes half way acrossed the top and can be glued to the bottom of the removal roof. What do you think?
Don
SEP 16, 2007 - 03:34 PM
Wayne,
One more thing I forgot. I have some other pictures of the stuff I built in the turret the weren't in the article. if you want I can try to email them to you.
Don
SEP 16, 2007 - 03:37 PM
Gunny,
I found that VERY GENTLE sanding in the mantle opening formed by upper and lower turret pieces creates enough tolerance in the upper and lower turret pieces for the gun mantle-to-lower turret fix.
I plan to put tiny "L" shaped brackets to secure the main gun and mantlet to the lower turret piece. These will be hidden by the trunnion, lower turret "chin" and main gun structure so that the upper turret can be lifted off to show off the main gun, shield, M240 and coax cradle, telescope, etc.
But the above will come later on after completion of the turret platform with loader's station and gunner's station. Maybe the rangefinder will have to stay where it is in the upper turret shell. As you so ably demonstrate, everything has to be fitted beforehand for a good fit.
I thought about cutting the upper turret shell just aft of the rangefinder, but I am strangely hesitant. Maybe an easily-removed commander's cupola is the answer since its removal will show the rangefinder and gunner's station.
Thank you for your kind offer to share pics. As you can see, everyone is raving about your terrific build and I certainly would be thrilled to see more pics. My e-mail address: wrobi95144@ comcast. net.
Wayne
SEP 18, 2007 - 10:29 AM
That about covers it!
need the bowdown emoticon for that one! holy smokes!
SEP 18, 2007 - 10:42 AM
Wayne,
I sent you some pics but my msn is acting up and I don't know if they went through. Did you get the email?
Don
SEP 20, 2007 - 02:59 AM
Gunny,
Thank you for sending the amazing pics. Felt like jumping into the gunner's seat, doing a zero compression check with the Cadillacs and running "Z" patterns through the infinity window!
Gunner-Sabot-Tank-(Identified! ) Fire! On The Way!
TARGET! CEASE FIRE!
SEP 20, 2007 - 10:47 AM

Ok, I'm about a year behind on this one but have been offsite for a while for the most part so I'm just now catching up. Saw this one today and have to say out-frigging-standing! Nice to see a couple of fellow 1st Tank BN brothers here and even better to see one giving this old girl the love she deserves. That's been one thing I've always wanted to see done, a full interior for the A1 because I sure as hell can't scratch build. lol Awesome work!
JUL 07, 2008 - 04:02 AM
Copyright ©2021 by Don Franklin. Images and/or videos also by copyright holder unless otherwise noted. The views and opinions expressed herein are solely the views and opinions of the authors and/or contributors to this Web site and do not necessarily represent the views and/or opinions of Armorama, KitMaker Network, or Silver Star Enterrpises. All rights reserved. Originally published on: 2007-08-31 00:00:00. Unique Reads: 38416

WEB HOSTING BY


Copyright ©2021 Armorama and Kitmaker Network, a subsidiary of Silver Star Enterprises
All Rights Reserved. Please read our Conditions of Use and Privacy Policy.
All Rights Reserved. Please read our Conditions of Use and Privacy Policy.