

1⁄35Upgrading A Sdkfz 7/2
12
Comments
Introduction
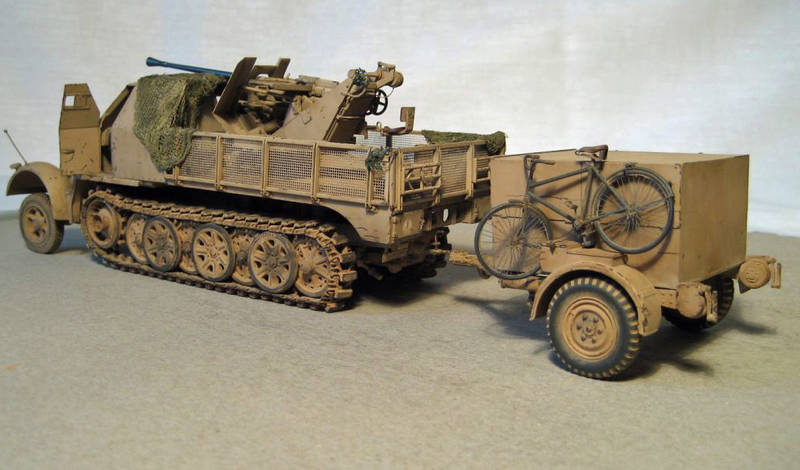
As a great fan of the 8-ton vehicle family, I had planned to start building an SdKfz 7/2 for the last 5 years, but the age of this model (mainly issued in 1972) and the need for a lot of scratch building frightened me. I had hoped that DML, AFV or Trumpeter would release it but finally I decided to upgrade the old Tamiya kit instead. First of all I found a reference vehicle for my model, it is a vehicle with the Hermann Goring division photographed in Rome in the beginning of 1944.The frame
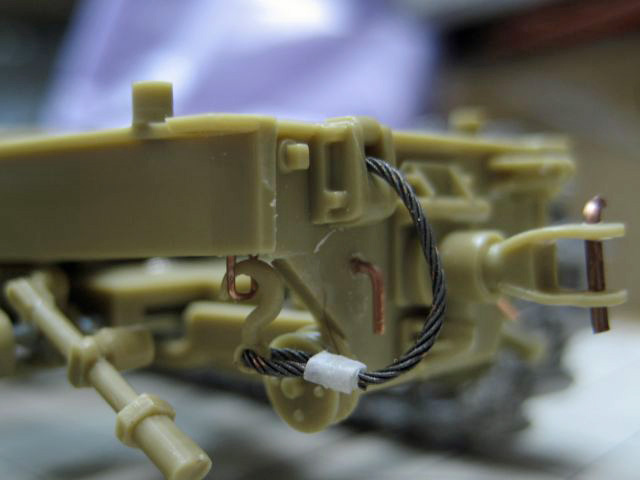
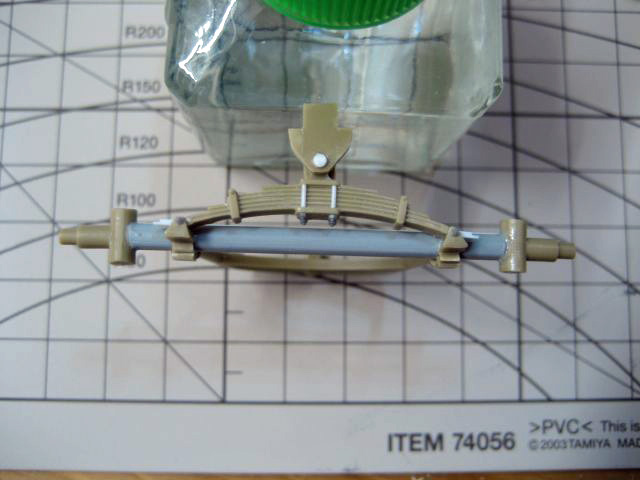
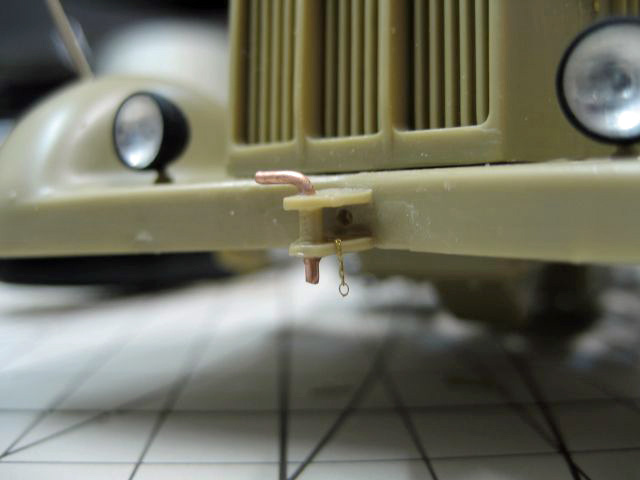
The construction work started with the frame. According to museum photos, Tamiya`s frame is very far from the original in terms of accuracy. However, I decided not to waste time and only focus on accurate detailing for the visible parts of the frame. Firstly, I made the fenders scale-thick by trimming them down with a knife. Then the inner parts of the fenders were detailed with 0.3mm plastic and supporting tubes from 1mm Lion Roar plastic rod. Four 1.0mm diameter nuts from Master Club were added on each spring of the rear suspension. On the back side of the frame, I made a hole in the exhaust and added a tow cable from Karaya along with a few details made from copper wire from from Aber sets ADZ-1 and ADZ-2.Rear suspension
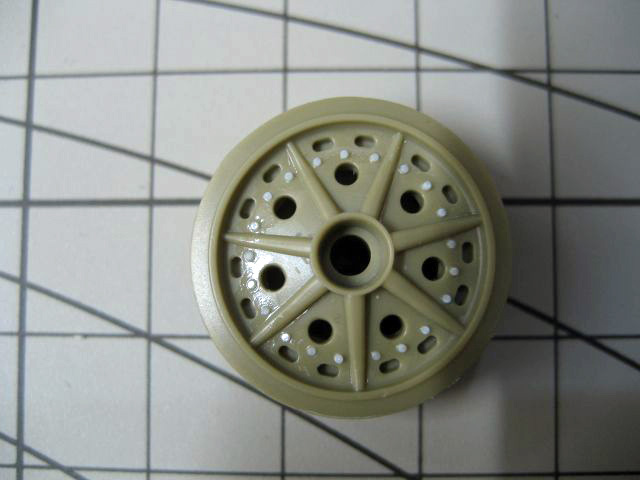
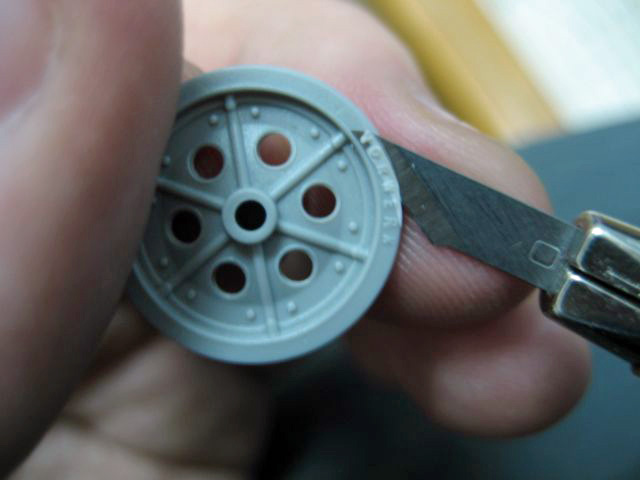
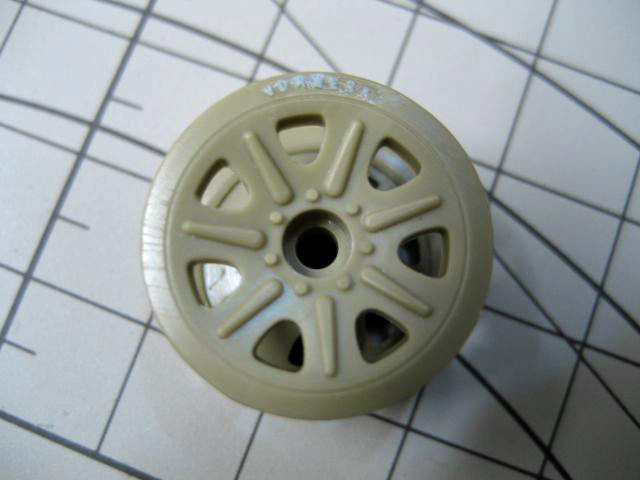
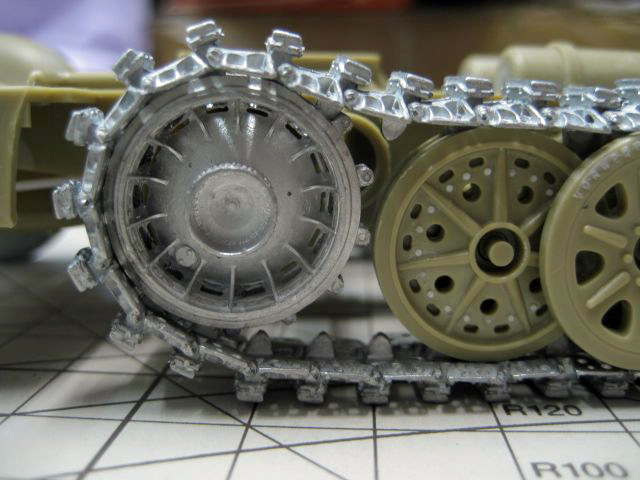
The main disadvantage of the kit's rear suspension are the awful vinyl tracks. These were replaced by the excellent metal tracks from Fruilmodel. The Fruil set also contains metal drive sprockets which are much better than those from the kit. The metal tracks required some improvements on the road wheels which are described in the track`s instructions. The road wheels of the inner row got the pressed dots made from sliced 0.5mm plastic rod. Then I decided to reproduce the tire manufacturer`s name on the tires, using the Vorwerk inscriptions cut from DML`s SdKfz 251 kit wheels. I wasn't afraid of spoiling the Dragon model, I simply cut the inscription from the inner road wheels since nobody will see the lack of them there for that kit! I put the Vorwerk on the wheel and moistened it with Tamiya Extra thin cement. The inscription is ready! After that the building of the rear suspension was finished.Front suspension
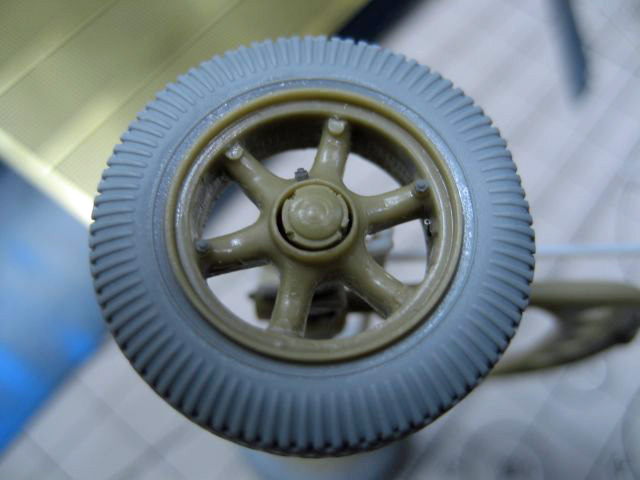
The front suspension is the weakest part of the kit in my opinion. It looks toy-ish and the poor detailing spoils the look of the model, especially since the kit`s details differ from museum photos too much, so I tried to fix that! Firstly, the axle was cut and changed by using 4.0mm plastic rod. Then the spring got Master Club`s 1mm nuts and 0.5mm rods. The tires were taken from DML`s Flak 37 kit and they perfectly fit the Tamiya wheels which were further detailed with nipples made from Model-Point`s nickel tubes and nuts from MasterClub. The steering beams were made from 1.0mm plastic rod and copper wires and the front suspension was ready.Cabin and engine hood
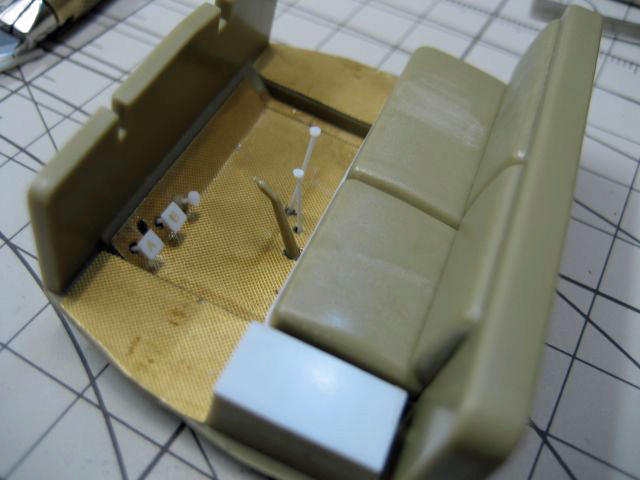
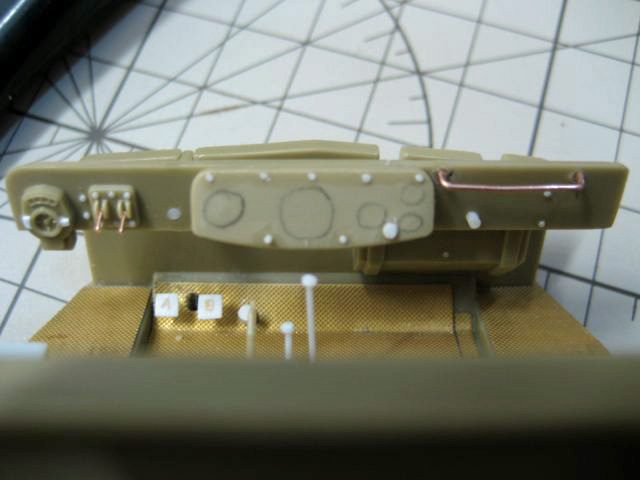
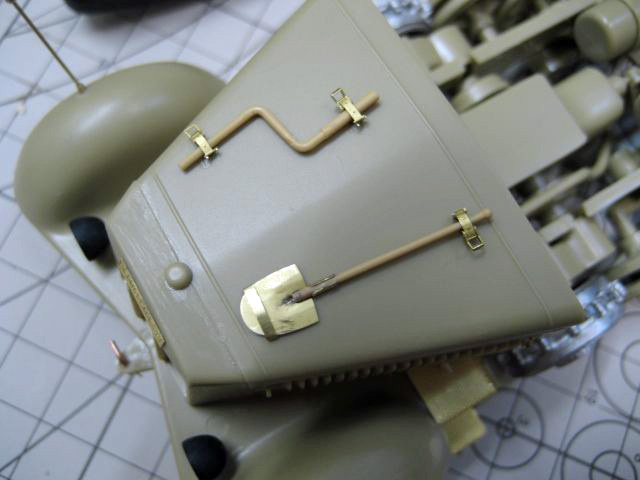
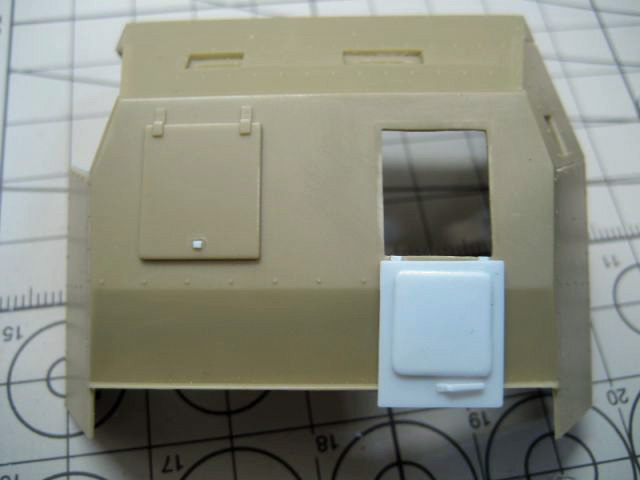
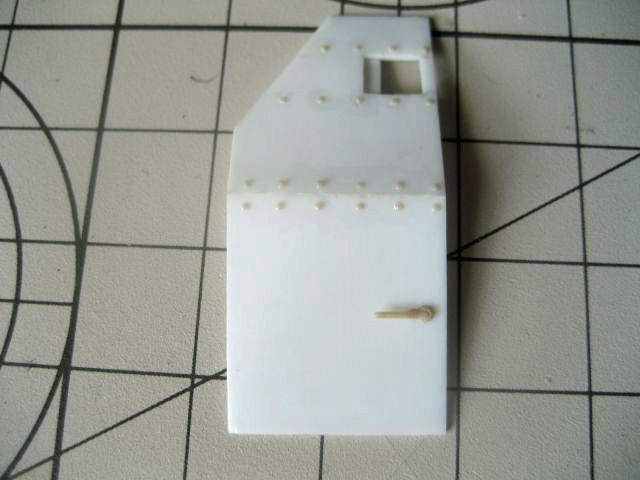
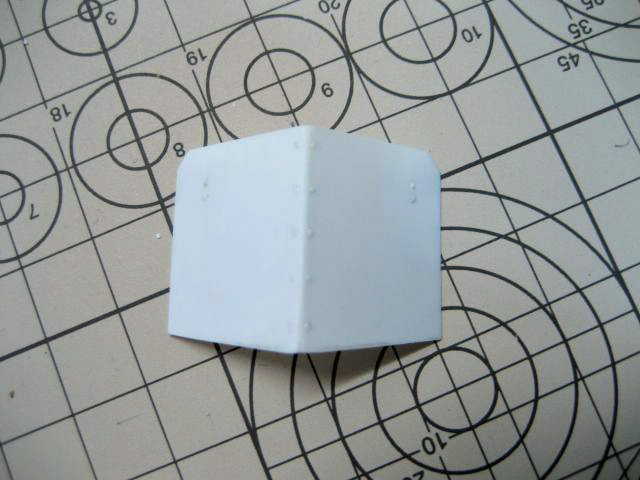
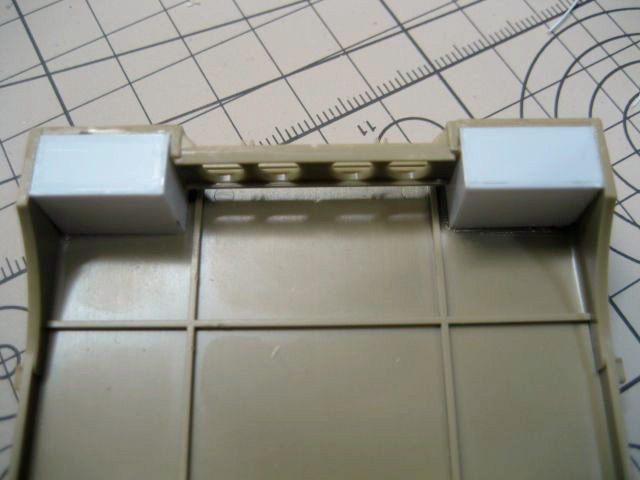
Now let`s pay attention to the cabin. The floor in it is flat without any detail so I used Lion Roar`s anti-skid plate in solving this problem. The cover of the accumulator was made from 0.3mm plastic plate and the levers and pedals were scratched from plastic plate and plastic rods. The letters A and B were added to the pedals according to museum photos. Then all the dashboard gages were cut from the control panel and the rivets added with the gages replaced by decals. The hand-rail was made from 0.6mm and the tumblers from 0.3mm copper wire. The PE set for SdKfz7 from Lion Roar was used in building the engine hood. The Krauss Maffei inscription, foot-boards, and handles were taken from this set. The trailer gear was detailed with a spike from copper wire and the hole for the starter was drilled in it. The headlights were taken from the Elf set and the Notek light is from MiG. The width indicators are from Voyager and the tools were taken from a Tamiya set of accessories for the Pz IV with Lion Roar PE clamps. According to the war-time photos there were two types of armor on the SdKfz 7/2 cabin. The side armor plates were made from either a single bent piece of metal or two armor plates that were riveted together. The second type is recreated in Tamiya`s model. I decided to make the driver`s door and roof hatch opened, which caused a lot of additional work. First I cut the hood through and made a new hatch from 0.3mm plastic plate. Then the edges of armor plates were made thinner with the help of a knife and abrasive to recreate scale armor thickness. The vision slits on the glacis were cut and the lacking rivets added under the glacis. After that, the rain guards were made over the doors with the mirror added from a PE set. The awful fasteners of the bench were cut and the bench was simply glued to the armor plate. The driver door is scratch-built from 0.5mm plastic plate along with the inner handle and the outer was supplied in the kit. The rivets on the door were made in this way: 1mm plastic rod was sliced then the rivets were glued to the door with extra thin cement. The door was then polished by 3M soft foam-rubber abrasive which made the rivets half-round. The radiator armored was made from 0.5mm sheet plastic with its rivets made in the same way as on the door.Platform
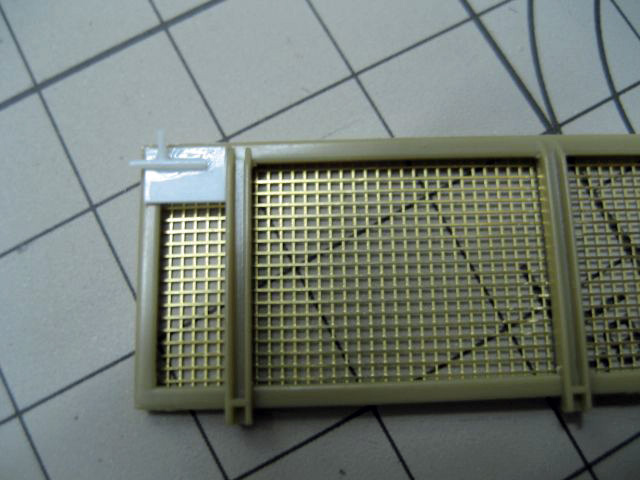
The gun platform demanded a small number of improvements starting with the boxes on the back side which were scratch-built, including their padlocks. The tail light was replaced by one from the Tamiya Pz IV accessory set. The number plate was removed, later on it would be replaced by a PE number plate from Aber. The grilles on the ramps were taken from the Lion Roar PE set and the latches were made from 0.5 mm plastic rod. Last but not least, some PE chains were also used.


About the Author


Comments

Excellent work Wladimir, I'll be following your pics closely when I do mine.
OCT 09, 2007 - 10:17 PM

beautiful work i have this one im eager to build but i need to locate some replacment tracks but i will definatly be referencing this when the time comes, great job.
Ron.
OCT 09, 2007 - 10:47 PM

An excellent overhaul on an old kit.
Sometimes I think it's more fun to upgrade an older/poorer quality kit than build a good one OOB!
Great work, well done.
James
OCT 10, 2007 - 12:06 AM

Beautiful!
Were did you get the 37mm ammo cans?
I'm looking for Flak 37 & 43 ammo cans.
OCT 10, 2007 - 12:34 AM

Thank you for reply, Matthew!
The barrel was painted Model Master Burnt Metal, then weathered with MiG gun metal pigment.
OCT 12, 2007 - 08:29 AM
That is really a stunning job! The added detail is well thought-out, and superbly done!
OCT 13, 2007 - 04:07 PM
Copyright ©2021 by Wladimir Yashin. Images and/or videos also by copyright holder unless otherwise noted. The views and opinions expressed herein are solely the views and opinions of the authors and/or contributors to this Web site and do not necessarily represent the views and/or opinions of Armorama, KitMaker Network, or Silver Star Enterrpises. All rights reserved. Originally published on: 2007-10-10 00:00:00. Unique Reads: 23891

WEB HOSTING BY


Copyright ©2021 Armorama and Kitmaker Network, a subsidiary of Silver Star Enterprises
All Rights Reserved. Please read our Conditions of Use and Privacy Policy.
All Rights Reserved. Please read our Conditions of Use and Privacy Policy.