

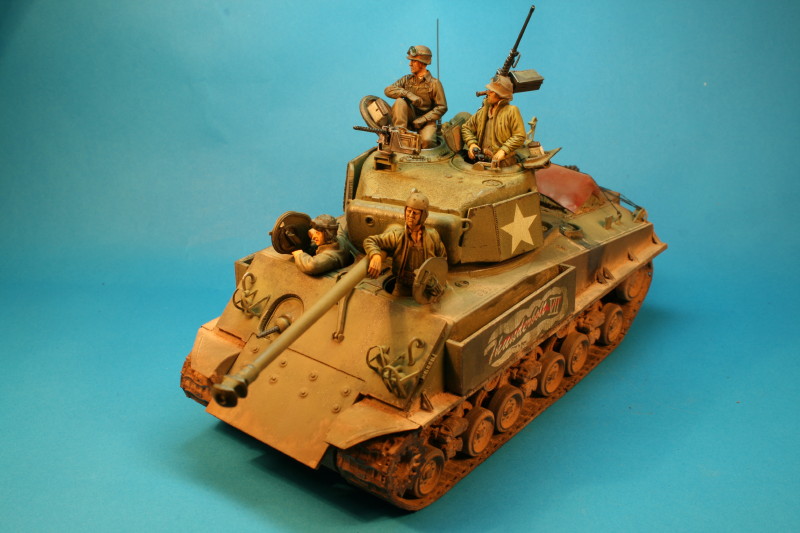
1⁄35Easy 8 Sherman
Painting
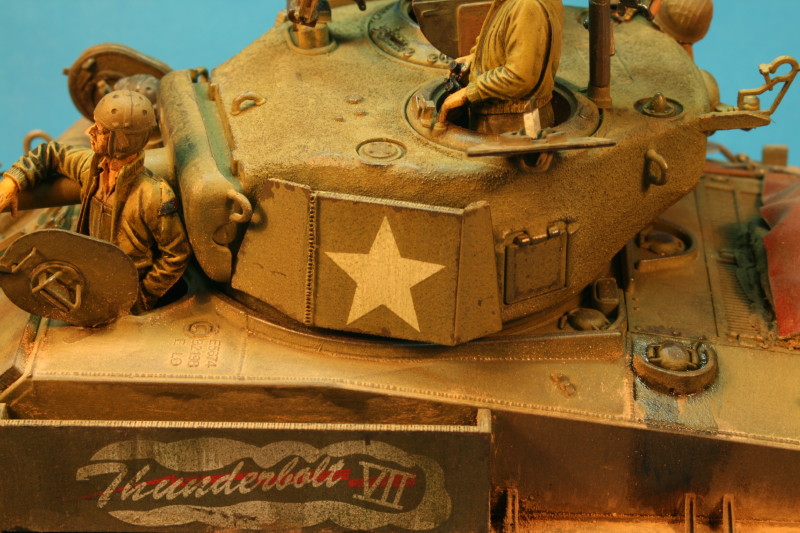
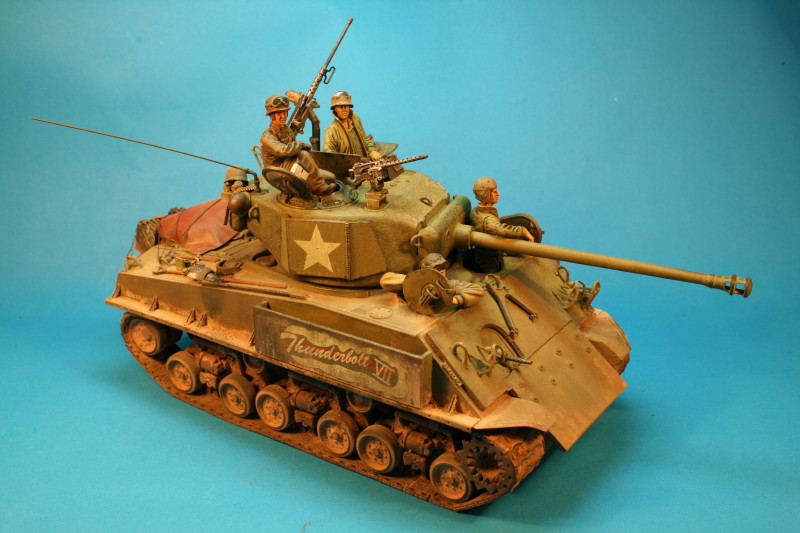
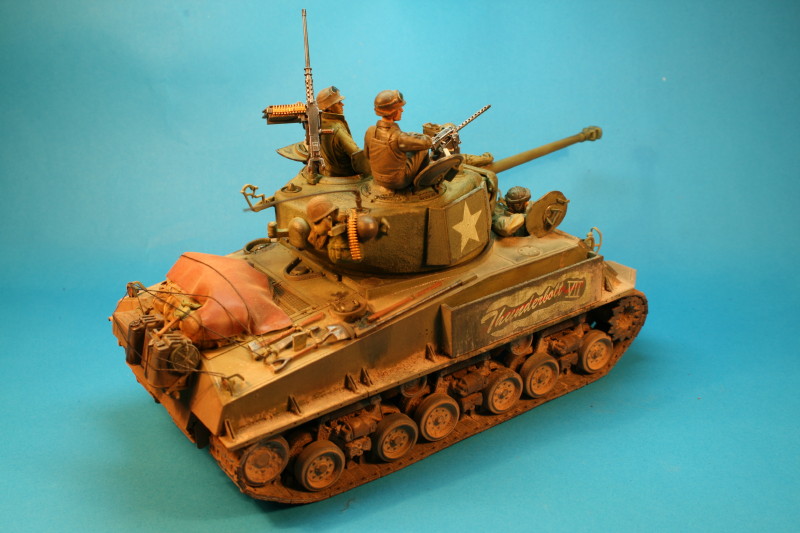
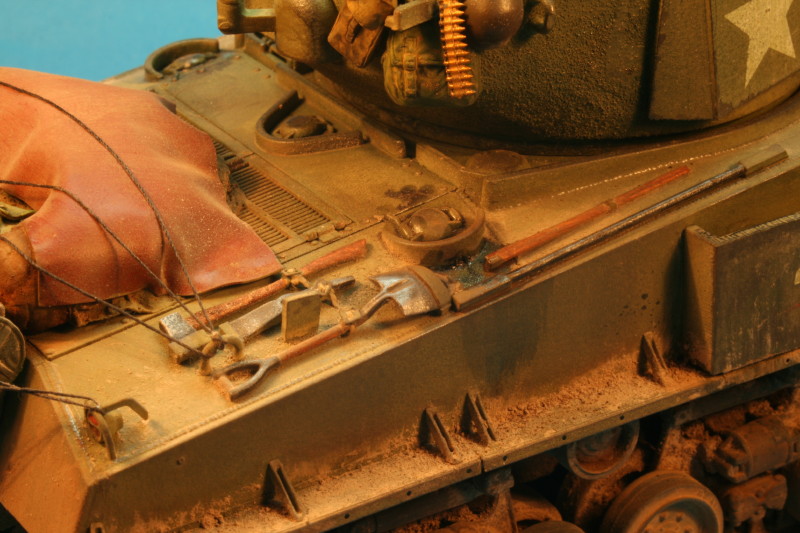
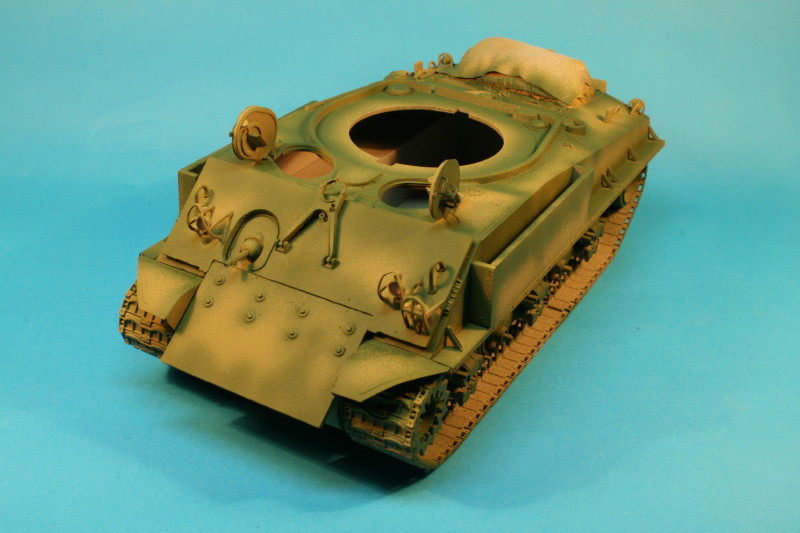
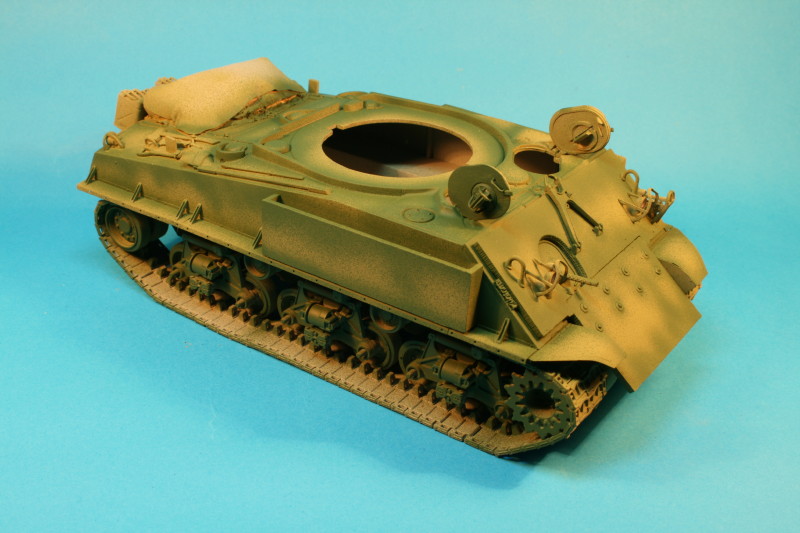
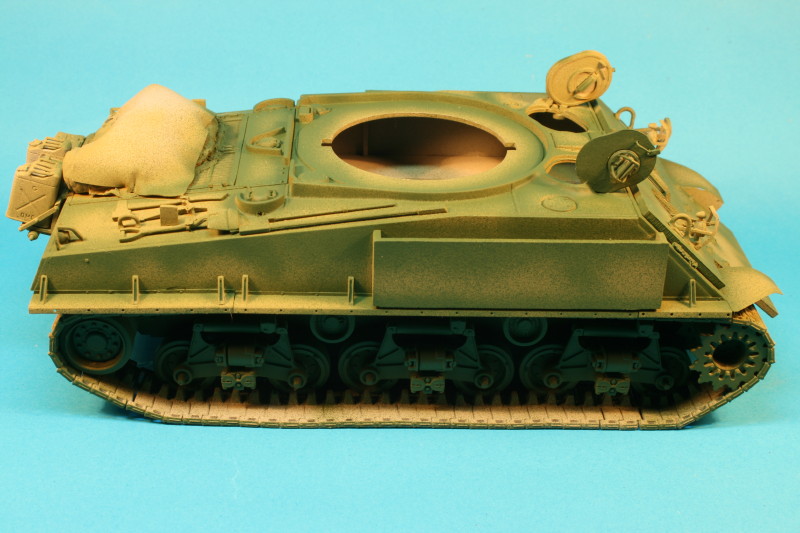
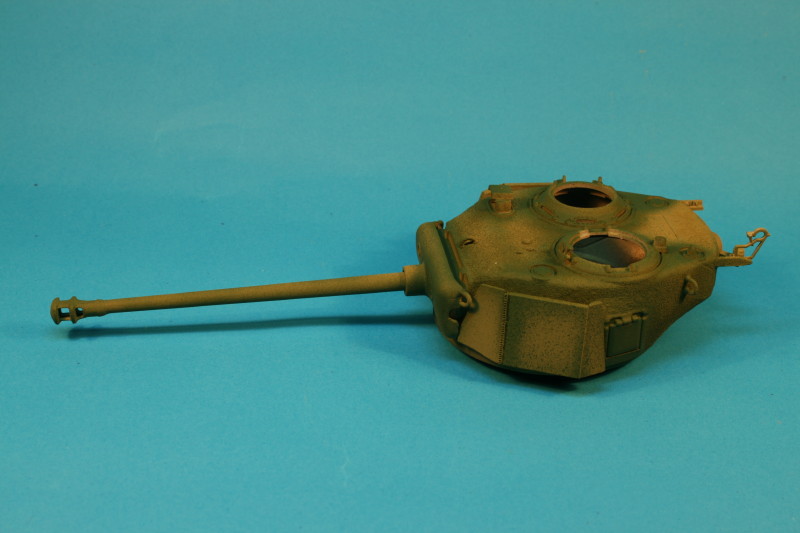
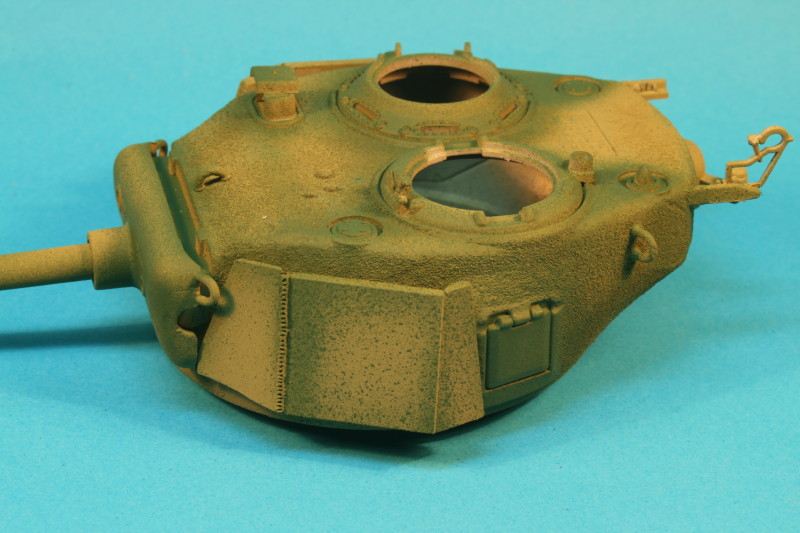
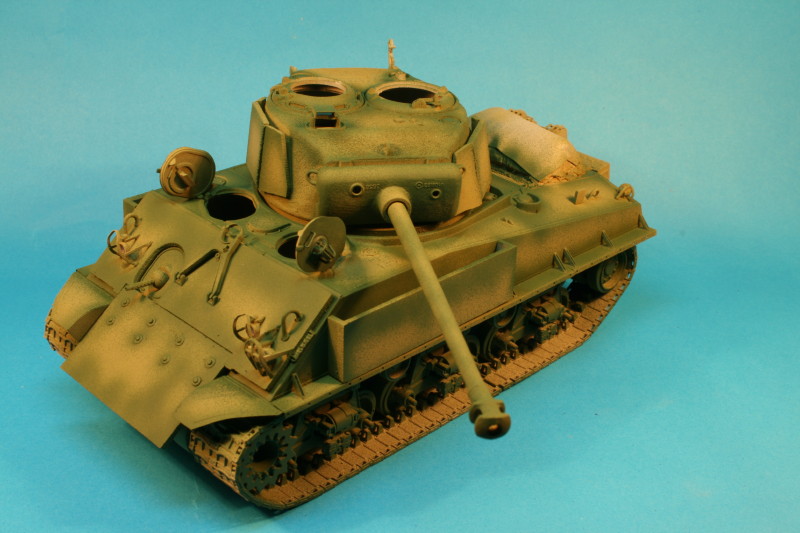
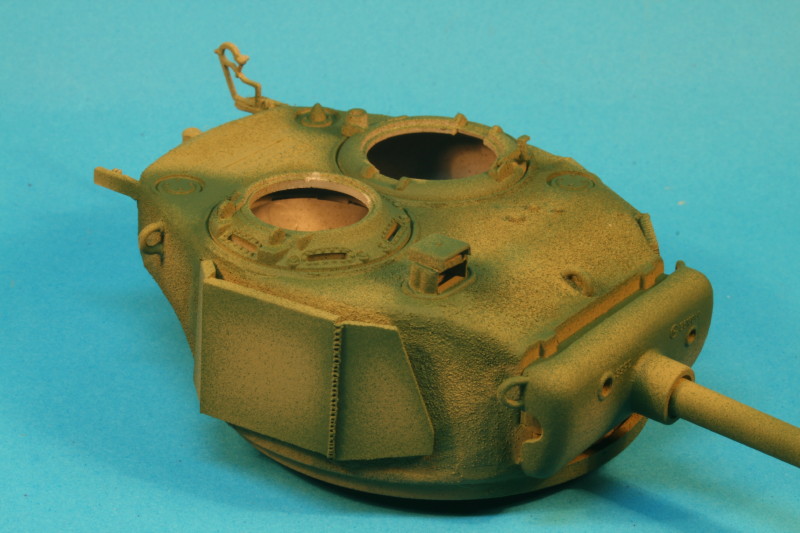
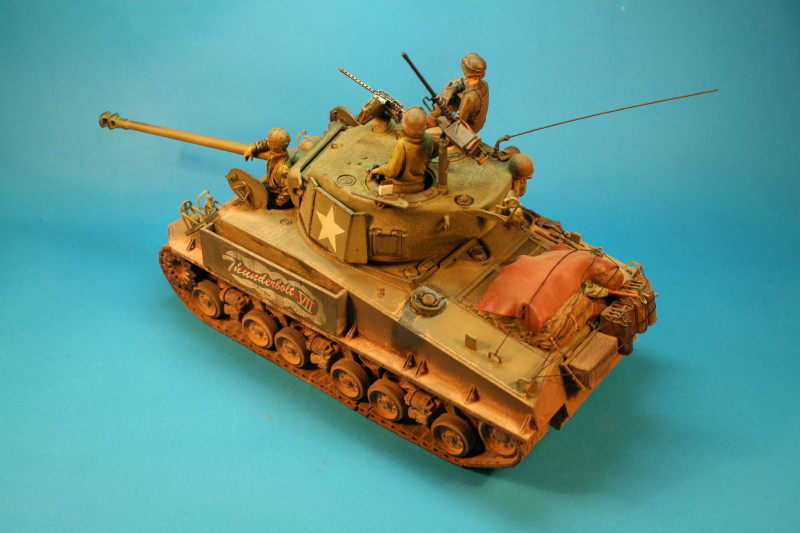
The model was primed using Halfords Grey Plastic Primer. This should be done outside, using a proper face mask. (Something along the lines of a Darth Vader mask would look good!) All paints used were thinned with IPA and sprayed on using my trusty Badger 100 airbrush and Im sorry about the mix ratios I use as they are a personal choice, mainly put down to trial and error. More to the error side, but I get there in the end with the help of an old model hull, which lives by the side of my painting desk, this I test all my mixes on first. If it doesnt look right on that, I add a bit more colour to the mix and try again..... Trial and error!! I cannot take credit for that idea as that came from Phil Stutcinskas in a past issue of TMI magazine. After the primer had dried for about 24 hours I pre-shaded the model. Basically I painted highlights to all the edges, raised weld beads and hatches etc with Tamiya olive drab straight from the bottle, as this is very dark, and makes a good base coat for the lighter colours to come. Because Tamiya Olive Drab is pretty dark on its own and I didnt lighten it. I go the other way and darken desert yellow with a mix of about 75% XF-60 Desert Yellow, 25% Olive Drab and a bit of XF-7 Red added for good measure. This takes the starkness out of the colour. Using this mix I thinly spray over the whole model, concentrating on the centre of the horizontal sides as this helps to bind in the last coat. I then pull away from the model a bit and give it an even lighter coat, or misting you could call it so you end up with highlights, middle, and low lights (or shadows). I then added a general wash of sepia oil paint, this helps to bind everything in, and is allowed to dry. The whole vehicle was then glossed over using Tamiya X-22 Clear in preparation for the decals. I chose the ride of Col. Abrams (hence the name of the modern Abrams tank) 4th Armoured division 1944, because of the name painted down the side of his tank, it looked the part (who says that Shermans all look the same!) once these were dry I sprayed the model with Humbrol flat coat. The stowage was painted at this stage using various Vallejo colours, Im still trying to get my head around these colours, I just cant get over how nice they are to use, but I still need a lot of work with them, I find painting them in layers helps. I then gave everything a dry brush using Humbrol olive drab, lightened with yellow, paint chips were done with Vallejo dark grey and olive drab applied with a oo size brush. The sides of the appliqué armour were dry brushed with Humbrol metal cote, and highlighted further with a 4b pencil, the tools were painted black, then dry brushed with metal cote, at this stage the tracks were painted flat black, and the guide horns, along with the drive sprocket teeth were dry brushed with metal cote in preparation for the weathering to come.Weathering
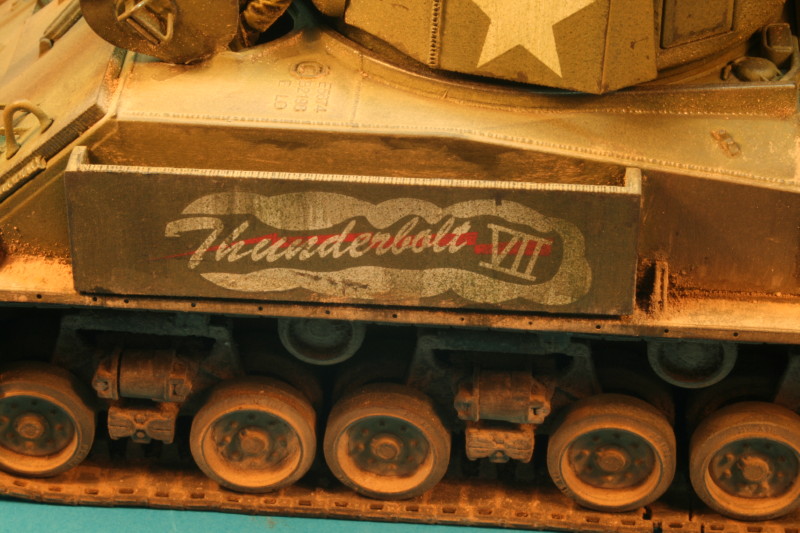
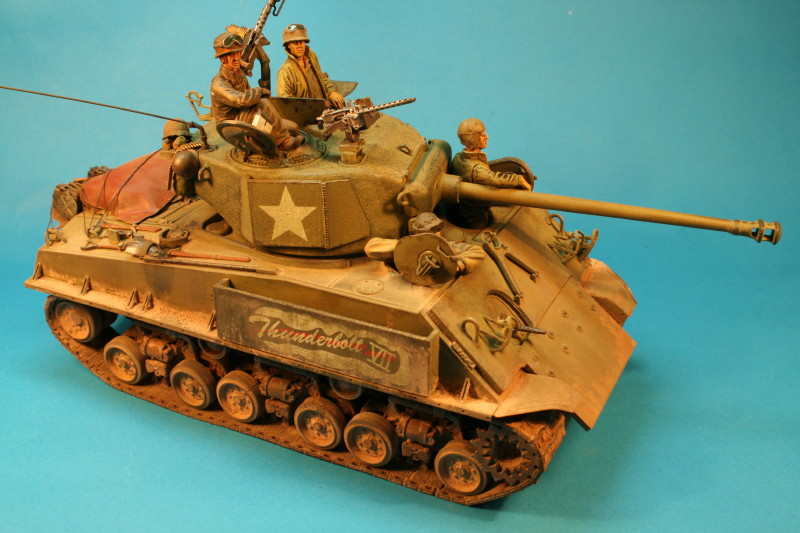
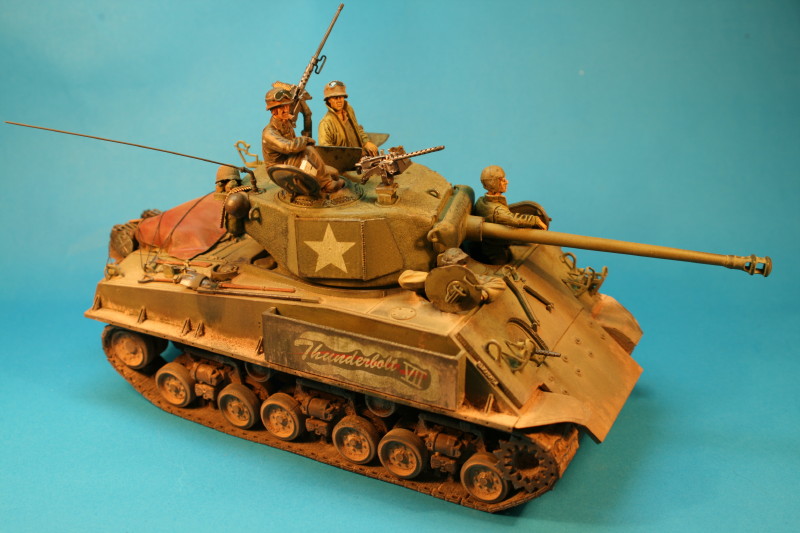
The very nature of this vehicle means it gets muddy, most if not all my reference show these tanks covered in mud, so with that in my mind off I went. I mixed up some Humbrol flat earth, and Mig powder Europe earth, along with some white spirit, and gave the whole lower hull a general wash applied with a wide brush, I know some people who apply this with their air brush, if it works for them great! personally I would never put any type of powder through my trusty airbrush. This was then left until nearly dry, while still tacky to the touch, I applied large amounts of Mig powder, Europe earth mixed with wet mud and gulf war sand to the lower hull and running gear, this was done using one of those old shaving brushes your dad may have lying around. (Cheers dad!!) When this was dry, a stiff brush was used to remove some of the mix, then the whole vehicle was given a coat of matt varnish and allowed to dry. Remember I left the outside run of wheels off the tracks, these were now painted, but before they were fitted to the tracks these were first sprayed with clean white spirit, then liberally covered in a mix of Mig powders and allowed to dry, then using a cotton bud dipped in white spirit, the points where the wheels come into contact with the tracks were scrubbed down to the black colour, then graphite powder was applied to this area to simulate wear. The turret was given a light coat of the powder mix and allowed to dry, then using a Mk 1 finger, dipped in to some graphite powder I rubbed around all the raised edges. I call this process metalizing which works for me!! Paint chipping was done using the edge of a Brillo pad dipped in Humbrol olive drab, and used around the hatches, and then a light overspray of Tamiya Buff was applied from above the model. Then the application of some more Mig powder, but this time only in selected areas, if you havent used the Dry Mud colour pigment yet, do so its a great colour, and works well with Europe Earth. The stowage was weathered in more or less the same way, using a wash, and pigments, the air recon flag was painted using Humbrol signal red, then weathered down, once again, the whole thing was sprayed with matt varnish.Crew Figures
For many years I have read with envy, how people sculpt their own figures, so I thought how hard can it be? Ill tell you how hard, the people who do this are masters of their hobby, and deserve the utmost respect.After 3 failed attempts at this I decided to go for stock figures, these are a mix and match bunch from the spares box, some bits are resin, some bits are plastic. These were painted using Vallejo acrylics, being an armour modeller; I would rather have my eyes pulled through the back of my head than try to paint figures, but this the basic process I followed. All the figures were primed with Halfords primer, then sprayed desert yellow, then various coloured washes were applied to the folds and creases, all this was done using thinned down Vallejos, building up the layers to alter the colours as I went. The seams under the pockets were picked out with olive drab applied with a tooth pick, then the whole figure was dry brushed with a very light shade of green to highlight the tops of the creases. The boots were painted dark brown, and washed with sepia oil paint, then dipped in the Mig powder mix and brushed off. The faces were painted off of the figures, using a dark skin base colour, then dry brushed with varying lighter shades of flesh colour, at this point the figure modellers among you are screaming thats not how to do it, so any tips and suggestions on figure modelling for tread heads would be most welcome.Conclusion
I cannot recommend this kit highly enough for allied armour modellers. This is one of Dragons new Sherman kits and what a job they have done for us, the detail is great, and the box is brimming with sprues, etched fret, just wow!!! and I believe that Dragon have also released a 105mm, and an Israeli Super Sherman along the same lines, Ill be getting those as well for the collection, along with another one of these, just brilliant models.... well done Dragon. Acknowledgements I would like to thank; Darren and Dave at Halifax Models for the kit Andy King for the help with the photos. (Cheers mate) My wife Marie and daughter Amy for putting up with me and Mr. Sherman. And my dad for the use of his shaving brush!!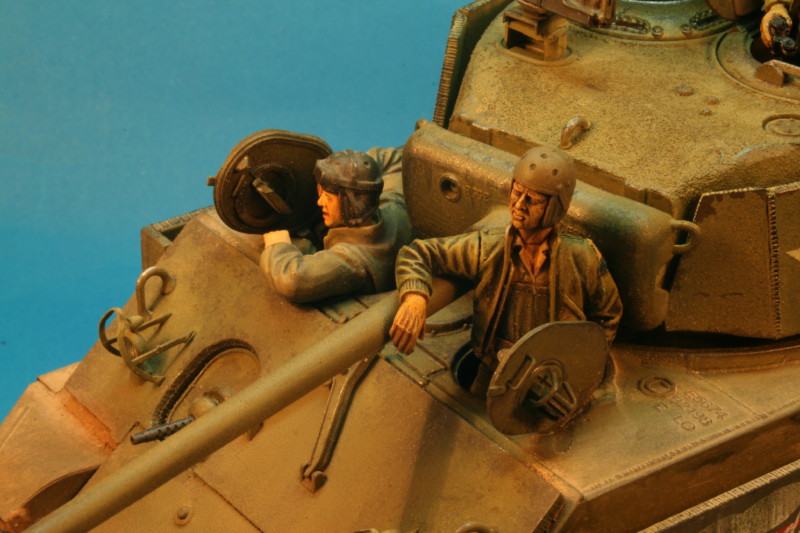


About the Author

Copyright ©2021 by Malcolm Ireson. Images and/or videos also by copyright holder unless otherwise noted. The views and opinions expressed herein are solely the views and opinions of the authors and/or contributors to this Web site and do not necessarily represent the views and/or opinions of Armorama, KitMaker Network, or Silver Star Enterrpises. All rights reserved. Originally published on: 2008-02-23 00:00:00. Unique Reads: 24613

WEB HOSTING BY


Copyright ©2021 Armorama and Kitmaker Network, a subsidiary of Silver Star Enterprises
All Rights Reserved. Please read our Conditions of Use and Privacy Policy.
All Rights Reserved. Please read our Conditions of Use and Privacy Policy.