

1⁄35Renault FT-17
PAINTING (AIRBRUSHING)
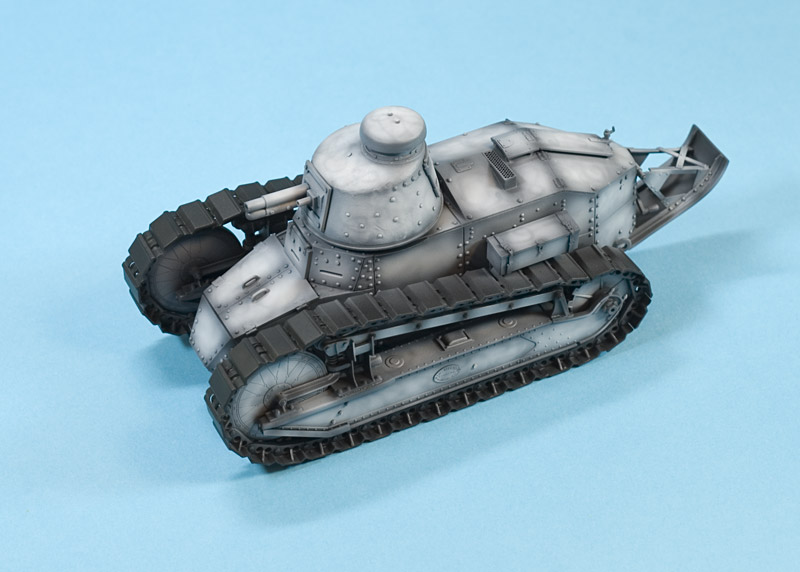
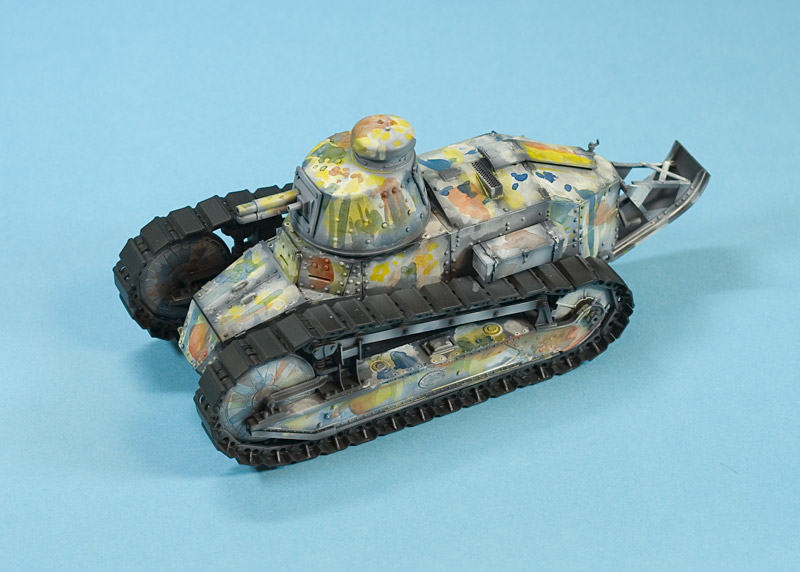
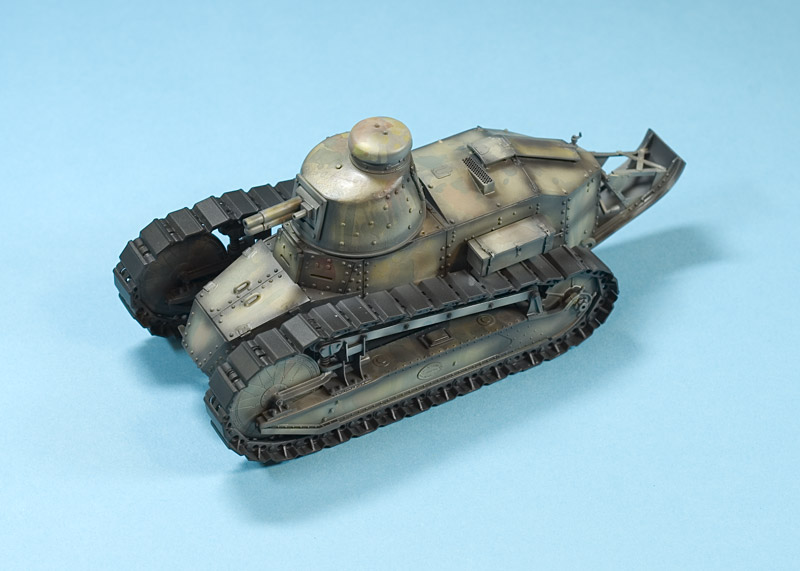
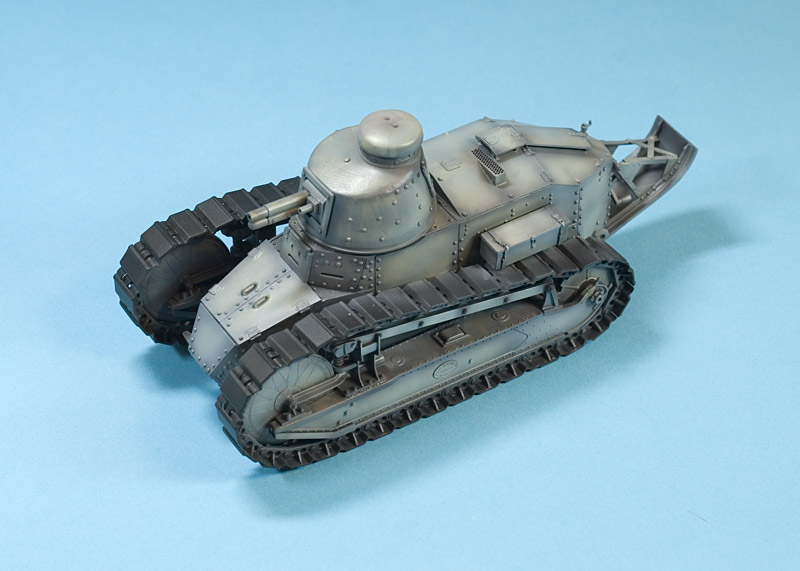
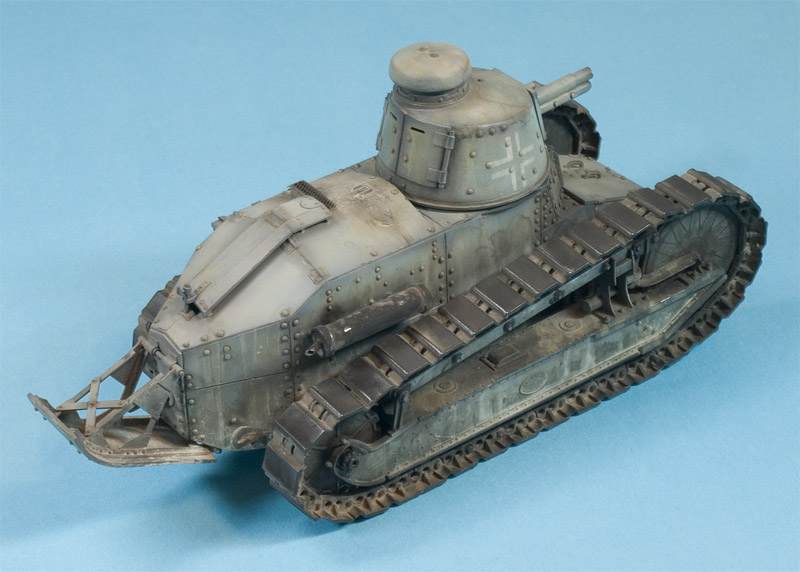
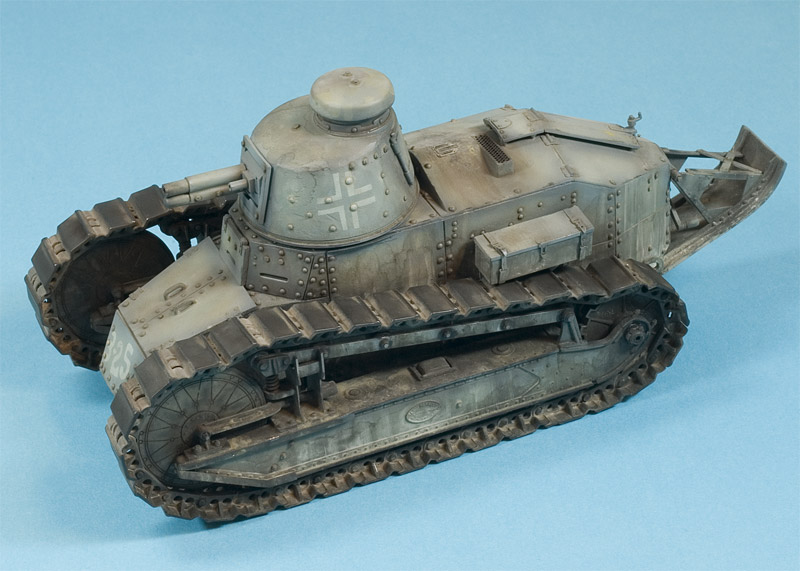
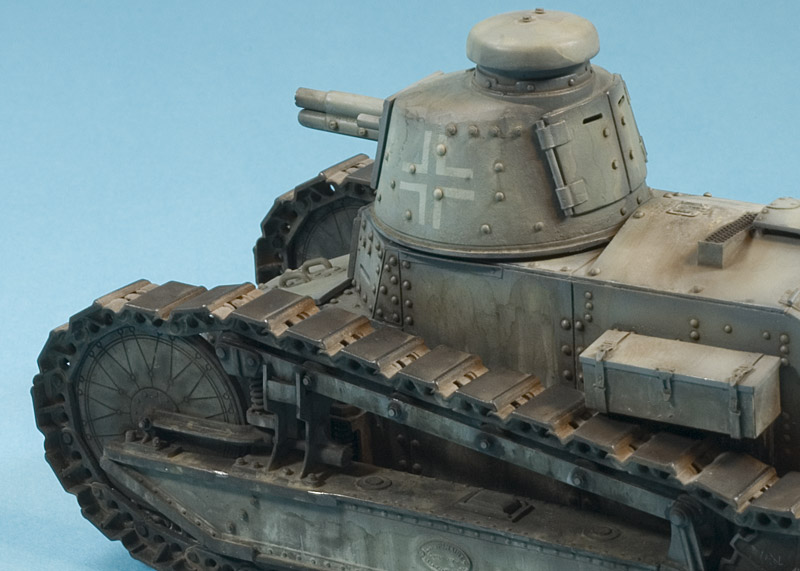
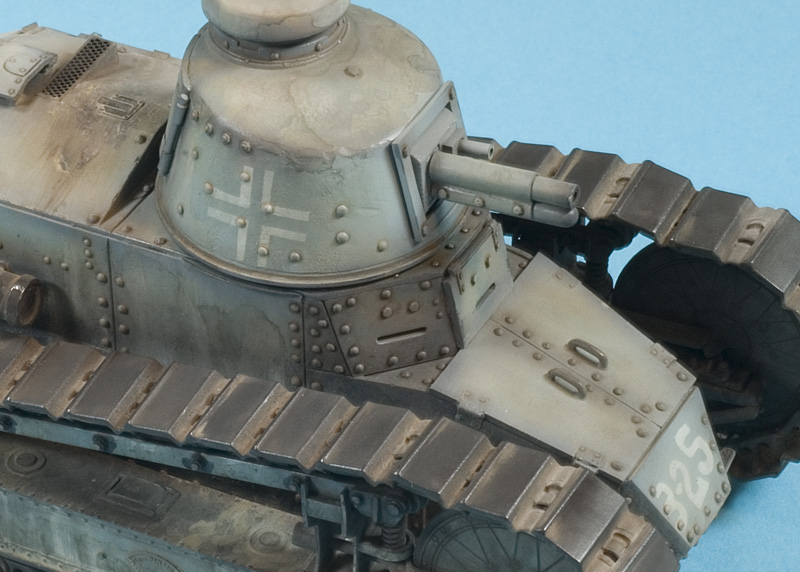
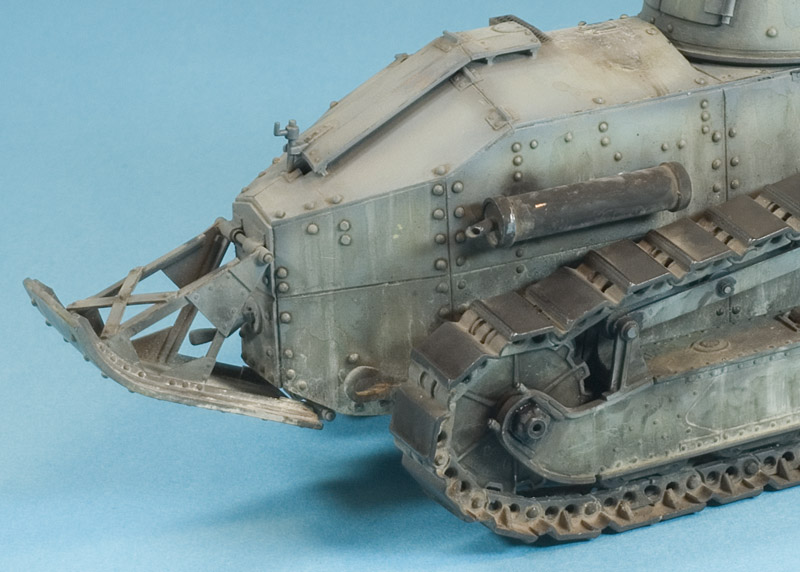
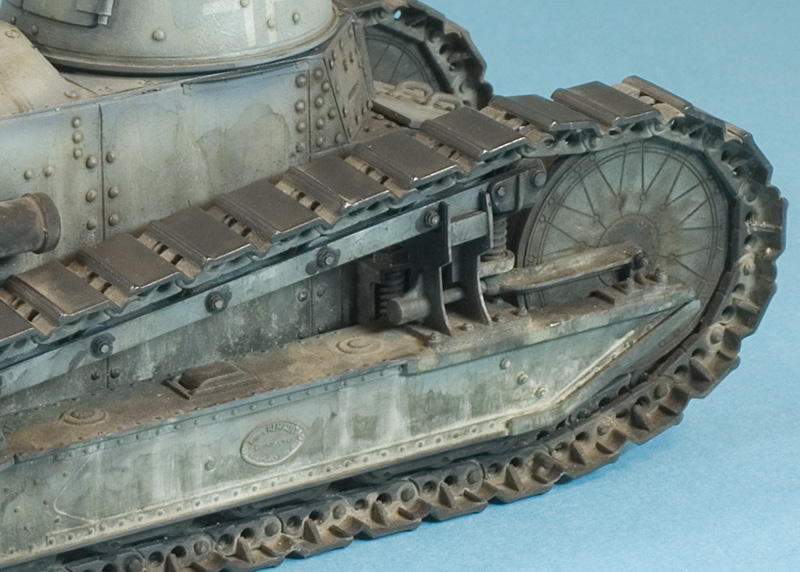
Airbrushing consisted of several painting steps involving base coats, shadow/highlight coats, off-color filters, a "primary color wash" (more on this later), and finally a "dusting" of the final blue color you see now. I sprayed many airbrush coats because later in the finishing process I like to make actual paint "chips". Buy using a dental tool I can scrape the fine layers of top paint to reveal a very heavy base coat. By having a heavy base coat you can be fairly careless making paint chips while not worrying about scraping down to the original grey plastic. My idea of "washing" this model with my "primary wash" during in the painting process was to have a complete model with much variation in a one-color finish. This worked out with my previous M3 Grant model but not so much with this one. The reason being was that my primary wash had too many hard edges and my latter airbrush color filters were way too thick. If done right this method will reveal a stunning paint finish that beats a boring flat finish any day!WEATHERING
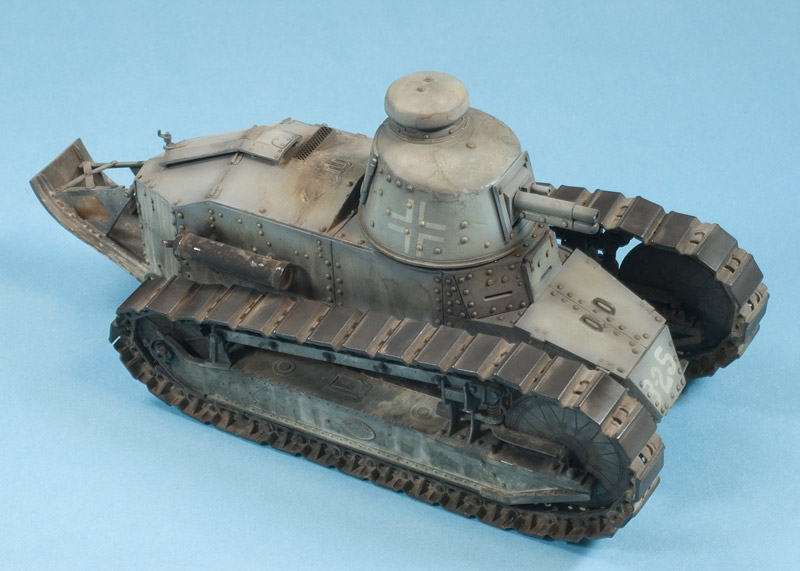
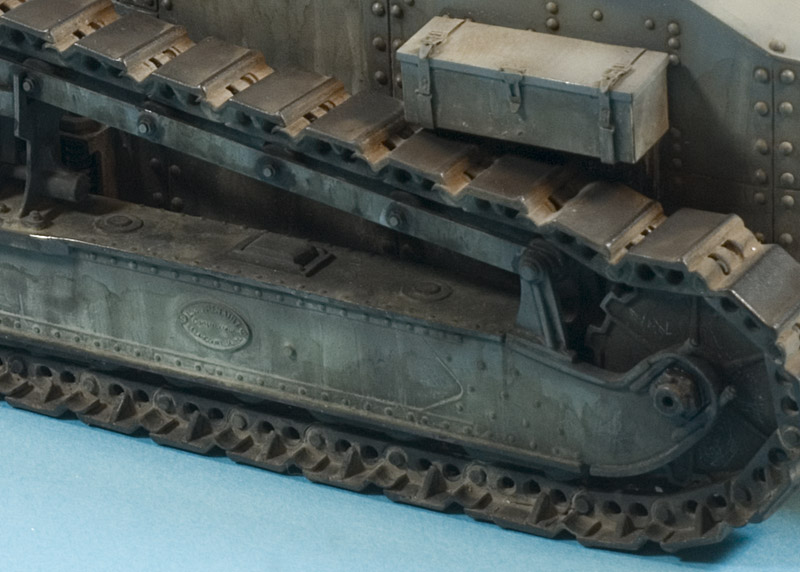
Prior to weathering I pin-washed the entire model with dark brown and black oil paint. Several applications of washing had to be done before I enjoyed what was in front of me. After that I tried a weathering product that was new to me, but familiar in many ways - MIG Pigments. MIG Pigments are like a bad habit. That is they can be difficult to stop using! I often had to make myself stop working in the same area before I actually overworked the area. As mentioned earlier this was my first time using these pigments. I usually bypass any practice on a new technique or product before I begin on the final piece (patience issue). This caused me to overwork the first area to be weathered to an extent that it looked unrealistic. After much thought I finally decided to keep going forward with that ultra-weathered look rather than try to fix it by somehow erasing the pigment. I must say that it was difficult to me to work in this manner (knowing to over-weather everything) and pray that it will all work out in the end. After several weeks of this the look my FT-17 really started to grow on me. Sure, it may be overly-weathered - but hey, it looks damn good being so. I enjoy how the multiple layers of MIG Pigments merge together to form different textures and effects.CONCLUSION
I love the challenge of building a kit from a manufacturer other than Tamiya, Dragon & Hasegawa. These kits give you an opportunity to improve certain modeling skills that high-tech kits do not require. Youll have lessons ranging from part modification to in-depth scratchbuilding. I believe that all serious modelers need to learn the benefits of working from scratch. Working with various scratch materials to complete a kit can give you satisfaction that an out-of-box kit cannot. Plus, skills learned from these crude kits can give you a piece that will rarely be seen on the internet or modeling convention.POST SCRIPT
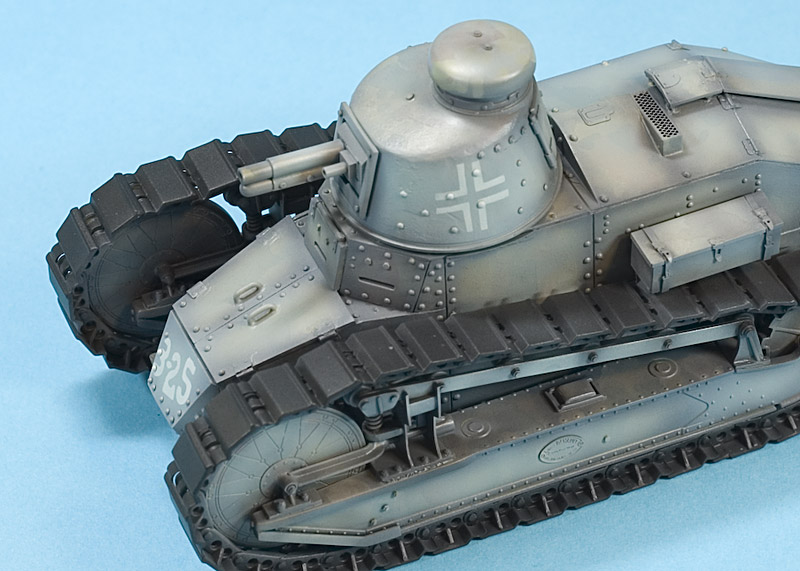
Because it has German markings its actually, maybe, probably an FT-31/PzKpfw 730(f). Or, more likely, an assemblage of many variants clumped together to form a semi-accurate "FT-17". Out of habit Ive called this model an FT-17 for simplicity. This is for you history buffs. You know who you are ;)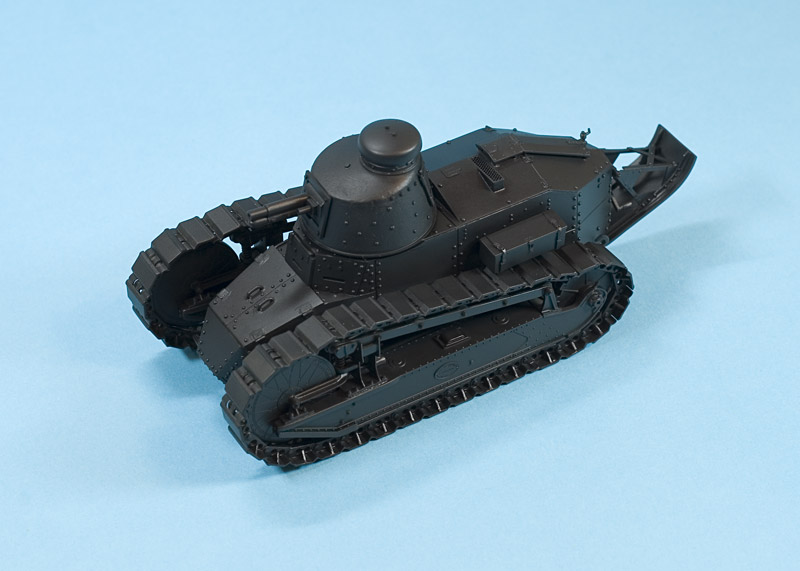


About the Author


FROM: KANSAS, UNITED STATES
Paul is a graphic designer in Kansas. His other hobbies include gaming, photography, LP collecting and cinema.
Copyright ©2021 by Paul Hargett. Images and/or videos also by copyright holder unless otherwise noted. The views and opinions expressed herein are solely the views and opinions of the authors and/or contributors to this Web site and do not necessarily represent the views and/or opinions of Armorama, KitMaker Network, or Silver Star Enterrpises. All rights reserved. Originally published on: 2008-05-30 00:00:00. Unique Reads: 31648

WEB HOSTING BY


Copyright ©2021 Armorama and Kitmaker Network, a subsidiary of Silver Star Enterprises
All Rights Reserved. Please read our Conditions of Use and Privacy Policy.
All Rights Reserved. Please read our Conditions of Use and Privacy Policy.