

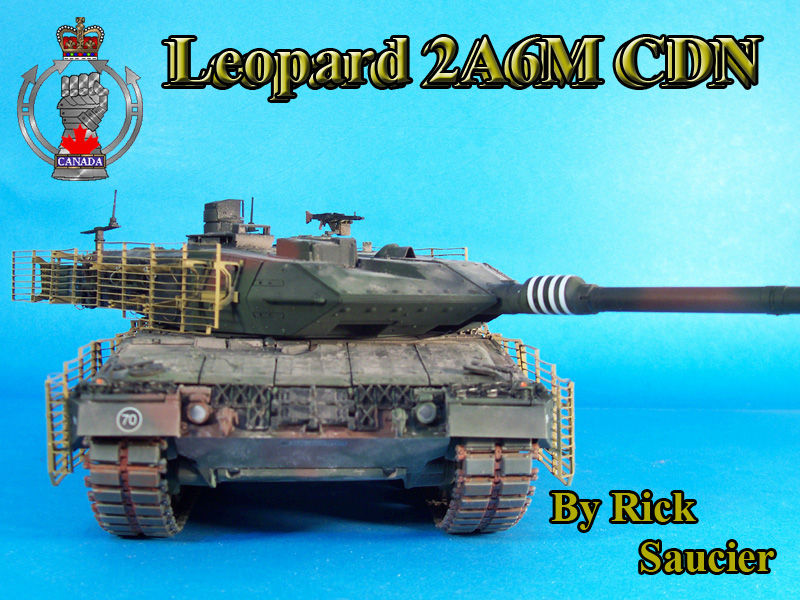
1⁄35Leopard 2A6M CDN
9
Comments
INTRODUCTION
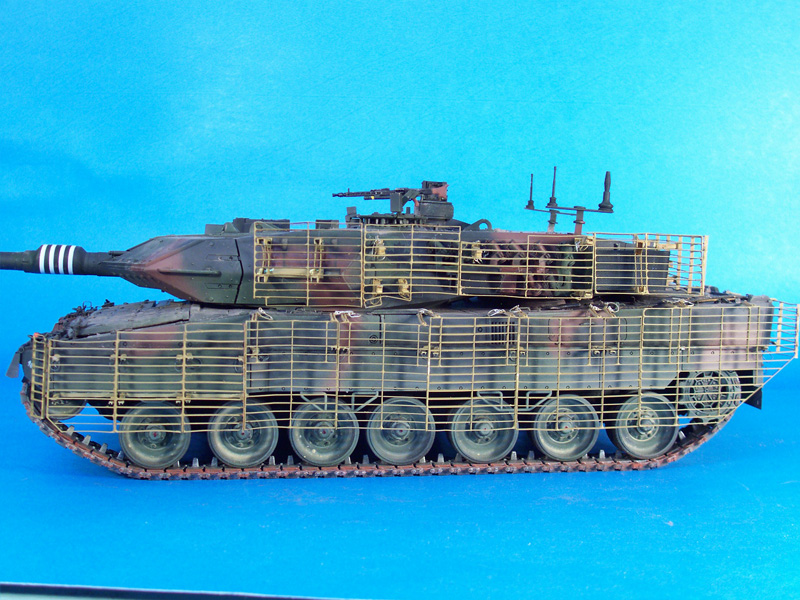
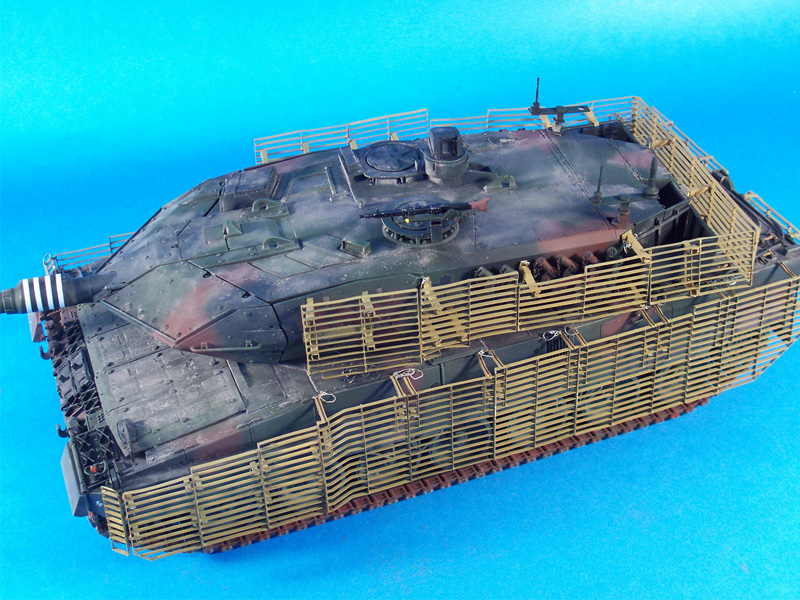
With Canadas role in Afghanistan, the need arose for a more modern Main Battle Tank to replace the Leopard 1C2 currently in theater. In 2007 the first Leopard 2A6M CDN landed in Kandahar Air Field (KAF), Afghanistan, with many unique Canadian modifications including the venerable Slat Armour. The kits used for this build were the- Tamiya Leopard 2A6 #35271
- the Eduard Leopard 2A6M slat armour set #36 019
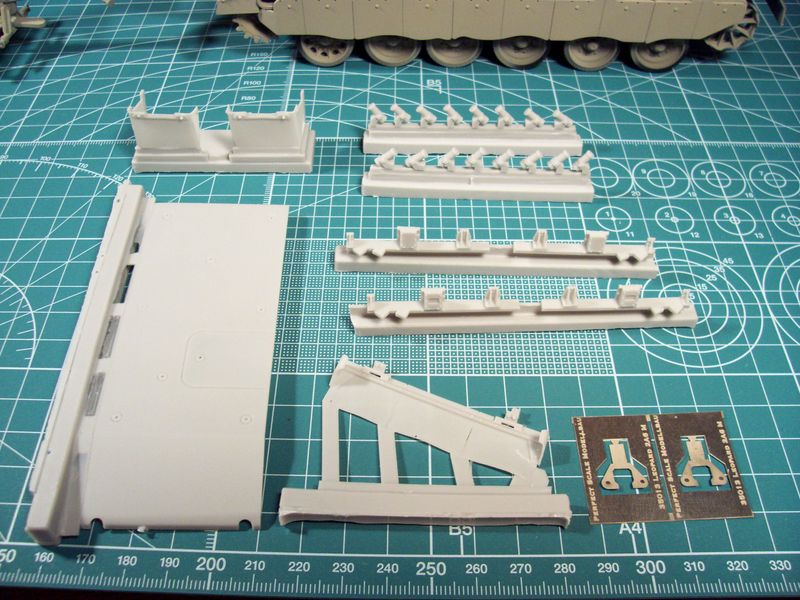
- the Perfect Model Scale (PSM) Leopard 2A6m conversion
- the Echelon Canadian Leopard 2A6m set #D356044
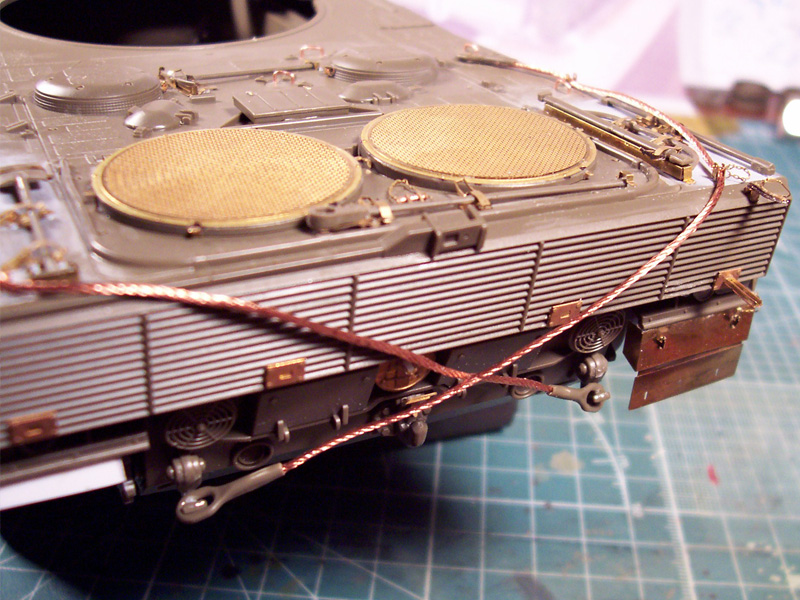
- the Voyager Leopard 2A5 PE set # 35011 (as if the slat armour wasnt enough photo etch?!)
CONSTRUCTION
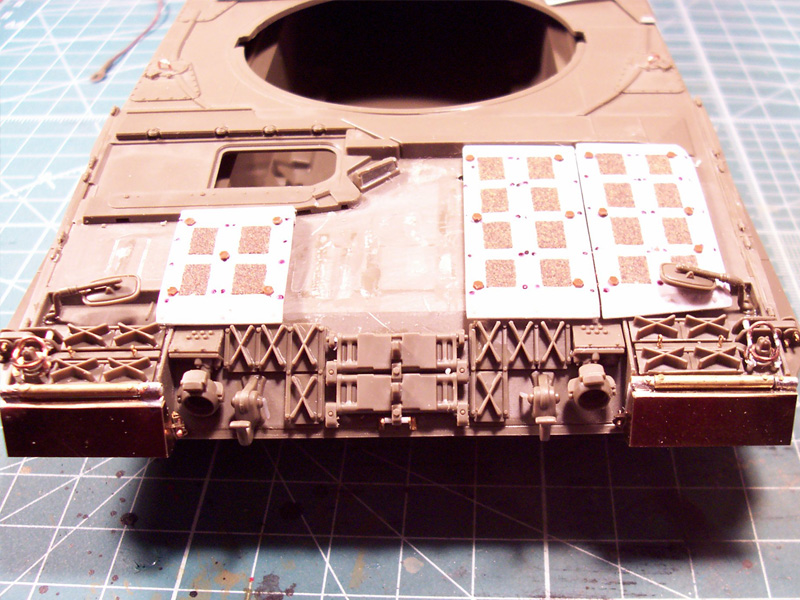
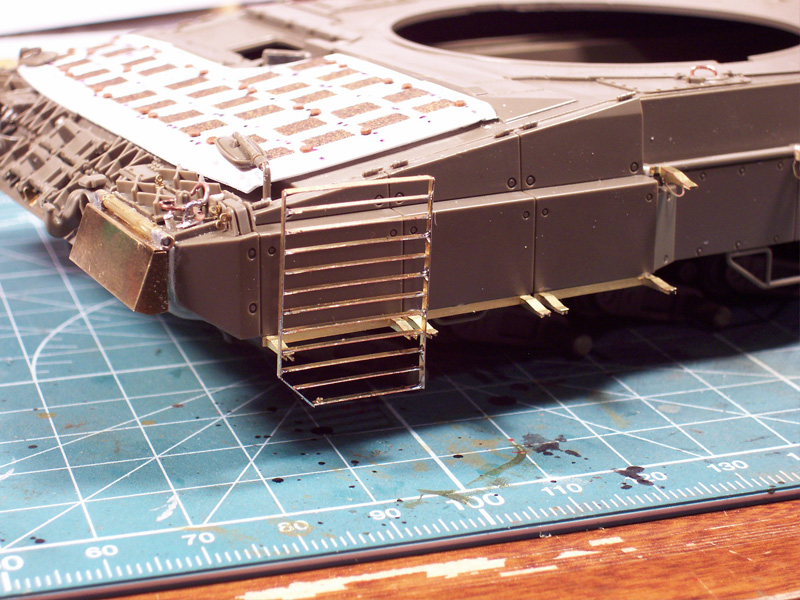
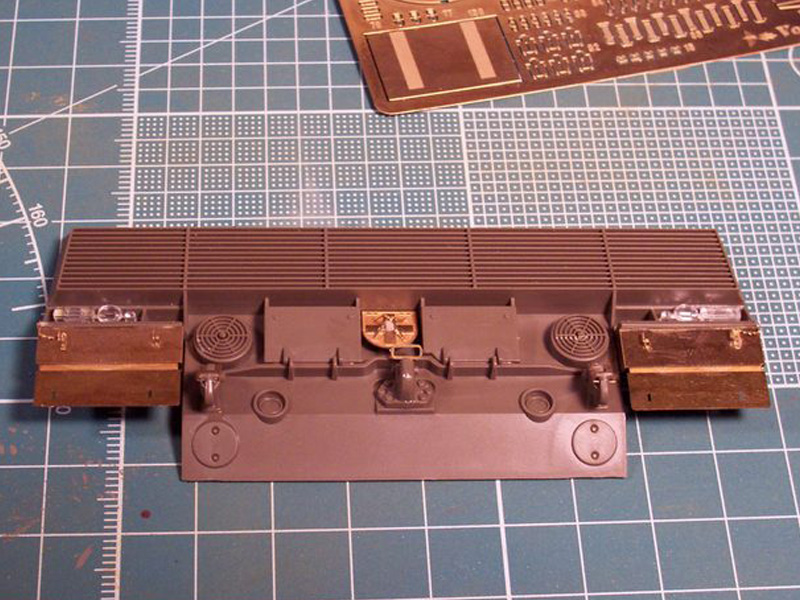
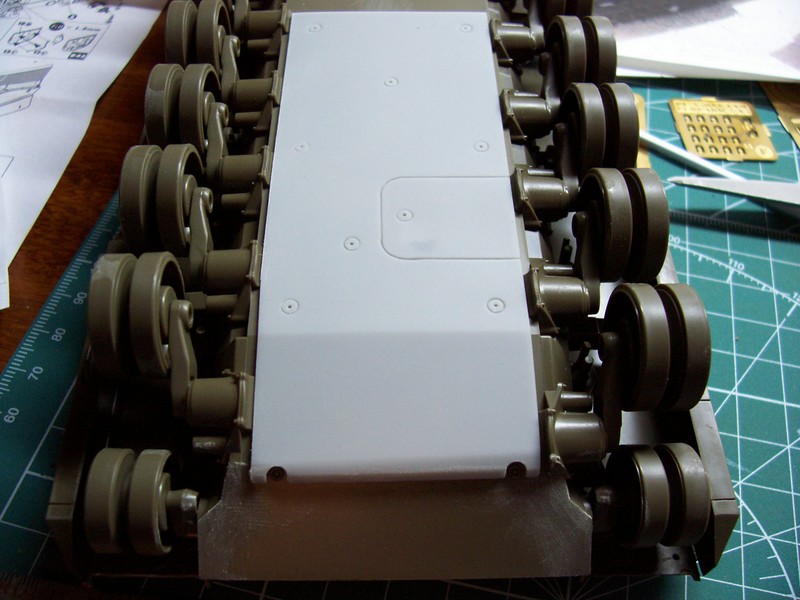
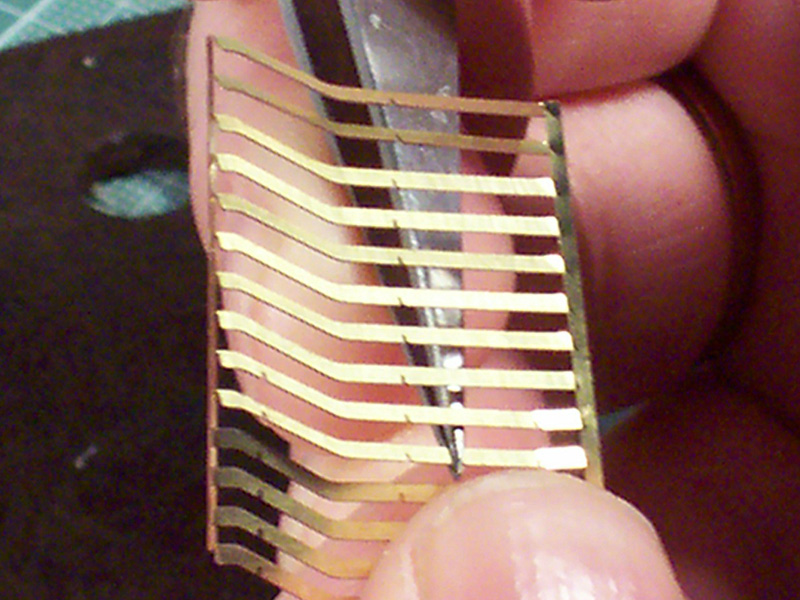
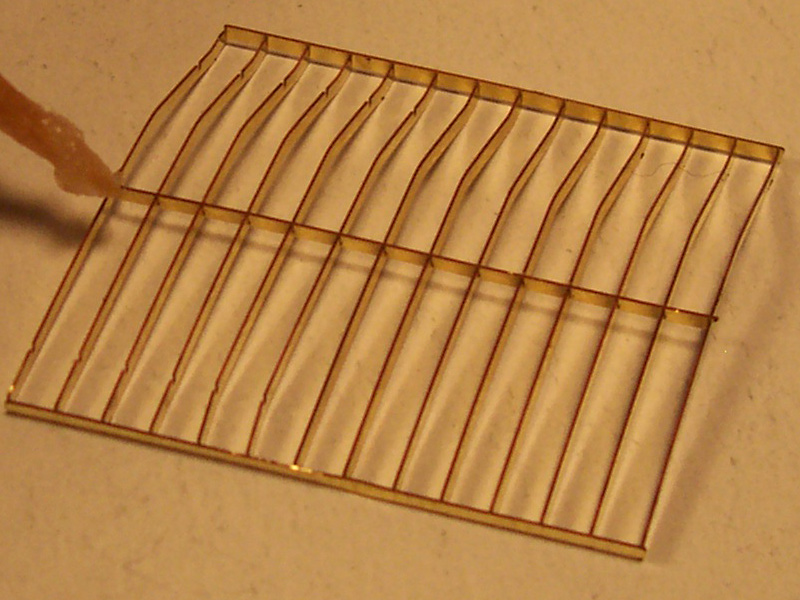
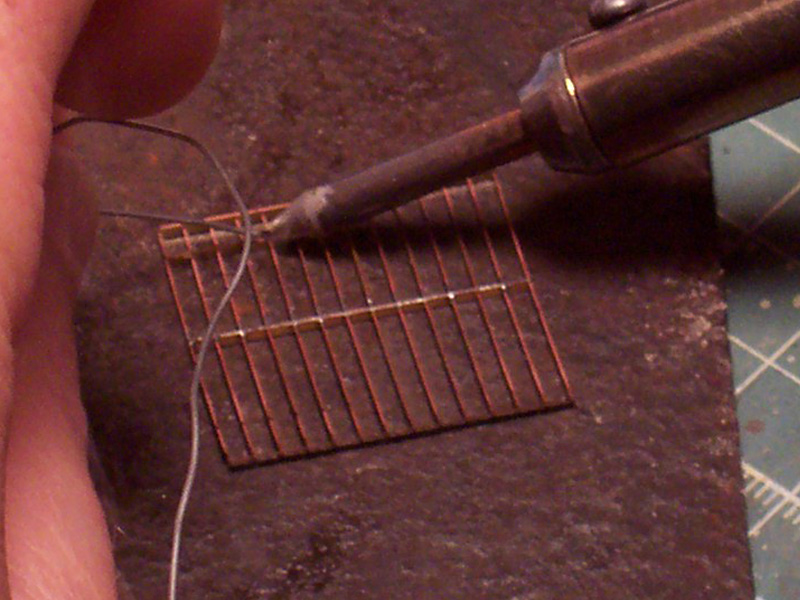
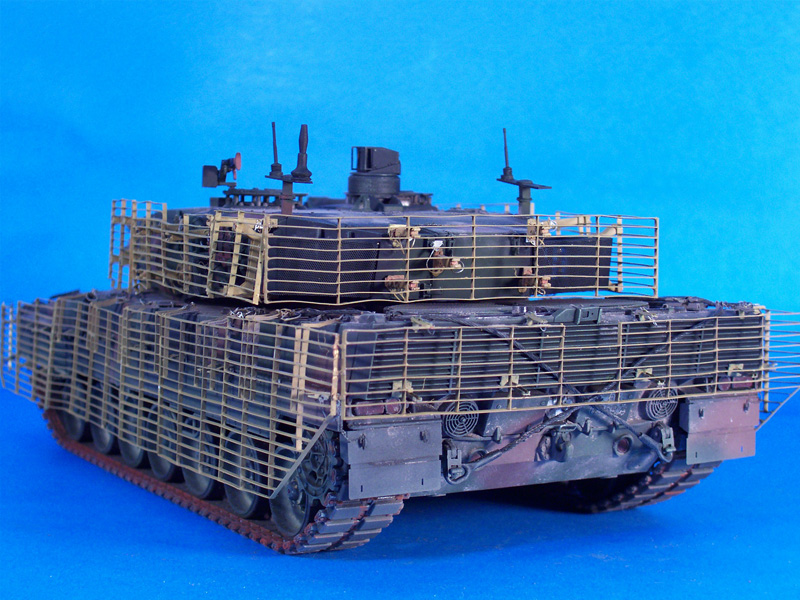
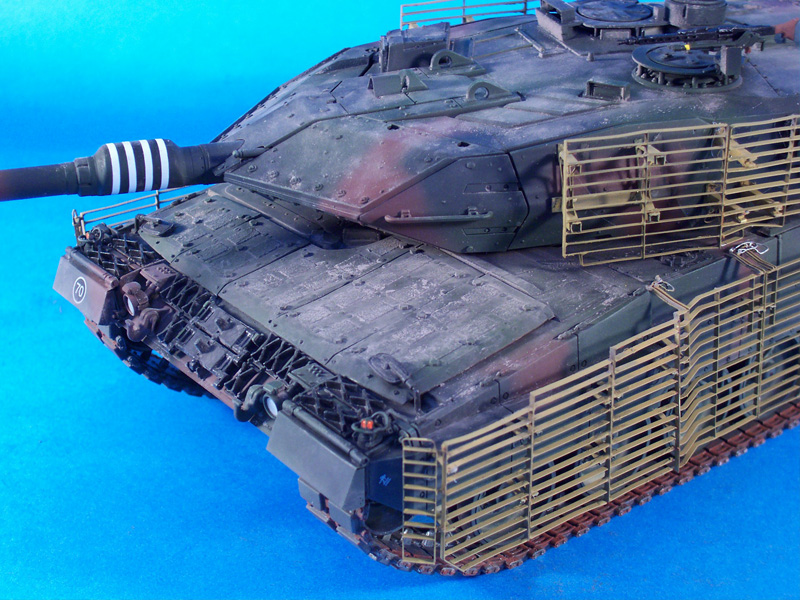
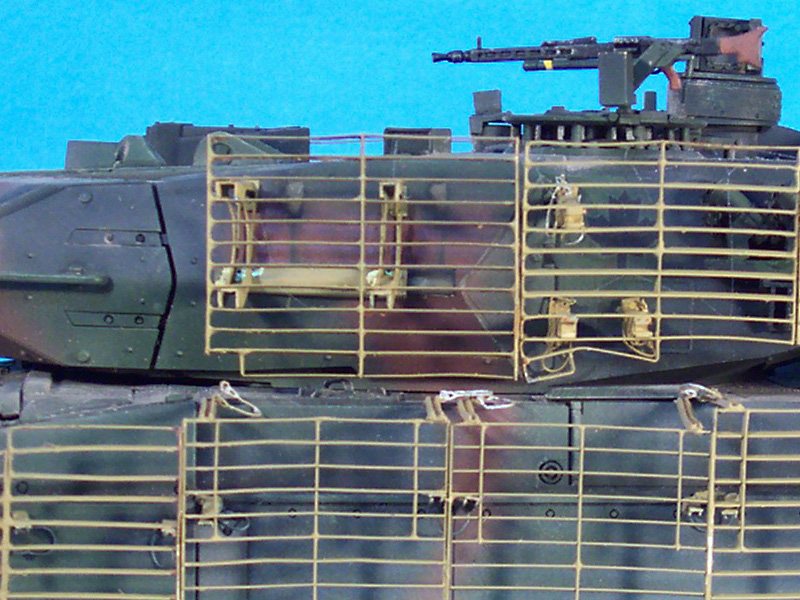
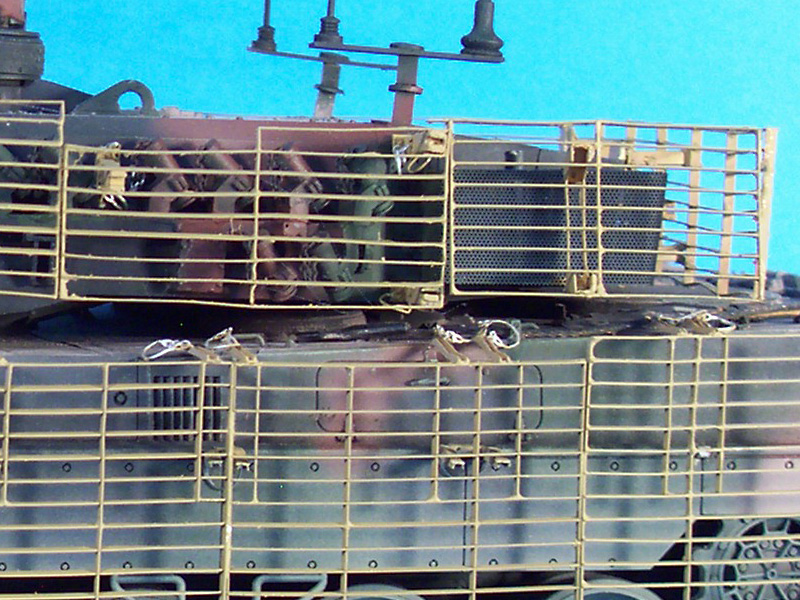
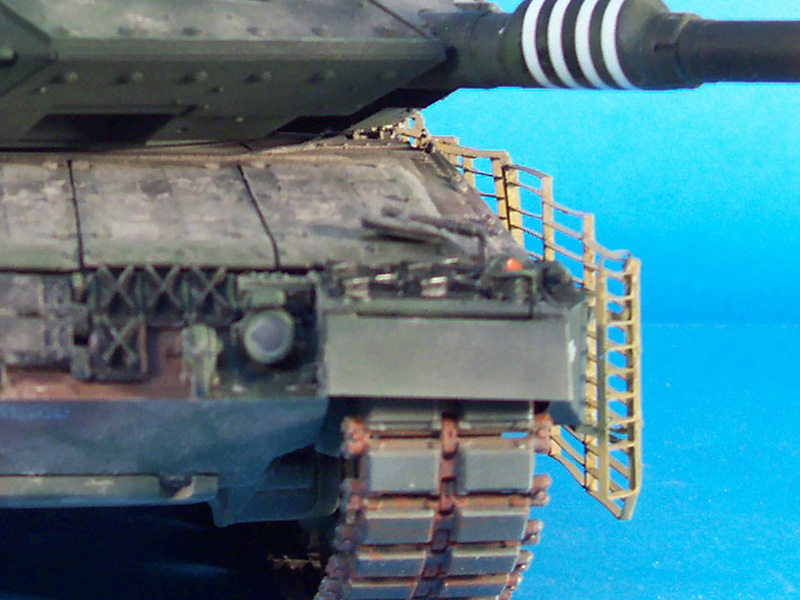
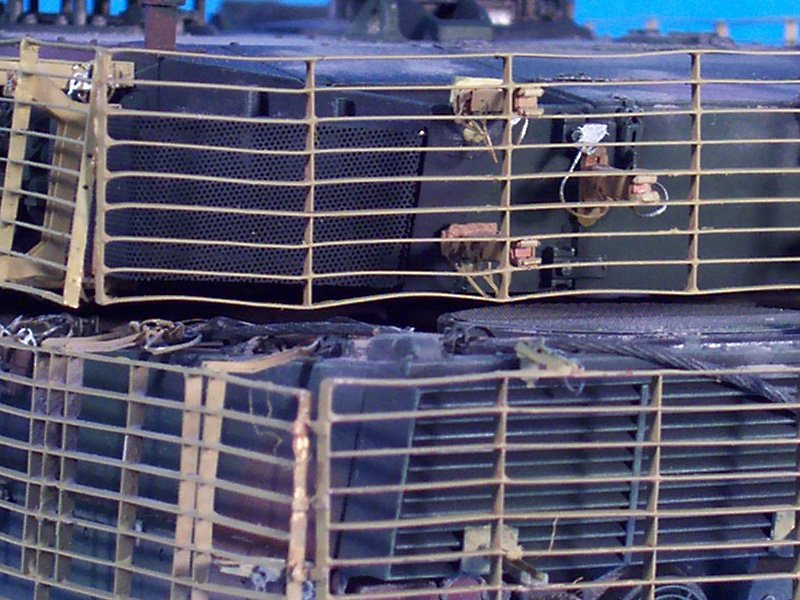
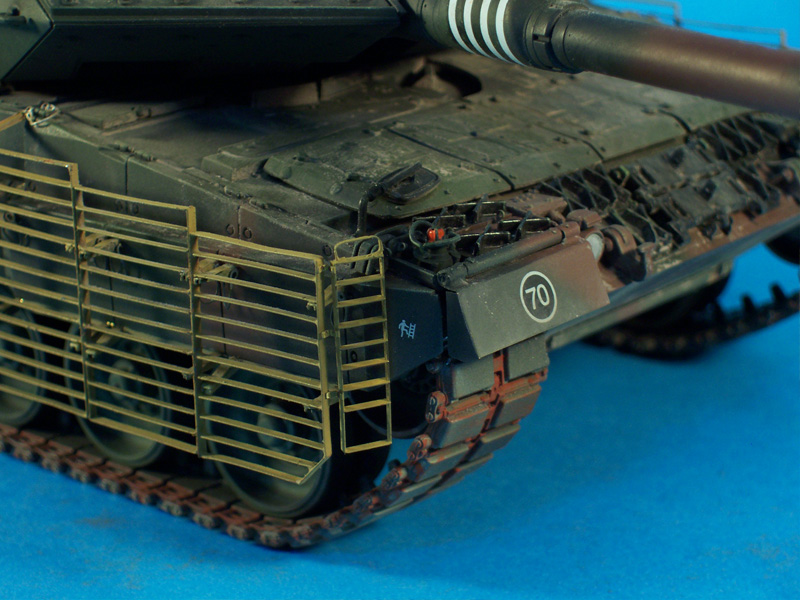
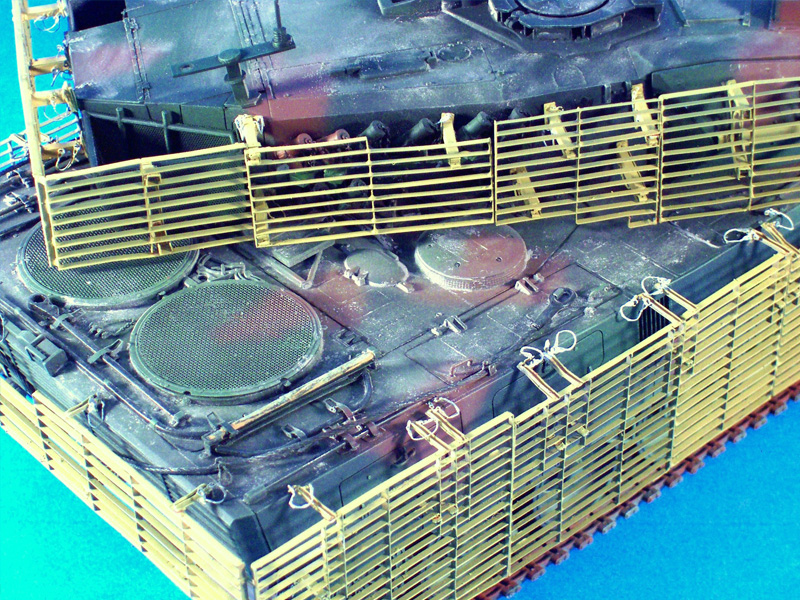
As with many armour builds, the lower hull and suspension were assembled first. This went together extremely well and at this point the PSM belly armour was added. Just some minor shaving of raised detail is required. For such a large piece of resin 5 minute epoxy was used to get a good strong bond. While this was curing selected pieces from the voyager set were added to the rear bulkhead. The rest of the hull went together without any issues, adding the side skirts and the upper hull to the lower section. Once the basic hull was set the task of deciding what was to be scraped off for the Voyager set details, and also making sure that the slat armour mounts would not interfere with anything else began. This took quite some time referring to three sets of instructions at once and writing down and making mental notes (I do not do so well with the later) with regards to what needed to go, stay or be modified. After all the checking and rechecking it was realized that the Eduard slat armour set is almost a direct fit, without a need for major surgery. Following the instructions, there are just a few little nubs that need to be shaved off for the mounts to be glued on. So the Voyager set of instructions was mostly used for the scrapping off of the kit detail such as the pioneer tool holds and the solid slabs that are supposed to be round bar handles for the fuel doors. The only real issue with the Voyager PE set was trying to role the front mudguard hinges. After the first one ended up looking more like a trapezoid than a cylinder, they were cut off and replaced with some round brass tubing. The two end pieces were soldered unto the mud flap, and the middle section was glued to the hull. Then a piece of plastic round stock was slid into the hole to allow the hinge to be workable. The rear mud flaps are supposed to be attached with just the edge of the metal serving as a bonding area right. To give the PE a larger surface area to bond to, a small piece of evergreen card was glued to the back of the hull below the taillights. Once the hull was pretty much complete, efforts to scratch build the upper glacis add-on armour was started. This was built with standard evergreen white card and square stock. Added to this were some Grant Line bolt heads and some stretched sprue for the smaller rivets. As well the anti slip adhesive strips were added by masking off the corresponding area and spraying some Rust-o-leum Fine Textured spray. After the hull was completed, the task of installing the slat armour began. They way Eduard designed the slat sections is quite ingenious; all that has to be done is to fold the sides (vertical parts) the correct way and then fold the slats (horizontal parts) to build the basic section. Then all that is needed is to insert the vertical bars and solder or glue it all together. So following the instructions it took about 15 minutes to assemble each section. For the main sections solder instead of CA glue was used as it makes a stronger bond. Next was the building of the attachment points. There are two styles of attachment points, ones that just require folding, and ones that comprise of three separate pieces that have to be glued together. As these parts are very small, using solder would have destroyed any sharp edges losing detail. After which there is a small cable and bolt head that have to be attached to each support. After all the sections were assembled, they were soldered to each other as complete assemblies. With all the supports attached and the hull armour complete it was time to tackle the turret. The basic turret went together without any issues and the required detail was removed for the Voyager set to be installed. This included the rear bin hinges, clasps and commanders sight detail. Unlike the hull, the slat sections were built and left in separate sections for placement. Using reference pics the supports were glued to the armour prior to placing on the turret. This was done because the armour is not straight, as the separate sections conform around the shape of the turret. Once the slat armour was dealt with there was some more scratch building required. The new style antennae mounts were built again using evergreen card and square stock with two aerials scrounged from a Stryker kit and one from a M-113. With an untrained eye these past the 50-50 test no problem (50 feet @ 50 mph). Also the mount for the C-8 personal weapons had to be made for installation in front of the commanders hatch. Now it was onto the painting and weathering process.Painting and Weathering
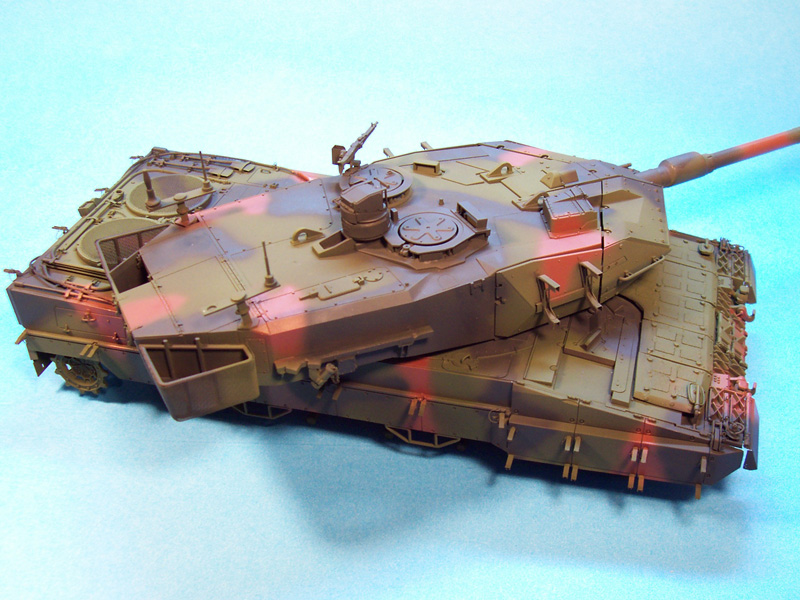
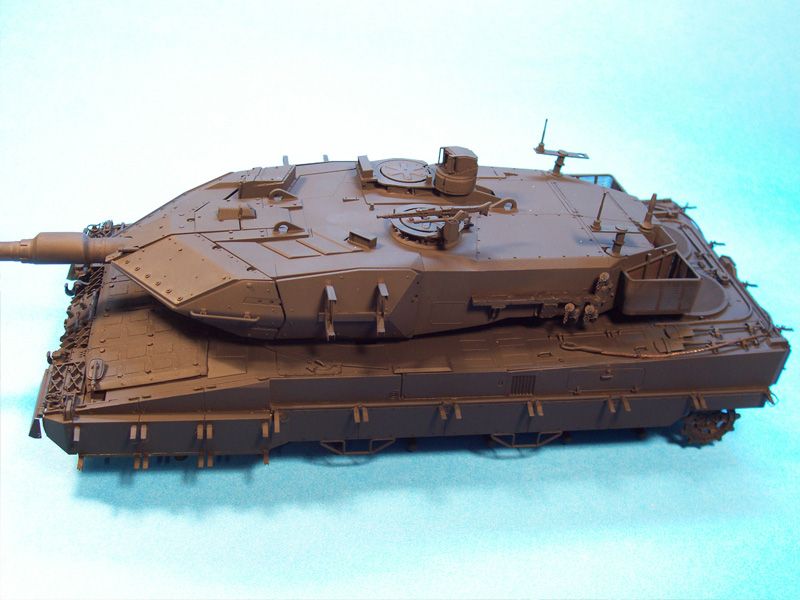
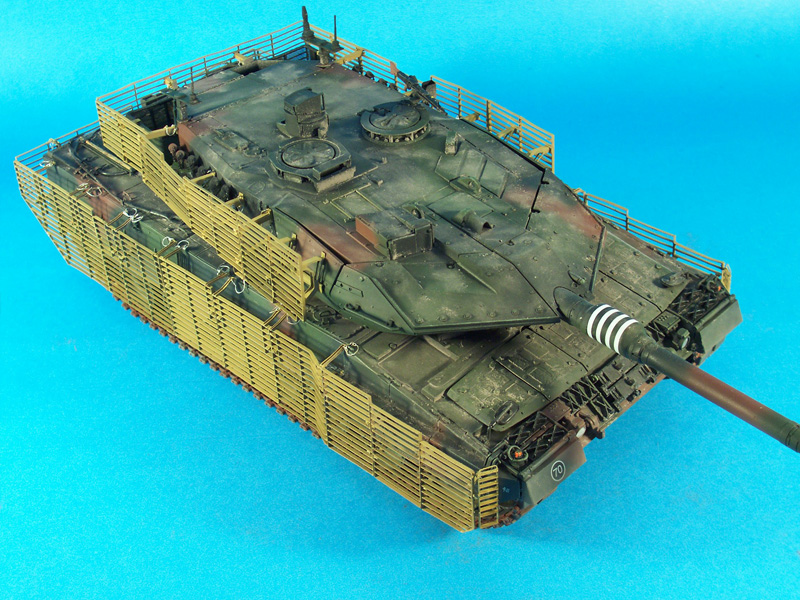
For the painting process Tamiya acrylics were used almost exclusively. They are water clean-up and dry quickly, which is a bonus painting a 3-tone camouflage pattern, as it is possible to lay down all three colours in one sitting. Before the colour coats were applied a base coat of flat black was applied, making sure to get in every nook and cranny. This helps later when applying the colour coats by acting as pre-shading, and if you happen to miss a few spots it wont be as noticeable. So if youre thinking that you can use the flat black as one of your colour coats, you probably could. But, the NATO Black has a slight tint of grey, so it would not be totally accurate. After the flat black had dried an overall base of NATO green was applied, a little thinner on the panel edges and a bit thicker in the centers, still showing some of the black ever so slightly in some spots. Then the NATO brown was laid down using reference pics from the web. Both the brown and the black were sprayed free hand without any masking. For this technique a low air pressure of 5-8 lbs and the paint flow setting set very low, with the nozzle of the airbrush millimeters away from the model for the outline. After the outline is done the flow can be brought up slightly along with pulling the tip away from the model. The paint mix for this stage has to be also adjusted thinner than average as to prevent spitting little globs of paint unto the models surface. For painting the slat armour and brackets Games Workshop Desert Yellow was used, airbrushing a base coat prior to installing the armour. After the armour was installed finishing paintwork was completed by brush. After the base painting was dry, the detail painting began of all the tools, weapons, etc. Once all the painting was finished the application of the excellent decal set from Echelon, and then a pin wash of black was applied and then a dry brush with a mint green that was specially mixed for a previous M-113 interior. The desired look for the model was a newly deployed tank with just the minimum amount of dust and dirt. MIG pigments consisting of Industrial City Dirt for the dust and Red Rust for the tracks were used. The extensive use of photo-etch in this build added many hours of extra work to the basic Leopard 2A6, but if one wants to build an accurate Canadian Leo2 serving in Afghanistan the slat armour is an evil necessity. The addition of the Voyager P.E. set is not required for accuracy; its just a very nice detail set for that extra pop. Now if someone would like to manufacture the new Barracuda Cam . I would like to thank Jason Bobrowich for his invaluable help in getting all the little details just right and Anthony Sewards for taking the time to upload numerous pictures on his site.


About the Author


Comments
Rick
This is absolutely first rate, really well done. I hope I get the chance to see this model in person some day. Excellent job sir and I've saved every photo for my reference so I can get off my butt amd try and build this beast.
It's a real pleasure to see this one and keep safe over there.
Bob
OCT 31, 2008 - 02:00 AM

Rick,
Fantastic to see your 2A6M in a feature....awesome job on breaking the ice for anyone interested in building one.
I will be starting mine very soon.
OCT 31, 2008 - 07:19 AM

Nice work Sauceman! You must have put many hours into it. The Slat Armor is sweet. Good job with the text as well..........Robert Liles
OCT 31, 2008 - 02:25 PM

That you all very much for your replies. This build really tried my patience at times (being ONE with the CA glue was sometimes more literal than figurative LOL).
It was especially interesting to write the summary on the airplane going home on HLTA and relying on memory haha.
Thanks again for the kind words!
cheers from the sandbox
NOV 01, 2008 - 03:50 AM

Looks really good. I don't know if I would have the patience to do the slat armor....
NOV 01, 2008 - 05:26 AM

Rick,
great build ! I love it.
I want to build a 2A6 but I'm teetering on the Slat armor PE build
How difficult was it to make sure the slat fitment points on the hull and turret were correct ?
Did you use a template or dry fit the slat ?
Regards
Paul
NOV 01, 2008 - 03:52 PM
Hey Paul,
Glad you like it.
What I did on the turret was start by placing the rear sections on square and even using the MK 1 eyeball. Then working my way around towards the front one section at a time. The attachment points were attached to the slats first and then the sections were fixed to the turret. Same for the hull, started at the rear but I soldered the whole side sections together and installed it as one piece. If I do make another I will install every section separately and see how that goes.
cheers from the sandbox
NOV 02, 2008 - 12:45 AM

Copyright ©2021 by Richard Saucier. Images and/or videos also by copyright holder unless otherwise noted. The views and opinions expressed herein are solely the views and opinions of the authors and/or contributors to this Web site and do not necessarily represent the views and/or opinions of Armorama, KitMaker Network, or Silver Star Enterrpises. All rights reserved. Originally published on: 2008-10-31 00:00:00. Unique Reads: 43104

WEB HOSTING BY


Copyright ©2021 Armorama and Kitmaker Network, a subsidiary of Silver Star Enterprises
All Rights Reserved. Please read our Conditions of Use and Privacy Policy.
All Rights Reserved. Please read our Conditions of Use and Privacy Policy.