

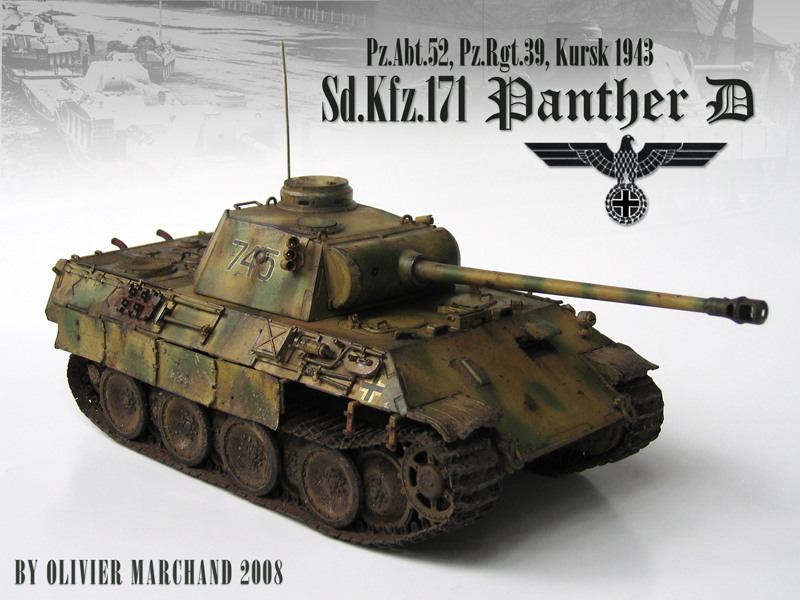
1⁄35Panther D
13
Comments
By Olivier Marchand
History
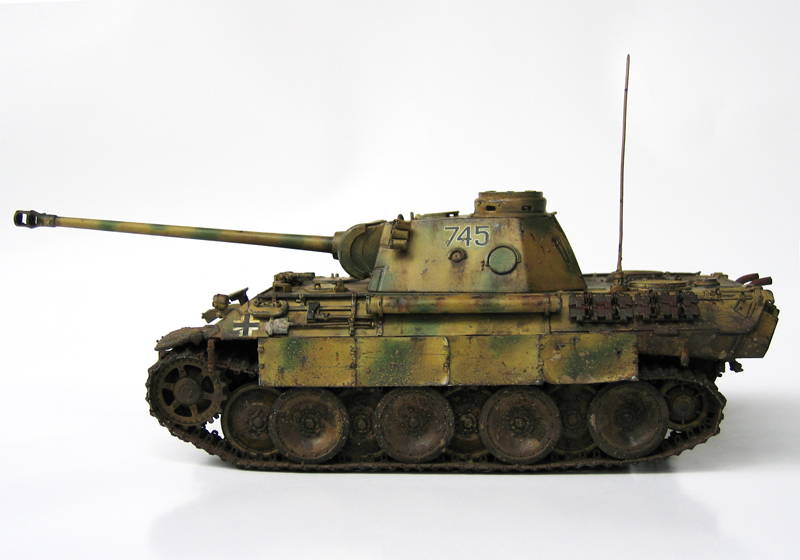
My Panther D fought for the first time in the battle of Kursk in 1943, the biggest tank battle in human history. The Panther D was fresh out of the factory and therefore in mint condition. My tank was one of the lucky ones that survived the battle and retreated with the rest of the German army in the great defeat against the USSR. Perhaps if Hitler had let the 6th Army escape Stalingrad with its 300,000 men the fate of Kursk would have been different.The Build
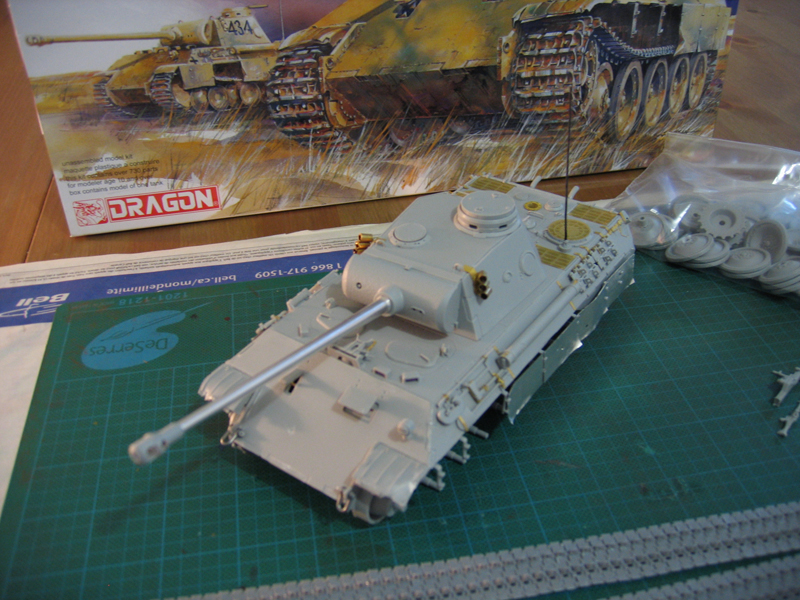
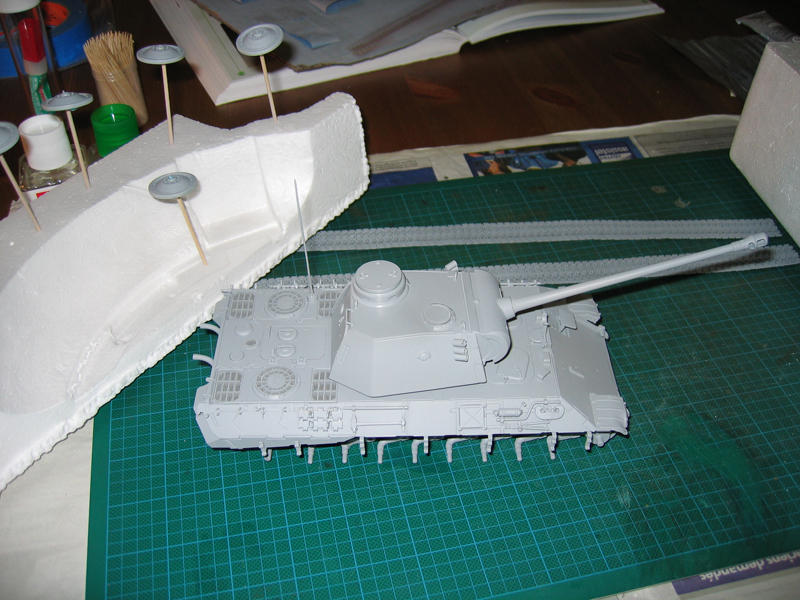
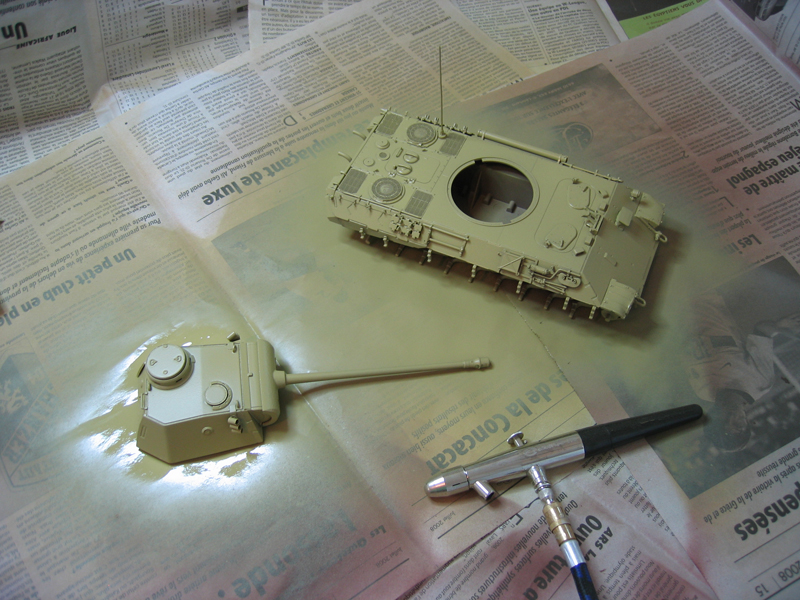
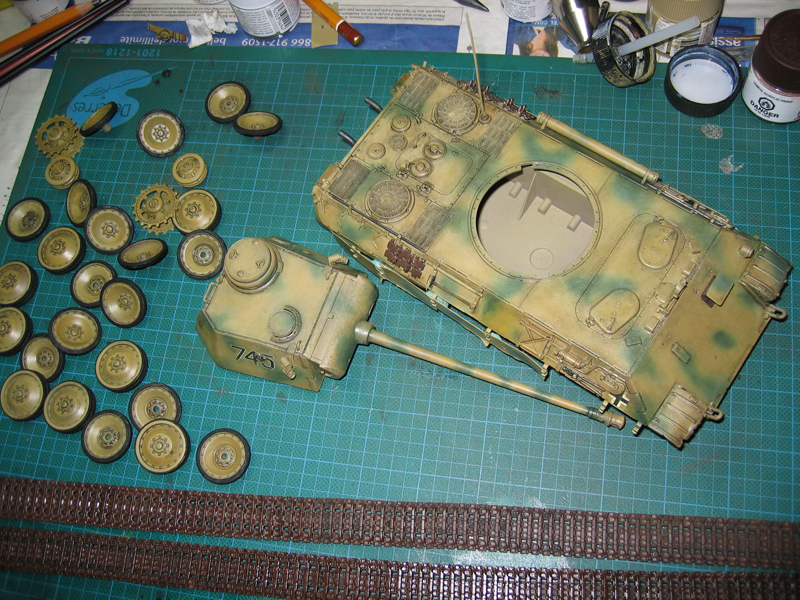
Building went smoothly. The Dragon Panther D Premium is a fairly good deal, it includes a photo-etched fret, is nicely detailed and easy to build. I used only what was included in the kit to complete the tank.Painting
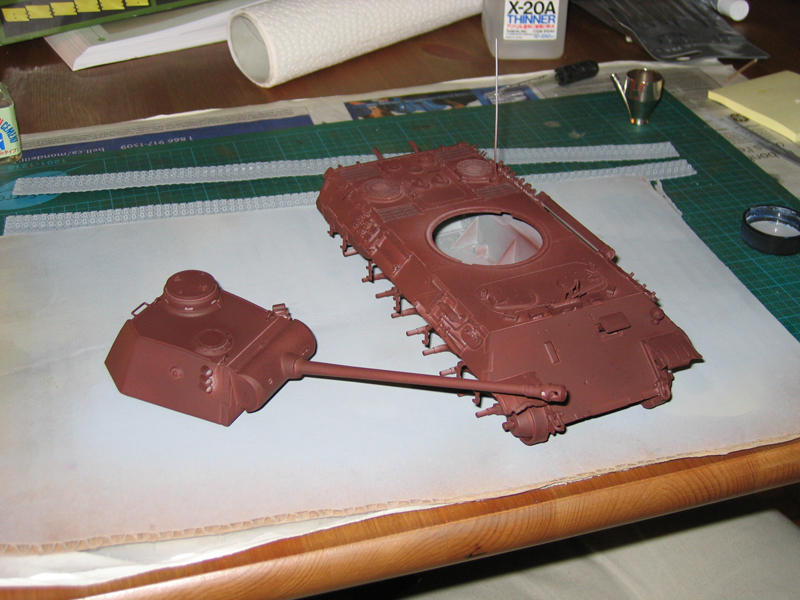
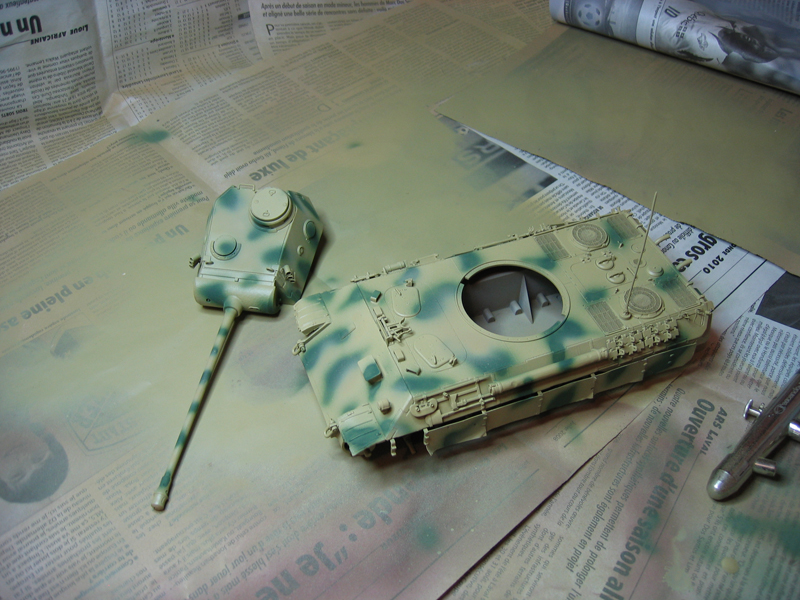
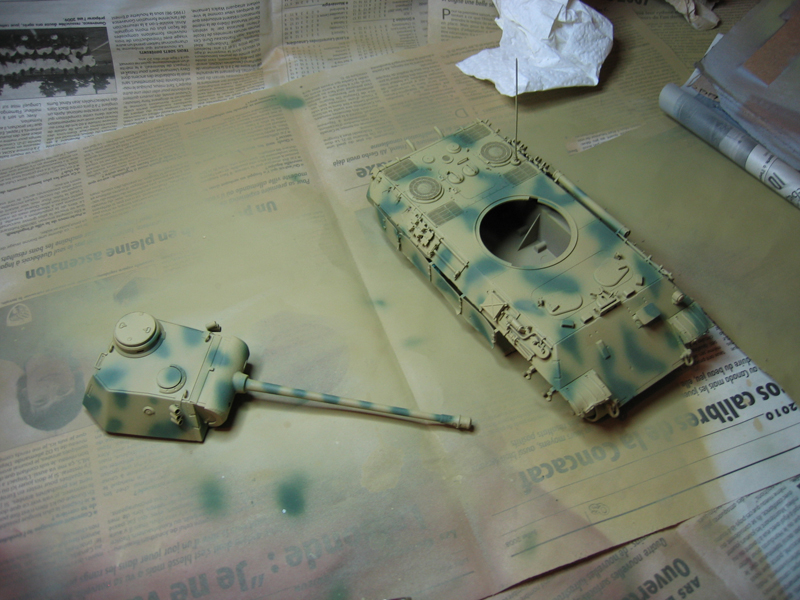
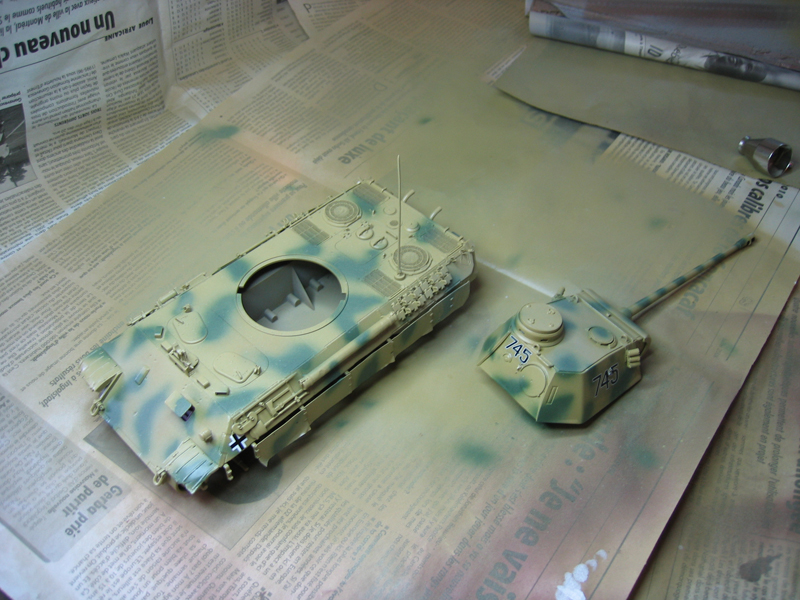
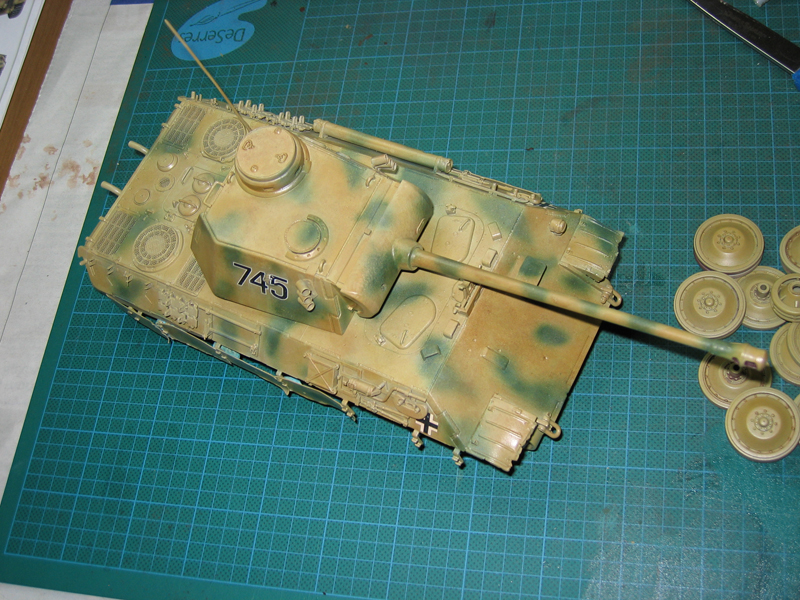
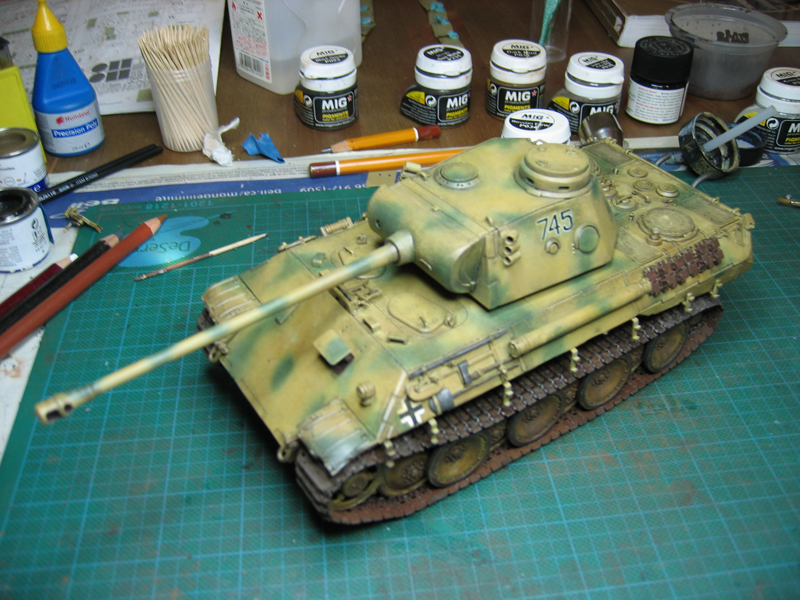
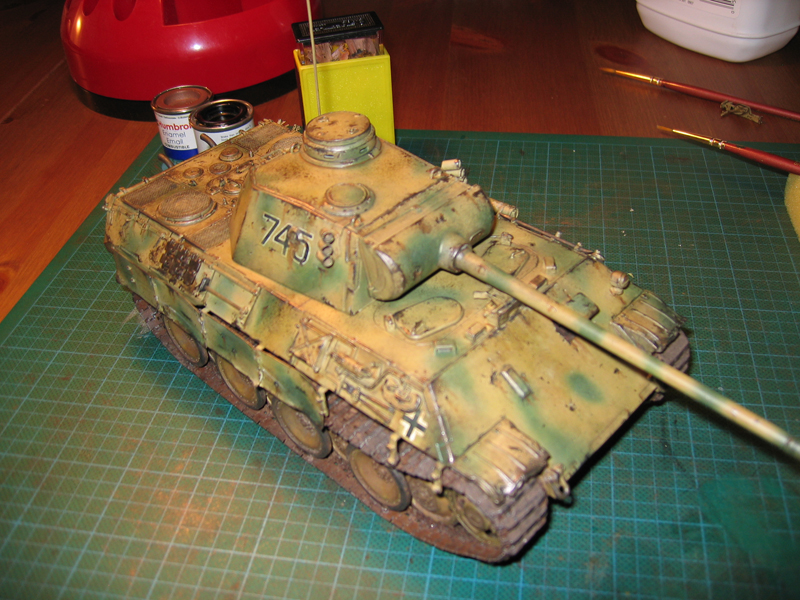
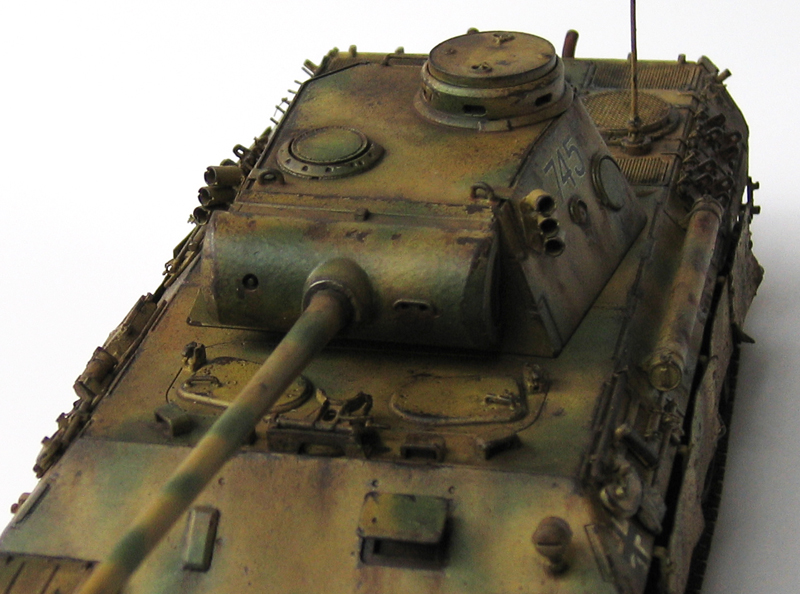
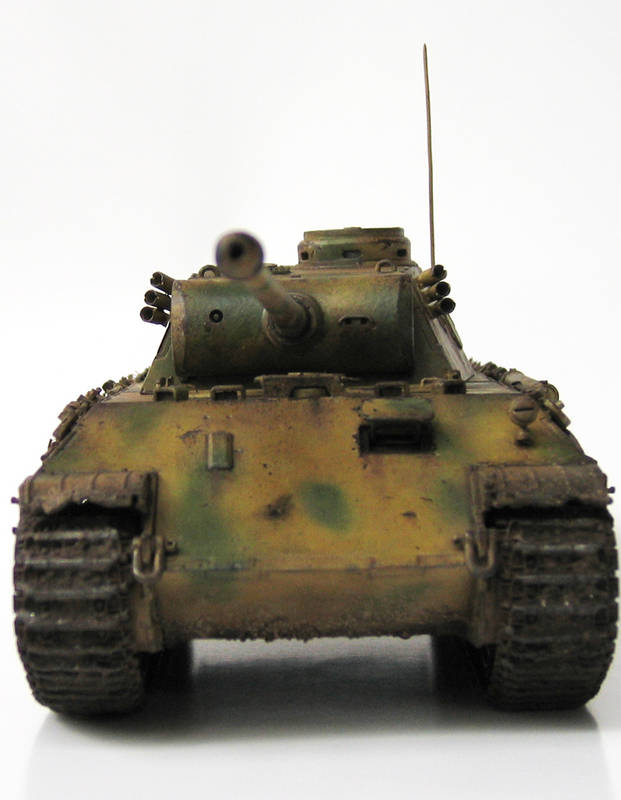
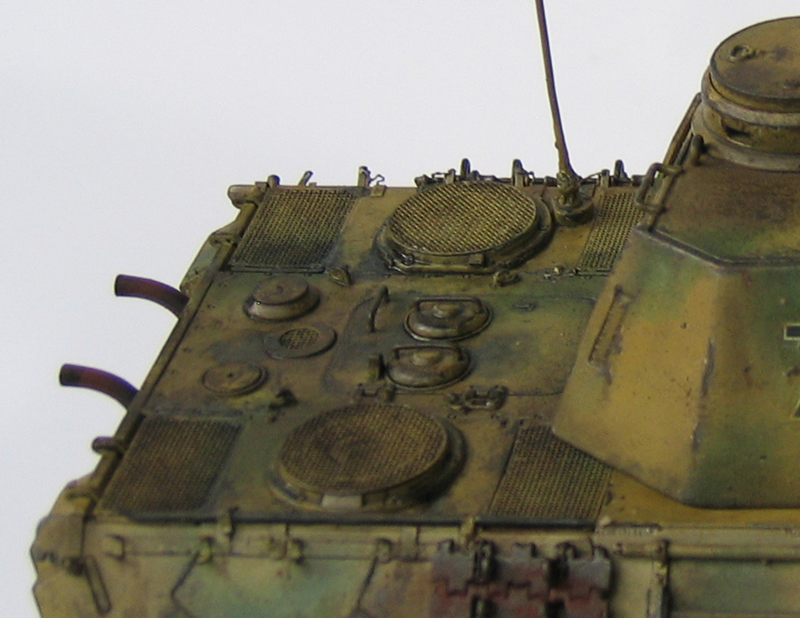
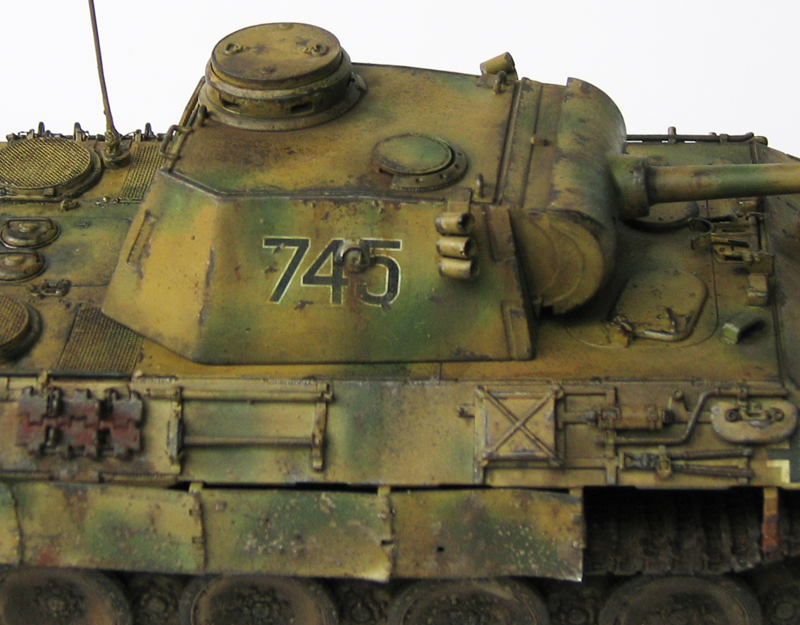
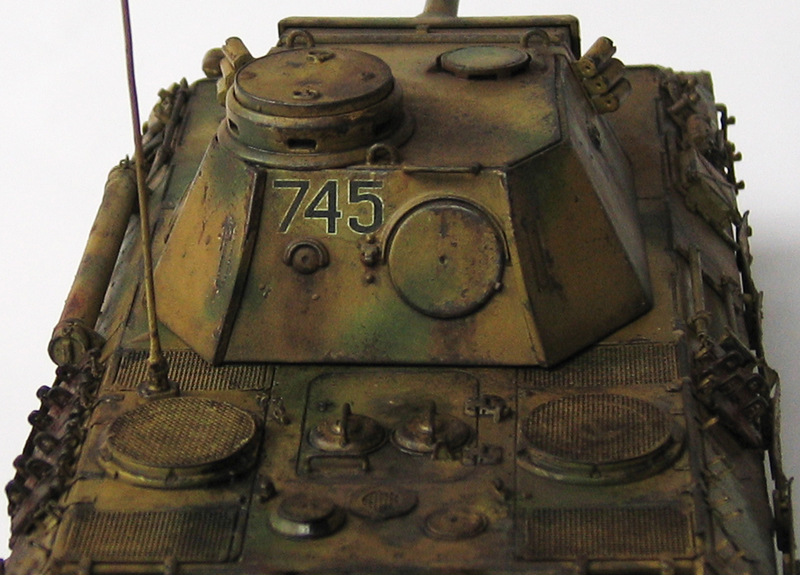
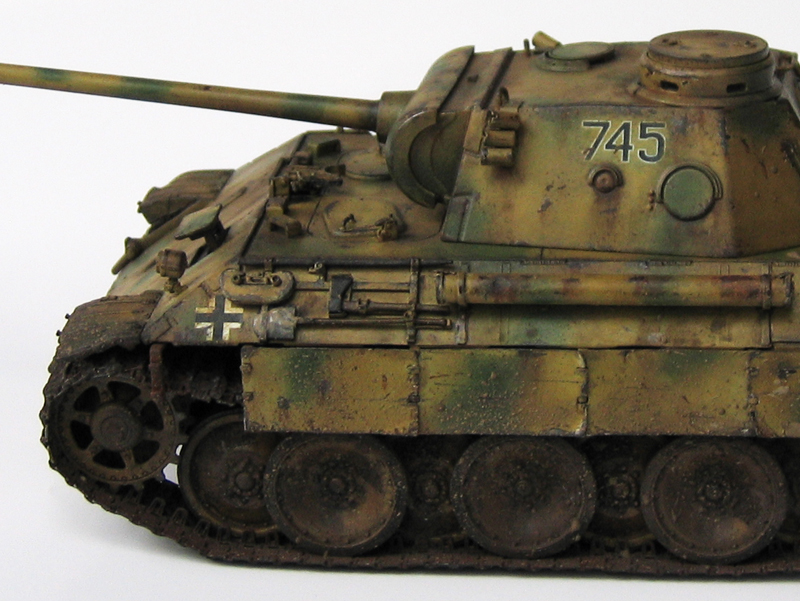
My first step was to add a coat of Tamiya primer. The primer was useful in identifying any imperfection in the modelling. The Tamiya spray can be messy and I found you could run the risk losing detail in the plastic. I applied a coat of Tamiya Red Hull primer, the same colour primer the Germans used in their factories during the war. Over this I simply applied a coat of Tamiya Dark Yellow paint using an airbrush. I used the camouflage suggested by Dragon, it is the same camouflage used on these tanks that served during the battle of Kursk. The colour I used for the camouflage was Tamiya Deep Green. I reduced the contrast of the green and dark yellow paint to mimic the look of the paint being faded by the sun over time. I applied layers of Tamiya Dark Yellow mixed with thinner (90%), to achieve this sun bleached effect. I sandwiched the decal between two coats of varnish. The layer of varnish under and on top of the decal was Future mixed with 50% water. To lessen the shininess of the varnish I added a coat of flat layer.Weathering
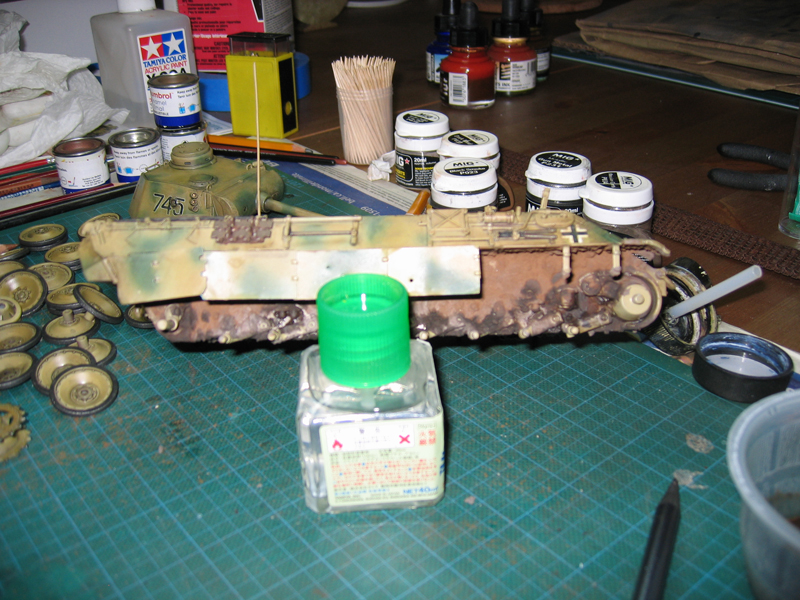
To add some variation and modulation in the paint of the Panther, I used a filter. I made the filter by using acrylic ink of Daler Rowney mix with thinner (90%). The Daler Rowney colours I used were Antelope Brown, Burnt Umber and Raw Sienna. I had to be careful here because the thinner could have altered the dry paint on the model. To blend the filters, I added very diluted layers of Tamiya Dark Yellow and Buff on top. To enrich the detail in the plastic I used a technique called a wash. I mixed oil paint with pure turpentine to obtain a diluted dark wash. I applied this with a brush in such a way as to let the wash go inside the detail of the tank. I was able to control too prevent to much of the wash being used collecting in one area by simply adding pure turpentine in the required area. Time to add mud. For this effect, I mixed Plaster of Paris, pigment, sand and white glue. Some oil and grease stains were made with Humbrol paint, black pigment and gloss varnish. I put the track on the tank at this point adding mud (same technique as Pic. 12),dust and dirt. For the scratch on the tank, I began by painting with acrylic light beige. After the paint was dry, I painted another layer of acrylic dark brown colour on top. I used an HB6 wood pencil, for the areas where I wanted the metal to be apparent. To create stains of rust and rain, I used Humbrol paint diluted in pure turpentine. Finally I used pigments to show dust and dirt over the tank. The first pass, was applied with pure turpentine and the second pass dry.


About the Author

FROM: QUEBEC, CANADA
Take look at my Blog : http://mini-history.blogspot.com/
Comments

Nice Panther Oliver. I particularily like the camo and weathering.
In a few of the first images you have the tracks assembled, and then painted, but they are laying flat on both occasions. Are they kit tracks or are they AMs? Just wondering how you managed to assemble them in advance, and without hardening.
DEC 23, 2008 - 07:20 AM

Hi Oliver
Really nice piece of work! It makes me wanna start the Panther D premium kit in my stash... But I better finnish up some of the semi-done kits on my workbench. Keep up the good work.
Jacob
DEC 23, 2008 - 08:34 AM


Fantastic work , got the Panther 'D' with zimmerit ( dragon kit ) sitting on the work bench now, hope it turns out even close to looking like yours
DEC 24, 2008 - 07:32 AM

What glue did u use? How long were thy glued before u formed them around the wheels? could u give us a Tutorial. Love the Panther Great stuff, really looks like it went through Kursk. Merry
DEC 24, 2008 - 07:43 AM

hi, I use the Tamiya glue. The one coming in the glass pot. Even after it dry you can bend your tracks. In some section it will break but it not complicated to fix. Also, because it very dirty you can rework over it and hide stuff.
DEC 24, 2008 - 08:33 AM


I just built this model.Thanks for the entry.I love build ing the Panther.Nice work
AUG 17, 2009 - 05:05 PM
Copyright ©2021 by Oliver Marchand. Images and/or videos also by copyright holder unless otherwise noted. The views and opinions expressed herein are solely the views and opinions of the authors and/or contributors to this Web site and do not necessarily represent the views and/or opinions of Armorama, KitMaker Network, or Silver Star Enterrpises. All rights reserved. Originally published on: 2008-12-23 00:00:00. Unique Reads: 21731

WEB HOSTING BY


Copyright ©2021 Armorama and Kitmaker Network, a subsidiary of Silver Star Enterprises
All Rights Reserved. Please read our Conditions of Use and Privacy Policy.
All Rights Reserved. Please read our Conditions of Use and Privacy Policy.