

1⁄48Pz.Kpfw.IV Ausf. H
10
Comments
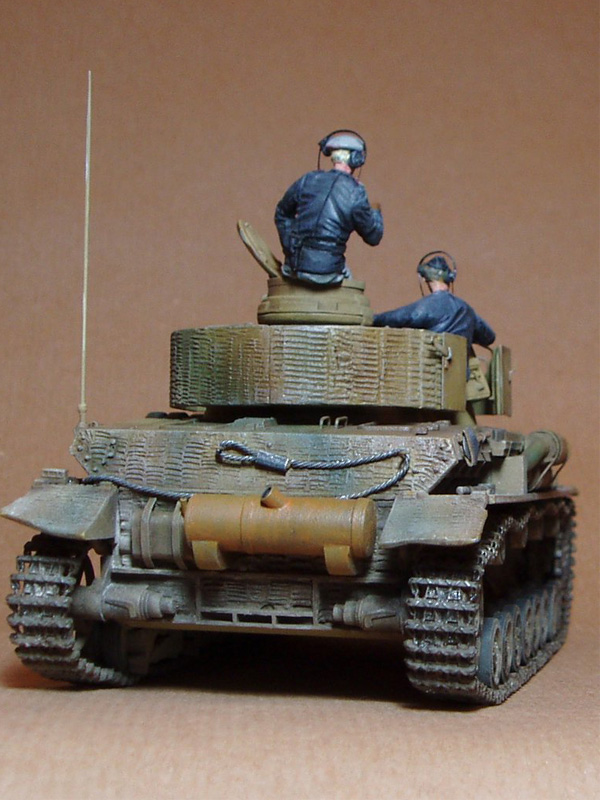
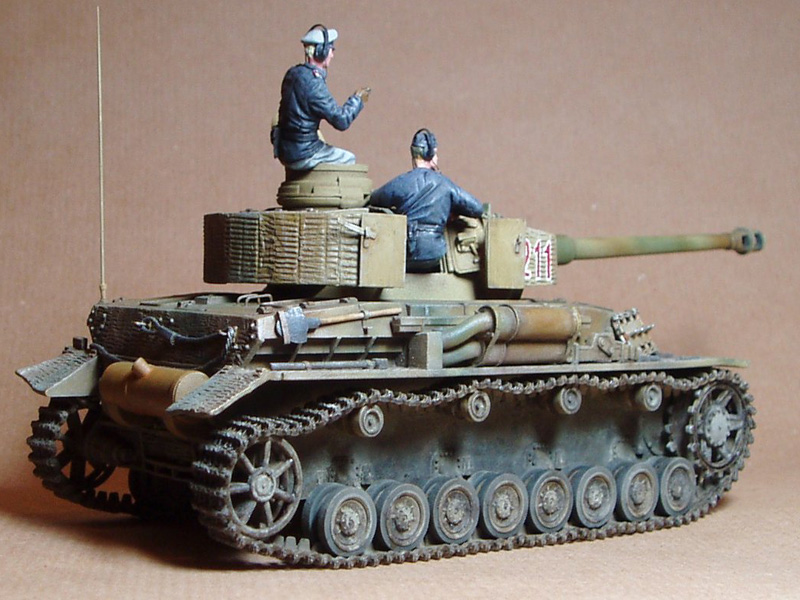
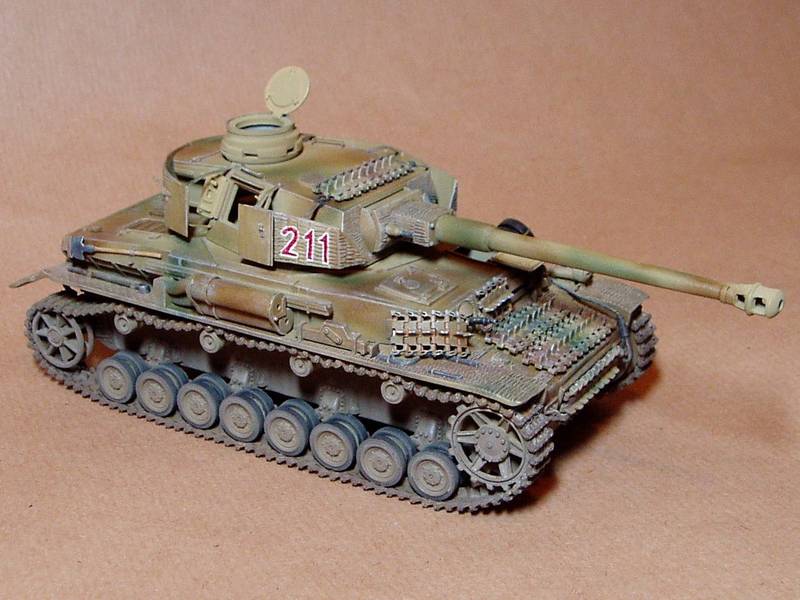
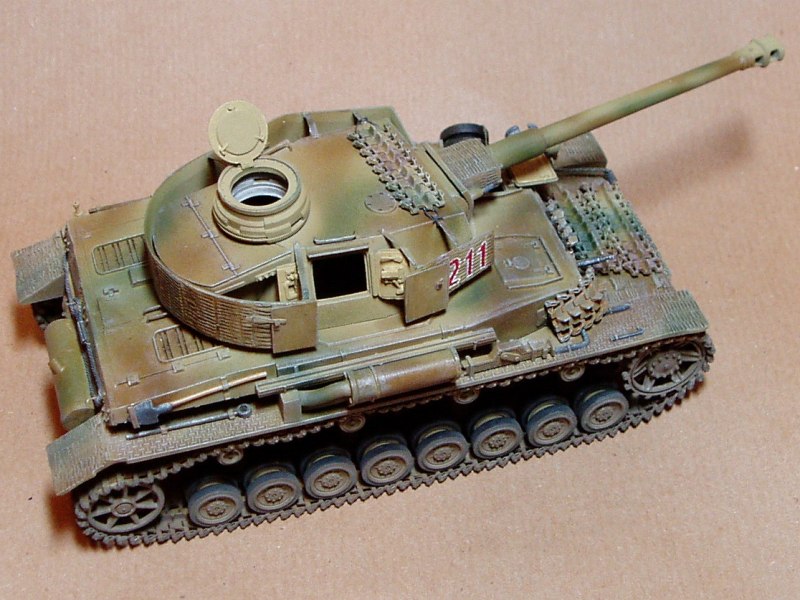
I used some of the tools from the kit, but made the gun tube cleaning rods and the shovel. The brush part of the cleaner rods was just a blob of filler paste sanded into shape; not very visible, but the ends of the rods were drilled and shaped on the ends to resemble the plug and socket fittings. The shovel blade was cut from brass sheet then bent into shape and glued to a piece of stretched sprue. Then followed lots of contorting of brass strip and swearing as the mounting brackets were made and fitted. Other added details were an additional spare wheel wired on over the left hand vision port, and spare Friul track links added over the right vision port as well as all over the front of the hull and on the turret roof.
The standard spare track on the nose was mounted under a brass strip which replaced the kits rack. I tried to work out how spare track was actually fitted, but even in very clear photos it is hard to see the method used. Occasionally extra metal brackets were welded on, but often it looks like the track links were wired on or sometimes just wedged into place. I wonder if they were sometimes spot welded on to the body, but maybe thats impossible. Mine were glued on (!) apart from that on the turret, which was wired around the schürzen stays.
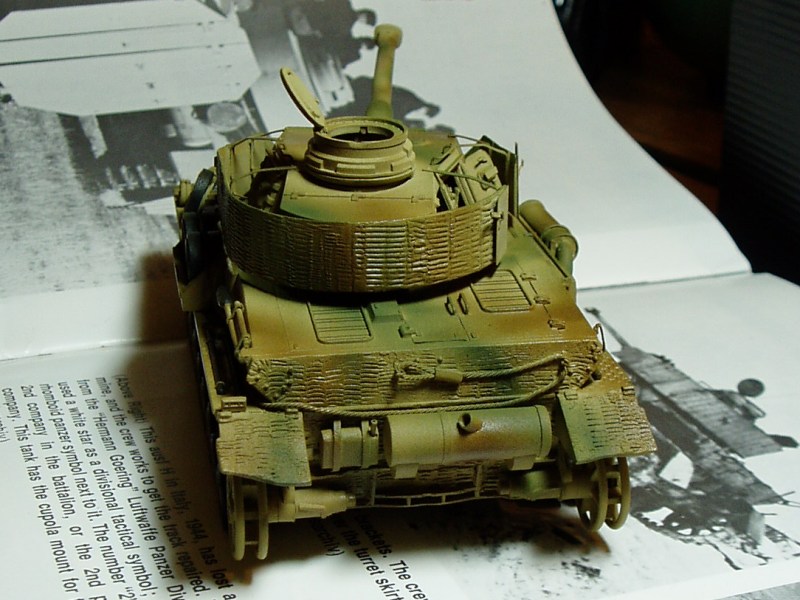
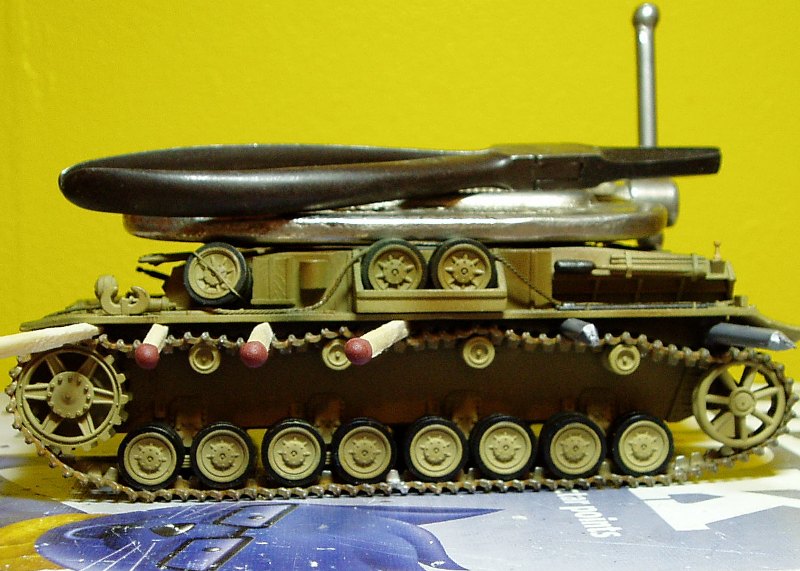
Disasters. Losing the headlamp was a minor one; luckily I still had the Bandai Wespe, so pinched that. Then one night I was thinking about how amazing it was that the turret hatch had stayed glued open all these years; the next morning, on my wifes birthday, I went to get her card from the model cupboard (an obvious hiding place) and managed to snap the hatch off. Much worse was when I came to fit the Friul tracks the sprocket teeth werent just too big, but werent even spaced correctly for the tracks. I dont know if this is a common problem, and I suspect they are really intended to fit Tamiyas kit. I must admit this is one bit that I dont feel that happy with; I had to cut the teeth off the sprocket, then add them, made from square section rod, back in through the track once it was in place. That was my plan, but in fact turned out to be harder than I thought, and Im not sure that the effect I achieved is that great. Sorry. Fig 13 shows the tracks being held in position overnight while the superglue fully sets.
Painting
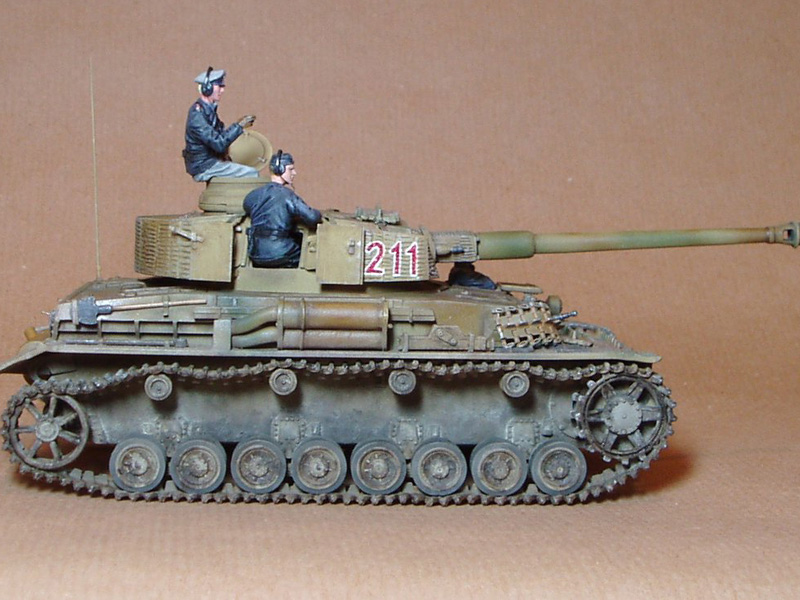
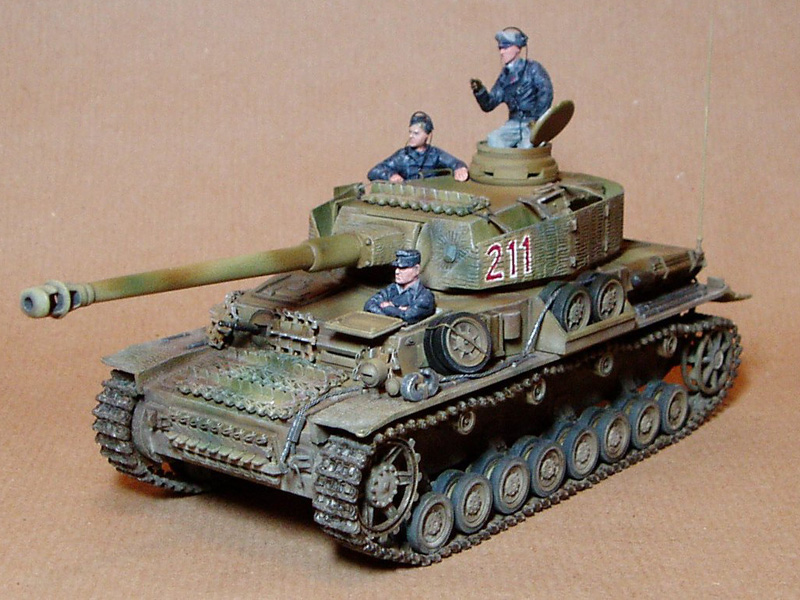
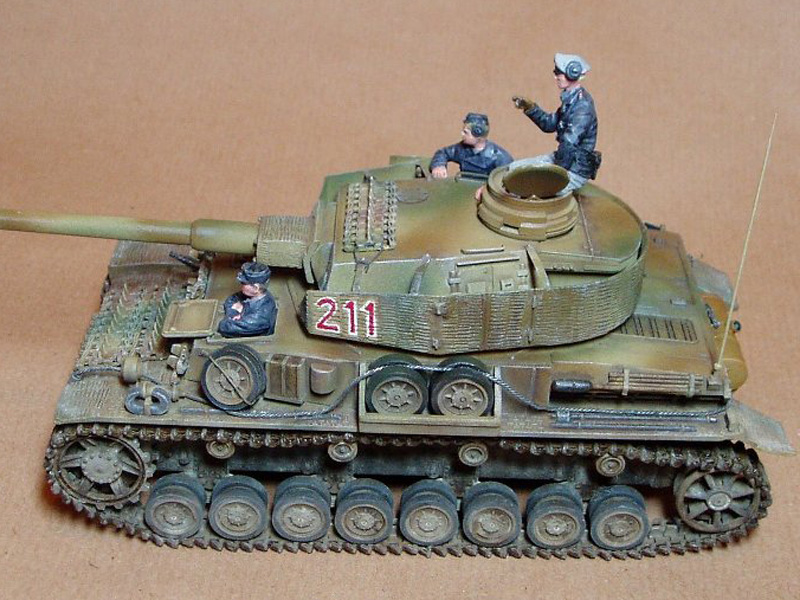
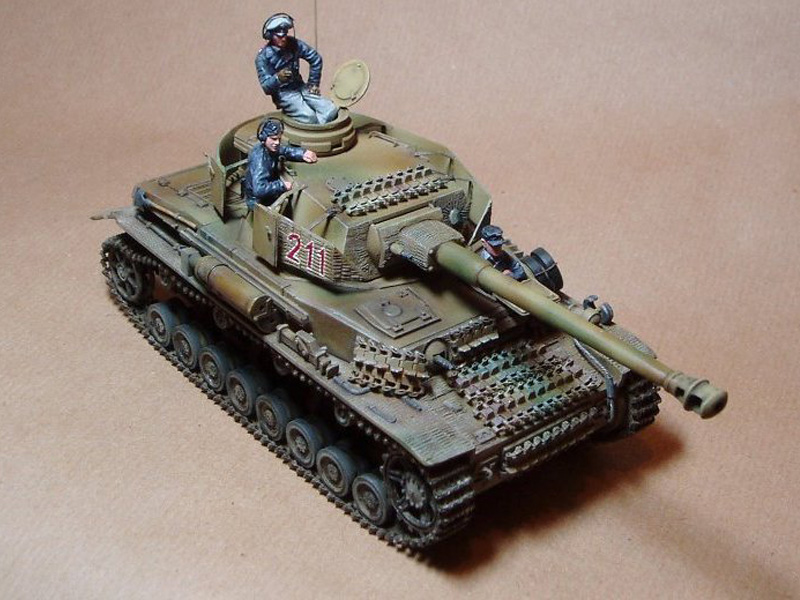
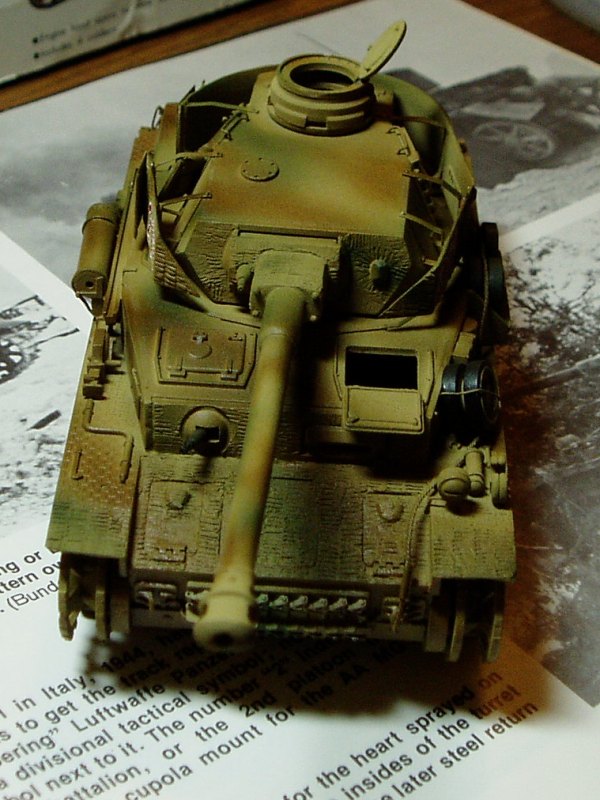
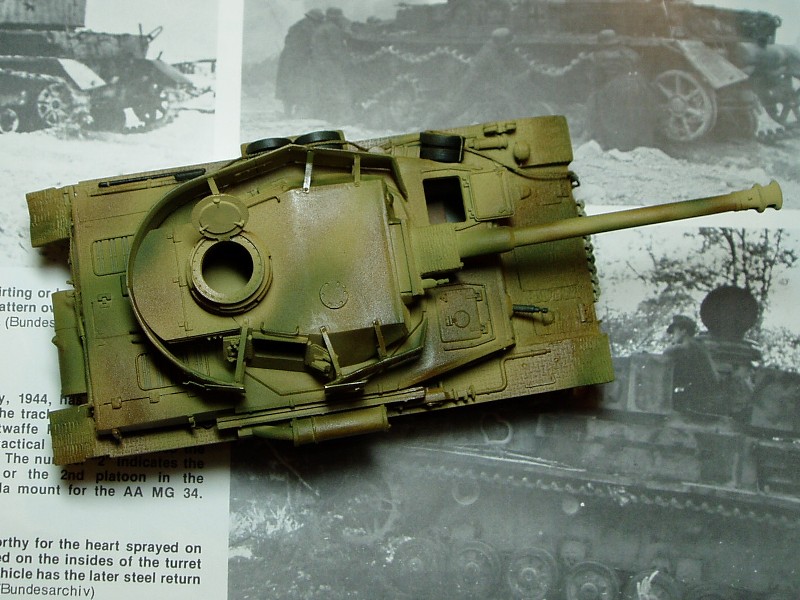
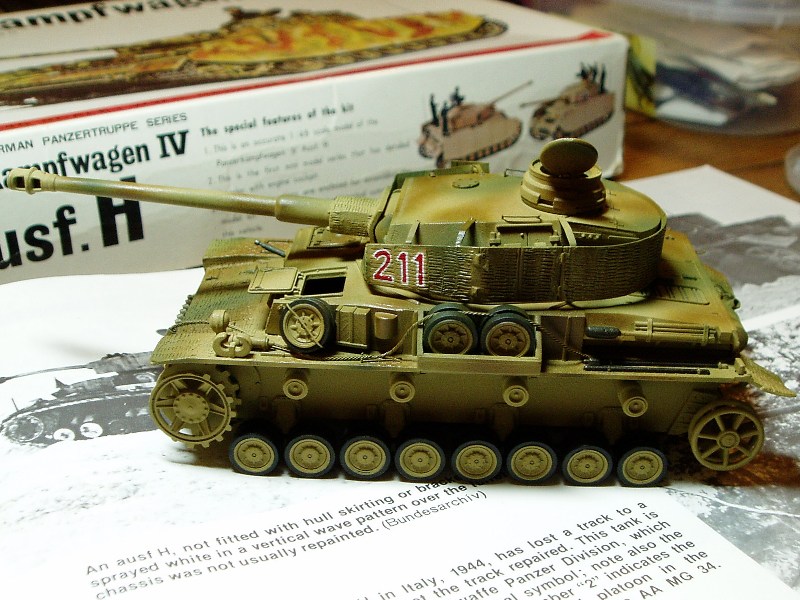
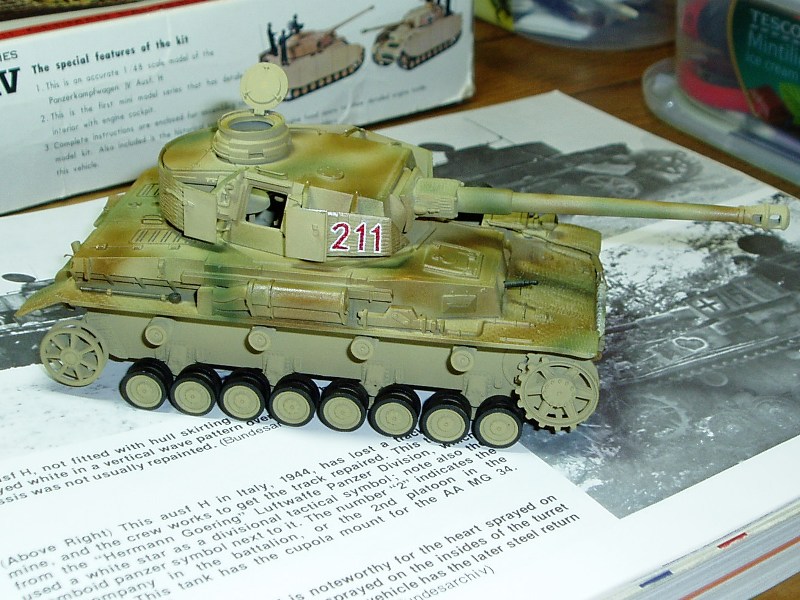
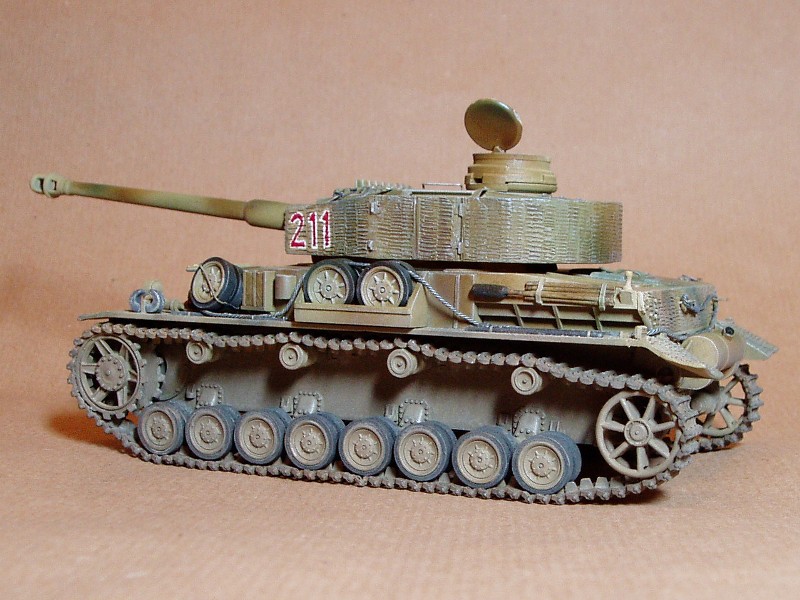
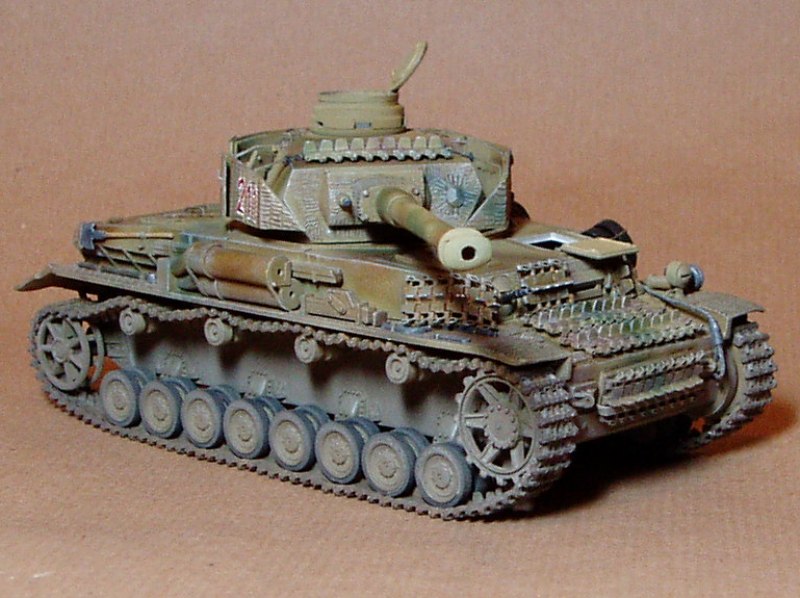
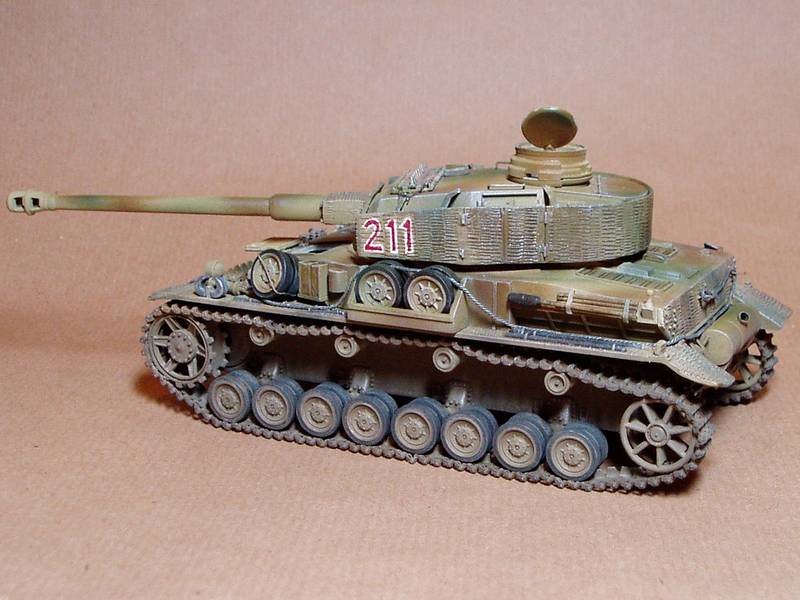
As far as painting goes, I followed the apparent current wisdom, and finished all the construction before commencing. Im not totally convinced about the wisdom of this. In the old days it was always recommended that some bits are painted before construction. I guess the current way is down to the far more common use of air brushes nowadays. I spoiled myself by buying one (I think I bought the set up recommended by a reviewer on this site . . .cant believe how cheap the Chinese compressor was) and so inevitably chose a three colour camouflage finish. See Figs 8 to 10. Its an interesting effect to see the first time, compared to what I used to achieve with brushes. Is it to do with seeing so many photos in black and white, that once youve rendered the softly sprayed camouflage pattern in full colour, it somehow looks too beautiful? Some models are criticised for being too pretty, but I can sympathise with people not wanting to cover up their lovely paint job. . . Im currently reading Tank by Patrick Wright (Faber&Faber, 2000); the author is a cultural rather than a military historian, so he has an interesting and off the wall take on the subject, but it is about tanks. He quotes a Scottish artist and poet, Ian Hamilton Finlay, who has apparently made a series of artworks of pastoral tanks; he says To camouflage a tank is to add the amiable to the severe the beautiful to the sublime, flutes to drums. The point being of course, that a tank is an embodiment of mechanised brutality, and camouflage is an attempt to make it resemble the fields of corn, the trees and the earth which are its antithesis, the very things that give life rather than bring death. For identification, I hand painted just tactical numbers on to the zimmerit of the schürzen. Again, its partly a cop out, but it is the case that from 1944 on, the application of divisional markings and even national markings became erratic. Also, I couldnt choose where this tank was meant to be, but in this state, I guess it could really be anywhere in the east, Italy or France some time in 1944. I think the numbers finally looked OK after the 15th minor touch up. See Figs 11 and 12. Im afraid that at the moment it still isnt quite finished. The photos show that the weathering isnt complete, hence the suspension looks a bit of a flat colour and the upper body looks very clean; the interiors of the hatches are also just dark yellow, and need their own weathering to be done. Apart from that, the only detail left to add is the aerial, to be fitted into the home made mount (the kit had nothing for this part). Im still pondering how to do the aerial; the real thing was tapered which suggests sprue, but really thats too delicate. Im sure I can think of some way of getting a taper like that on a thin wire. Oh well, its been 28 years, whats a few more weeks?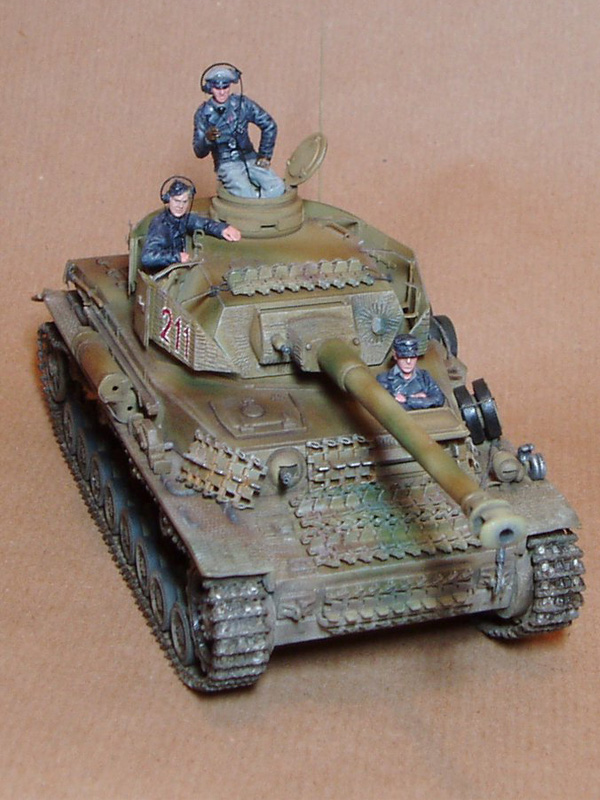

About the Author

FROM: ENGLAND - SOUTH EAST, UNITED KINGDOM
Earliest model memory is a Super Sabre my grandmother bought for me around 1972. Have always dabbled in painting and making things, and rediscovered doing that with plastic in 2008. Vowed then to complete the 30 year old stash, and have made some progress. Hobby goes hand in hand with BBC Radio 3...
Comments

Matthew you have done a good job of resurrecting this old kit, well done. Please do not use that yellow background again it hurt my eyes.
DEC 30, 2008 - 12:20 PM

Very impressive piece of construction. Might consider a cat or dog whisker for the antenna. With luck you can find one more or less the right size, and they taper nicely.
JAN 01, 2009 - 09:25 AM

nice wall colour certainly attracts the peoples attention lol!
great panzer 4 though
JAN 01, 2009 - 10:08 AM

[quoteMight consider a cat or dog whisker for the antenna. With luck you can find one more or less the right size, and they taper nicely.[/quote]
Strangley, I did think of that, and we even have a black cat who stays in doors all the time, but I have no idea what she does with her old whiskers as I can't remember finding one for ages. Not sure if it is possible to straighten them? In the end I made the antenna from a piece of Plastruct 0.5mm round section rod and achieved a bit of taper by sanding down progressively from one end. Something I discovered in Halfords (a car spares shop) is P1500 sand paper which will abrade something that fine and without kicking up any granules of plastic. Once it starts to clog up a bit, it can actually be used to polish plastic back up to a sheeny surface again.
Sorry about the yellow, that is our dining room wall! It looks a bit less bright under normal lighting conditions. Next time I might take photos in the hall which is bright orange . . .
I did send in some photos of the fully finished version, complete with some crew - and the aerial - not sure if they will be published, or I might upload them later if I can get around to working it all out.
JAN 02, 2009 - 12:35 PM
Matthew if you have some new pictures by all means send them along as they can always be added to the feature for you.
JAN 02, 2009 - 01:02 PM

Matthew,
Well done! Good to see another Bandai fan.
I have put two Bandai reviews up, with more pending. If you care to join in the endevour, please do.
Hope to see more of your work, Bandai or others.
Fred
JAN 09, 2009 - 08:36 AM

Considering their age, I thought the Bandai 1/48 was pretty good. Although the Pzr IV H had a very large (diameter) gun barrel. Did you taper it down some - it looks more the right size. I did my zimmerit with green stuff (body putty) and parts of an old hacksaw blade. Interesting that 1/48 armour didn't catch on back them, but now that everything else has been done and redone in 1/35, they are getting back to it. I just wish that Tamiya would quit using the metal parts!
JAN 11, 2009 - 06:09 PM
Must admit I didn't notice a problem with the barrel diameter, but must admit that I had to do a fair amount of filing and sanding to get rid of the join in it, so by the time you've done that and tried to keep the cross section round, the diameter was considerably reduced any way. I think in fact the barrel isn't quite round any more, but it doesn't show much. . .
Yes, I think they were good for the time - being mainly brought up on Airfix and Matchbox, they were certainly better than those, and as good as a lot of the Tamiya. I remember the Wespe as being very enjoyable build which led me to buy the P.IV. Might get around to revamping that one some time. I was tempted recently to buy a Bandai Tiger from eBay, but the price went a bit too far. I wonder if people are collecting these things in order to keep them in the box? I'd certainly build it !! Was half thinking about a Tiger / Pz IV diorama, such obvious companions.
JAN 16, 2009 - 05:32 AM
So I guess this one took about as long as one of my builds?
Nice job.
Scott
JAN 16, 2009 - 08:59 AM
Copyright ©2021 by Matthew Lenton. Images and/or videos also by copyright holder unless otherwise noted. The views and opinions expressed herein are solely the views and opinions of the authors and/or contributors to this Web site and do not necessarily represent the views and/or opinions of Armorama, KitMaker Network, or Silver Star Enterrpises. All rights reserved. Originally published on: 2008-12-30 00:00:00. Unique Reads: 20471

WEB HOSTING BY


Copyright ©2021 Armorama and Kitmaker Network, a subsidiary of Silver Star Enterprises
All Rights Reserved. Please read our Conditions of Use and Privacy Policy.
All Rights Reserved. Please read our Conditions of Use and Privacy Policy.