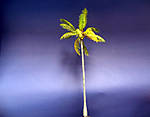
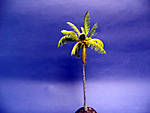
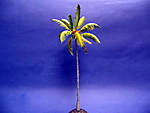
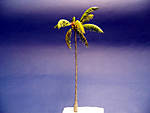
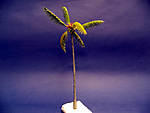
1⁄35Coconut Palms a Tutorial
23
Comments
Introduction
Many modelers have tried to create palm trees, some have done very well, some have failed, and some could still improve their techniques further. The coconut palm is one of the most common palm trees throughout the Asian/Pacific region. They are cultivated in large plantations throughout Asia, and large populations exist on small tropical islands throughout the Pacific. They are characterized by their long, broad fronds, tall slender trunk and dense coconut growth. Mainly due to the nature of the fronds, coconut palms can be quite a difficult piece of flora to model convincingly.Materials
All that is needed to complete a coconut palm similar to this tutorial is:Trunk
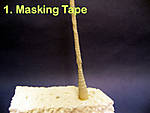
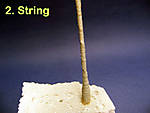
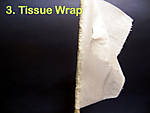
The trunk structure is replicated using a bamboo skewer about 20cm long (7m in scale). Soak the skewer in hot water and then bend slightly to give the impression of a heavy canopy. Wrap the trunk in masking tape, winding gradually upwards. According to my own observations of palms in nature, different areas of the trunk have different thick nesses. Wind more tape on the bottom 2cm’s of the trunk to replicate the thick trunk base. Please note, this will not be the final texture! The masking tape is used only to build up thickness at different parts of the trunk. Image 1Next, wrap some fine string around the trunk in a criss-cross pattern to simulate the trunk’s rings. Apply some wood glue, thinned with water, to the trunk. Wrap a single ply piece of tissue paper around the trunk. Now you have the final trunk texture with the rings showing through. If you cannot see the rings made by the string, you have wrapped too much tissue paper around the trunk. Image 2 and 3
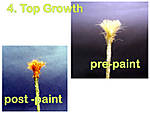
To represent dead growth at the top of the trunk, use static grass or cut-up hemp rope and glue it to the top of the trunk. I suggest spraying the fibres with hairspray to give added strength when you come to attaching the fronds. Some fibres can also be added to the bottom of the trunk to represent exposed roots; this can be seen on heavy laden or leaning trunks which have been partially uprooted. Image 4
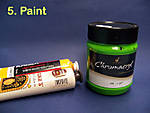
The next stage is painting! First, give the trunk a complete dry brush of Tamiya acrylic black, then a coat of grey, then highlight the rings the rings with deck tan. Paint the dead growth with a variety of reds, oranges and browns. I used Humbrol enamels for this stage. Image 5
Coconuts/seeds
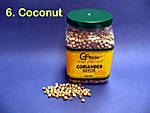
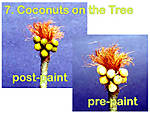
Wild coconut trees produce small coconuts (fit in your hand) and are green throughout most of their growth. At the end stages they turn yellow, then brown and shortly after, fall off the tree. Cultivated coconuts tend to be larger and more plentiful on the tree. To replicate coconuts, coriander seeds are the perfect material to use. Glue them to the tree and paint a green, yellow or brown colour. Be sure to position the coconuts taking into account their weight. They should droop towards the trunk, not sticking out or balancing on top of the trunk. Image 6 and 7Fronds
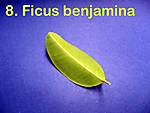
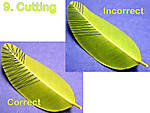
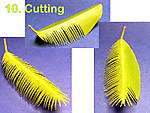
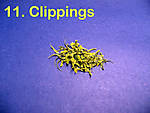
Ficus benjamina leaves are very waxy and do not curl up very much at all once picked and painted. Ficus benjamina trees are common household pot plants, you should be able to find one at your local garden centre or in nature if you happen to live in a tropical region. If you cannot find these leaves anywhere, you can always use tracing paper as I've heard it is a good alternative for making fronds. You might not get the natural look though. Image 8Once the leaves are picked, cut the blades immediately. My diagrams illustrate the correct and incorrect way to cut the blades. After cutting correctly, you should be left with small trimmings. Don't throw these away as they can come in handy for making other tropical plants or grasses. Image 9 and 10
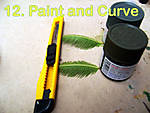
Paint the fronds using a variety of greens, yellows and browns to gain a realistic colour. I used cheap artist acrylics (dry brushed) for the job, but any paint type should do the trick. Healthy fronds are a dark to light green colour, unhealthy/dying fronds begin to yellow at the tips, and dead fronds are completely brown. The stem which runs down the centre of the fronds should be a green-yellow colour. After painting they will curl slightly, and this adds to the realism. If you want to have a little control over the shape of the fronds, leave them a while before painting and they will get a natural curve. Keep both ends under weight and the centre should bend upwards. Image 11
Once the fronds are painted, it is time to begin attaching the fronds to the trunk. A healthy, fully grown tree would have anywhere between 15-25 fronds. Attach the unhealthy/dead fronds at a low angle and work your way up, dying fronds should rest roughly horizontal, healthy fronds at a high angle.
Conclusion
The final result should give you a very accurate representation of a coconut palm, equal if not better than a result using photo-etched fronds. It is certainly cheaper! Credit goes to Santiago Tre (csago) for ‘introducing’ me to the ficus benjamina frond method, which I adapted for the writing of this feature.Comments
Thanks everybody! I am really glad this article is tempting some of you to try Pacific type dioramas.
Make sure you show us when you are done!
Chas
JAN 04, 2009 - 12:03 AM
I understood from my girl - a 'local' - that palm trees are planted decorative features and do not occur naturally here in Italy. It may therefore be realistic to add palm trees to your Italian dio when you decide to enter an area of a certain luxury, like maybe a seaside boulevard.
When I go to Sicily I'll try and make picture for a landscape and architecture feature though.
JAN 04, 2009 - 12:35 AM
Very comprehensible, youngc.
Looks real too! I have a picture of a coconut farmer with a monkey on a long leash that climbs up and picks the coconuts and drops them down. The farmer uses a variety of whisles and mouth noises to command the monkey. I'll find it and post it here. Could be a good diorama reference shot.
JAN 04, 2009 - 05:15 AM
Chas,
Thanks a bunch (I would make the pun 'a bunch of bananas, but you showed us coconuts)
An excellent feature!
Fred
JAN 30, 2009 - 05:10 PM
G'day Fred. I'm happy you like the feature. Yes, I would like to try a banana palm soon.
KoSprueOne, thanks for your comment. I have heard about these monkeys being used for coconut collecting. I agree it would make a great diorama possibility!
Chas
JAN 31, 2009 - 02:16 AM
Outstanding tutorial! One question though; how do you attach the dead growth and leaves to the trunk? Just superglue them?
Thanks!
JAN 07, 2015 - 07:28 PM
That original posting is over 6 yrs old now! I suppose you could use thick super glue, or small dabs of hot glue.
JAN 08, 2015 - 02:20 AM
I saw it was an old topic but I thought I would ask anyway. Thanks for your reply, I'll just have to experiment a bit.
JAN 08, 2015 - 05:23 PM
So 6 years ago one could have used super glue but TODAY... Nowadays you obviously use the special "Leaves and growth attachment system" from AK (glue sold separately).
(Note, you can't use the trunk fixer solution set system as they are not compatible!)
You might want to consider the leave cutter scissors set for ultra realistic leaves!
JAN 11, 2015 - 03:54 AM
Copyright ©2021 by Chas Young. Images and/or videos also by copyright holder unless otherwise noted. The views and opinions expressed herein are solely the views and opinions of the authors and/or contributors to this Web site and do not necessarily represent the views and/or opinions of Armorama, KitMaker Network, or Silver Star Enterrpises. All rights reserved. Originally published on: 2009-01-02 00:00:00. Unique Reads: 48857


