

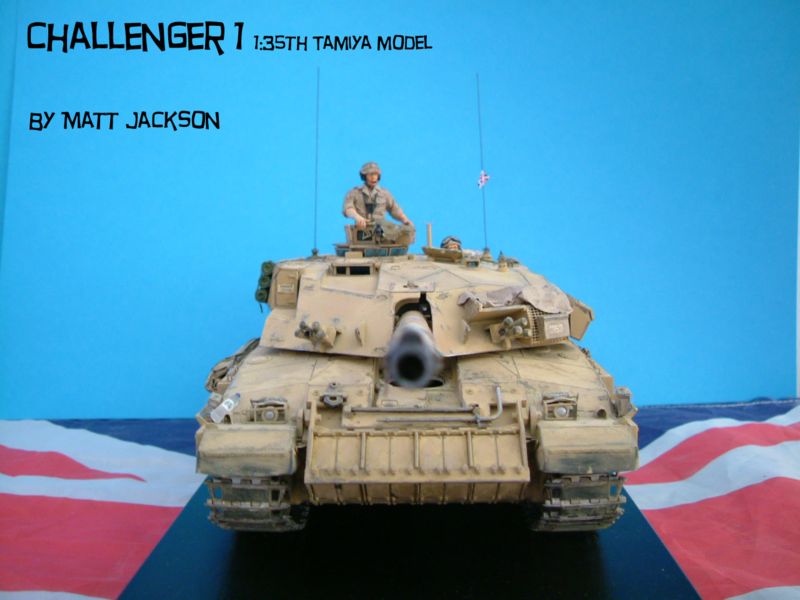
1⁄35Challenger 1
3
Comments
Introduction
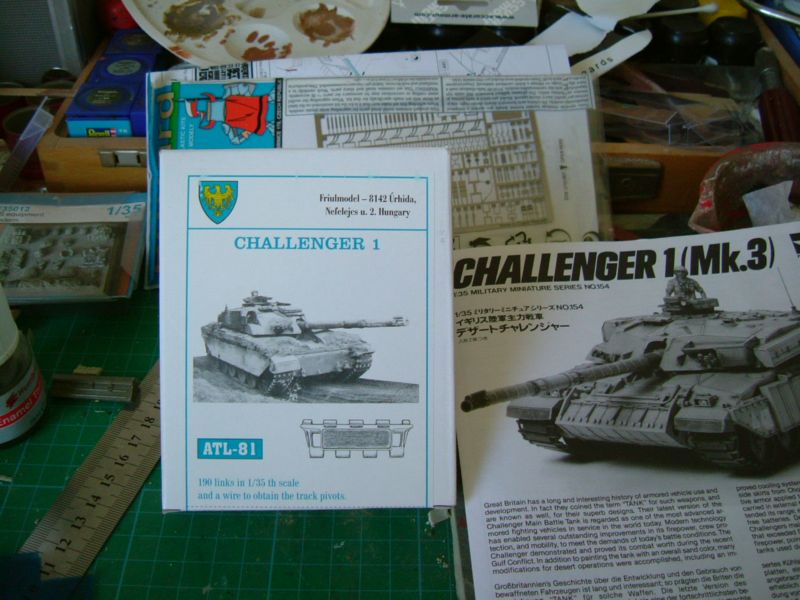
Hi I'm Matt and one of my hobbies is Military Model making. I am a member of my local model club based in Medway. I have been building models since I was a child. I like to display my models for all to enjoy and have placed a number in various competitions. Recently I found this kit part-made at a show for £10 along with a new vanguard book about the Challenger 1 for £5, only the lower hull and wheels were assembled and with no bits missing. I wanted to try out some Friulmodel track so I decided to get some for this build and some Eduard Photo etched. So, with my order on its way, I then had a good look through the book and used the internet to get some ideas. I had a good idea what I wanted to do I decided to go for the desert version, with some add-on parts, I started to build the kit. I have added some photos of this build some photos, I have added Eduard Photo etched instructions to some photos to help tell the story off this build.
Construction, pt.1
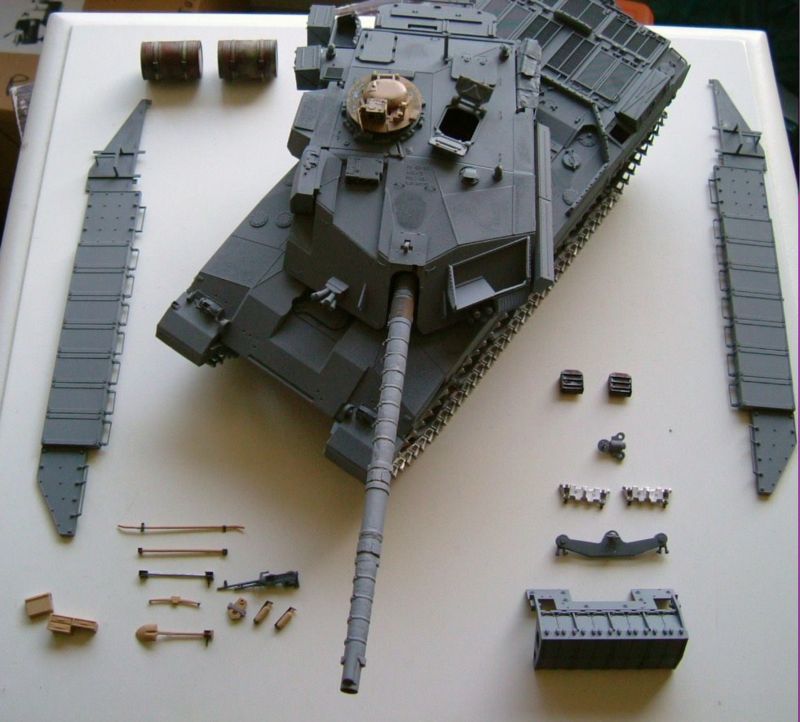
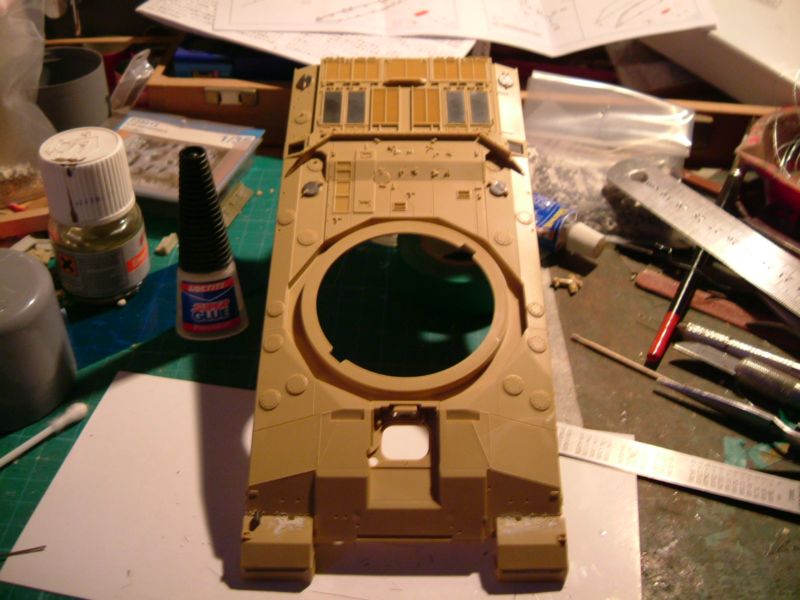
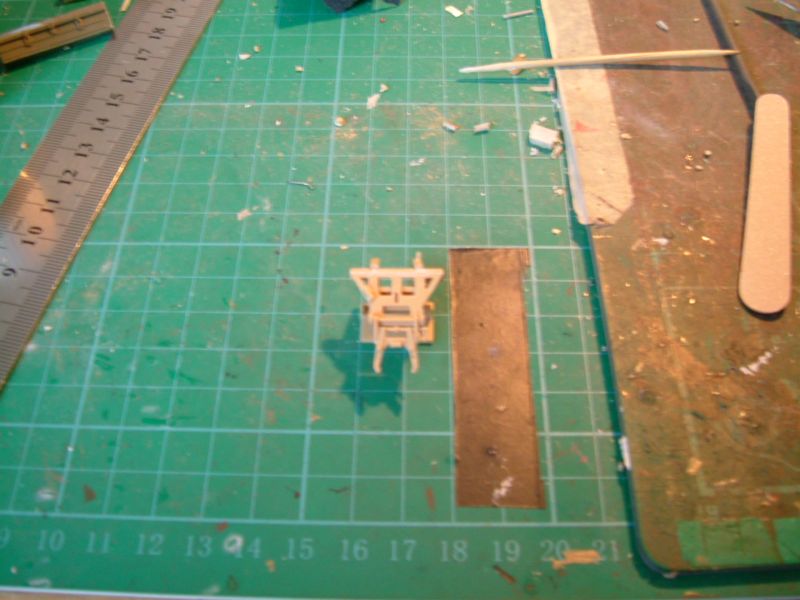
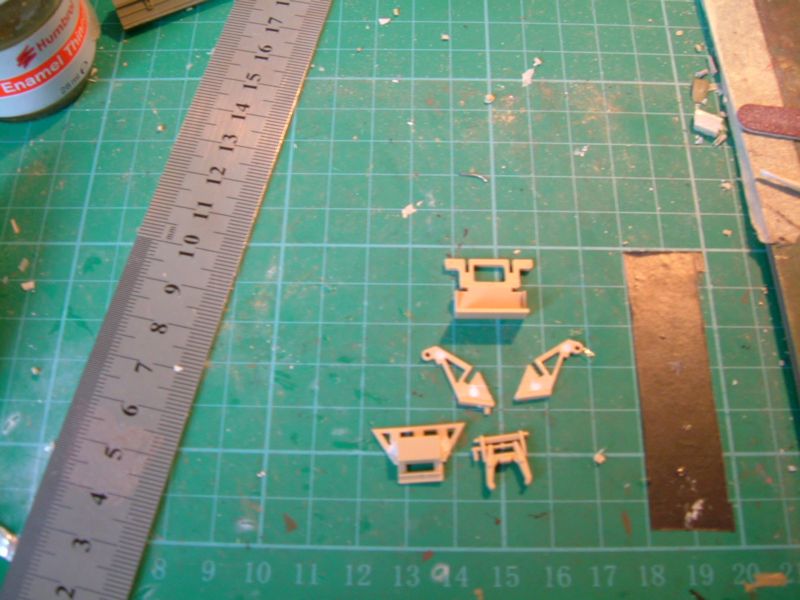
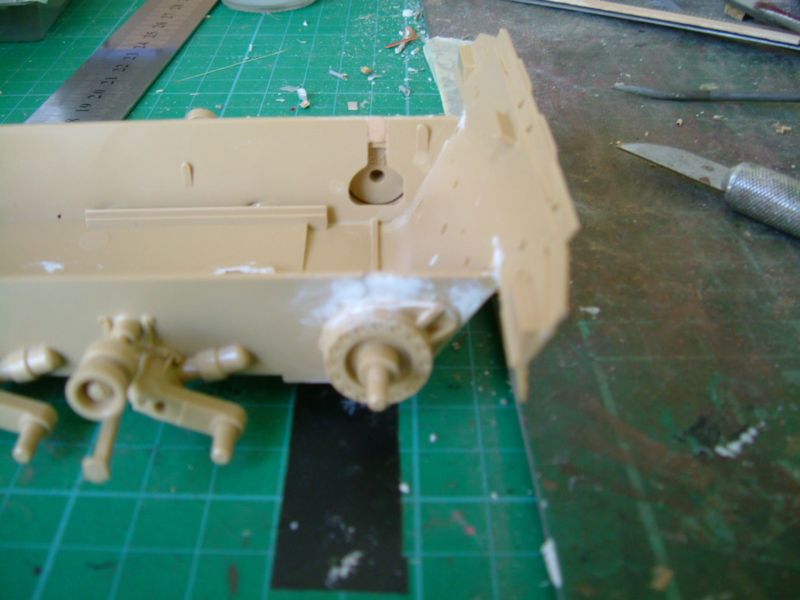
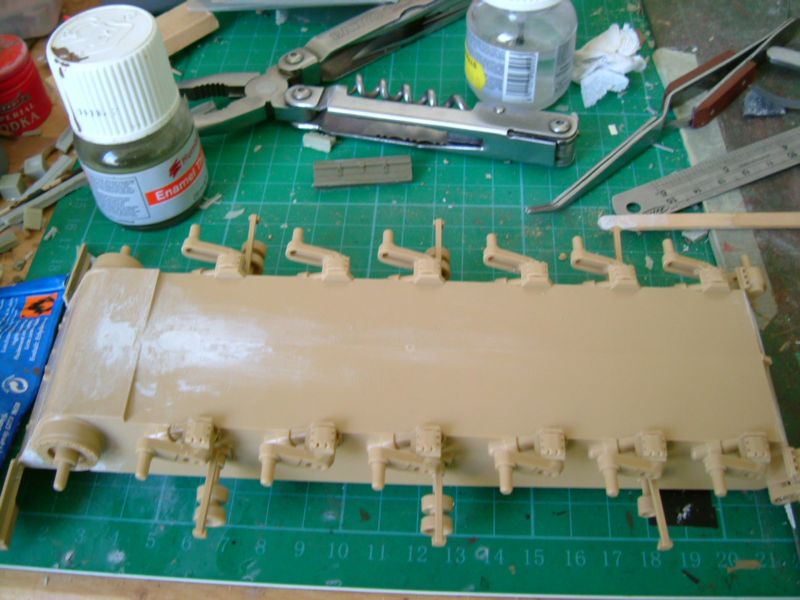
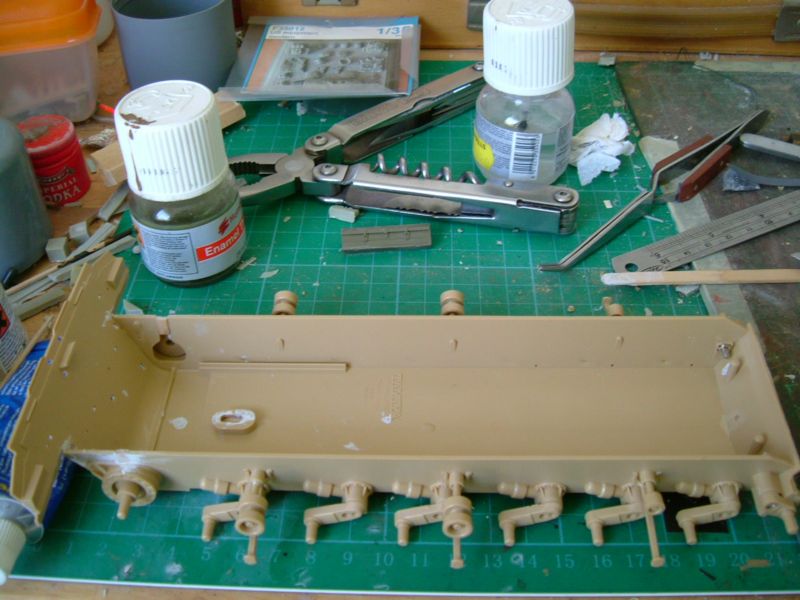
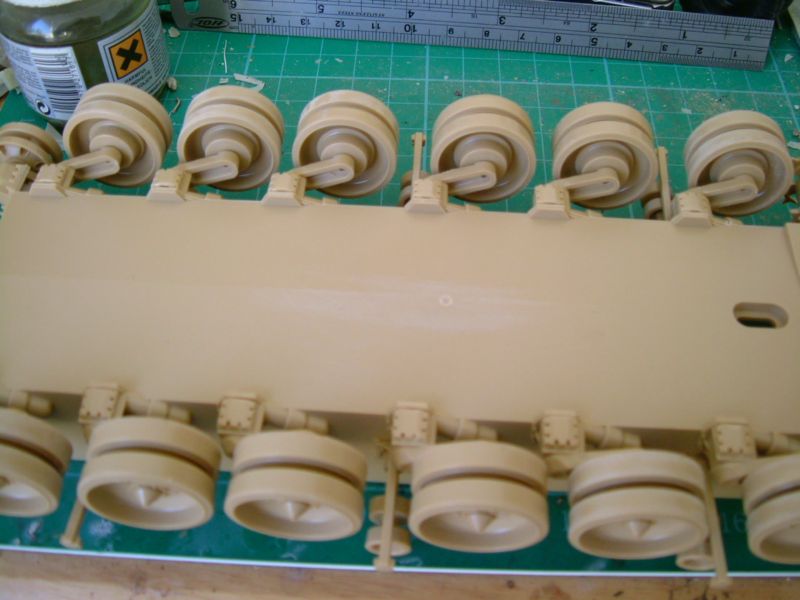
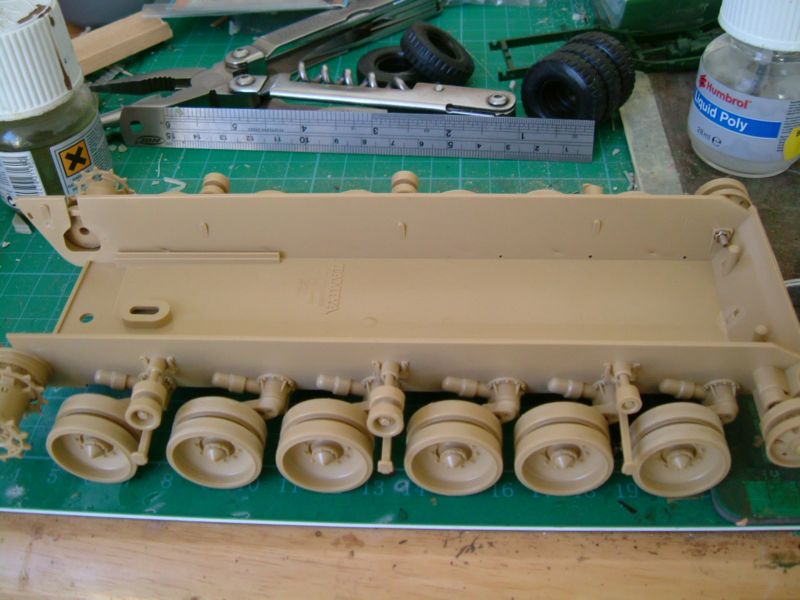
I started the project by looking at the part-made lower hull and the Tamiya instructions to see what I needed to do. It looked like the wheels and lower hull were assembled and the wheels attached to the lower hull. So with the stage 1 to 4 in the Tamiya instructions all ready assembled I attached the rear panel. Then decided do some boring filling (using Revell Plasto) and sanding which applies to all parts that needed it. Following the instructions I moved on to stage 5, Gun travel lock I decided to go for the desert version this kit can be built into desert or NATO version.
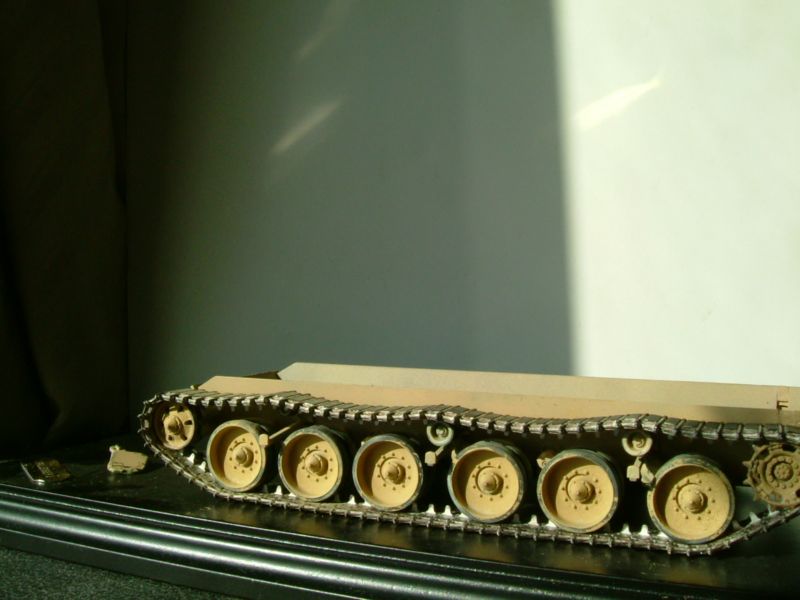
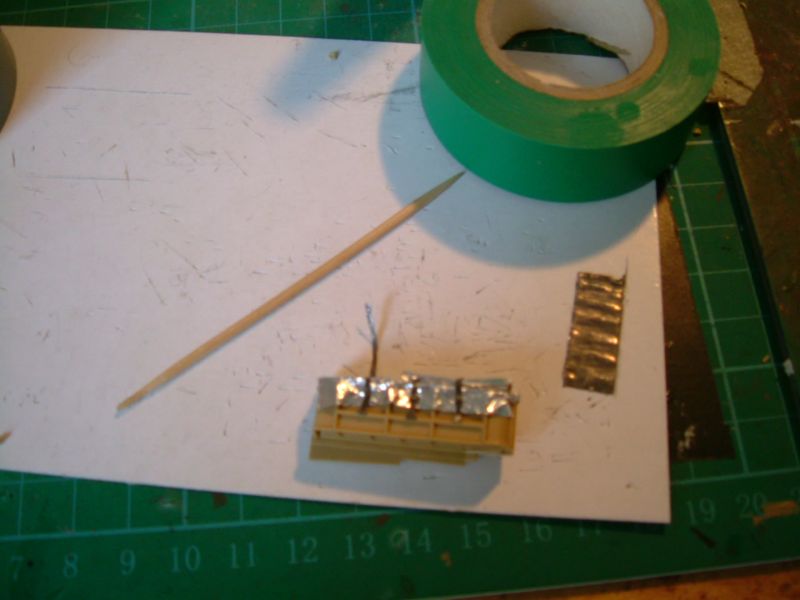
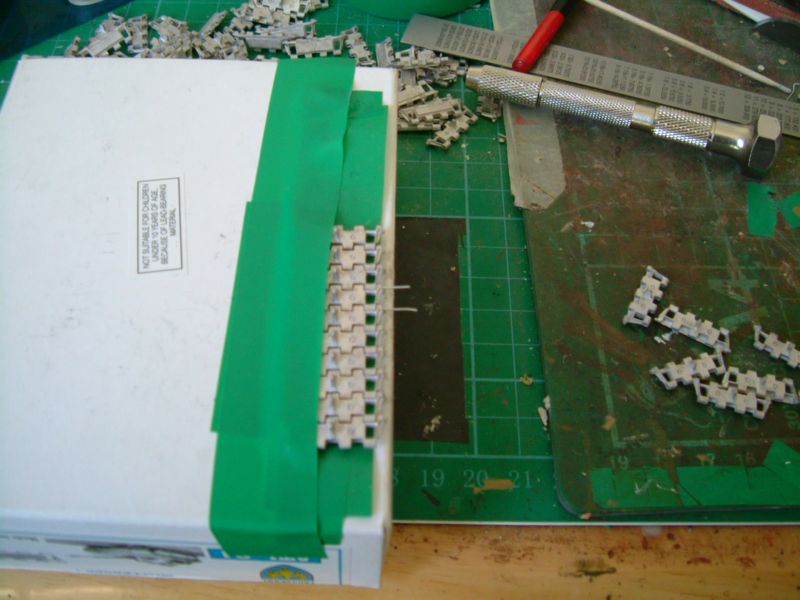
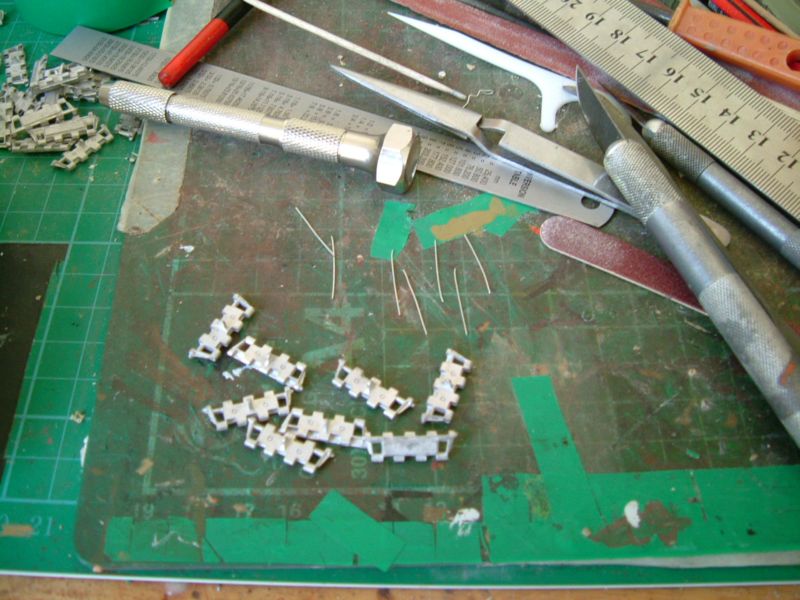
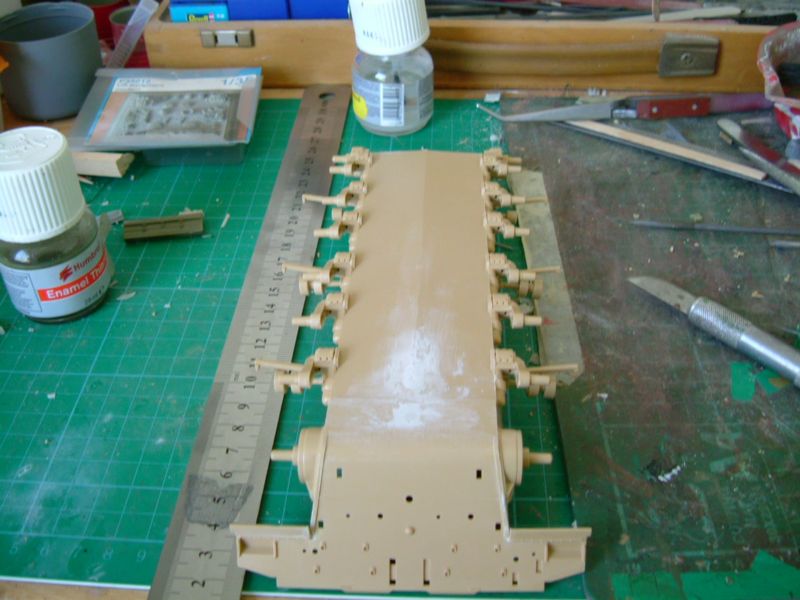
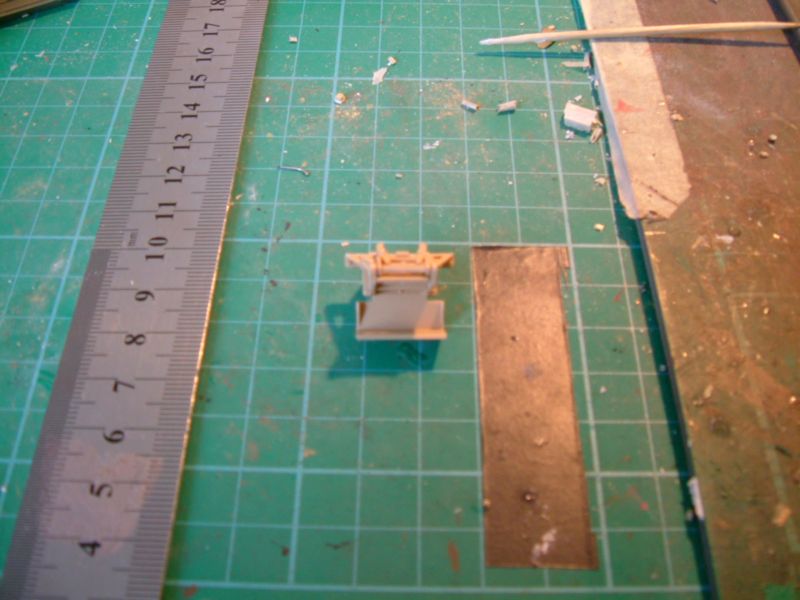
Track construction for this stage I decided to use Friulmodel white Metal track; this is the first time I have used this track. I started by checking, drilling and cleaning the track for the left side and then cutting the pins to size. For the next stage I had to make a rig which was made from the box the track came in with a bit of tape, so then putting 10 links at a time in the rig then I Put in the pins (then repeated) Using the track from the Tamiya kit to get ruffle the right length for the left side; then repeated the process for the right side track.
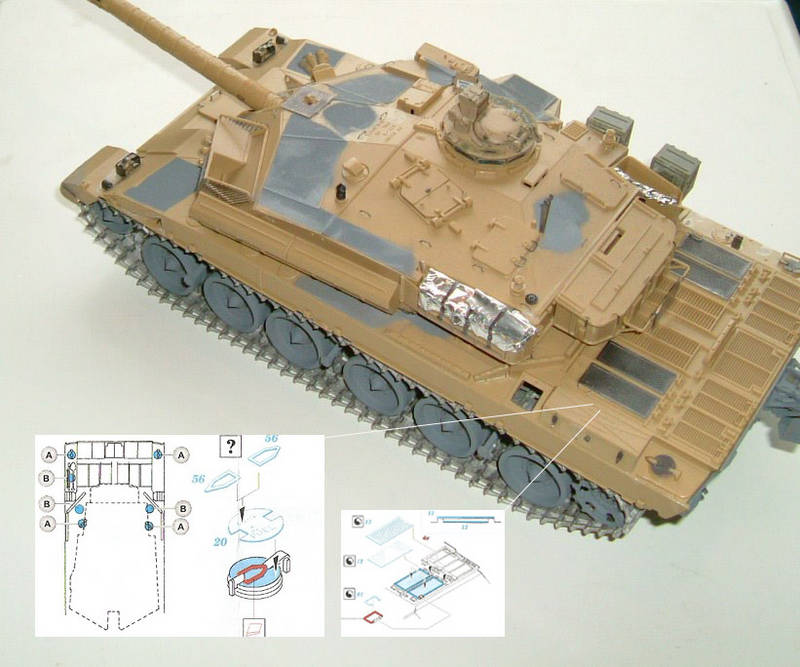
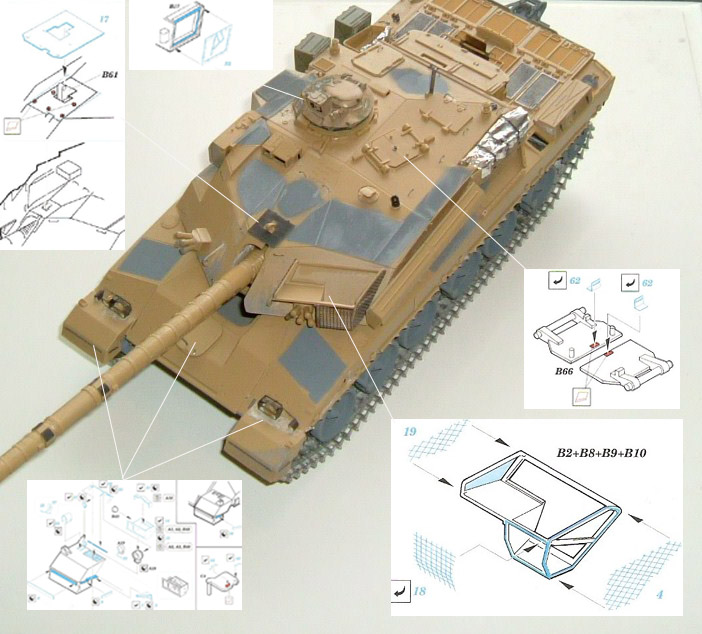
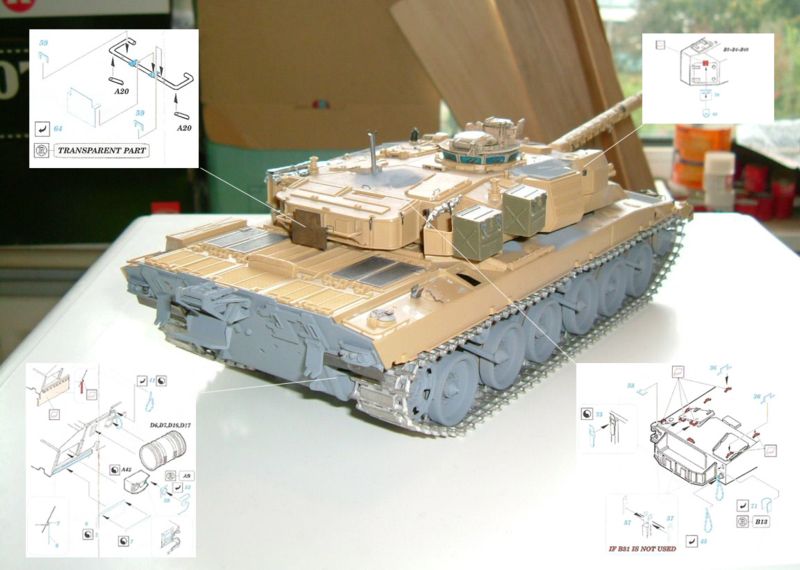
Back to the Tamiya instructions: Jumping to stage 8-9 upper hull construction, I decided for this build to get some Eduard Photo etched. So, following Eduard instructions I started to remove and sand all the parts that needed it and replaced with Photo etched parts. Now this took some time throughout the build to do, bit by bit, so I will not bore you with all the detail. However, I have added Photos with instructions and will say that the Eduard instructions are very good to follow and user-friendly.
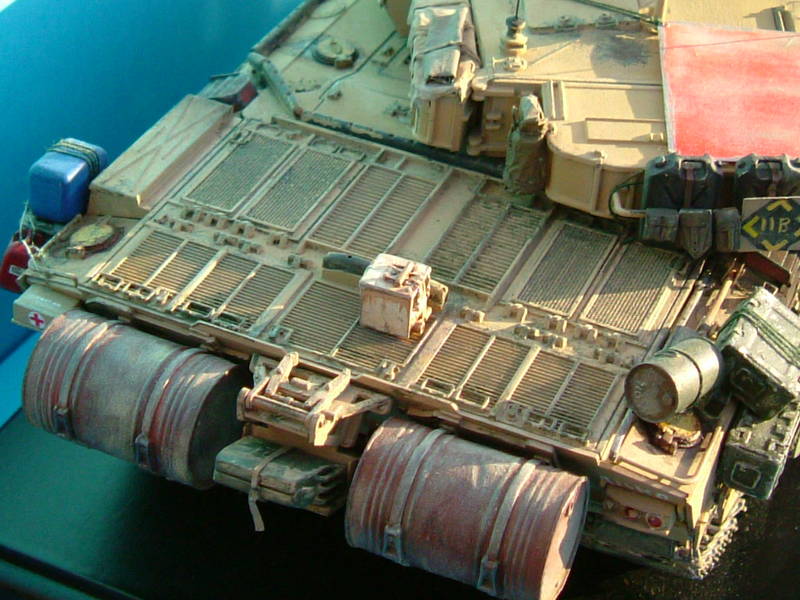
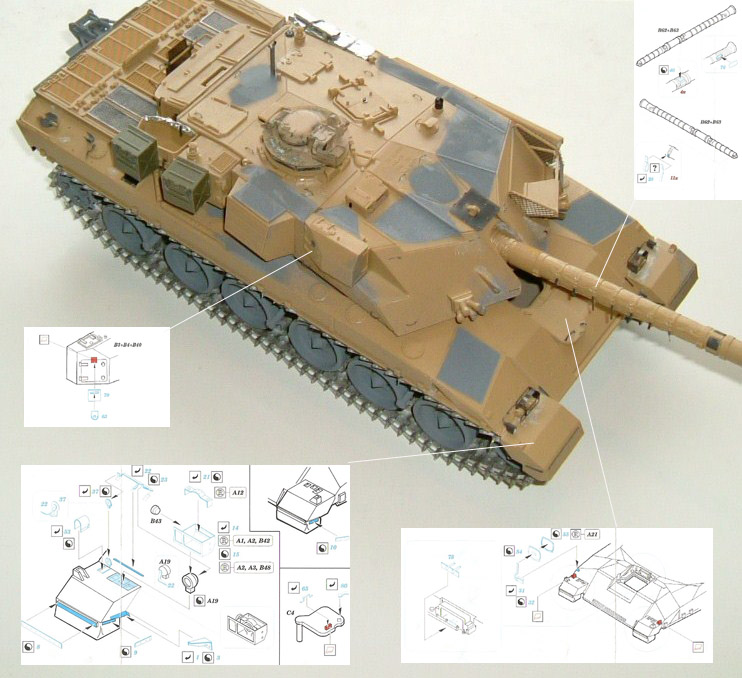
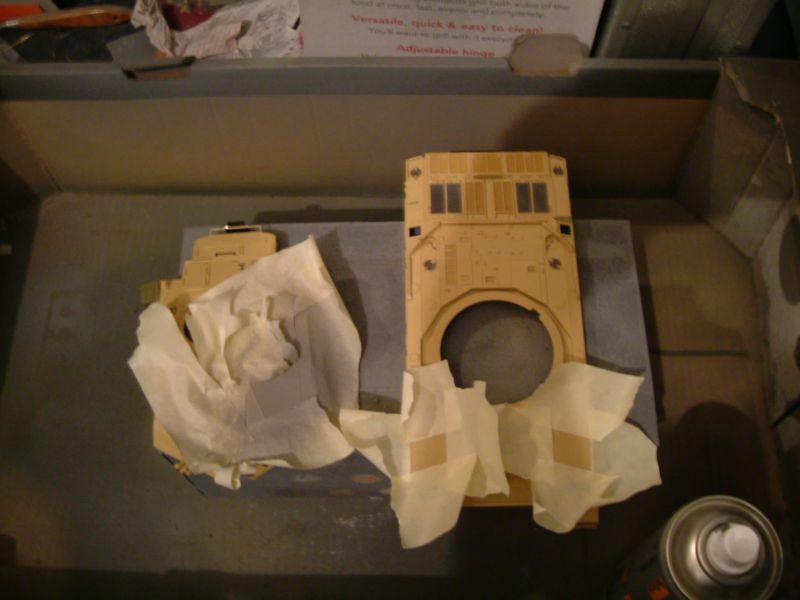
On the upper hull I replaced the fuel caps and light fittings and, with some Add on Photo etched parts, I moved on to the next part (non-slip paste). Some tanks have this paste on them; this is to stop the crew from slipping off the tank in the wet. To get this effect, I used Halfords Plastic Primer, not shaken or rubbed down. This is the first time I have tried this and was happy with the way it came out. Following Eduard and Tamiya instructions stage 6 -9 and 10 the external fuel tanks, tow hook, tool case and the all tools I started to remove, again sanding all the parts that needed it and replacing with Photo etched parts.
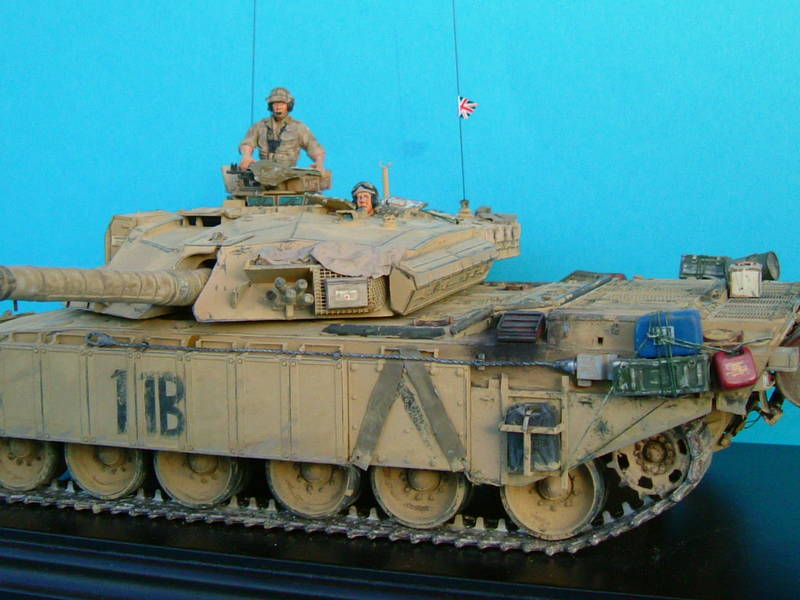
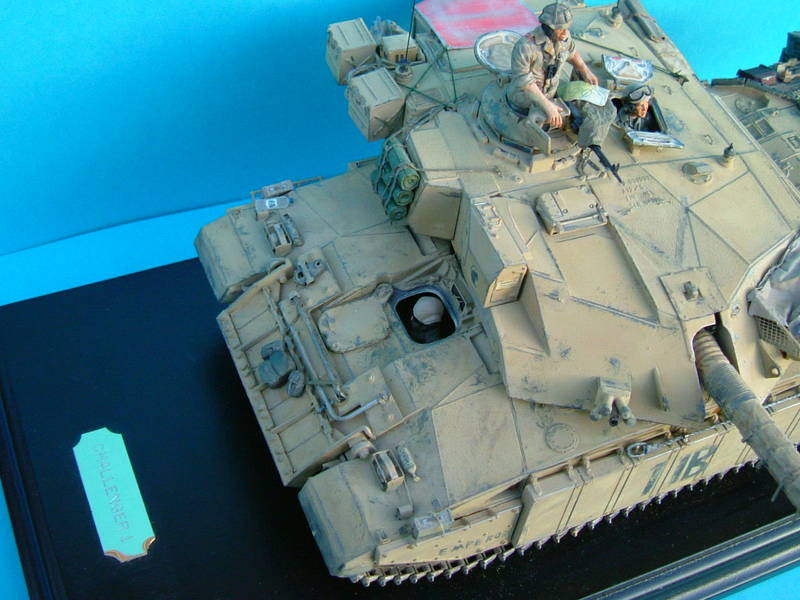
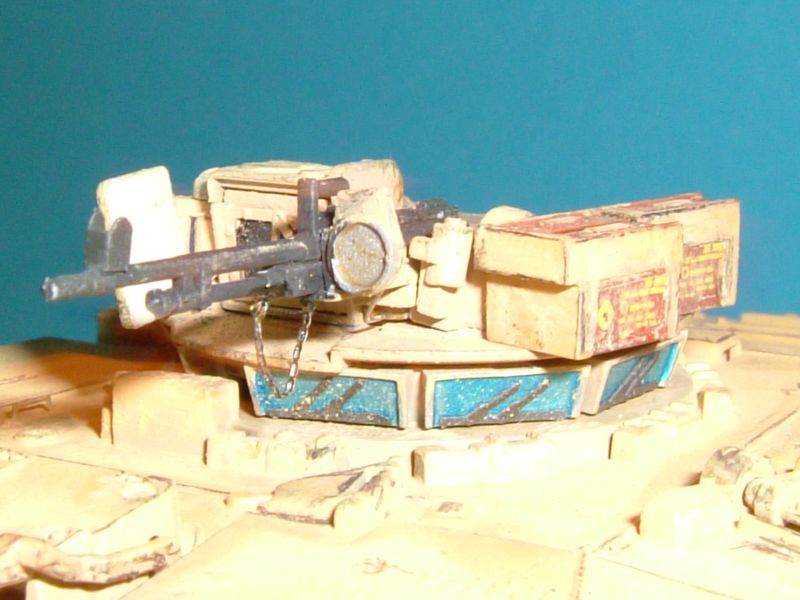
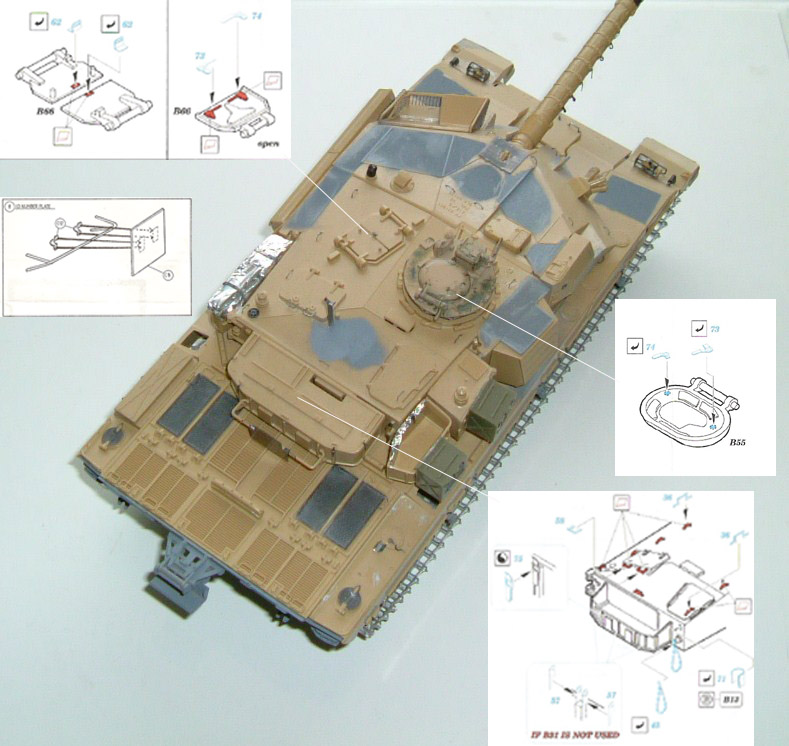
Turret construction: Sorry no Photos of turret construction! I think it is because this part was built in little bits at a time so I think I just got on with it; sorry! Following Eduard and Tamiya instructions stage 16 to 21, I started by assembling the main gun then the turret, following the instructions and again started to remove and sand all parts and replace with Photo etched parts, handles, straps and hooks e.t.c. On the main gun, right along the barrel, I placed Photo etched strap parts; and then I assembled the Commanders cupola. With this assembled, I then sprayed with Hannants British Gulf Armour paint and then painted the periscopes with Revells acrylic aluminium then Tamiya clear blue. Then I attached Photo etched widow- wipers. Moving on to assembling the turret baskets/tool boxes and camouflage net bin: I replaced the mesh with Photo etched mesh and then for the side- baskets I used ordinary household tin foil and homemade straps made from thin lead and Photo etched parts and kit parts. As you see from the photos, I have added 2 more storage boxes, as some crews did add extra boxes for more storage. Theses boxes are from my spare parts box. (ARV club, FV107 Scimitar)
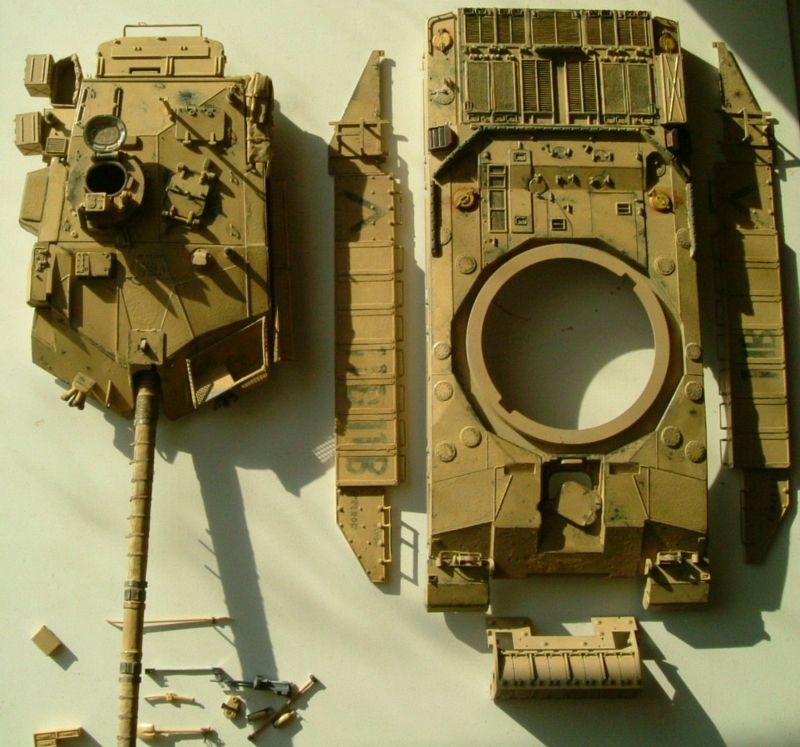
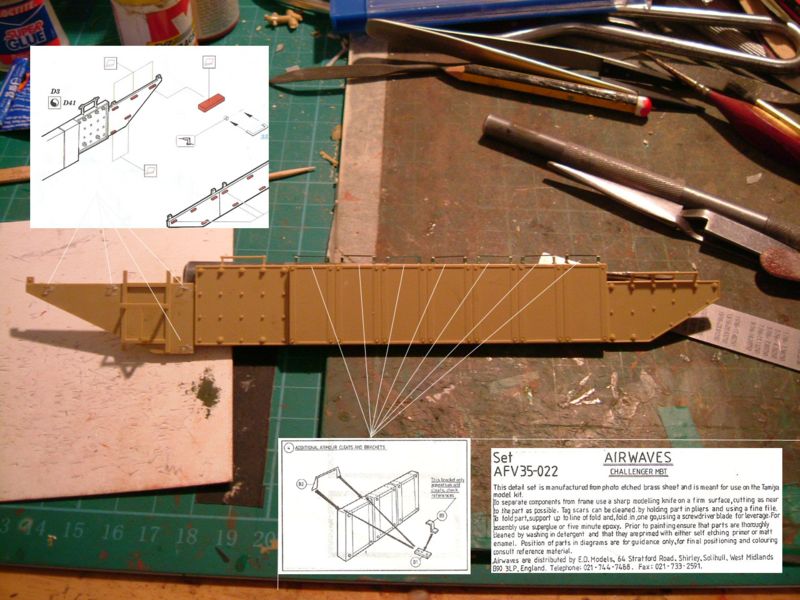
With most of the stages completed, and it being a club night, I decided to take it to the club to see what they thought. It seems luck was on my side, as a member of the club had brought along a box that he had available, with part-made Challenger 1 and 2 in it, along with more spare parts and lots of decal sheets and Airwaves photo etched set for Challenger 1, (very useful!) My model was well-received with lots of members looking forward to seeing the finished article. With the new Airwaves parts, I replaced the Eduard Photo etched Id number plate with an Airwaves part. This was simply because the Airwaves looked better. I then started assembling the side Armour with Add on Airwaves Photo etched parts. With the Armour and much of the construction work completed, I then primed the model using Halfords Plastic Primer. I started with the low hull then upper hull, Turret, side Armour and add on parts.
Painting & Weathering, pt.1
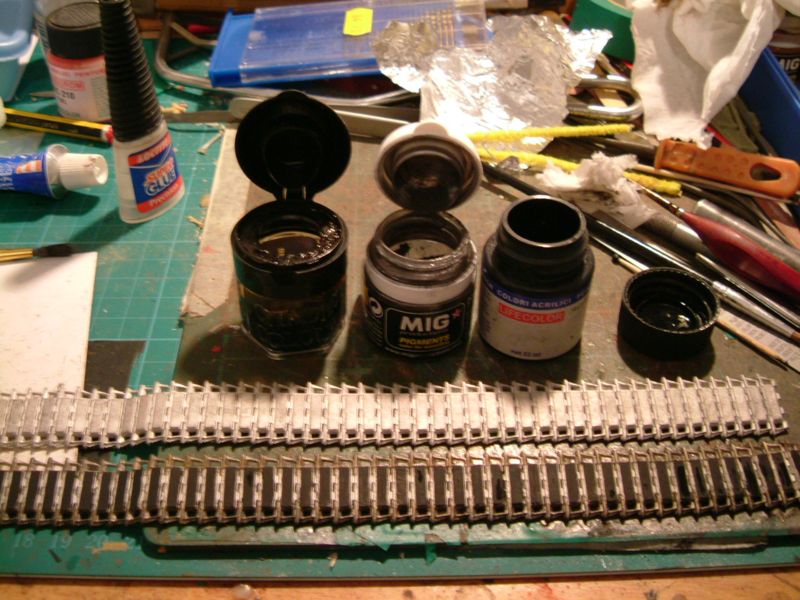
Starting with the track, I used a combination of: (Lifecolor) -Matt Black, (Mig Pigments) - Gun Metal, (Citadel washes) - Brown ink. First I painted on some Brown ink and then some Gun Metal pigment. I did not prime the track as I wanted to rub down the track to show the white Metal track; this is more like staining then painting. I then painted the rubber pad matt black.
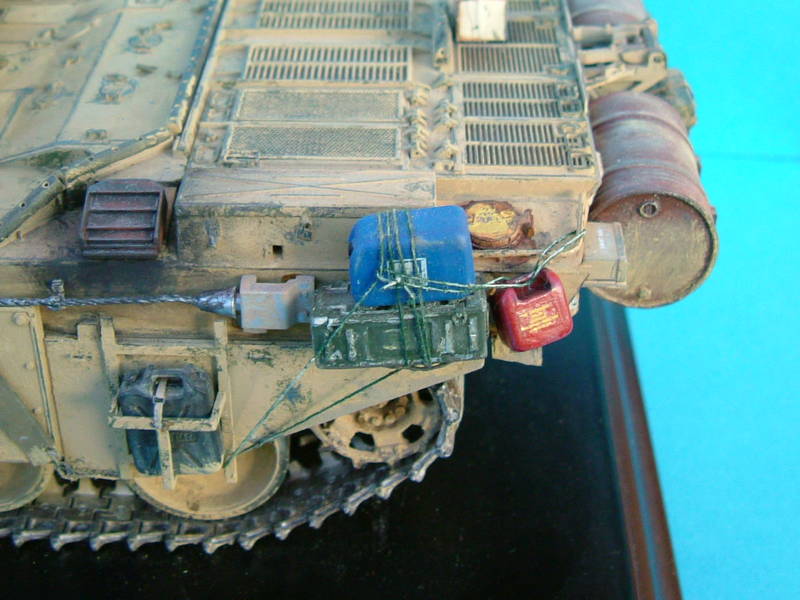
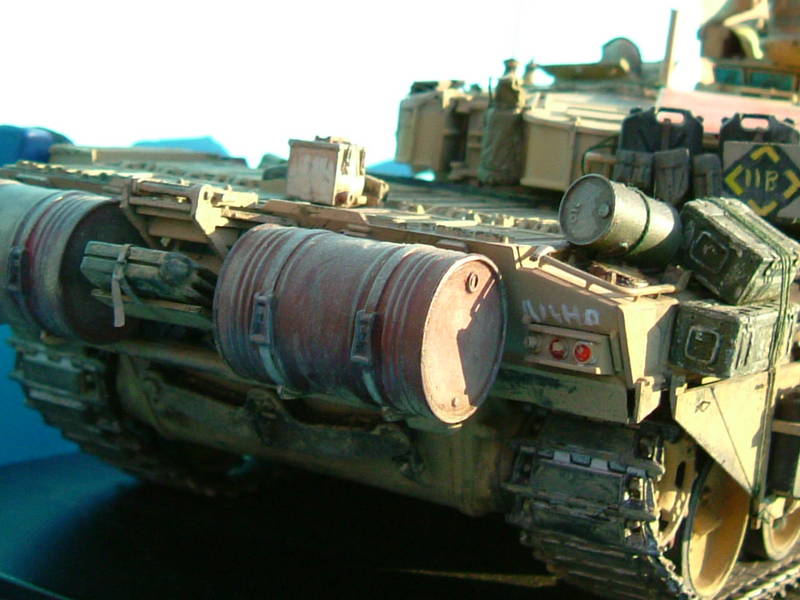
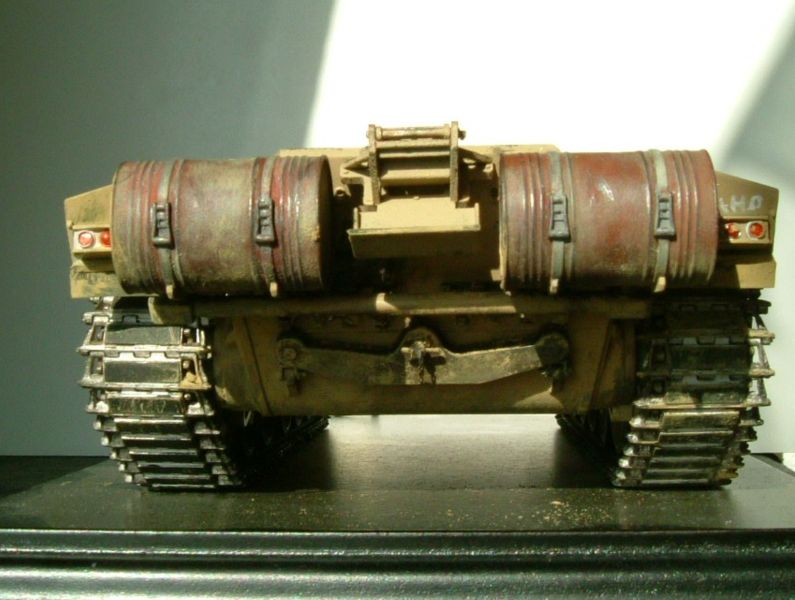
Next, I painted & attached all rear panel parts: external fuel tanks, tow hook and tools and rear lights. I started with painting the external fuel tanks with Revell for the rust and then used Citadel washes, Brown ink and Mig Pigments for standard rust and painted the straps with Tamiya buff. Then using a (Tamiya) Weathering, sand & mud set and an HB pencil, I used artistic license to make it look weathered and scratch. Next I painted the rear lights with (Revell) acrylic aluminium and (Tamiya) Clear Red and Orange according to the instructions and then the tow hook and tools (Tamiya), metallic grey and weathered; the same as before.
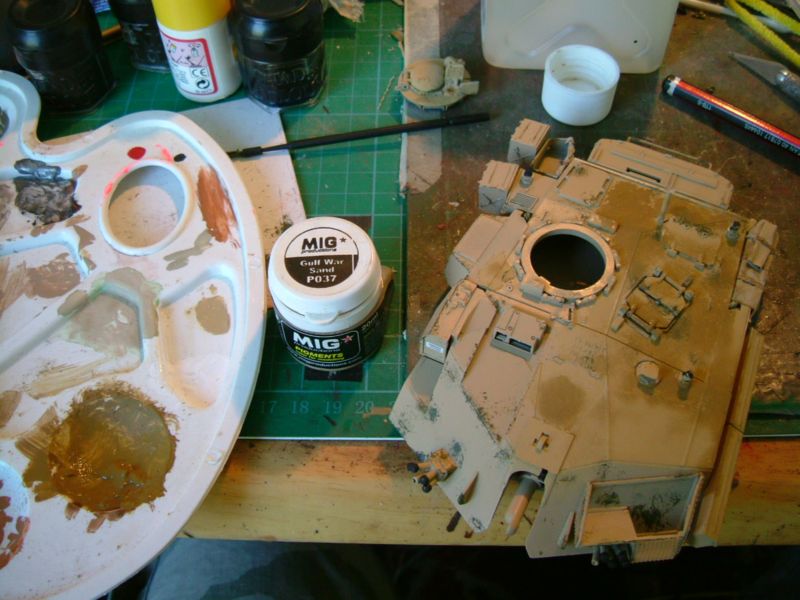
Then I moved on to the low hull which I sprayed with (Hannants) British Gulf Armour paint, with the rubber part of wheels matt black. Weathering for this was a combination of: (Mig Pigments) Dry Mud, Gulf War Sand, Industrial City Dirt, Pigment fix and (Revell), Bronze green, mat, some sand paper, paintbrushes and my trusty HB pencil.
Then I began to rub down with sand paper the parts that I wanted to look weathered. Using a Paintbrush, I dabbed on small touches of Bronze green. Next I used Pigments to make it look dusty. Using a mixing palette, I mixed the Pigments individually with Pigment fix then dabbed individually all over low hull & wheels; weathering this, as detailed above. Finally, I attached all the parts to the low hull. I have added some photos so you can see what I mean.
Painting & Weathering, pt.2
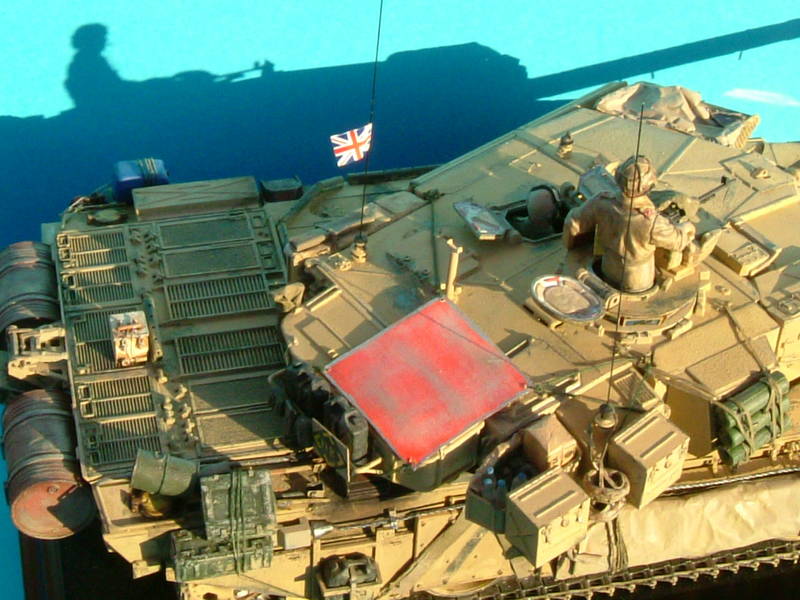
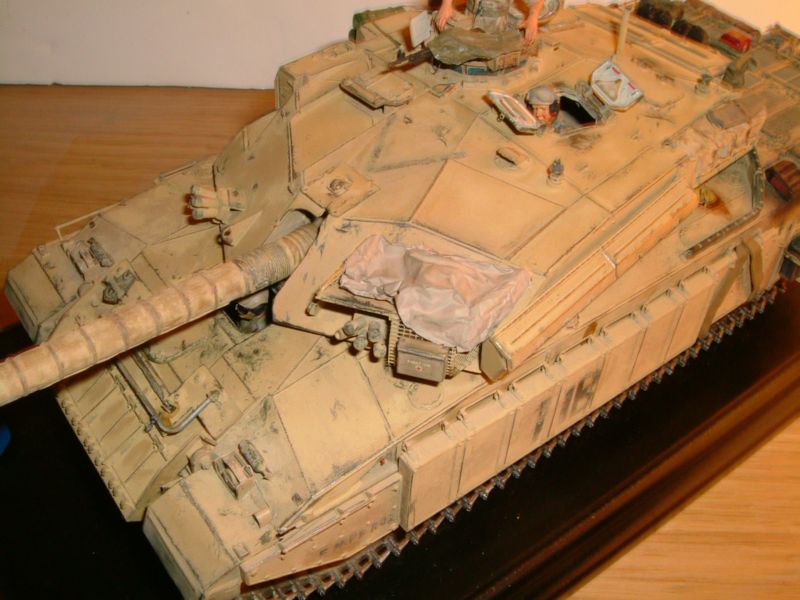
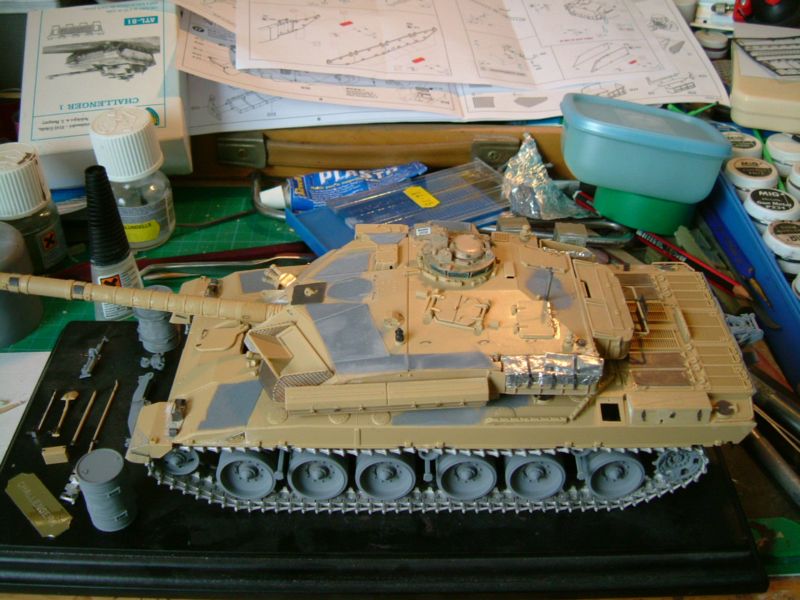
The Upper hull and Turret continued the same as the lower hull, spraying with (Hannants) British Gulf Armour paint. I also added decals and marking before weathering and I will talk about this in more detail later. I painted the storage cover and gun cover with (Tamiya) buff. These were Weathered using, (Mig Pigments) Dry Mud, Gulf War Sand, Industrial City Dirt, Pigment fix and (Revell), Bronze green, mat, some sand paper, HB pencil and Paintbrushes (as for the low hull). Then I painted the exhausts with (Revell) rust, (Citadel washes), Brown ink and (Mig Pigments) standard rust, before attaching them.
Construction, pt.2
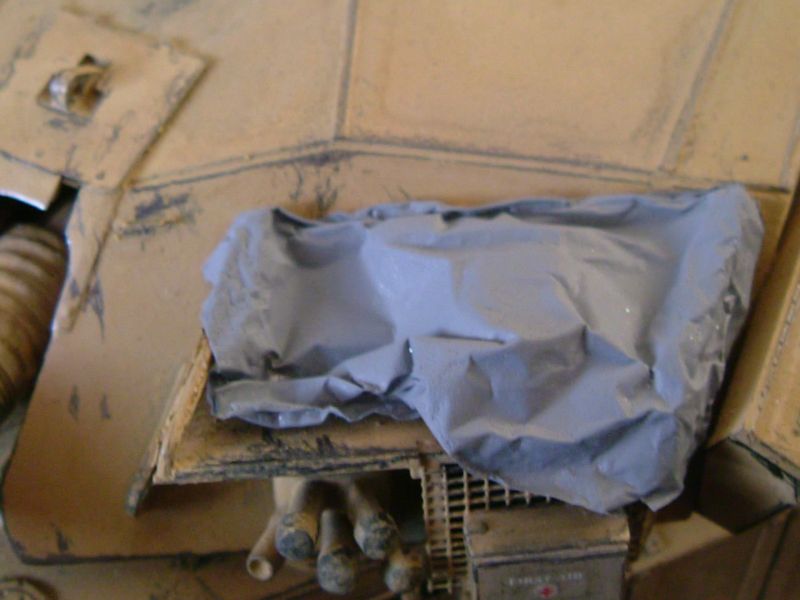
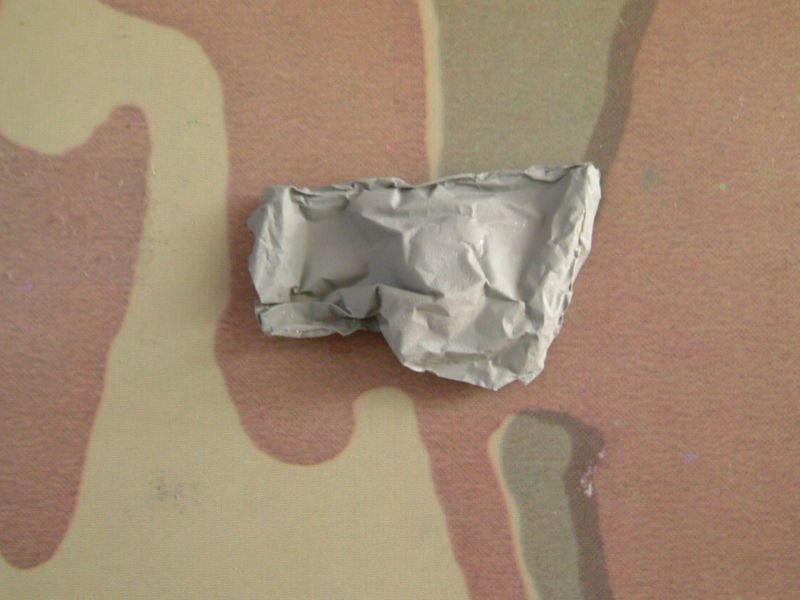
Attaching the low hull to the upper hull following the Tamiya instruction I then attached the front and side armour, moving on to attaching all add on parts, tools, water cans, and fuel cans. I decided to cover the camouflage net bin, using ordinary household tin foil, shaped and then primed, using (Halfords) Plastic Primer and then painted the cover with (Tamiya) buff.
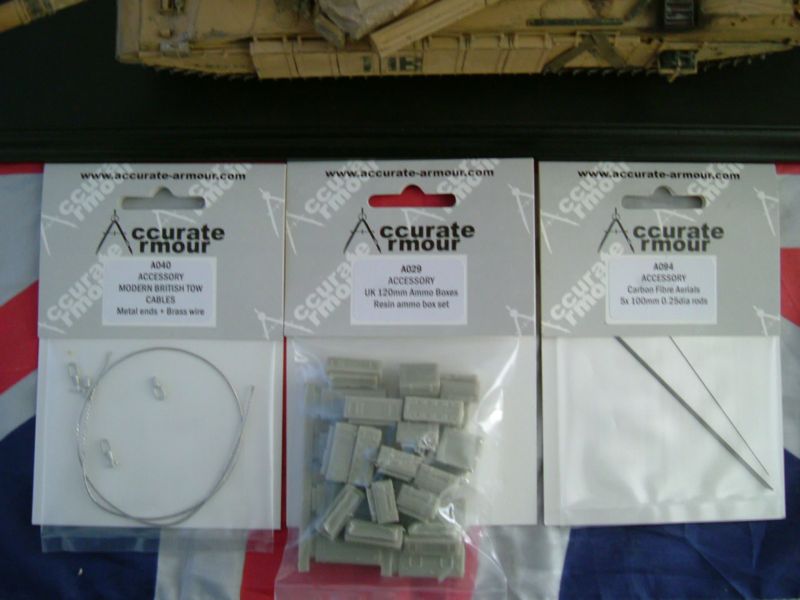
Unexpectedly, I found more add- on parts in my spare parts box: A collection of Helmets and Bedrolls from Accurate Armour. I made straps for these, using paper primed and painted and then primed and painted the entire lot. I then added the Commercial Water Bottle set.I decided buy some new parts from (Accurate Armour), 120mm UK Tank Ammo Boxes, British Modern Tow Cables, Carbon Fibre Aerial Rods and from (Pro Art Models), Modern oil/chemical drums and canisters set.
Accessories, Decals and Markings
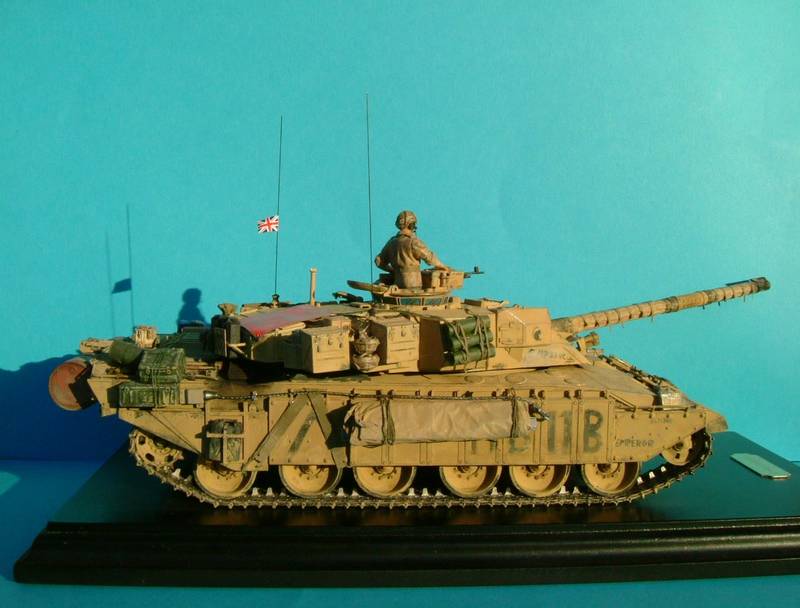
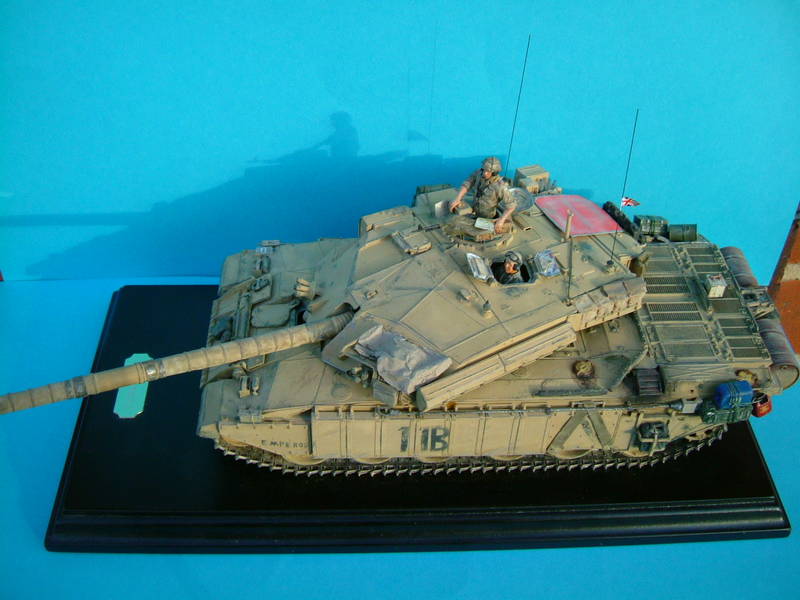
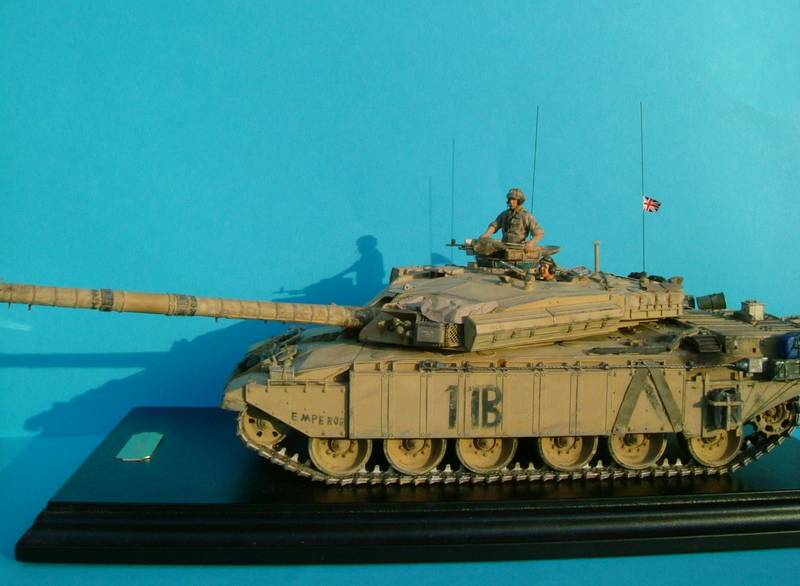
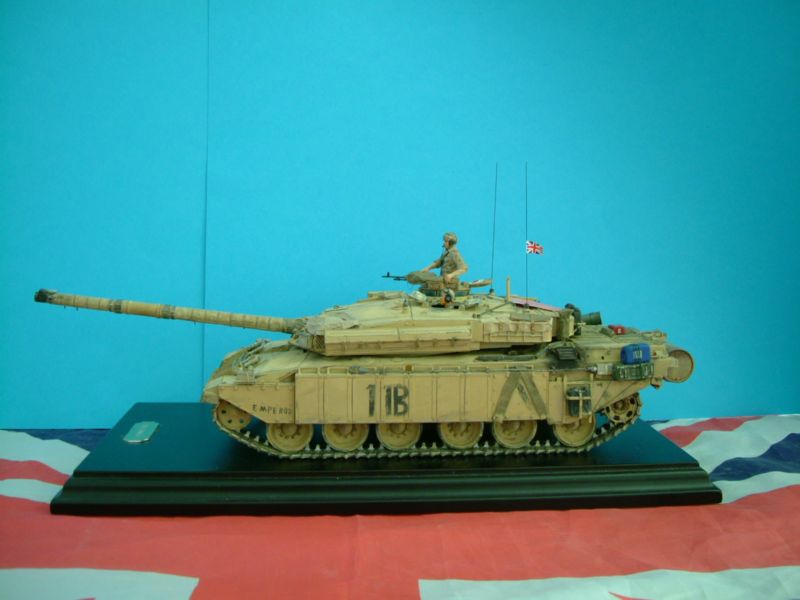
For this model I decided to loosely base it on Challenger 1 Mk.2 Command Tank, Regimental HQ, 14th/20th Kings Hussars.4th Armoured Div., Kuwait, 28 February 1991 (EMPEROR). I say loosely, as the Tamiya kit is a Mk. 3 and not a Mk. 2, However, I liked the illustrations and subject of this Challenger in the New Vanguard book so decided to go for it. To do this I used the illustrations, Tamiya instructions and Challenger 1 and 2 decals and hand- painted the rest.
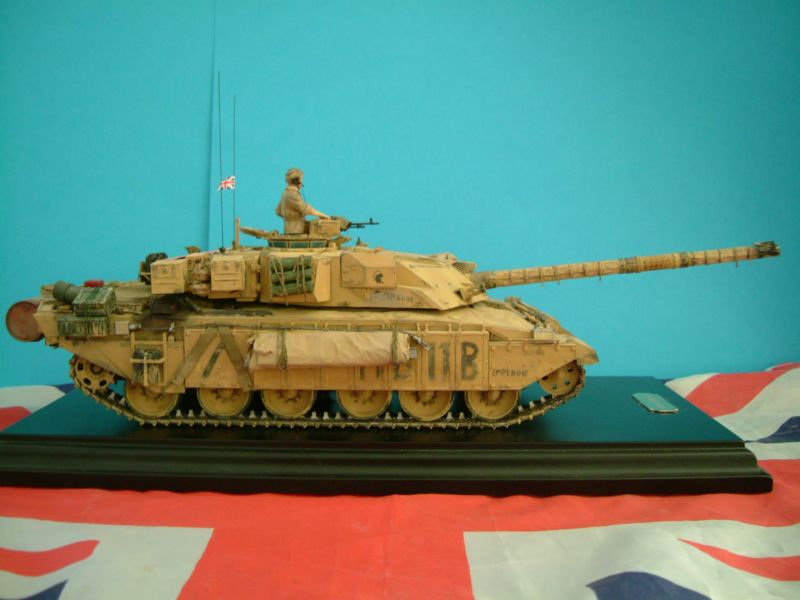
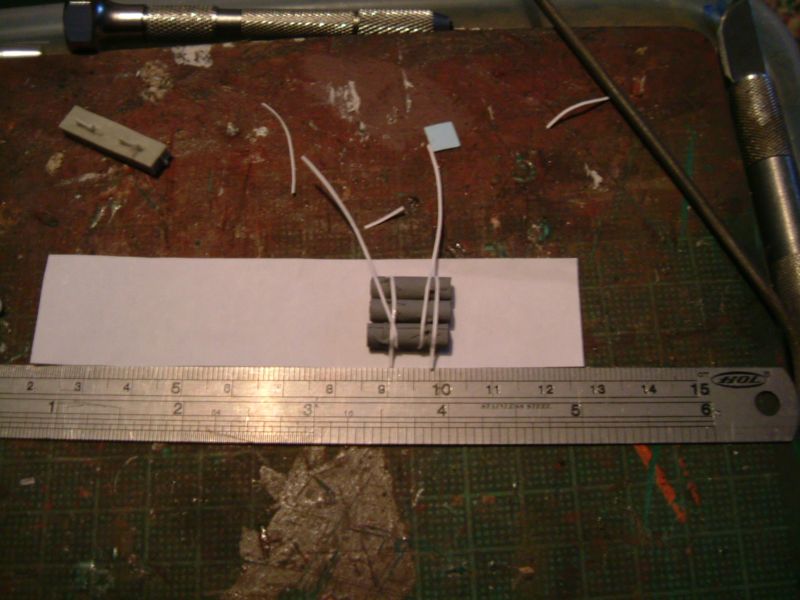
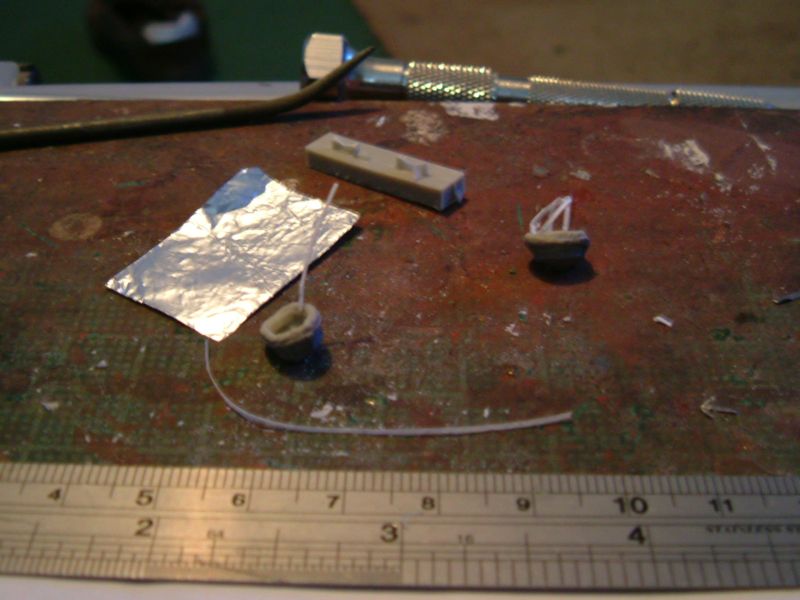
After attaching some accessories: Ammo Boxes, Tow Cables, Aerials and General Accessories, Helmets, and Bedrolls, I added a larger roll and small strips made from ordinary household tin foil and then primed using (Halfords) Plastic Primer. I then painted with (Tamiya) buff. I then attached a small UK Antenna Flag (ECHELON DETAILS), some Commercial Water Bottles and a NATO ration pack in the storage bin.
Figures
I used the Cromwell AFV crew for Gulf, Bosnia etc.: 3 half figures. Then, using references, I painted 2 crewman wearing general service coveralls with the Commander in British desert camouflage. Paints used: Tamiya, XF-57, XF-52, XF-59 and XF-51, Revell, flesh matt, Citadel, flesh wash and Lifecolor, matt black. Then the weathering, using Tamiya weathering master kit sand, light sand and mud (item 87079).
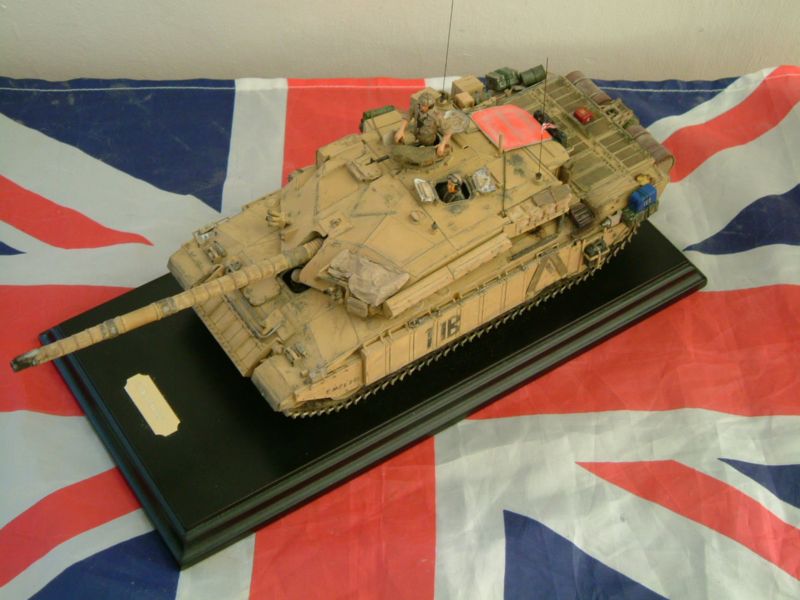
Finishing off and Displaying
With a bit more weathering and cleaning, I decided to display the model on a plain black base with a simple brass plaque. Due to model weight I decided to screw it to the base. To do this, I removed the turret and then drilled a small hole in the bottom of the Upper hull. Using a black screw, I then screwed the model to the base and reattached the turret.
Kits and Items Used
* Pro Art models, Modern oil/chemical drums and canisters set, item no, 35011
* Accurate Armour, Bergens, Bedrolls, Helmets, item no, A023
* Tamiya, 1:35 Challenger 1, item no, 154
* Friulmodel, 1:35 track, item no, 8142
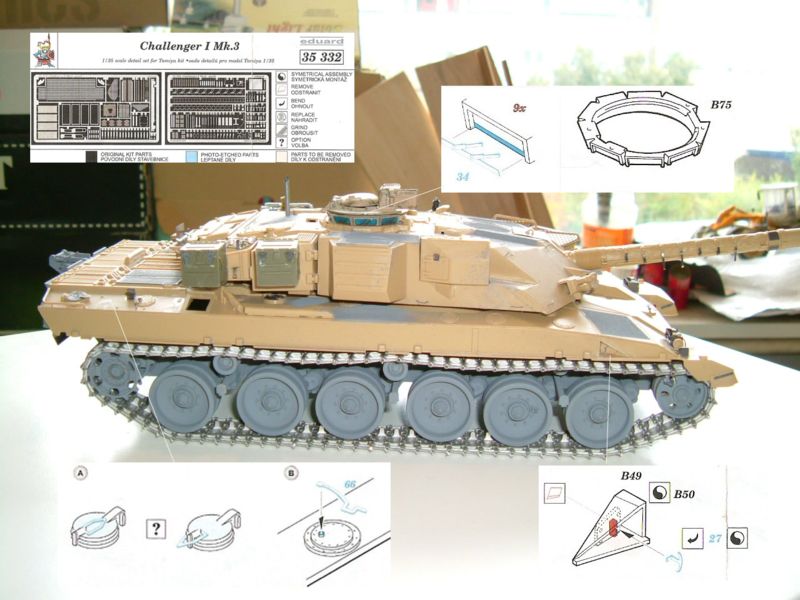
* Eduard, 1:35 photo etch, item no, 35 332
* Accurate Armour, Aerial rods, item no, A094
* Accurate Armour, 120mm Ammunition boxes, item no,A029
* Cromwell Models, AFV crew for Gulf, Bosnia etc. -3 half figures, item no, CF33
* Airwaves, 1:35 photo etch, item no, 35-022
* Echelon Details, small UK Antenna Flag, item no,ET35405
About the Author

Comments

Matts challenger looks superb
he has some really nice work you should check his website out
JAN 30, 2009 - 02:30 AM

Matt you have done some really nice work here, and I really like the way you have showed the PE placement in the pictures.
FEB 01, 2009 - 01:41 PM

How timely, I am in the middle of a Challenger I build myself, Gulf War I. Mind if I steal a couple of ideas Again good build pics.
Keep up the good work, Warren
FEB 10, 2009 - 06:53 AM
Copyright ©2021 by Matt Jackson. Images and/or videos also by copyright holder unless otherwise noted. The views and opinions expressed herein are solely the views and opinions of the authors and/or contributors to this Web site and do not necessarily represent the views and/or opinions of Armorama, KitMaker Network, or Silver Star Enterrpises. All rights reserved. Originally published on: 2009-01-30 00:00:00. Unique Reads: 26056

WEB HOSTING BY


Copyright ©2021 Armorama and Kitmaker Network, a subsidiary of Silver Star Enterprises
All Rights Reserved. Please read our Conditions of Use and Privacy Policy.
All Rights Reserved. Please read our Conditions of Use and Privacy Policy.