

1⁄35Panzer I - France 1940
1
Comment
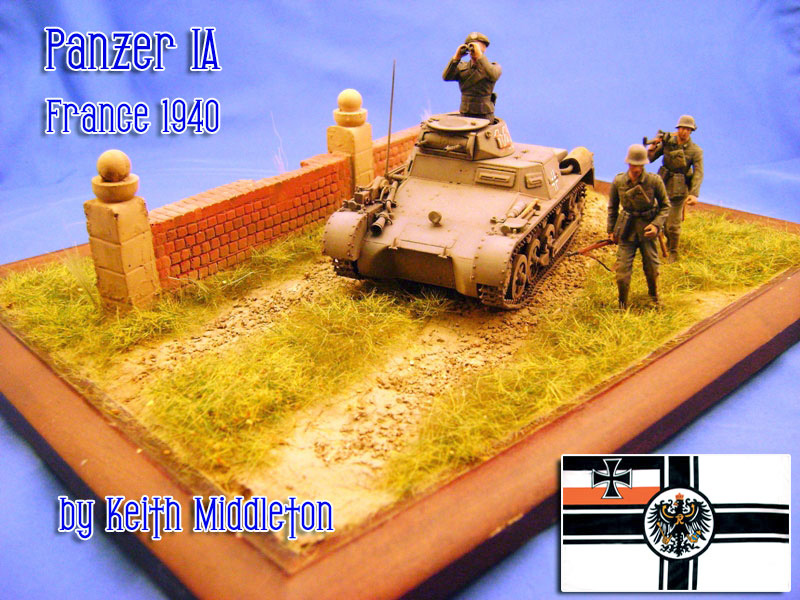
The Houston Armor Club (HAC) that I belong to holds regular group builds/contests. About once a year the club purchases enough kits of a particular model to hold a contest where each member has the opportunity to build the same kit. This year the kit was the Dragon Panzer IA (DAK) Smart Kit (6289).
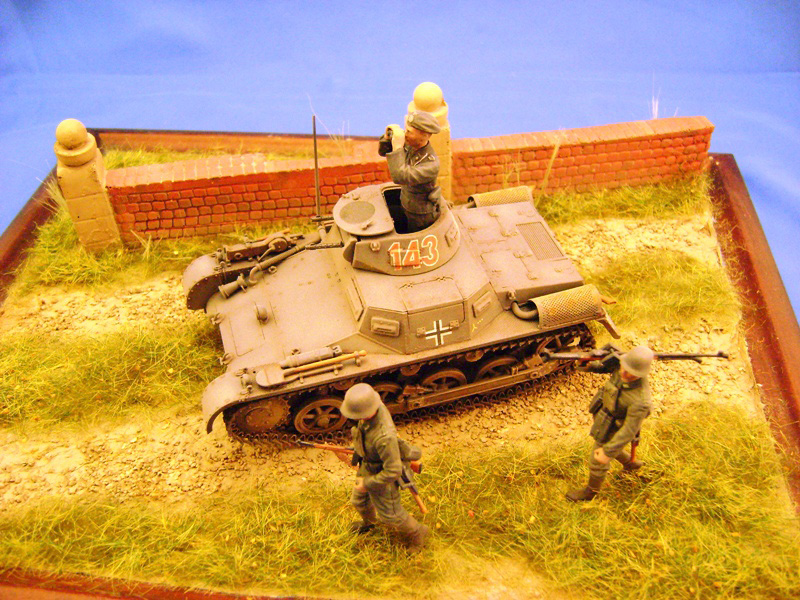
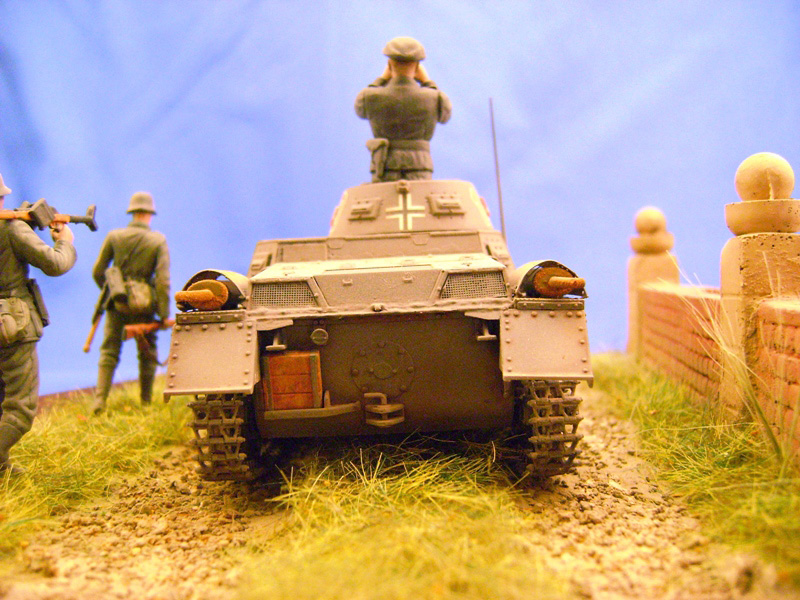
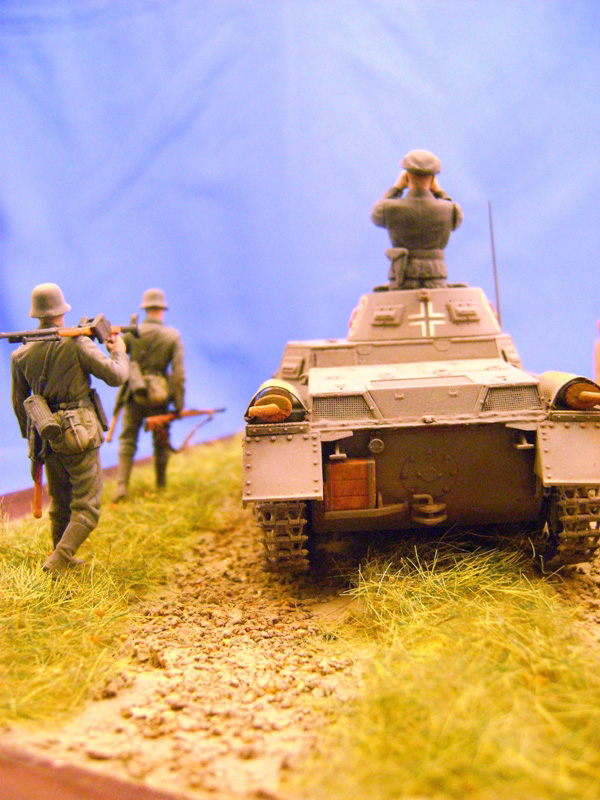
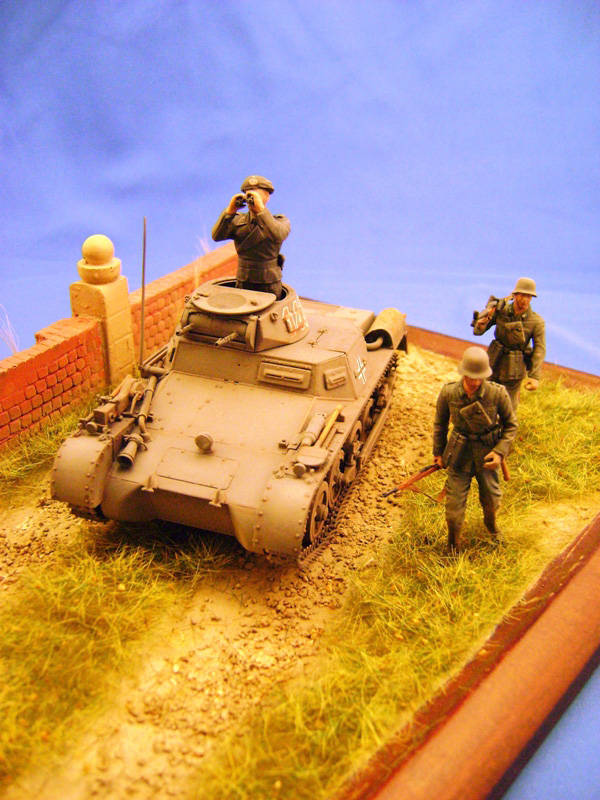
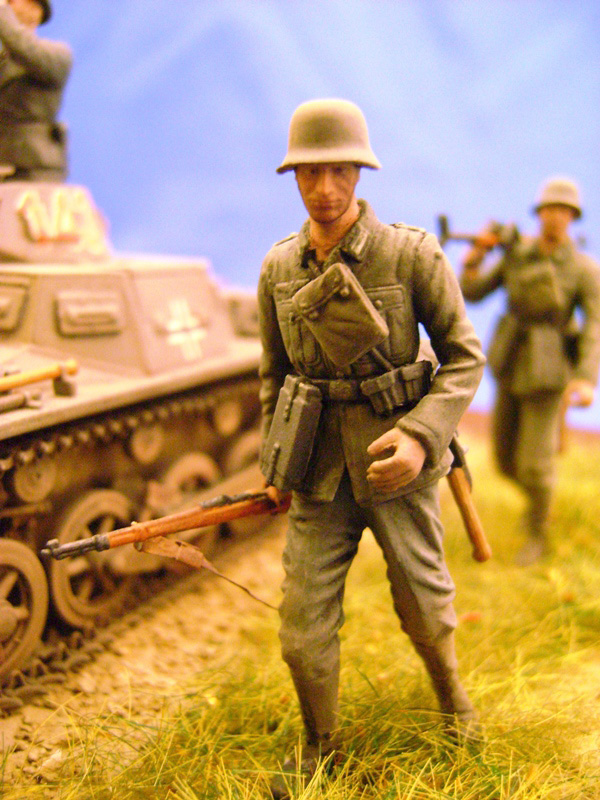
I normally build dioramas and I decided to continue that practice with a diorama set in 1940 in France rather than North Africa. I also knew that with my building pace, if I wanted to get the Panzer I done on time for the contest, I would have to keep the diorama small and simple. So, I elected to use a small base I had made during a groundwork demonstration at a previous HAC meeting. After making the base at the meeting and allowing it to dry, I had primed it and set it aside for when I would actually use it in a project. In keeping with the small is better theme, I decided to use only three figures: a panzer crewman wearing a beret from the Dragon Sturmartillerie Crew (6029) and the two walking figures from the Dragon German Anti-Tank Rifle set (6196). With the exception of the decals for the Panzer I (which came from the Dragon Panzer IB kit), everything was built straight out of the box.
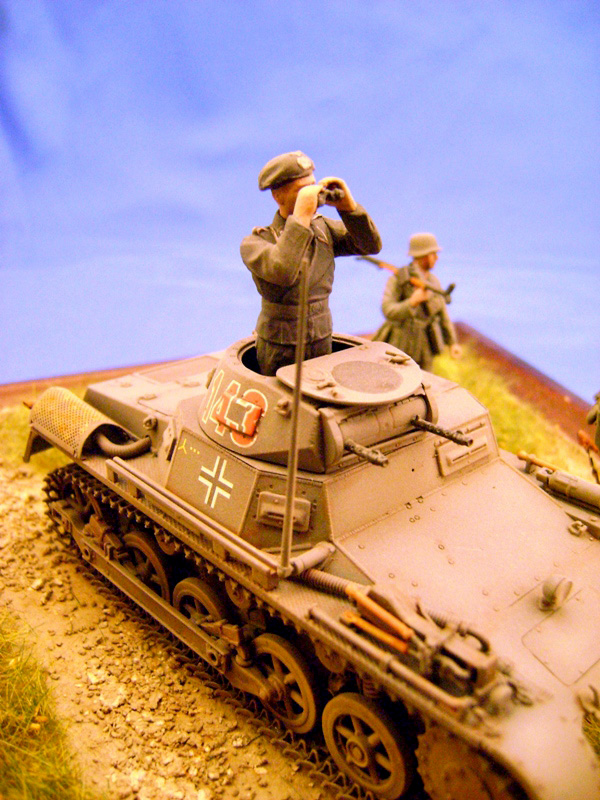
The magic tracks were a highlight however. I assembled each side as a single run using blue masking tape. Initially, I reduced the tackiness of the masking tape by pressing the tape on my pants leg several times. I then assembled a run of 87 links as called for in the directions (which turned out to be the correct number for both sides) and applied Testors liquid cement to the connection between each link. After the glue had set for about ten minutes or so, I pulled the run off the tape and placed it on the tank and cemented the two ends together. I also placed some minimal sag in the tracks at this point. I recommend making the connection on the bottom, directly underneath a roadwheel so you can use the roadwheel as a pressure point when connecting the ends together. Also, keep in mind the fact that the track run will tighten up as the glue dries.
I then applied the washes using artist oils thinned in mineral spirits. Doing one side at a time, I applied a raw umber wash to the lower hull, running gear, and tracks. I then applied a light wash (unbleached titanium with a small amount of white mixed in) to the upper hull and turret. Finally, I applied a pin wash of raw umber, sepia, and Indian Red. I used Q-tips dipped in pure mineral spirits to clean up any excess at each stage and a blow dryer, on its lowest heat setting, to accelerate the drying time as well. Once the washes had completely dried, I applied earth colored pigments to the lower hull and tracks using rubbing alcohol to set them. Once the pigments had completely dried, I applied a raw umber wash using thinned craft acrylic paint. When this acrylic wash was dry (once again, I used a blow dryer to accelerate the pace of drying) I brushed earth colored pigments over the entire tank and then applied a flat coat using Modelmaster Acryl Flat. The flat coat reduced the impact of the brushed-on pigments as I desired and got the tank ready for the final steps.
I now added the headlight lens, painted and weathered the tools, painted the machine guns, and added rusting solution to the mufflers and guards. Once all of these items were dry, I added a mix of rust colored pastels to the mufflers and guards, and applied ground up graphite to the machine guns. The final step was to spray a highly thinned coat of Tamiya Buff over the entire model.
After several years of working on figures for dioramas, I have developed a fairly simple and quick method for painting figures that I believe delivers consistently good results. Normally, with the exception of the helmets, I completely assemble my figures. Once the figures were assembled and the minimal gaps filled, I sprayed a coat of the same inexpensive rattle can primer purchased at Walmart.
With the figures now assembled and primed, I proceeded to paint the faces and hands. While I use artist oils to paint the faces of my figures, my first step consists of a base coat of a flesh or tan acrylic paint. Once that has had plenty of time to dry (at least over night, but for me, due to my limited modeling time, usually several days) I start with the artist oils. At this point there are two requirements: a good supply of flat brushes and sufficient time to complete the entire face painting process. Initially, with a small flat brush, I apply a generous coat of raw umber to the face of each figure. After a few minutes (the amount of time it takes to do this to each figure I want to paint during that session), using another flat brush (lightly moistened with thinner if you prefer) I then remove the majority of the raw umber paint which should leave a somewhat dark stain with the deepest staining in the appropriate locations. I then mix flesh tint with either Naples Yellow Hue or Yellow Ochre at about a two to one ratio until I get a flesh mix that I think looks right. I then separate out some of the original flesh mix and add white to make a lighter shade. Finally, I separate out another batch and add a very small amount of red to create a third flesh shade. I then paint the face with the original flesh shade and then using all three flesh shades, plus raw umber and white, work on blending the colors until the face looks right. This is the reason I like using artist oils versus some other medium: you have a tremendous amount of time to work on adjusting and blending the colors so the face looks right. For the eyes, if there is a large amount of the white of the eye showing (i.e. the figure is not squinting), I separate out a small amount of the light flesh mix and add additional white and paint the eye. If I go outside the lines of the eye, I correct it by blending it into the rest of the face. Finally, using a sharpened toothpick, starting with the left eye, I place a dot of raw umber in each eye. Again, if my aim was bad (not an infrequent occurrence) or the dot is too large, I correct it with the flesh mixes. With this technique, I can paint the faces of numerous figures in a single session. I allow the faces to dry at least overnight before painting the uniforms and equipment.
I painted the uniforms and equipment with an assortment of acrylic paints, including Valejo, Pollyscale, Modelmaster Acryl, and inexpensive craft acrylics. To add shadows I applied washes using artist oils. For the infantry figures, I initially applied a Greenish Umber wash to the tunics and a Paynes Gray wash to the pants. The final wash was a mix of ivory black and sepia which was used on all three figures. I cleaned up any excess wash using Q-tips dipped in pure mineral spirits. After the washes had completely dried, I did some light drybrushing using artist oils. For the Panzer crewman I used Paynes Gray lightened with white while for the two infantry figures, I used unbleached titanium. Once they were dry, I applied a flat coat which reduces the glossy appearance created by the washes as well as the starkness of the drybrushing. Next I added pigments and pastels to weather the uniforms and give the figures a 5 oclock shadow. Finally, I applied ground up graphite to the barrels of the infantry weapons.
I planned on using Hekis tall grass on the base, so I followed their recommendation by first adding a yellow/brown/green mix of Woodland Scenics static grass to the appropriate areas of the base by sprinkling it over a diluted coat of white glue and water. Once the static grass had dried overnight I began adding the Heki grass on top of the static grass a small area at a time. Hekis tall grass comes attached to a fine mesh. Hekis recommended method for adding the tall grass to a base is to tear off a small section of the grass, stretch it to the appropriate size and shape and then glue it to the static grass. I have found this method works well and I once again used a mix of white glue and water brushed on top of the static grass. The mesh is hidden when using this method. The final step for the base was to apply earth colored acrylic washes to the dirt road to add additional depth.
I normally build dioramas and I decided to continue that practice with a diorama set in 1940 in France rather than North Africa. I also knew that with my building pace, if I wanted to get the Panzer I done on time for the contest, I would have to keep the diorama small and simple. So, I elected to use a small base I had made during a groundwork demonstration at a previous HAC meeting. After making the base at the meeting and allowing it to dry, I had primed it and set it aside for when I would actually use it in a project. In keeping with the small is better theme, I decided to use only three figures: a panzer crewman wearing a beret from the Dragon Sturmartillerie Crew (6029) and the two walking figures from the Dragon German Anti-Tank Rifle set (6196). With the exception of the decals for the Panzer I (which came from the Dragon Panzer IB kit), everything was built straight out of the box.
Building the Panzer I
While the detail on the Panzer I is very nice, in the end I was not impressed with this Smart Kit due to problems with the fit and assembly. The problems arose in three areas. First, was the fit of the superstructure to the lower hull tub. The superstructure did not fit properly into the lower hull leaving a significant gap in the rear that had to be filled with putty. Second was the very tight fit of the turret into the opening in the hull. The fit was so tight I was concerned I would damage the turret or hull when inserting, removing, or turning the turret. I had to do significant sanding and trimming to loosen this fit. Both of these problems were confirmed by other members of the HAC. Finally, I had great difficulty, even after annealing and bending the PE muffler guards into the proper shape and then getting them to fit over the mufflers themselves.The magic tracks were a highlight however. I assembled each side as a single run using blue masking tape. Initially, I reduced the tackiness of the masking tape by pressing the tape on my pants leg several times. I then assembled a run of 87 links as called for in the directions (which turned out to be the correct number for both sides) and applied Testors liquid cement to the connection between each link. After the glue had set for about ten minutes or so, I pulled the run off the tape and placed it on the tank and cemented the two ends together. I also placed some minimal sag in the tracks at this point. I recommend making the connection on the bottom, directly underneath a roadwheel so you can use the roadwheel as a pressure point when connecting the ends together. Also, keep in mind the fact that the track run will tighten up as the glue dries.
Painting and Weathering the Panzer I
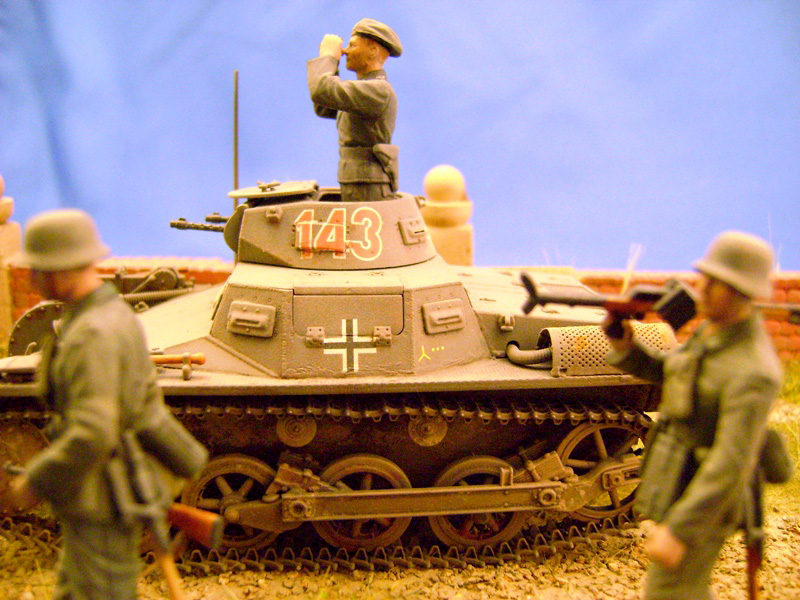
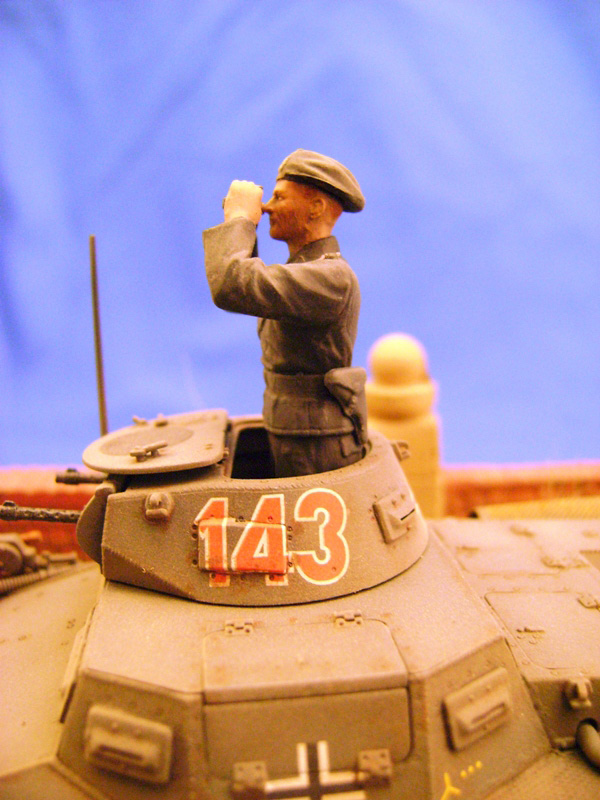
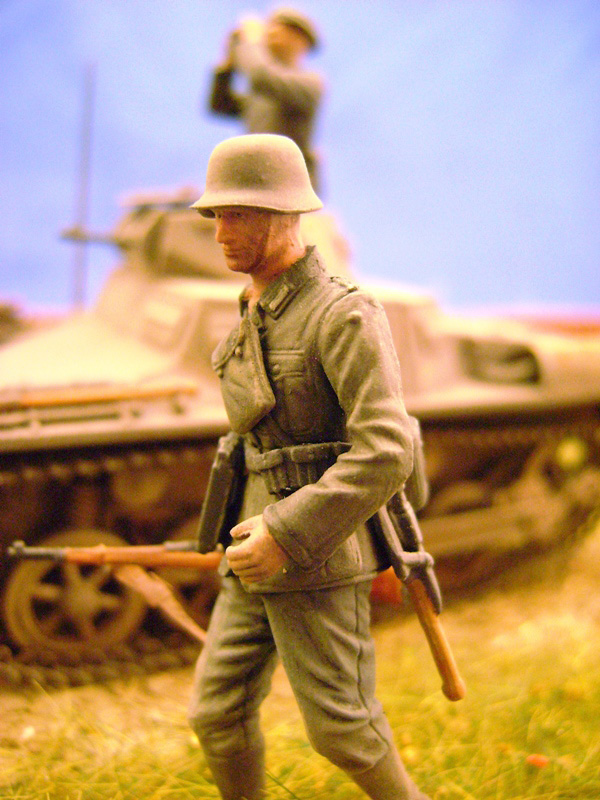
I primed the Panzer I using inexpensive light gray spray primer bought at Walmart. I then sprayed the lower hull with Gunze Tire Black. I initially sprayed the upper hull and turret with Tamiya German Gray and I then followed up with the gray lightened with Tamiya Buff, hitting the middle of panels. Finally, I sprayed highly thinned, full intensity gray over the entire upper hull and turret to blend those areas together and reduce the starkness of the contrast. Next, I sprayed the lower hull, tracks, and running gear with Tamiya Flat Earth followed by some Buff. After gloss coating the model with Modelmaster Acryl Gloss, I applied the decals using Solvaset. After the decals had dried overnight, I sprayed them with the same gloss coat.I then applied the washes using artist oils thinned in mineral spirits. Doing one side at a time, I applied a raw umber wash to the lower hull, running gear, and tracks. I then applied a light wash (unbleached titanium with a small amount of white mixed in) to the upper hull and turret. Finally, I applied a pin wash of raw umber, sepia, and Indian Red. I used Q-tips dipped in pure mineral spirits to clean up any excess at each stage and a blow dryer, on its lowest heat setting, to accelerate the drying time as well. Once the washes had completely dried, I applied earth colored pigments to the lower hull and tracks using rubbing alcohol to set them. Once the pigments had completely dried, I applied a raw umber wash using thinned craft acrylic paint. When this acrylic wash was dry (once again, I used a blow dryer to accelerate the pace of drying) I brushed earth colored pigments over the entire tank and then applied a flat coat using Modelmaster Acryl Flat. The flat coat reduced the impact of the brushed-on pigments as I desired and got the tank ready for the final steps.
I now added the headlight lens, painted and weathered the tools, painted the machine guns, and added rusting solution to the mufflers and guards. Once all of these items were dry, I added a mix of rust colored pastels to the mufflers and guards, and applied ground up graphite to the machine guns. The final step was to spray a highly thinned coat of Tamiya Buff over the entire model.
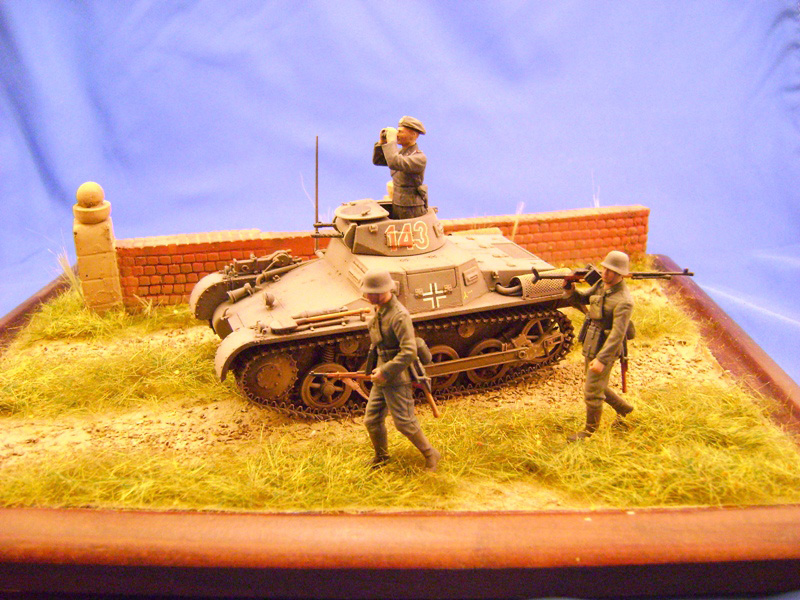
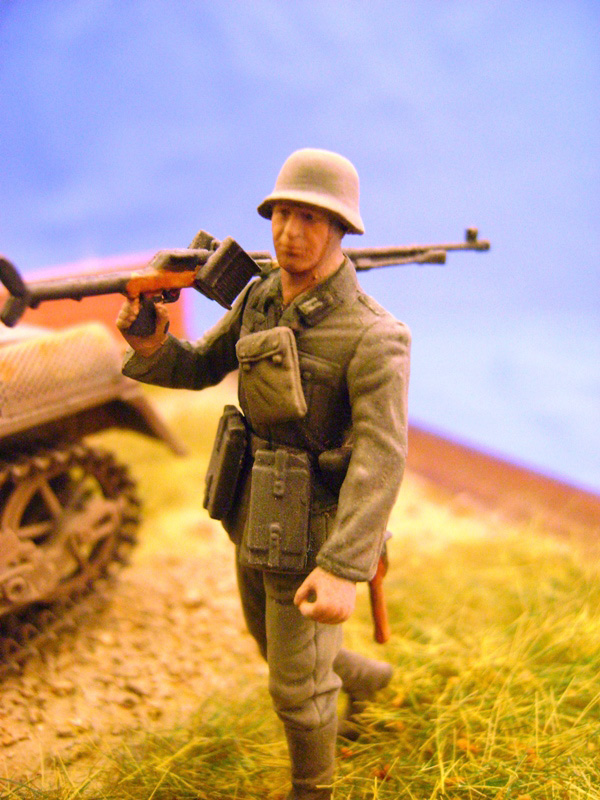
The Figures
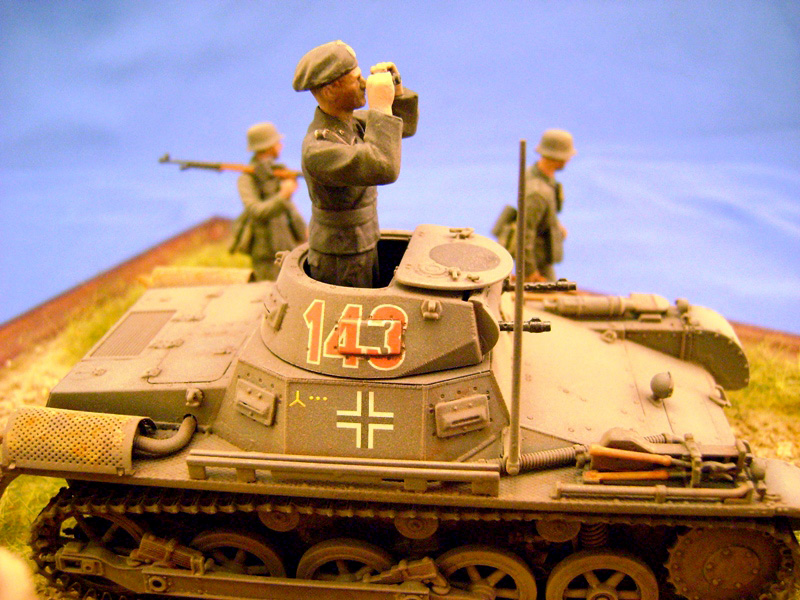
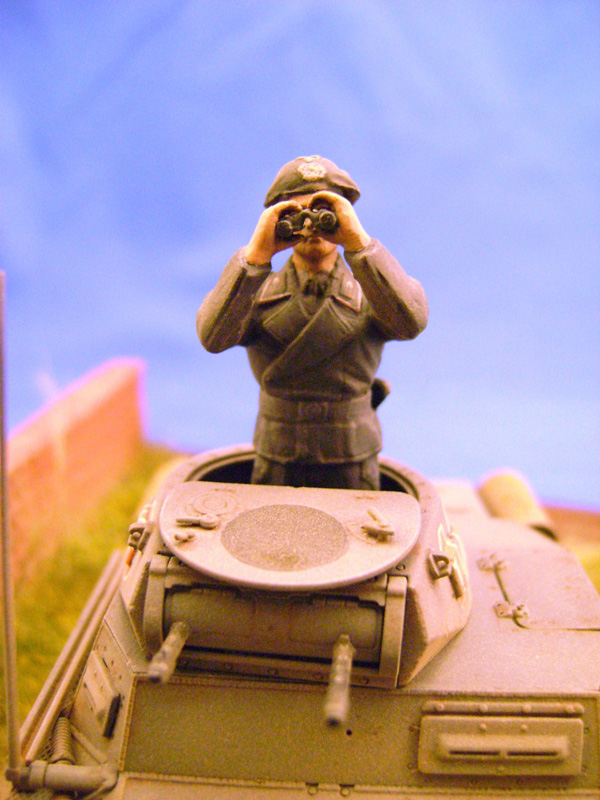
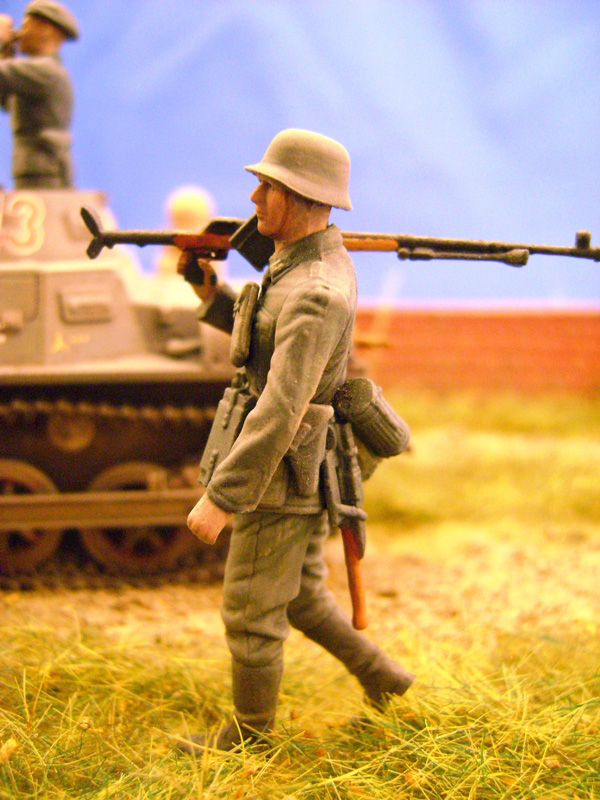
I assembled the three figures without any difficulty. There is a noticeable difference in the physical appearance of the newer and older Dragon figures. The panzer crewman, from the old Sturmartillerie Crew set, appears short and rather stocky when compared to the tall and thin infantry figures from the more recent Anti-tank Team set.After several years of working on figures for dioramas, I have developed a fairly simple and quick method for painting figures that I believe delivers consistently good results. Normally, with the exception of the helmets, I completely assemble my figures. Once the figures were assembled and the minimal gaps filled, I sprayed a coat of the same inexpensive rattle can primer purchased at Walmart.
With the figures now assembled and primed, I proceeded to paint the faces and hands. While I use artist oils to paint the faces of my figures, my first step consists of a base coat of a flesh or tan acrylic paint. Once that has had plenty of time to dry (at least over night, but for me, due to my limited modeling time, usually several days) I start with the artist oils. At this point there are two requirements: a good supply of flat brushes and sufficient time to complete the entire face painting process. Initially, with a small flat brush, I apply a generous coat of raw umber to the face of each figure. After a few minutes (the amount of time it takes to do this to each figure I want to paint during that session), using another flat brush (lightly moistened with thinner if you prefer) I then remove the majority of the raw umber paint which should leave a somewhat dark stain with the deepest staining in the appropriate locations. I then mix flesh tint with either Naples Yellow Hue or Yellow Ochre at about a two to one ratio until I get a flesh mix that I think looks right. I then separate out some of the original flesh mix and add white to make a lighter shade. Finally, I separate out another batch and add a very small amount of red to create a third flesh shade. I then paint the face with the original flesh shade and then using all three flesh shades, plus raw umber and white, work on blending the colors until the face looks right. This is the reason I like using artist oils versus some other medium: you have a tremendous amount of time to work on adjusting and blending the colors so the face looks right. For the eyes, if there is a large amount of the white of the eye showing (i.e. the figure is not squinting), I separate out a small amount of the light flesh mix and add additional white and paint the eye. If I go outside the lines of the eye, I correct it by blending it into the rest of the face. Finally, using a sharpened toothpick, starting with the left eye, I place a dot of raw umber in each eye. Again, if my aim was bad (not an infrequent occurrence) or the dot is too large, I correct it with the flesh mixes. With this technique, I can paint the faces of numerous figures in a single session. I allow the faces to dry at least overnight before painting the uniforms and equipment.
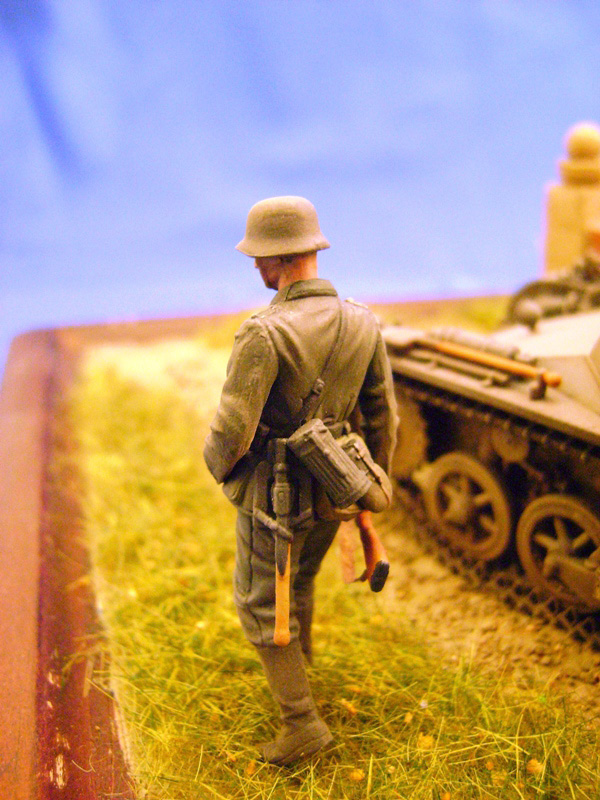
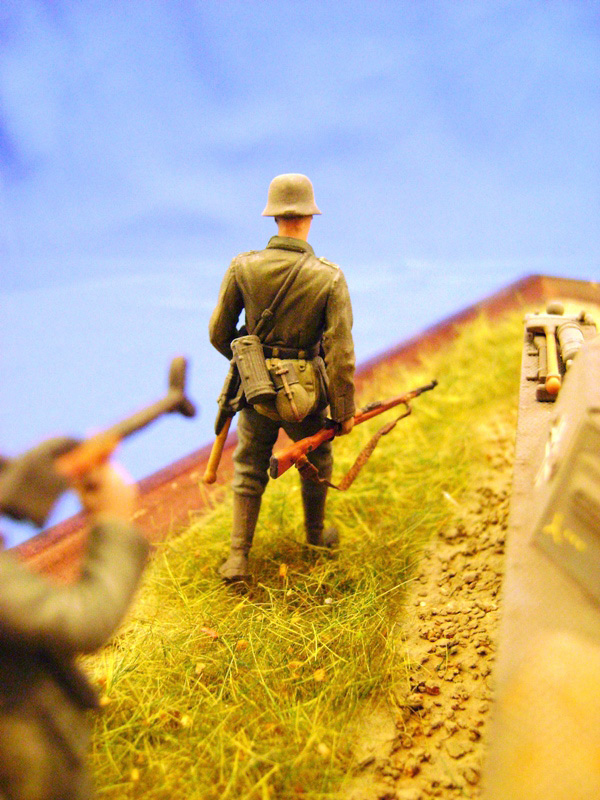
I painted the uniforms and equipment with an assortment of acrylic paints, including Valejo, Pollyscale, Modelmaster Acryl, and inexpensive craft acrylics. To add shadows I applied washes using artist oils. For the infantry figures, I initially applied a Greenish Umber wash to the tunics and a Paynes Gray wash to the pants. The final wash was a mix of ivory black and sepia which was used on all three figures. I cleaned up any excess wash using Q-tips dipped in pure mineral spirits. After the washes had completely dried, I did some light drybrushing using artist oils. For the Panzer crewman I used Paynes Gray lightened with white while for the two infantry figures, I used unbleached titanium. Once they were dry, I applied a flat coat which reduces the glossy appearance created by the washes as well as the starkness of the drybrushing. Next I added pigments and pastels to weather the uniforms and give the figures a 5 oclock shadow. Finally, I applied ground up graphite to the barrels of the infantry weapons.
The Base
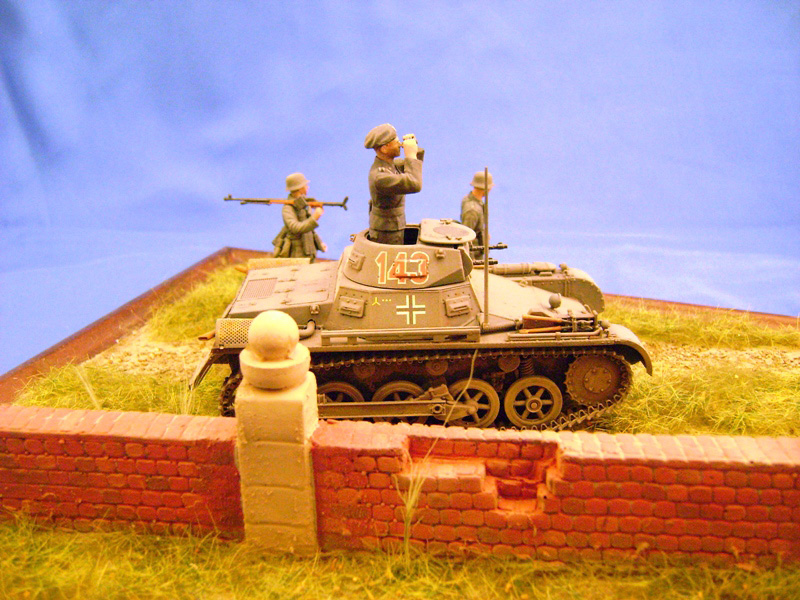
As already mentioned, the groundwork had been put on the base and a wall and dirt road had been added long before this project. To create my groundwork I use a mixture of Celluclay, Durhams Water Putty, White Glue, water, and cheap craft acrylic paint in an earth color. So, my first step here was to hand paint the wall, followed by several raw umber acrylic washes. I then used the airbrush to paint the groundwork a variety of earth colors making sure to allow some overspray on the lower portions of the wall.I planned on using Hekis tall grass on the base, so I followed their recommendation by first adding a yellow/brown/green mix of Woodland Scenics static grass to the appropriate areas of the base by sprinkling it over a diluted coat of white glue and water. Once the static grass had dried overnight I began adding the Heki grass on top of the static grass a small area at a time. Hekis tall grass comes attached to a fine mesh. Hekis recommended method for adding the tall grass to a base is to tear off a small section of the grass, stretch it to the appropriate size and shape and then glue it to the static grass. I have found this method works well and I once again used a mix of white glue and water brushed on top of the static grass. The mesh is hidden when using this method. The final step for the base was to apply earth colored acrylic washes to the dirt road to add additional depth.
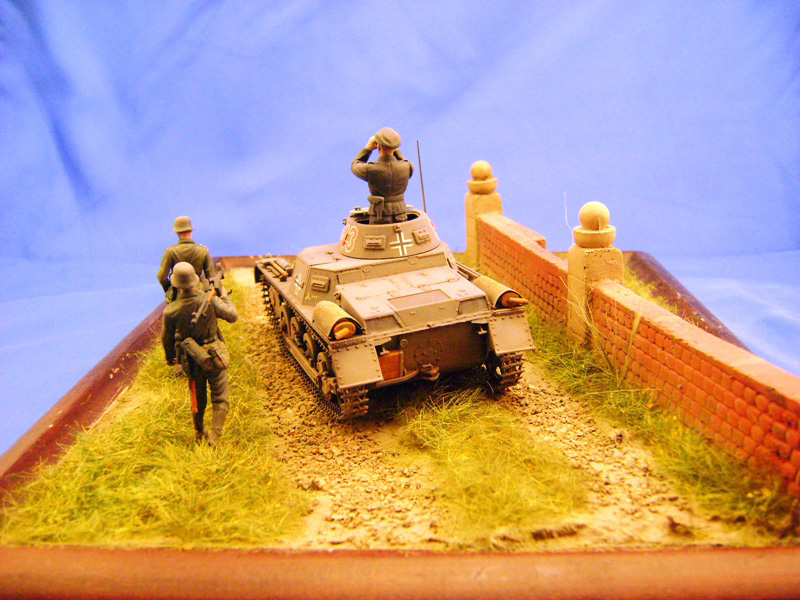
Final Assembly of the Diorama
With the Panzer I, figures, and base all complete, it was a simple and quick process to finish the diorama. First, I glued the crewman into the turret and glued the Panzer I on the road. For the two infantry figures, I initially cut off most of the toothpick I used as a holder during the painting process, which left only a small peg. I then drilled a small hole into the base and glued each infantrymans peg into the hole. After about six weeks of work, the diorama was complete and ready for the pending HAC contest.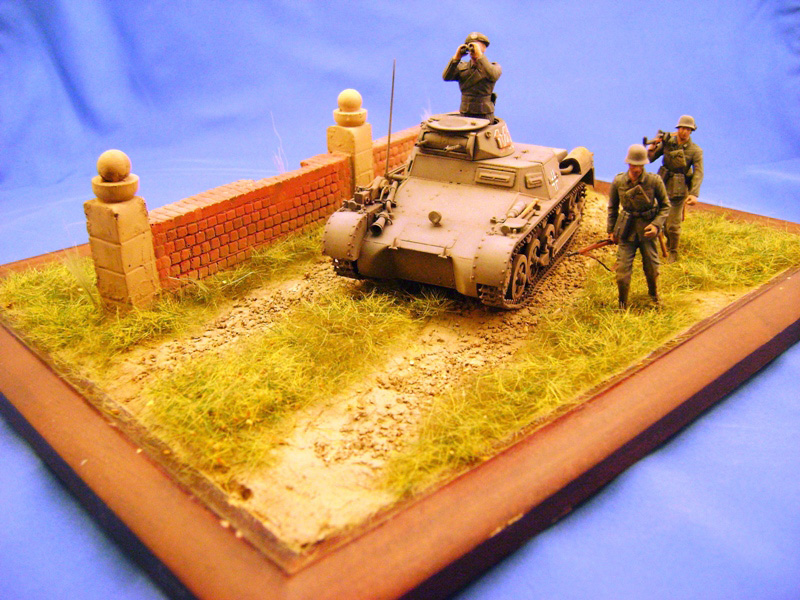

About the Author


Comments

Keith,
Thank you for sharing your very detailed article and build with us. You obviously put alot of time and thought into it. Rob Liles
MAY 09, 2009 - 05:08 AM
Copyright ©2021 by Keith Middleton. Images and/or videos also by copyright holder unless otherwise noted. The views and opinions expressed herein are solely the views and opinions of the authors and/or contributors to this Web site and do not necessarily represent the views and/or opinions of Armorama, KitMaker Network, or Silver Star Enterrpises. All rights reserved. Originally published on: 2009-04-25 00:00:00. Unique Reads: 20369

WEB HOSTING BY


Copyright ©2021 Armorama and Kitmaker Network, a subsidiary of Silver Star Enterprises
All Rights Reserved. Please read our Conditions of Use and Privacy Policy.
All Rights Reserved. Please read our Conditions of Use and Privacy Policy.