1⁄35Hornisse
3
Comments
introduction
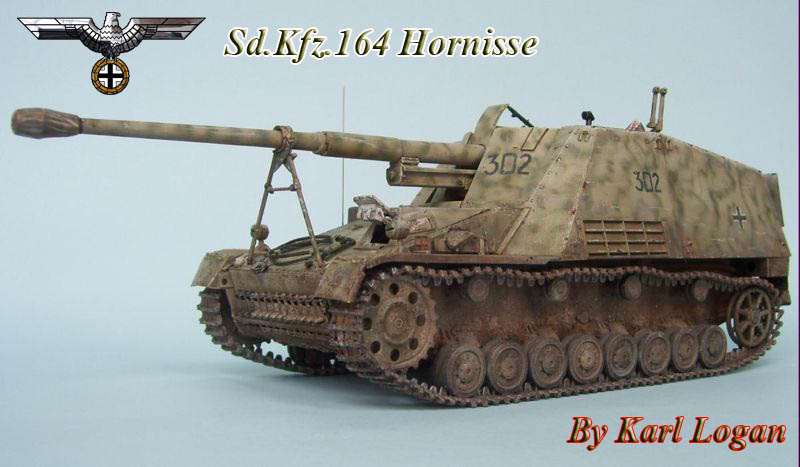
The kit is DML's early "Hornisse" in 1/35. This is the original release of the kit. Also used was the Verlinden Update set, which provides a resin gun and breech, MG's, PE racks and radio unit, as well as some other resin details.construction
One of the maddening things about the pre-"Smart" kits of this family of open-topped vehicles the Hornisse, Nashorn, and Hummel, is that DML provides a jig part for locating the gun travel lock, but this part should NOT be glued in! So of course, like a total amateur, it was glued it in! This resulted in having to pry it off, which necessitated repairing the side of the hull with a piece of styrene. The PE racks go together fairly well; although a bit tricky, and quite "tight" in their clearance, which required the removal of approximately 1-1,5mm from each of the "ears" of the racks in order to make them fit correctly. The DML inner-hull lifting lugs are also pure fantasy--I made new ones out of a thicker piece of styrene.painting
I paint my open top vehicles in pieces, and then put them together when the interior painting is all weathered. The shells were painted with craft store acrylic paints, and Testor's Brass enamel. The model was first painted with Tamiya acrylics, in the order of; Base coat of Dark Brown custom mix; standard Dark Yellow, Lightened Dark Yellow, and then greatly-lightened Dark Yellow--nearly an off-white. The camo was then painted with Tamiya "Field Gray"--which I found is as close to the long lost Tamiya" "Panzer Olivgrun" as one could get, in my opinion!weathering
The model was finished by using all MIG products. First, pre-mixed filters were laid over the hull, and then washes added. The pigments were last to be added, in several layers. To finish it off, I borrowed a technique from the great Adam Wilder--that of "splattering". You use your airbrush to spray THROUGH a paint brush loaded with paint. The air stream will blow a "spatter" of paint onto the model. This is NOT an easy technique to master! I highly suggest that you practice it with a scrap before you potentially ruin your model! Also have a wet brush of water ready to wash off any errant paint should the technique go awry. It took me quite a bit of tries to get the look I was going for! The muffler was done using a combination of 502 Abteilung oils, MIG pigments, and Tamiya paint.Comments
I have reposted this 'what's new' announcement, to fix the 'discuss this' link from the On Display feature.
That is a superb Hornisse Karl, absolutely beautiful.
Henk
FEB 28, 2009 - 04:46 AM
i have built the same model and seen many others and i believe this is as close to perfection as you can get!!! you should be very proud of yourself !!! thanks for the lesson oldantiqueguy
FEB 28, 2009 - 07:04 AM
Thanks, Henk, and thank you too Michael! I'm pleased that you enjoyed the article!
FEB 28, 2009 - 04:34 PM
Copyright ©2021 by Karl Logan. Images and/or videos also by copyright holder unless otherwise noted. The views and opinions expressed herein are solely the views and opinions of the authors and/or contributors to this Web site and do not necessarily represent the views and/or opinions of Armorama, KitMaker Network, or Silver Star Enterrpises. All rights reserved. Originally published on: 2009-02-25 00:00:00. Unique Reads: 15128


