

1⁄35Australian Mk5/1 Centurion in Vietnam
7
Comments
CONVERTING THE KIT
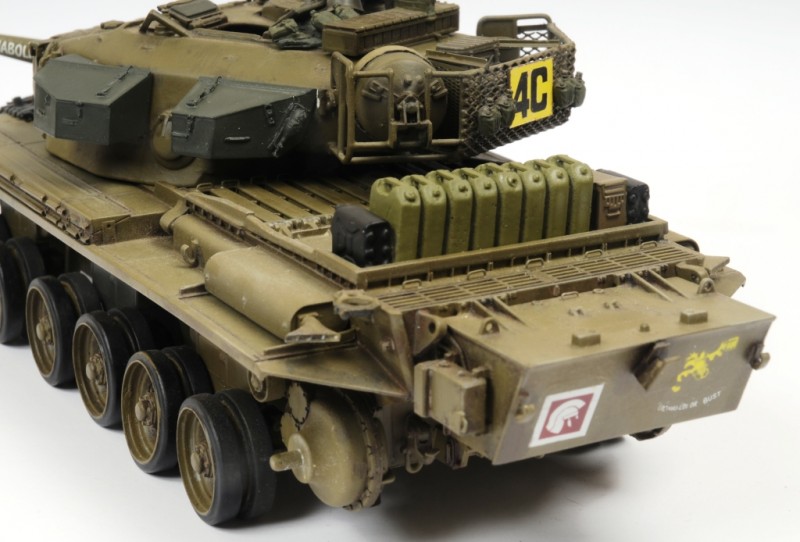
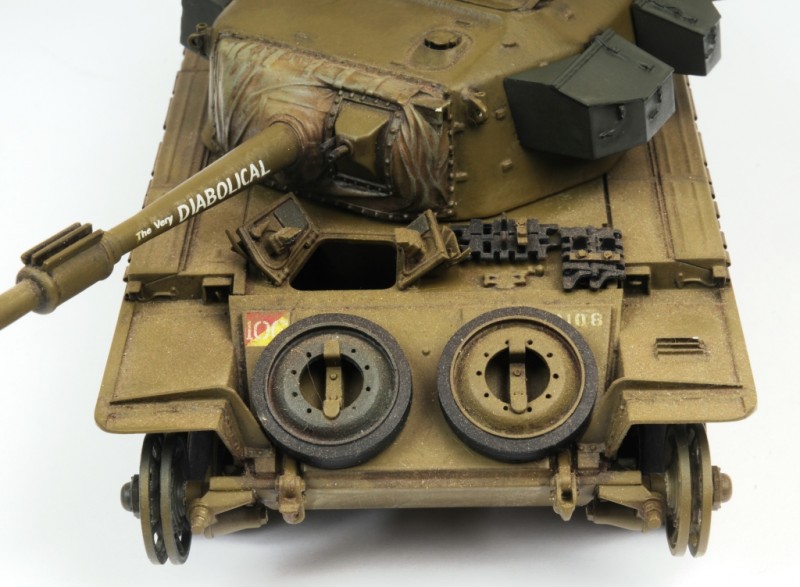
Although some incomplete markings for The Very Diabolical were included in the kit, there was no way the tank could be depicted using the parts in the box. The first items to be replaced were the kit wheels, which comprised ill fitting soft rubber tyres that seemed to be resistant to any glue known to man. I replaced the wheels with resin items from Legends, although an excellent set of resin replacement tyres (which I have reviewed on this site: https://armorama.kitmaker.net/modules.php?op=modload&name=Reviews&file=index&req=showcontent&id=3626) has since become available from Firestorm. A shortcoming with the kit is the lack of a canvas mantlet cover, which was fitted to all Australian Centurions in Vietnam. As it was, one was provided in an update set I got from Firestorm, which also provided excellent replacement resin reinforced hull bins, turret hatches, fuel cell, turret ammo rack and covered IR light. This update is no longer available, but Firestorm now offers the reinforced bins and mantlet cover separately (which I have reviewed on this site: https://armorama.kitmaker.net/modules.php?op=modload&name=Reviews&file=index&req=showcontent&id=3627). Replacement resin spare wheels, a decal sheet and water jerries came from Mousehouse, and various other accessories came from a very useful Vietnam M113 update set from Legend.
THE BEAST
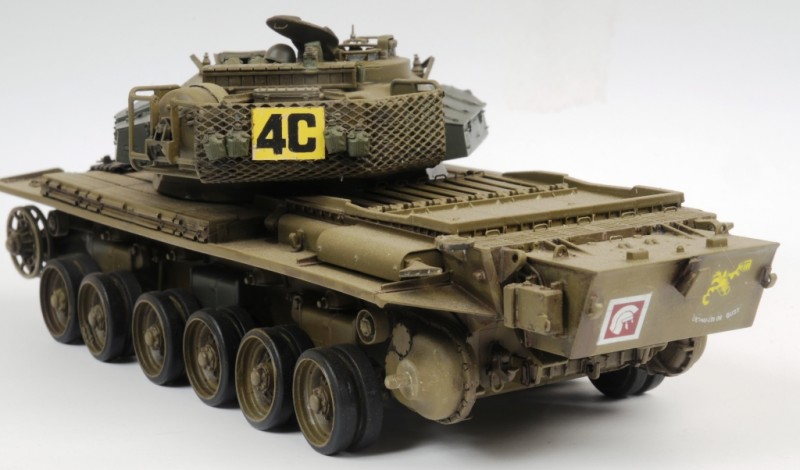
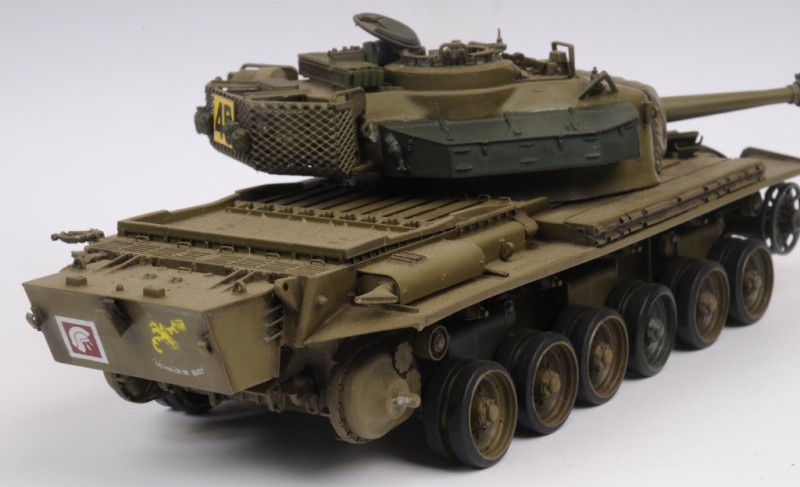
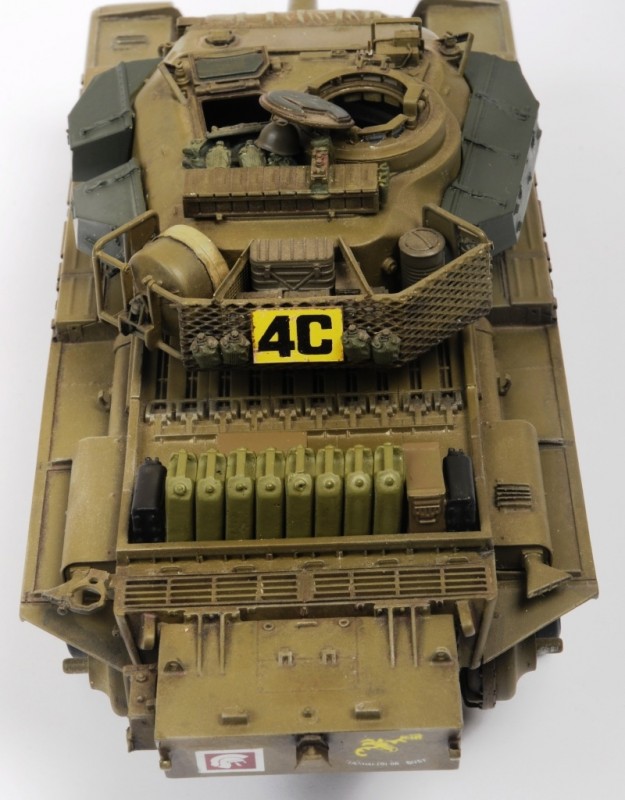
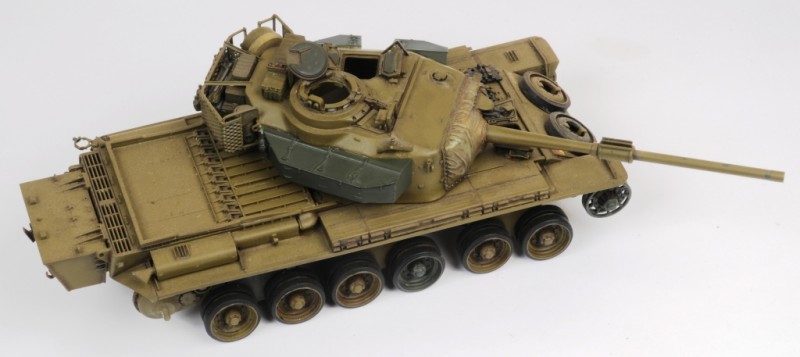
The AFV Club Centurions are superbly engineered and go together beautifully. I replaced all grab handles with brass rod and fuze wire and fashioned the guards from plasticard sheets, strip and angle. Weld beads were added to the glacis armour using Milliput and the turret was sanded before texturing with Gunze Sangyo Mr Surfacer. I replaced the kit mesh for the turret basket with heavier gauge aluminium architectural model mesh. After masking the periscope faces, I painted the base vehicle in Australian Olive Drab Lustreless, which is available from White Ensign paints. For many years I had pondered why The Very Diabolicals crew would have applied the camouflage to the turret bins, but I think I can safely surmise they were replacements from Britain the sheet metal bins were often damaged by the jungle and incoming fire that were painted Deep Bronze Green. I painted the bins in the much darker colour along with some wheels and a suspension station. Like the real tank, I hand brushed the cam pattern on to the bins. Another feature of the tank were angle iron guards on the aerial basis, which I rendered in Plastruct. The PRC 25 radio in the ammo rack came from Tamiya. Once the decals were applied, I gave the factory fresh paint a top coat of Testors Dullcote, which I left to harden for several weeks before a wash and dry brush.
THE SCENE
I wanted to depict The Very Diabolical in its native environment in a muddy field ploughing through vegetation! After caking the tank in a mud mixture mixed with chopped vegetation, I fitted the kit tracks and applied some more mud! The sparse terrain was set on the plinth using foam and cellulose paster, and I set the tank in to place with a nut and bolt through the centre on the hull through to the base board to give the vehicle a heavy appearance and articulate the suspension. I then applied some more mud to make the tank appear part of the terrain, and then I set to work on the vegetation, which was primarily field grass which was folded in half and planted in holes I drilled and held in place with PVA wood glue. I kept two tracts clear to represent the swathe made by the tracks, which I filled with a mixture of chopped up vegetation debris, and more mud.
All too soon the mud mixture started to dry to a bland matt brown, so I stippled on gloss lacquer, which not only set the mud in place, but also gave the appearance the tank had received a drenching of the omnipresent tropical Vietnam rain. The Very Diabolical in place, it needed a crew. I am yet to see a picture of an Australian Centurion in Vietnam buttoned up, and I firmly believe that crew figures not only add a sense of scale to any vehicle, but also bring it to life. I used the driver and crew commander from the ancient 1974 Tamiya M113 APC and fitted resin Verlinden heads. The crew commander has a flak jacket, which were often worn by turret crews due to the risk of wounds from RPG rockets exploding in trees above the tank, and I depicted him talking in to the PRC 25 radio, to which I fitted a coiled lead fashioned from winding fuze wire around a brass rod. The barbed wire coils on the long range fuel tank came from Verlinden.


About the Author

FROM: NEW SOUTH WALES, AUSTRALIA
Journalist and photographer - aka :"scribbler and snapper" - based in Sydney Australia. Been modelling as long as I can remember and it's my great distraction away from work. Regards my career, well every time I think it's slowing down it goes and speeds up again! Check out my blog at: http://heatse...
Comments

Mick, very impressive! I really like the overall look and feel of this tank. Job well done!
AUG 13, 2009 - 10:21 PM

I loved watching this come together!. A great little dio Mick looking foward to you finishing your other Cent.
AUG 14, 2009 - 01:00 AM
Great job Mick, this is one beauty of a Centurion. I watched your build up with great interest, loved the techniques you used and really enjoyed watching this one come together. I'd give my eye teeth to see this one in person.
Well done sir, well done.....
Bob
AUG 16, 2009 - 08:06 AM

Very nice work.
I don't know much about the subject matter, but you build is of a very high quality and the finished diorama is a really nice peice.
One to be proud of and thanks for sharing it with us.
James
AUG 17, 2009 - 01:48 AM

Good job it look cool how long did it take this is jeepkid 019 right back
AUG 28, 2009 - 02:29 PM
Copyright ©2021 by Mick Toal . Images and/or videos also by copyright holder unless otherwise noted. The views and opinions expressed herein are solely the views and opinions of the authors and/or contributors to this Web site and do not necessarily represent the views and/or opinions of Armorama, KitMaker Network, or Silver Star Enterrpises. All rights reserved. Originally published on: 2009-08-14 00:00:00. Unique Reads: 26247

WEB HOSTING BY


Copyright ©2021 Armorama and Kitmaker Network, a subsidiary of Silver Star Enterprises
All Rights Reserved. Please read our Conditions of Use and Privacy Policy.
All Rights Reserved. Please read our Conditions of Use and Privacy Policy.