1⁄35Jaws
21
Comments
The hull
Of course the part of the hull I would be modeling would have to be hollow, which meant I had to find some way to create that. The most obvious way would have been to create a form in whatever material and then vacuform the hull, but then I would not have my planking. So no doubt about it, I first had to model the form and then lay some “planks” on it.I started to draw the intricate lines of the boat using cad software and then reduced the scale of the plans to roughly 95% so that I would respect the extra surface taken by the planking. (Image 1) As I would have to model the keel, I cut an extra 3 mm on all the surfaces that would be holding the keel (red drawings on image 1.)
I was surprised at the number of different lines I had to draw as the hull of Elcoes are full of curves and diagonal lines. After drawing all those lines I printed them on paper, (image 2) glued them on some 1mm plasticard and cut them out with an X Acto (image3). I had to take care of the different levels and set up for more “fitting” than “force glue” by precisely cutting the plastic as I was foreseeing the moment when I would have to use brute force to fill this shape.
In almost no time I had a perfect plastic base that I had to fill (image 4.) But then what to fill it with? I first thought of using expanding foam for its lightness but then my previous experiences with the material were not that good, so I set up with using plaster (image 5.)
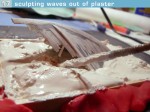
-----------------Now the filling part is very straightforward and just requires that you use some good quality plaster (if you prefer, the expensive one sold in art shops sold in cardboard packs of 1kg more than the one you buy in housebuilding werehouse.) That’s because it holds it shape better and is much easier to model. So I mixed a very heavy paste and basically applied it with a big modeling knife in the holes of the shape while holding it in my other hand. After a few seconds the stuff starts to fall, so you fix the shape again and again until the stuff starts to dry (10 minutes or so). When it begins to dry, you wet your fingers and smooth the surface. That’s it guys, if you want to get a good shape, you have to get your hands really dirty at this stage. When the stuff was throughly dry, I straightened up the shape again using a knife (image 6.)
When it was completely dry, I realized I had been unable to create a really very straight surface at the bottom of the boat where the keel will lie. So I applied a thin plastic sheet the size of the future keel on those not so perfect angles and glued it on the plastic parts. I then proceeded to apply a second coat and then I had my almost perfect form (image 7) Then what to use to do the planking itself? I first thought of balsa or another kind of flexible wood, but unless I were about to use some techniques I don’t master, I would have been unable to hold the shape when I would be about to take the form out.
So I set up once again for Magic Sculp.
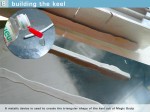
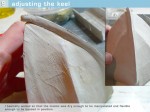
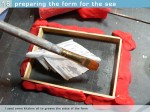
I greased a glass surface (ideal for its smoothmess) with kitchen oil and rolled a lump of mastic. I then made the keel while pressing the mastic with a square metal sheet until I got a perfectly triangular shape. Then I waited for the MS to be dry enough to be manipulated without taking the risk of destroying its shape –but still bendable enough so that it would be take the curved shape while I would press it against the plaster form.(image 8 and 9)
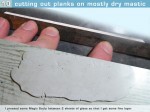
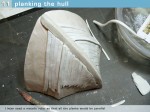
I followed the same technique to make the individual planks : a fine layer of Magic Sculp that i flattened between two sheets of greesed glass. Once the MS was dry enough, I took a ruler and cut out some planks that I pressed against the plaster form.(image 12 and 13) Note that a thicker lump was applied at the middle of the shape as it was needed. Of course as the MS was greased, I had no trouble in unmoulding the whole shape –though individual planks tended to fall apart later.
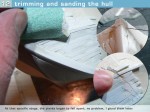
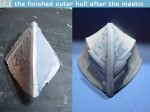
So well, here i had a pretty much dreadful result of course –though I tried with a small metal ruler to get the planking the straightest possible, some of the planks were of various thickness as the pictures show. So I had a hard time sanding the whole, and cutting the excesses with a small saw. (image 14) When I saw I couldn’t do any better, I applied huge layers of tamiya filler and sanded the whole so that only bits of planking would appear –and also to guarantee that I would indeed get a perfect shape (image 15.)
Once I was finished, I set up doing the inside of the boat. Once more the help of that excellent Conway book proved very valuable indeed. I found out that beneath the front of Elcoes you would normall find a small warehouse as well as sink and toilets. I am not very fond of toilet humor so I leave to somebody else the care of imagining some toilets hanging from a thread in the wreck. And I choose to model only the general inner structure of the boat knowing that anyway, nobody would notice anything as most of the parts would be hardly above half an inch from the water.
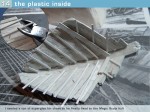
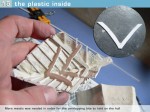
Using various length of evergreen, and helped form the pictures in my book I reproduced the rather intricate inner details. But then I had hard time to glue the plastic on my Magic Sculp planks (especially the V shaped shapes), In the end I just happened to have drown the whole in superglue, later using Tamiya filler as well as extra Magic Sculp to make the joints between overlapping bits of plastic to disappear. All in all a very messy job, but it’s funny how the fact that very few will be visible in the end tends to help getting such results (image 16, Image 17.)
Comments
Jean-Bernard,
My most sincere and generous compliments to you for again presenting a TOTALLY original, and expertly rendered, personally-unique diorama. You are really a shining light of talent and inspiration here.
The hobby advances because of people like YOU, sir!
AUG 07, 2009 - 02:18 PM
hey Alan thanks for your comments as always
I am back for good this time and fortunately my red legs turned brown enough, I would like to be an honorary Brit honestly, if only because you can't find Cumberland Sausages, Bodington lager and decent fish and chips in France
Karl thanks a lot -yet I don't know if this hobby really wants to be advancing as a whole, oh well no matter I am here to stay
Thanks for the kind words guys, I have to outstretch myself to find anything clever to somewhat express that I really am very pleased with your comments
AUG 15, 2009 - 02:14 AM
My friend, I think you should create a new medal, you do not ride alone and give wonderful color but will also provide jobs to your feelings
This is much much more difficult than any technique, which is complicated by
Domi
AUG 15, 2009 - 10:20 AM
Hey Bobby, there is one thing I didn't told in the SBS, it's that I didn't know how to paint the Asian kid properly, so the same day I had to paint it coming back in the tube there was that probably Philippino guy standing near me, and i fear he found me a bit queer
Domi, Always an honour coming from such a creative diorama maker like you
AUG 28, 2009 - 10:30 PM
Hello Jean Bernard,
What a great piece you did. Absolutely outstanding, and so is your story of the process. I totally agree with your thoughts about the modelling scene and especially about competitions.
I wish to be as talented as you to realize all my ideas. But anway, seeing your stunning work encourages me to follw my way. Thank you for that, and thank you you for sharing your standpoints and ideas about modelling. You give great power to these "outlaws".
Your diorama is again as all the others i know from you a masterpiece. I cant stop whatching the pics and i truly hope i will see it once in nature. I bet the impression is much deeper as from the pics.
Maybe that your figure is not perfect what ever that means (I don´t tnink so) but you sculpted it your own. And for me the motion and balance is perfect.
By the way my "Adler" is pretty close to be finshed i hope you will like it.
Many thanks for all
Peter
AUG 29, 2009 - 12:55 PM
That must be an ethnic weakness, but most of the time I find it very hard to do that
Now Peter those are pretty nice things you said, and about my small dio too. You know there are all those posts in forums that say "oh yeah, we model for fun", it's true for a lot of the guys, but for some it simply is not. I mean, they spend the day at their office doing things others tell them to do, and then when they come back home and get into their hobby, they follow the same kind of rules in the hope of earning a golden medal.. oh well, that's none of my business anyway, but it's true I won't be attending one of those shows before a long time.
There are great pictures of the SMS Adler with the front destroyed by a collision I think, now that would be a pretty nice thing to model Good luck with that model of yours, and I hope your originality will be rewarding, commercially too!
AUG 30, 2009 - 10:51 PM
Copyright ©2021 by Jean-Bernard André. Images and/or videos also by copyright holder unless otherwise noted. The views and opinions expressed herein are solely the views and opinions of the authors and/or contributors to this Web site and do not necessarily represent the views and/or opinions of Armorama, KitMaker Network, or Silver Star Enterrpises. All rights reserved. Originally published on: 2009-07-26 00:00:00. Unique Reads: 29248


