

1⁄35Carro Armato L6/40
5
Comments
Hull interior
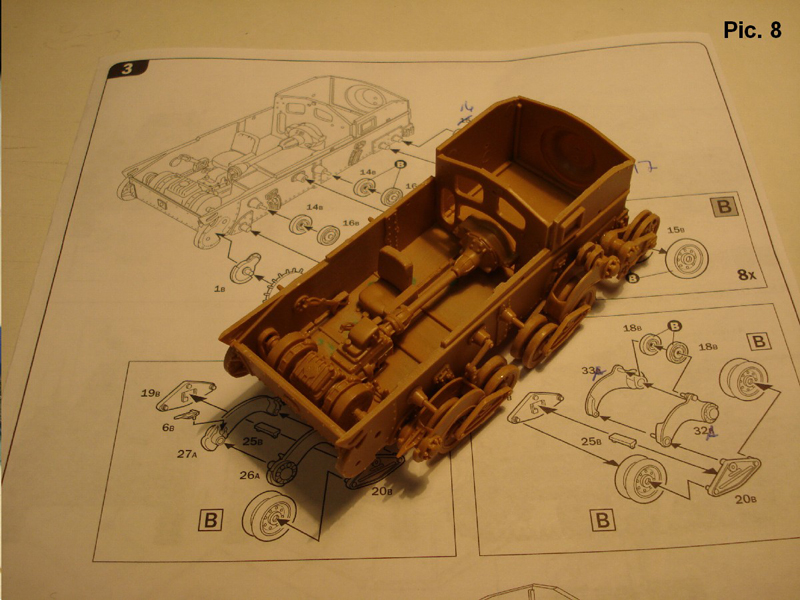
The interior went together without any problems (Pic. 8). It is not very complete but it was enough for me as not much of it can be seen through the hatches in the end. For those wanting to go all the way there is an interior set available (No. 4056) by Model Victoria.
Upper Hull
Construction of the upper hull started with fitting the engine deck. This part was warped (Pic. 9) but this was easily fixed by taping the part while the glue cures.
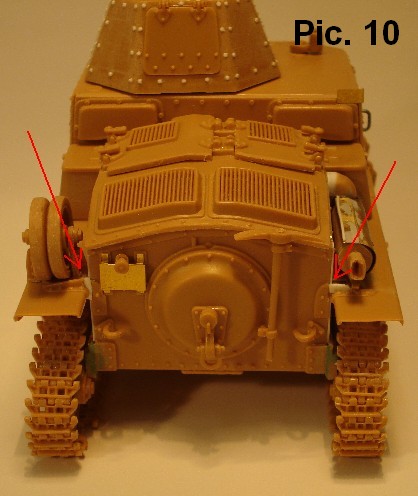
The track guards went together well; take care when fitting the jack to get it in the right direction as the locating holes are molded wrong. Fitting the guards to the hull was another matter though. The attachments on the back leave some substantial gaps which can either be filled or the replaced altogether (Pic. 10).
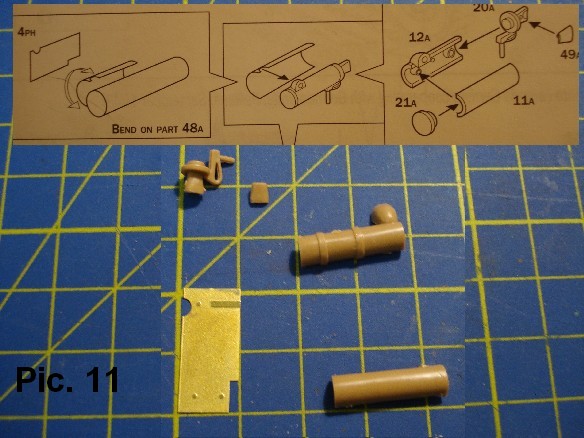
The muffler also went together well with the photoetch shield being bent on a piece of plastic especially provided for this task. Heating the part over a flame before bending helped to keep it in the correct state (Pics. 11 & 12).
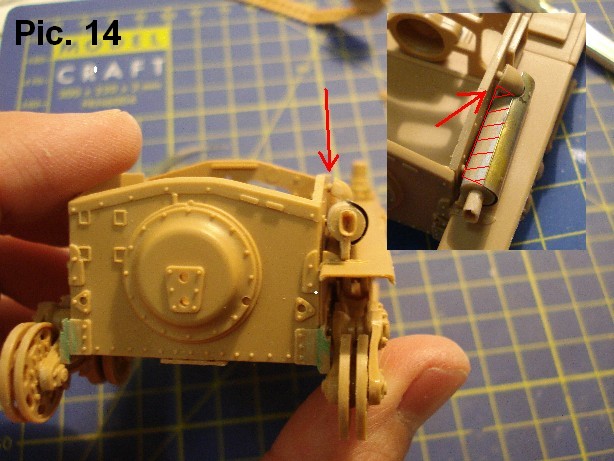
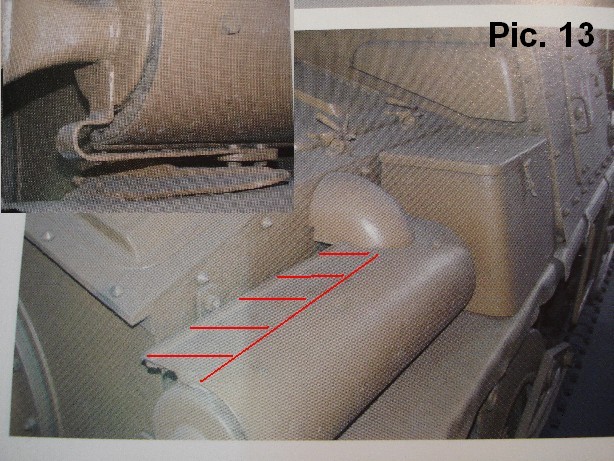
When comparing the muffler to original pictures (Pic. 13, taken out of the reference booklet provided with the kit, modified by the author) I noticed the shield was too small and this was not due to a mistake on my part. Instead of covering the whole muffler on top and extending almost to the hull, it only extends midway to the muffler. In addition, the attachment point of the muffler to the hull leaves a large gap and then the muffler is fitted at the wrong angle (Pic. 14).
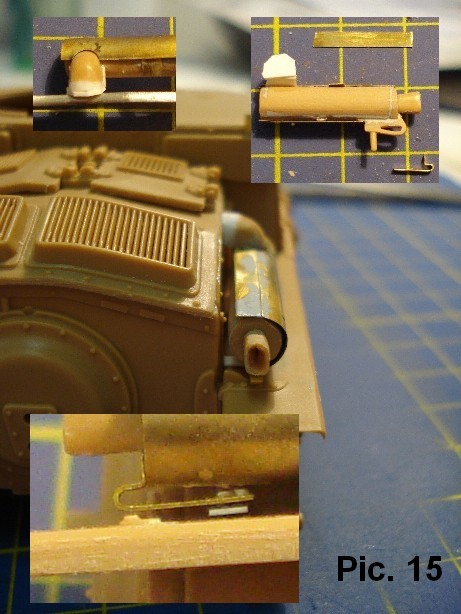
The first problem was solved by adding a piece of left over PE and a lip at its end from plastic card. For the second problem I added some leftover plastic material and sanded it to shape. While I was at it, I removed the molded on attachment point to the track guard and replaced it with PE, two screws and a piece of plastic card as attachment to the track guard (Pic. 15).
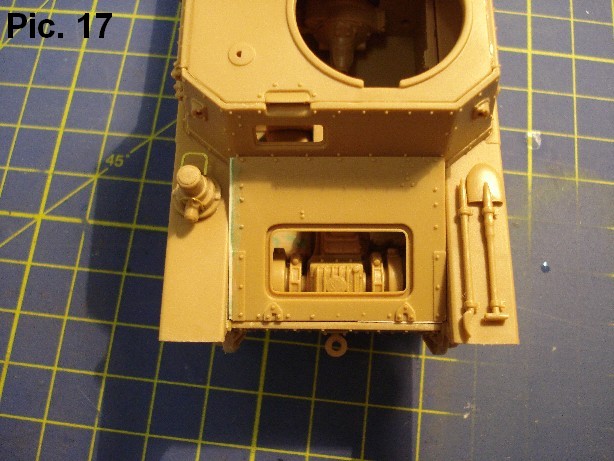
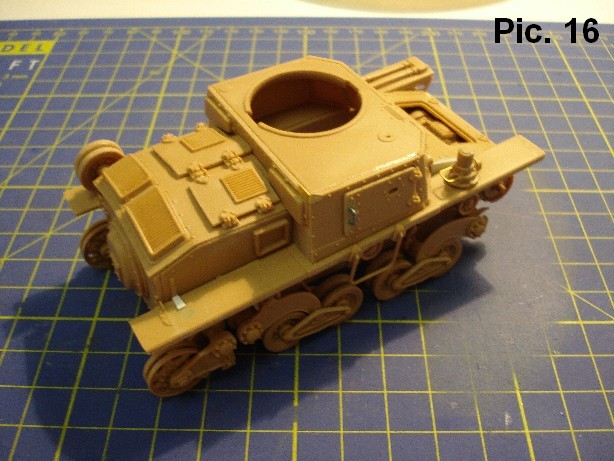
The upper hull consists of 5 parts and goes together without any problems (Pic. 16). The front glacis has some gaps on the front and left side that had to be filled with plastic card (Pic. 17). It is possible that these are due to my not being careful enough when building the hull in the first place, but Ive had feedback of other modelers with the same problem. The rest of the smaller details were problem free.

About the Author


FROM: ZURICH, SWITZERLAND
I'll build just about anything military related that gets my interest, though most of it is 1/35 scale WWII Allied.
Comments

Hi Stefan,
Very useful article and a good job on the kit.
Many thanks
Al
AUG 06, 2010 - 06:44 AM
Stefan, very well done feature on this interestng vehicle. Articles that feature observations and potential pitfalls of a kit are always more than helpfull.
Cheers,
Jan
AUG 06, 2010 - 11:41 AM

Glad you like it guys.
Hey Jan, this would be a good opportunity to change over to 1/35 scale, it's almost braille scale in size.
Cheers!
Stefan
AUG 07, 2010 - 09:30 AM
Stefan, please! Where would be the challenge in dropping back to a scale that is equivalent to a walker or training wheels on a tricycle. If anything, I am dying to try 1/144 detailed figure painting.
Cheers,
Micro tread_geek
AUG 07, 2010 - 11:52 AM
Copyright ©2021 by Stefan Halter. Images and/or videos also by copyright holder unless otherwise noted. The views and opinions expressed herein are solely the views and opinions of the authors and/or contributors to this Web site and do not necessarily represent the views and/or opinions of Armorama, KitMaker Network, or Silver Star Enterrpises. All rights reserved. Originally published on: 2010-08-06 00:00:00. Unique Reads: 21136

WEB HOSTING BY


Copyright ©2021 Armorama and Kitmaker Network, a subsidiary of Silver Star Enterprises
All Rights Reserved. Please read our Conditions of Use and Privacy Policy.
All Rights Reserved. Please read our Conditions of Use and Privacy Policy.