

1⁄35Super-tree or Super-nuts ?
16
Comments
Well, if the infomercial was right, hanging upside-down is good for you. So,
I hung Mr. Tree by his heels (Picture H) so I could apply an elastomeric
coating to all the exposed copper. Its easier to apply this thick, goopy
stuff to every branch, tree and individual wire than youd think. Just
play the Rolling Stones loud and continuously, while you repeat the phrase,
I am doing this because I choose to. I am doing this
Why
elastomeric? I figured that between my own fingers that have individual brains
and go their own way, just like a cats tail, to inquisitive fingers of
others, it is better to bend than break. I flipped it right side up to cover
what I missed. Imagine the fun YOU would have at this point using your fingernails
to remove the elastomeric coating from the end of every single wire, as I did
to leave the copper exposed and to try to keep in scale.
Picture I is what wood, epoxy, wire, solder, plaster and elastomeric coatings look like after they collide. Picture J is a close-up showing the various materials coming together. Black marks are for locating places where additional support, more wires, and such are needed.
I used two-part epoxy putty (wood colored) for the bark (Picture K). The gray area was metal colored two-part epoxy that I used after I ran out of the other. This added the additional thrill of setting up in half the time of the wood-colored epoxy. So, with toothpicks, with their ends carved into random diamond-ish patterns for putting in the recesses in the bark, I worked like a Voodoo shaman on speed trying to get the various patterns poked into the epoxy while I had to blend the joints of the small patches I could work on at one time, all before set up time. Picture L shows some of the detail and the boles and the places where the tree heels itself when it loses a branch, prior to painting.
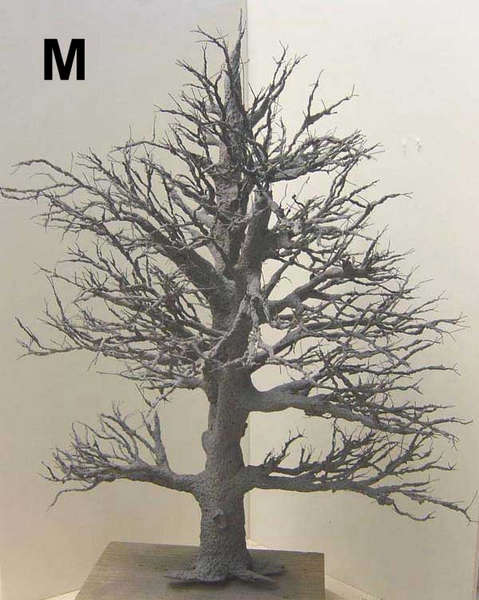
Picture M is the tree base-coated with good ol gray primer. I have to remember in the future that airbrushing a tree (or anything else) in front of a paint booth because it doesnt fit inside and forgetting to cover up your cabinets will give formerly white cabinets a new look!
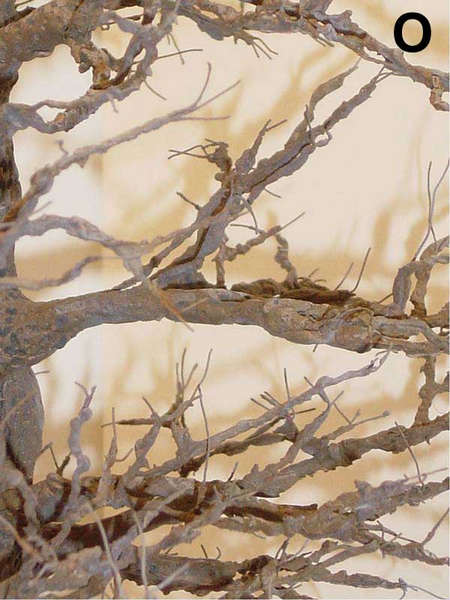
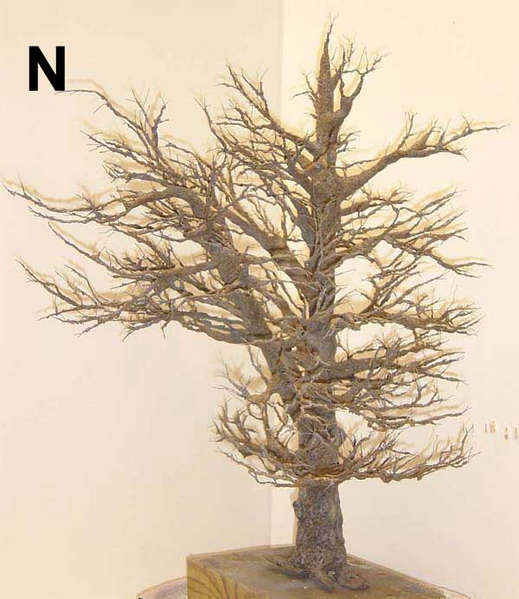
Real paint. Washes. Highlights and more highlights are shown in Picture N. Lowlights include realizing what is going to happen to all this paintwork after I have to air-brush the leaves AFTER they are on the tree, because I never could figure out how to get the leaves painted before getting them on the tree. Picture O gets closer to the wire ends that attract finger and faces better than the kite-eating tree in Peanuts. I had to bend and re-bend the branches umpteen times either to get the right look, or, more commonly, because I bumped them doing something else.
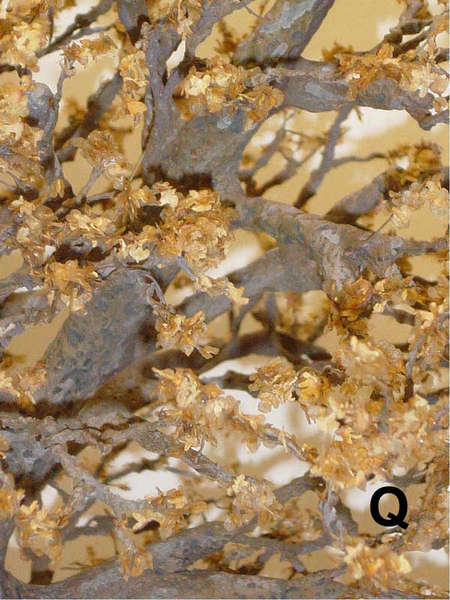
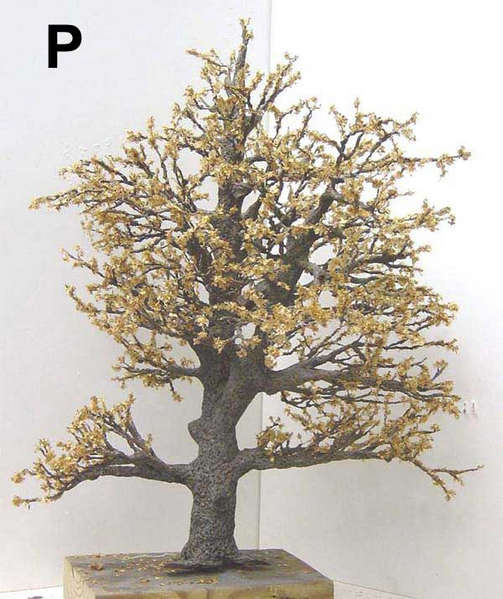
Picture P looks like autumn, because the tree is full of brown leaves stuck on with Woodland Scenics Hobby-Tac. I wish I were modeling autumn, so I could stop here. But, even though I wasnt going for the full-monty of authenticity to the movie, it was summertime. The leaves are silver birch catkin seeds. I learned, after more than 20 telephone calls, that apparently no park, arboretum or conservatory in the U.S. has any silver birch catkin trees. But, having a son who lives in the Czech Republic and who likes to hike is the next best thing. Thanks, son, for your two days of efforts for Dad! Was it worth the trouble? Look at Picture Q. The catkin leaves are perfect! No darn shredded HO railroad foam or parsley, sage, rosemary and thyme for this tree! Now, what do I do with a drawer full of chopped spices in my playroom that I bought in case thats what I had to use for this tree? I wear a respirator when I model!
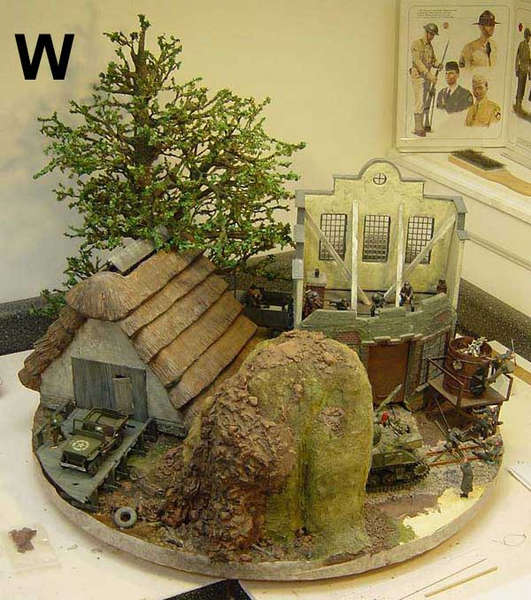
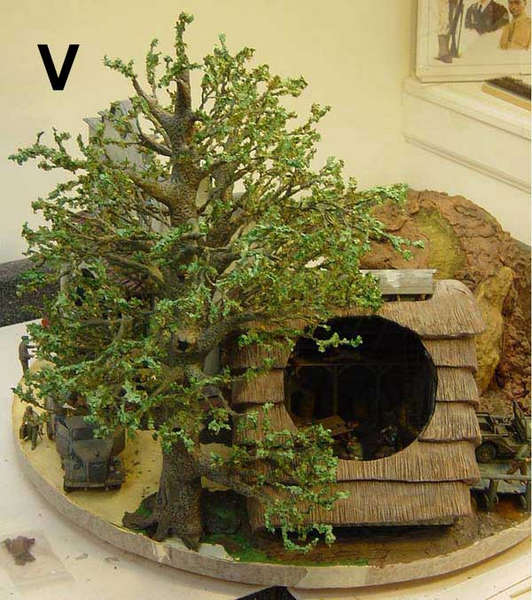
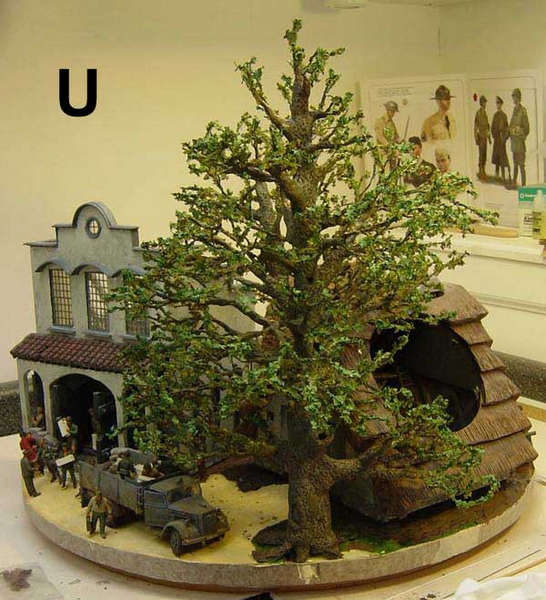
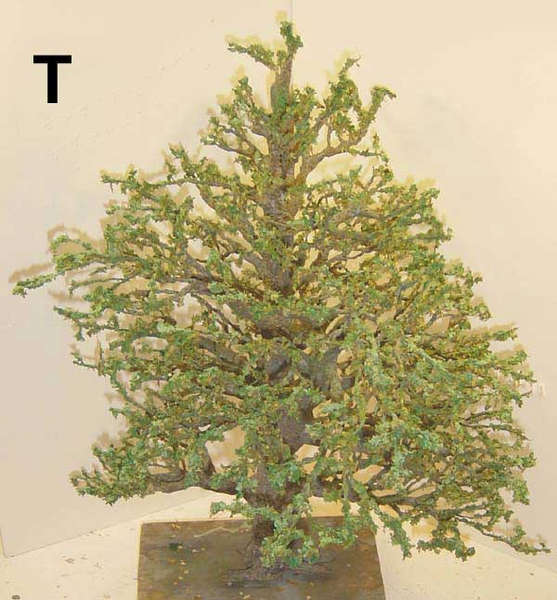
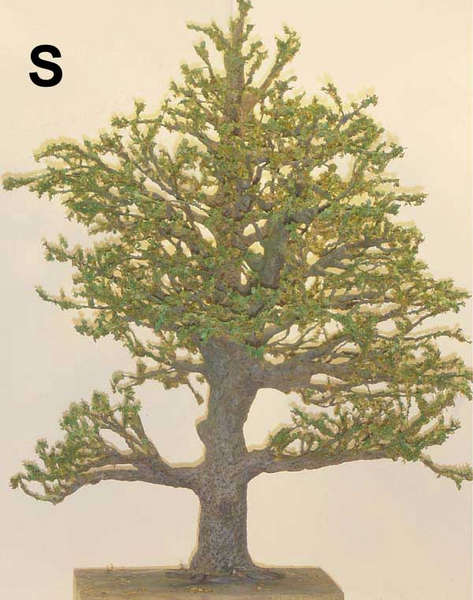
R we ready for the finale? Pictures R, S and T are three views of the tree, after repainting all the green over-spray. Picture U is a front view showing how the tree blocks Scene Two (the railroad yard with Oddball coming out of the railroad tunnel). Picture V shows how the tree blocks Scene Three (loading the gold from the bank), while it doesnt block the cutout in the thatched-roof of the barn from Scene One. Finally, Picture W shows the back of the tree with some of Scene Two showing and the backs of Scenes One and Two. Please note that the tri is far from finished. I have to detail over forty figures, add posters, trash, railroad yard debris, a waterfall and water drip from the hill and huge amounts or grass, weeds, bushes, smaller trees, etc. Then the pastels.
Picture I is what wood, epoxy, wire, solder, plaster and elastomeric coatings look like after they collide. Picture J is a close-up showing the various materials coming together. Black marks are for locating places where additional support, more wires, and such are needed.
I used two-part epoxy putty (wood colored) for the bark (Picture K). The gray area was metal colored two-part epoxy that I used after I ran out of the other. This added the additional thrill of setting up in half the time of the wood-colored epoxy. So, with toothpicks, with their ends carved into random diamond-ish patterns for putting in the recesses in the bark, I worked like a Voodoo shaman on speed trying to get the various patterns poked into the epoxy while I had to blend the joints of the small patches I could work on at one time, all before set up time. Picture L shows some of the detail and the boles and the places where the tree heels itself when it loses a branch, prior to painting.
Picture M is the tree base-coated with good ol gray primer. I have to remember in the future that airbrushing a tree (or anything else) in front of a paint booth because it doesnt fit inside and forgetting to cover up your cabinets will give formerly white cabinets a new look!
Real paint. Washes. Highlights and more highlights are shown in Picture N. Lowlights include realizing what is going to happen to all this paintwork after I have to air-brush the leaves AFTER they are on the tree, because I never could figure out how to get the leaves painted before getting them on the tree. Picture O gets closer to the wire ends that attract finger and faces better than the kite-eating tree in Peanuts. I had to bend and re-bend the branches umpteen times either to get the right look, or, more commonly, because I bumped them doing something else.
Picture P looks like autumn, because the tree is full of brown leaves stuck on with Woodland Scenics Hobby-Tac. I wish I were modeling autumn, so I could stop here. But, even though I wasnt going for the full-monty of authenticity to the movie, it was summertime. The leaves are silver birch catkin seeds. I learned, after more than 20 telephone calls, that apparently no park, arboretum or conservatory in the U.S. has any silver birch catkin trees. But, having a son who lives in the Czech Republic and who likes to hike is the next best thing. Thanks, son, for your two days of efforts for Dad! Was it worth the trouble? Look at Picture Q. The catkin leaves are perfect! No darn shredded HO railroad foam or parsley, sage, rosemary and thyme for this tree! Now, what do I do with a drawer full of chopped spices in my playroom that I bought in case thats what I had to use for this tree? I wear a respirator when I model!
The Finale
R we ready for the finale? Pictures R, S and T are three views of the tree, after repainting all the green over-spray. Picture U is a front view showing how the tree blocks Scene Two (the railroad yard with Oddball coming out of the railroad tunnel). Picture V shows how the tree blocks Scene Three (loading the gold from the bank), while it doesnt block the cutout in the thatched-roof of the barn from Scene One. Finally, Picture W shows the back of the tree with some of Scene Two showing and the backs of Scenes One and Two. Please note that the tri is far from finished. I have to detail over forty figures, add posters, trash, railroad yard debris, a waterfall and water drip from the hill and huge amounts or grass, weeds, bushes, smaller trees, etc. Then the pastels.
Other than the fact that the tree took so long to do, I ran out of time to finish the tri for our Regional IPMS show May 7-9, I was satisfied with the results. Oh, well, theres always next year, or, maybe if we get to host the Nationals in 06. Thanks for reading this. Your comments are welcome, good or bad.
Jeff Winkel
Sealhead

About the Author


FROM: KANSAS, UNITED STATES
I am a middle-age newbie that bit off more than I can chew by working on my second diorama. It is a TRIORAMA or, in other words, three scenes from the movie Kelly's Heroes (on a turntable). I've been ten years on it. Putting it down, restarting, changing things as my knowledge and skills improve...
Comments

That's what I like about our hobby. We can do what we want. Some dioramas are designed to be viewed in the round and some are like bas-relief, and some shouldn't be viewed from the back (some shouldn't be viewed from the front) and some are in shadow boxes.
The nightmare I started just got in my head, the three scenes, and 11 years later, I'm still putzing with it.
Sealhead
JUN 25, 2004 - 08:30 AM

Jeff,
Your diorama and tree look great. Thanks for the tree tutorial too. I was hoping I could squeeze one more bit of information from you.
The building in your diorama, is it a kit or built from scatch? If it is a kit can you give me some contact info of it's source.
Thanks,
Scott.
JUN 28, 2004 - 06:11 AM
Dear Scott,
The farmhouse was scratchbuilt. The roof was a nightmare of trial and error. The bank building (in front) and the railroad roundhouse (in back) of the same building was scratchbuilt. The water tower was scratchbuilt, but will be redone. The accessories in the farmhouse like milk cans, etc. was scratch. The figures were a combination of figure kits, swapping body parts like heads and hands, and repositioning them to have the pose I wanted. The railroad track was scratch.
The tree, as you know, was scratch, and all the weeds, grass, bushes, trees, etc. to come will be scratch.
Sealhead
JUN 28, 2004 - 08:53 AM

Dear Jeff,
If you don't mind my saying so, yes, super nuts is what you are (no offense meant). And that's what makes the thing (and the guy who created the thing) so great. You were nuts enough to begin the project, but you finished it. You didn't quit. You are an inspiration to all of us who fiddle with parts smaller than the average eye can see and create something out of virtually nothing. Thanks for the feature -- if the idea of the triorama, on its own, deserves a Best of Show, what more the tree?
Admiringly,
Andrew Oliveros
JUN 28, 2004 - 07:22 PM
Dear Andrew,
Very kind of you Andrew (I think). But, I'll feel better when I finish the darn thing. My target is when we host the Nationals in 2006, but even that is a push with everything else on my plate.
I don't mind being called "nuts". I've had professionals tell me that. I have been told my persistence makes up for my lack of ability. There you go.
Also, it is cool that 2500 people decided to peek at this project and better yet to put a little something back into Armorama.com because it has done so much for me.
Sealhead :-)
JUN 28, 2004 - 11:40 PM
I know how it is...but, way its been for me, you're never really done with any project -- every dio (or trio) or figgy or tank or plane or ship takes on a life of its own, wanting something extra to make it "just right", even if it's darn near perfect already.
Anyway, those who say your "persistence makes up for lack of ability" must be blind or envious. I know creativity when I see it. You have the gift, man. Don't let anyone tell you differently.
Great work. Here's to even greater work ahead.
JUN 29, 2004 - 04:05 PM

Wowzers, what a TREE!!!!
I dont do military scale dioramas, but 1:10 scale for model horses, or just my own scale for my animal sculptures. I have been wanting to do a nice tree for a while, and just happened upon this one while browsing. Nice work!!
AUG 23, 2004 - 08:24 PM

well i have been reading this post so many times before and also printed and checked it at home.
I dont know why i didnt post before ...maybe i was looking , just thinkin how carried away u can be with modelling doing a 3 scene dio for 11 years !!!!!!!!
What to say the text is so detailed and well describing and Jeff is so honest in telling all flaws and mistakes that happened to him . The result is superb and so its that tree. What else can i say ....
Costas
DEC 07, 2004 - 11:50 PM
UPDATE FROM SEALHEAD 12/8/04
I thought the tree was a bit skimpy. So, I am back at it. Here's a new tip. When you want to add additional copper wire to get a bushier armature, get a length twice as long as you want to add and join it to the existing "branch" at the middle of the new wire.
Then after a few twists, you can double back the bottom half of the new wire to make even more branches and twigs. Half the work and twice the twigs.
Sealhead
DEC 08, 2004 - 01:49 AM
Copyright ©2021 by Jeff Winkel. Images and/or videos also by copyright holder unless otherwise noted. The views and opinions expressed herein are solely the views and opinions of the authors and/or contributors to this Web site and do not necessarily represent the views and/or opinions of Armorama, KitMaker Network, or Silver Star Enterrpises. All rights reserved. Originally published on: 2004-06-20 00:00:00. Unique Reads: 36493

WEB HOSTING BY


Copyright ©2021 Armorama and Kitmaker Network, a subsidiary of Silver Star Enterprises
All Rights Reserved. Please read our Conditions of Use and Privacy Policy.
All Rights Reserved. Please read our Conditions of Use and Privacy Policy.