

1⁄35Scratch Building Cobbles and Rubble
13
Comments

Editors Introduction...
Having been a part of this community for so long and having read so many threads about dioramas. Cobbles and Rubble are very popular topics. There are lots of ways to make cobbles, lentils, AM products, or scratch. Rubble - it raises questions about quantity, quality, positioning, techniques... you name it and it's been discussed. Marty has put together a great quick detailed feature that really shows a number of things when it comes to both of these subjects. On top of his great scratch built cobble stone street he accentuates the sewer and sidewalk with great rubble.Cobbles and rubble
There are several after-market products currently available for anyone who needs to create street sections including cobblestone and sidewalk. I considered purchasing something like that but then realized that I could probably reproduce it quite well for a fraction of the cost. The Benefit of making my own cobblestone section is that I can make it any size and shape I want.Here is how I did it:
- I started by rolling out two 1/4 inch thick and more or less even sized squares of Plastalina. Plastalina is a non-hardening modeling clay and it is very easy to work with.
- Then I cut out two identical circles out of those rolled out squares. These circles are a bit smaller than the wooden plaque this base is going to sit on.
- Next I cut off a generous portion of one of the circles (about 1/3) and then stacked both circles one on top of the other with the full one on the bottom. (image 1)
- Then I surrounded the entire mold with a wide strip of styrene and poured plaster into it.
- I let it sit for a couple of hours and while still relatively wet I took it out of the mold and turned it upside down. I now had the basic shape of my street section. The area where the section of a circle was cut off was now the raised section, the sidewalk.
- Using a straight edge and a small steel nail held inside a hand vice I started scribing the lines on the sidewalk. I made curb stone lines first and then the squares representing concrete tiles. (image 2)
- Then by hand I scribed all the individual stones. None of the stones are identical and that was the desired effect.
- Once this was done I let the base dry for about 24 hours and then painted it in various shades of gray, brown and beige.
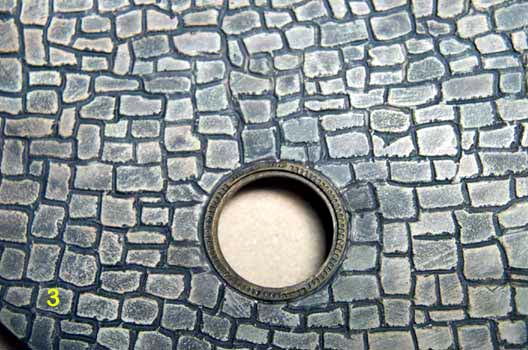
- After the paint had dried (another 24 hours) I gave it several brown and gray washes. (end result can be seen in image 3)
Progress and testing ...
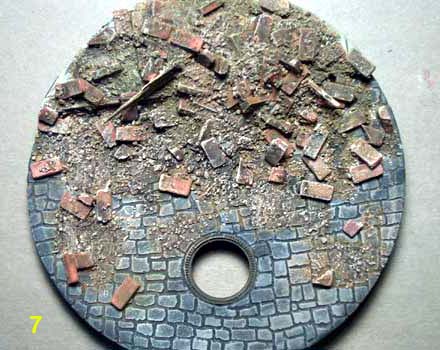
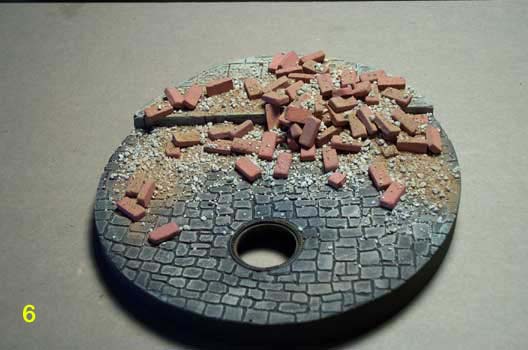
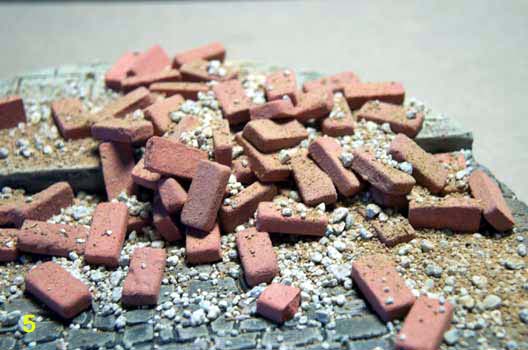
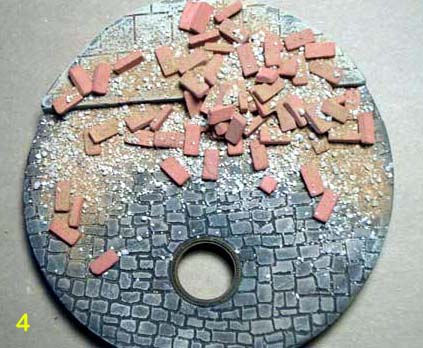
Place a bunch of the rubble down so it looks strewn around, images 4, 5 and 6. Test different positions, and quantities, and mixes. For now nothing has been glued to the base as this is just a test. The remaining pictures show the base with rubble permanently secured to it. Everything has been weathered and is just about ready to receive a figure and a few accessories.Rubble
Making rubble was a lot of fun and here are the steps:- I started by sprinkling some bricks, cat litter and dirt on the base without gluing them into place. This was a visual test. I needed to do it to get the basic idea of how I wanted it all laid out (images 4, 5 and 6).
- Then after clearing the base of all the debris I applied a generous amount of stucco filler (premixed substance used for patching stucco walls) forming a mound and immediately sprinkled bricks all over it pressing some into the paste. This was put aside for about an hour (until it was dry). Great thing about the stucco filler is that it has a nice rough texture.
- More bricks were glued to the base in random yet organized way.
- Next a generous amount of white glue and water (75 - 25 ratio) was applied with a brush to the entire mound and other areas on the base. Then entire base was covered with cat litter and finely sifted dirt.
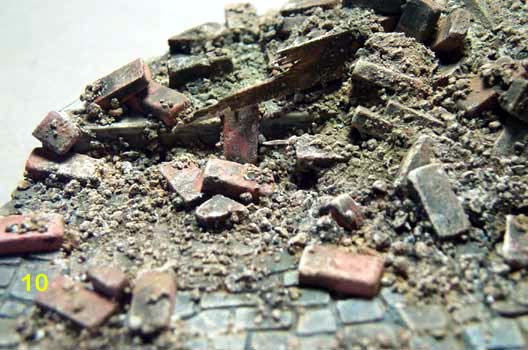
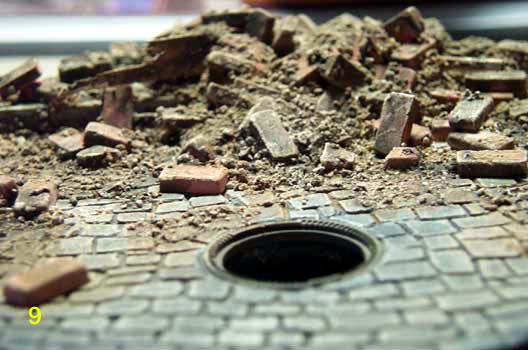
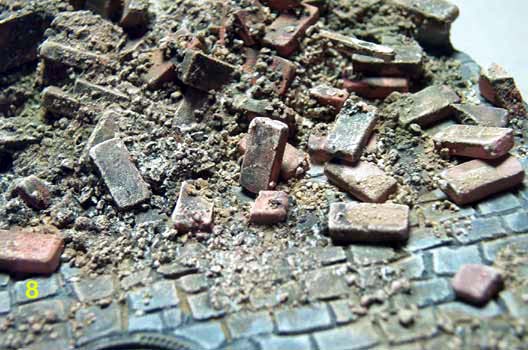
- Once dry the excess dirt and litter were shaken or blown off the base and the whole thing got washed using acrylic Raw Umber. Later I added another couple of dark washes and finally dry brushed it all with beige color. (images 8, 9 and 10)


About the Author


FROM: MASSACHUSETTS, UNITED STATES
I have been building models since I was about ten years old. My uncle, who a the time lived in Holland, introduced me to model-building by giving me some of his unbuilt kits. They were mostly Tamiya's German Armor and figures. I immediately caught the bug so to speak. Like many others, I put my ...
Comments

Marty, very good idea I will be trying it one day. Where do you find plastina at? Kevin
JUL 20, 2004 - 04:06 PM


A very useful way to make the coble sones. Thanks for the article I usually scratchbuild the cobble stones on plaster, it's really a dusty work. I think your method is more clean
JUL 20, 2004 - 06:11 PM

A very useful article for both novice and experienced users. Thanks for sharing this Marty !
JUL 20, 2004 - 06:29 PM


Thanks guys for your comments. I am glad you find my technique useful. As far as the Plastalina goes, I got mine at A.C. Moore arts and crafts store but any good quality art supply store should have it. Besides, like Matt said, any non hardening clay should do. I like Plastalina because it doesn't leave any residue on the plaster.
I am posting a photo of this base with a figure on it.

JUL 20, 2004 - 09:03 PM

Another great article Marty! An alternative to the Plastina modeling clay is a brand called KleanKlay. While I have never used it, a very talented modeler in the local club highly recommends it for using in molds for plaster.
Keith
JUL 20, 2004 - 10:33 PM


Great tip. For sure I´ll give a try to it in my next dio.
Have the same question than Scott about the bricks.
JUL 20, 2004 - 11:27 PM
Bricks are made of colored Plaster of Paris. When I make those I usually add powdered acrylic paint pigments to the plaster. That way when I cast the bricks they come out already colored.
JUL 20, 2004 - 11:32 PM
Copyright ©2021 by Martin Wasiak. Images and/or videos also by copyright holder unless otherwise noted. The views and opinions expressed herein are solely the views and opinions of the authors and/or contributors to this Web site and do not necessarily represent the views and/or opinions of Armorama, KitMaker Network, or Silver Star Enterrpises. All rights reserved. Originally published on: 2004-07-20 00:00:00. Unique Reads: 17293

WEB HOSTING BY


Copyright ©2021 Armorama and Kitmaker Network, a subsidiary of Silver Star Enterprises
All Rights Reserved. Please read our Conditions of Use and Privacy Policy.
All Rights Reserved. Please read our Conditions of Use and Privacy Policy.