1⁄35Scratchbuilding armored locomotive BR 93
4
Comments

I got interested in the armored trains of WW II after seeing all the kits available, especially from Dragon/DML. There are boxcars, flatcars, panhards and others. Ironsides has some resin kits as well. I began building the railcars that were out there. I have an artilleriewagen, kommandowagen, infanteriewagen, and more. Then came the K5 Leopold from Trumpeter that I absolutely had to have. (I haven't started it yet) Finally, I realized that I needed a locomotive to 'move this train', but when I looked around, the only locos I found were very expensive resin kits, or braille scale, neither of which were any help. I found the magazine published in France "Fanatics Dioramas". It had an article with photos and a few drawings. I got it from Squadron, and it was exactly what I was searching for. I got all the material together and started the project...
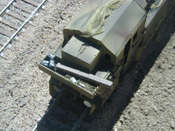
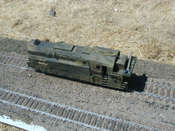
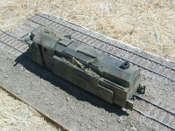
This is a BR93 armored locomotive. It was inspired by a French magazine called "Fanatics Dioramas". The model was entirely scratchbuilt. I used plastic card from Evergreen, Plastruct, and other items such as balsa wood, wire, solder, Eduard photo-etched tread plate, and hundreds of straight pins for the rivets. It is finally complete. I added a few details, and a bit of weathering. I placed it on a railway and trackbed that I built using Dragonís kit. I hope you enjoy seeing it as much as I enjoyed the build. I started with the front end of the locomotive, then cut strips for the sides. I used Testors glue. With no measurements in the magazine article, I used the Dragon track/railbed kit and the railcars for size references.

Progress was slow. I added a tool box to the rear, made of balsa wood

Now came the details. Access panels and boxes, which needed hinges, handles, and locks. These were made with wire and small cutouts from plastic card.


Now came the toughest details. I looked around for an old locomotive from a model RR shop with no luck. I checked the internet, especially ebay, but nothing was suitable for the wheels. After thinking it over a while, I realized that they would be barely visible, so I scratchbuilt them also. I cut them from plastic card, and with some balsa wood and wire, positioned them under the loco.


The rivets were another difficult item. I tried punch and die, but since I needed hundreds of rivets, that method got old real fast. I tried the little polymer balls found in water filters. They were great for the hinges, but not for the body of the train. I pondered this for a while and then got a great idea. I bought a few boxes of steel straight pins, and using a wire cutter, cut the heads off the pins. I used a pin vise, and drilled holes along the body. A drop of CA glue in each hole, and insert the pin head. Beautiful rivets were the result!
Now for the painting.....I started with a coat of flat black primer, to keep the overall tones dark, and to help with shadowing. Then I mixed some Tamiya dark yellow with a bit of gray and black to get a color I was happy with. I airbrushed two coats of the base color, and then added some dark green and red/brown for the finished 3 color camouflage.


I then airbrushed some flat black in various places to represent coal dust and soot. I also used some black and earth tone pastels to finish some light weathering.
Finally, I attached some camouflage netting in various places, put a few tools and items in the tool box on the rear, and there it is at last! I cannot remember enjoying a build as much, and the satisfaction of doing it from scratch increased the challenge. I know itís not perfect, there are some imperfections and blemishes, but I learned a lot and had fun doing it.
Comments
Very good article. I enjoyed the progress photos during the build and enjoyed the article. Thanks
JUL 20, 2004 - 10:09 PM
Excellent article to go with that excellent model!
I also wondered how you did the drive wheels, since you couldn't see 'em. Good cheat!
I would love to see a photo taken at eye level to the model.
Cuhail
JUL 21, 2004 - 10:17 AM
an excellent article about an excellent piece of scratch building. Well done mate
JUL 21, 2004 - 12:28 PM
It's a lovely article on a fascinating subject. However, sometime in the past 8 years, the last 10 pictures have vanished, replaced by those disappointing red "X"s we all know and dread. Possibly the images have been moved to another folder, and may still be recovered. I look forward to seeing them!
FEB 09, 2012 - 09:13 AM
Copyright ©2021 by Robert Bianca. Images and/or videos also by copyright holder unless otherwise noted. The views and opinions expressed herein are solely the views and opinions of the authors and/or contributors to this Web site and do not necessarily represent the views and/or opinions of Armorama, KitMaker Network, or Silver Star Enterrpises. All rights reserved. Originally published on: 2004-07-21 00:00:00. Unique Reads: 14786


