

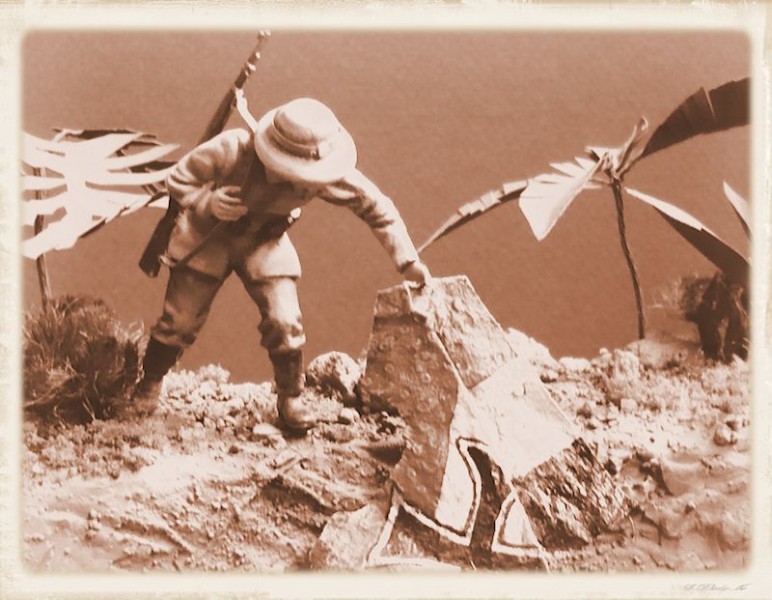
1⁄32The Rufiji Delta Incident, May 1915
3
Comments
the base
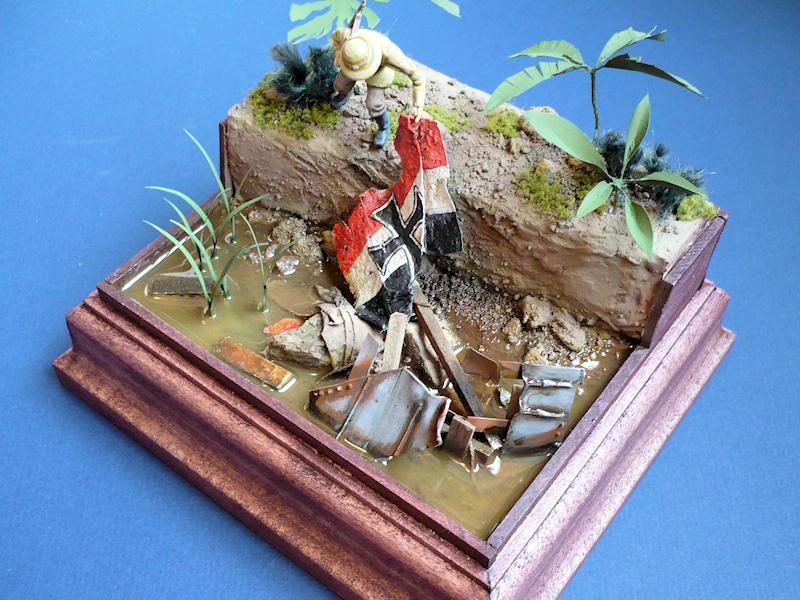
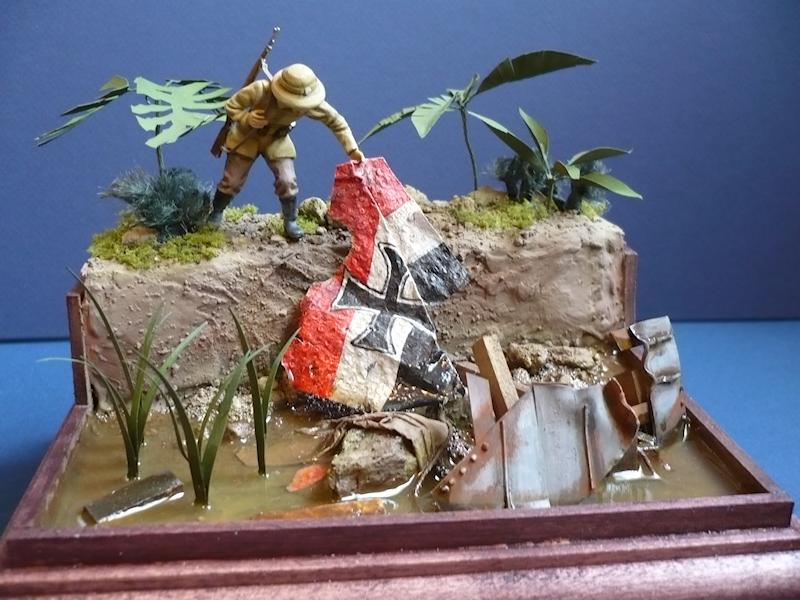
I needed a river bank, fetid muddy water, a few tropical plants and some debris to indicate the loss of the ship. I also had to produce a 1916 German Imperial naval ensign for our intrepid Schutztruppe to drag from its watery grave. I created the base with a piece of expanded poly foam, enclosed on four sides with a decorative moulding cut and mitred to fit exactly. I knew I would be pouring epoxy resin and so this base needed to have no holes or possible leaks. I trimmed the raised edges with balsa wood, then cut the river bank from poly foam, building this up at the rear. I covered the entire base with Polyfilla spackle, added small stones and grit and once dry, coated everything in dilute PVA adhesive to seal it and make it water tight. As added insurance I placed small pieces of glue-soaked paper towel around all the edges of the river area, ensuring a waterproof seal. Once this ground work had set, I masked off the edges and airbrushed the river bank with Tamiya Red Brown, followed by an overspray (at an oblique angle) of Desert Yellow, followed by Dark Yellow and finally Buff. I left the river bed in Red Brown, which I washed over several times with Sepia oil paint.GROUNDWORK and PLANTS
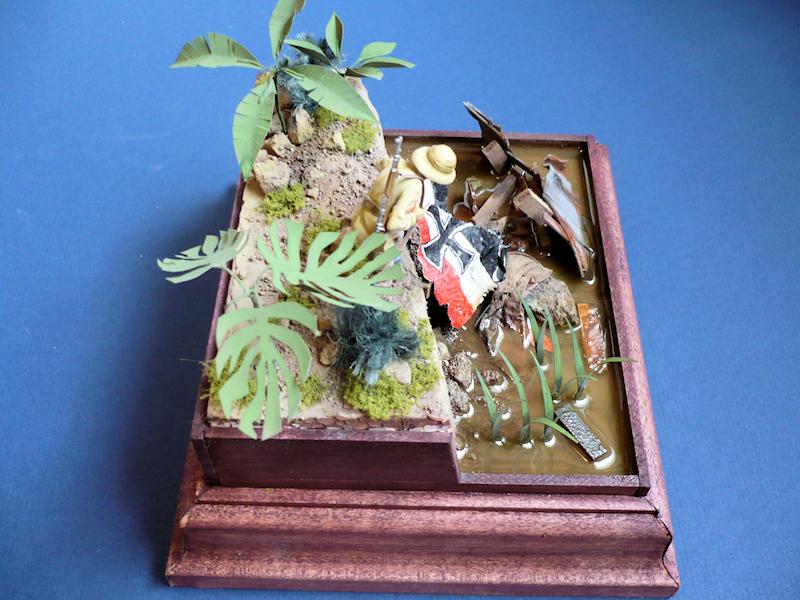
From internet pictures and photographs, I hand drew the leaf shapes for the small palms, reeds and the Philidendron on paper. I then cut these out with a scalpel and soaked them with liquid plastic. The liquid plastic is a solution made from off cuts of plastic sprue dissolved in ether and / or chloroform. Be careful, dont inhale the vapours! Once dry, the leaves can be formed into realistic shapes. The stalks were made from picture-framing wire, unravelled at the ends and glued to the leaves with cyanoacrylate adhesive. Once these had dried off, I primed everything, including plants and figure with Tamiya Fine Surface Primer. The plants were airbrushed with Tamiya NATO Green and then brush painted with oils. I drilled the base and inserted the plants stalks and stems to a suitable depth. I used Woodland Scenics ground cover and teased out garden twine to add extra greenery to the river bank.THE FLAG
This was quite difficult. I have traditionally made flags from tissue paper, soaked in PVA adhesive. I wanted this flag to look beaten and water-logged. I chose a piece of paper towel, which had small dimples in it. This would give it some texture and hold the oil paint when I shaded it. I soaked the piece in diluted PVA glue and waited around 5-10 minutes for it to start to stiffen up. I then laid the flag in its final position and folded it in on itself accordingly. I left it to dry thoroughly in this position. Once set, I painted the design in waterproof acrylic inks, the type used for calligraphy. Once dry I shaded the design with oils, and then was ready to put everything together. The river bed debris was pieces of balsa, string and plastic card. The debris gives only a suggestion of the wreck of the ship. In reality, the ship was some way off shore, but it is likely that, during the later strip down of the remaining armaments, fragments may have been abandoned closer to shore.THE WATER
The diorama builders biggest challenge! I chose to use epoxy resin for this diorama. It sets slowly, does not attack paint finishes and does not generate any significant heat during setting. I bought a kit from the local art shop for around $14 that would make around 150ml of resin. I only needed around 30ml. A good way to begin is to fill the area you wish to embed with water, then pour this into a measuring vessel to see how much you need...mine was about 30ml. I mixed the epoxy resin with the hardener according to the kit instructions. I tinted the resin with oil paints, using very small amounts and proceeding slowly. I used Sepia and Yellow Ochre, and then a dash of White to make the water opaque. It looked great in the bowl. I poured small amounts in the two front corners first (the lowest and deepest area), and checked for any leaks. Hooray!...none! I then carefully poured in the rest of the resin, allowing it to achieve its natural level. The layer was around 5mm thick. I set the base on a marble window sill to set for 24 hours. One day later, the resin was rock hard! I am very happy with the result. The diorama encompassed around 50 hours of work, spread over about 2 months. Photo attribution: Bundesarchiv, Bild 105-DOA3002 / 105-DOA3035 / 105-DOA3100 / 105-DOA3013 / 105-DOA3034 / 105-DOA3018 / Walther Dobbertin / CC-BY-SA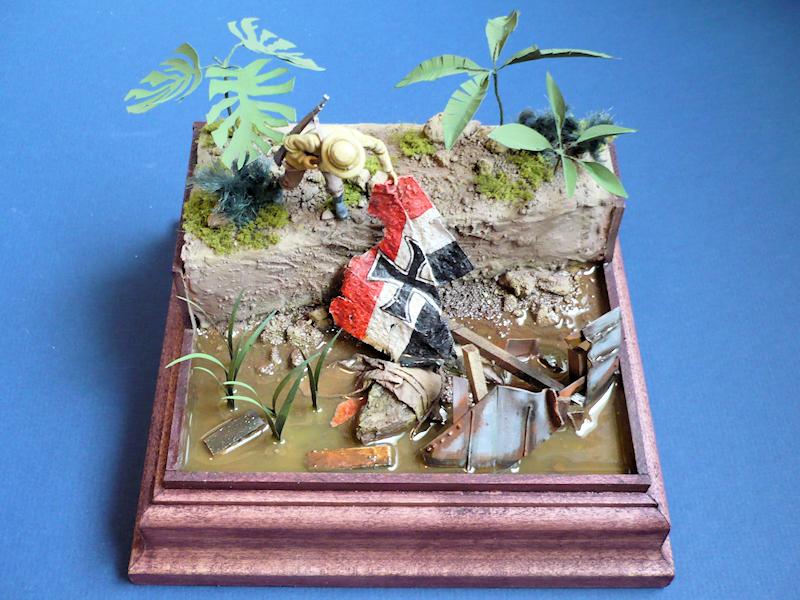
About the Author


FROM: ONTARIO, CANADA
South African born Garth hails from Ontario, Canada. His key modelling interests are heavily converted 54mm plastic and metal figures, along with 1/35 scale World War 2 armour, softskins and artillery and has been modelling since the age of 10. Garth is the Chief Veterinary Technologist at the Toron...
Comments

Interesting article. However, I believe the Konigsberg actually had 6-inch guns, not 16 inch.
OCT 26, 2012 - 08:04 AM


Nicely done little dio. Check the riflt sling - comin' out of his hand a bit. I like this.
Ironmike
NOV 13, 2012 - 06:18 AM
Copyright ©2021 by Garth Jerome. Images and/or videos also by copyright holder unless otherwise noted. The views and opinions expressed herein are solely the views and opinions of the authors and/or contributors to this Web site and do not necessarily represent the views and/or opinions of Armorama, KitMaker Network, or Silver Star Enterrpises. All rights reserved. Originally published on: 2012-09-09 00:00:00. Unique Reads: 19876

WEB HOSTING BY


Copyright ©2021 Armorama and Kitmaker Network, a subsidiary of Silver Star Enterprises
All Rights Reserved. Please read our Conditions of Use and Privacy Policy.
All Rights Reserved. Please read our Conditions of Use and Privacy Policy.