

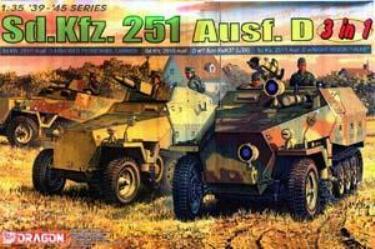
1⁄35Building Dragon's Sd.Kfz. 251/9 ausf D
I heard about Dragon's new 3-in-1 Models line, and I was quite intrigued by the idea though at the same time I wondered if such a project was way beyond my skill level. After reading a bit more about it I decided to order one and see what kind of mess I could make!
When this kit finally showed up at my door I was amazed at how big the box was and how heavy it was as well! I couldnt wait to get it opened and see what was waiting for me inside. What I found was a treasure trove of plastic goodness: sprue after delicious sprue of parts to create the Sd.Kfz. 251/1 APC, the Falke night-vision version or the 251/9 with the 75mm KwK 37.
On top of that there are photo etched parts, decals galore, four bonus Nachtjager figures, a neat little sprue with rubberized greatcoat and boots, and a whole slew of other wonderful items. Although a good portion of these wont be used your spares box will be sure to plant a big wet kiss on you!
Alas, upon further inspection I noticed not all was well. I could tell that the top Superstructure (Part F) had some serious warpage in it, as did one of the two Rear Doors (Part 28 on Sprue A). After pulling a temper-tantrum that would make any pre-schooler give me props, I decided to sit down and assemble the model the best I could.
Initial Assembly of Wheels
The first step is to assemble the Engine, Gas Tank and Battery into the bottom Superstructure, but I found that unless you were going to cut open the floor of the model, there was absolutely no point in following this step because nobody is going to see it. I skipped this Step. But, if you do decide to take this route, it should make for a very visually pleasing model.Attaching the Wheels is pretty straight forward, though the Sprocket Wheels (Parts E8 and E9) need to be CAREFULLY cleaned of excess flash at the sprue gate or you will find yourself cutting off the individual Sprockets. However, once the Wheel Arms are on, everything else falls into place nicely. The Front Suspension (Parts C30 and C35) calls for perfect alignment, or your two front Tires will come out looking awkward and misaligned. I found that it is best to leave the two Tires off until the glue holding the Suspension together has had time to cure properly.
Interior Floor and Details
Starting with Part A29, you begin to build the Interior of the Sd.Kfz. 251 model kit. Pay special attention to your instructions now because this is where the directions will vary according to what version you are building. Since I chose to build the 251/9 version, I skipped a head a bit and selected the right assembly sequence.The two-piece Seat Supports (B35 and B37) call for special attention as they dont quite fit 100% perfectly so you might find yourself digging-out the grooves that join the two pieces together with a hobby knife to ensure they find a uniform grip with each other.
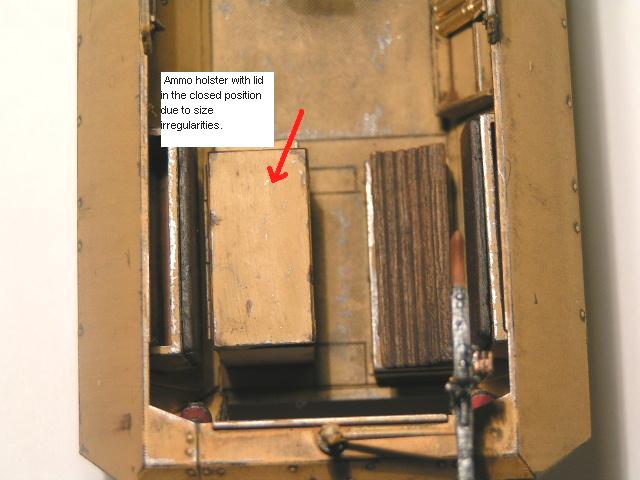
Part A39 will have to have a bit of the end filed away with some sandpaper or a hobby knife to make it fit correctly as well. So far, the Interior comes together with only minor and easily fixed problems. The only other thing I noticed was that some model builders may not like Part R11 the Ammo Holster. Though nicely done, the DML part seems to have the 75mm shells moulded into it, and the empty slots where some shells have been removed looks small when compared to the brass shells included in the kit. I decided to leave the Ammo Holsters Lid down.
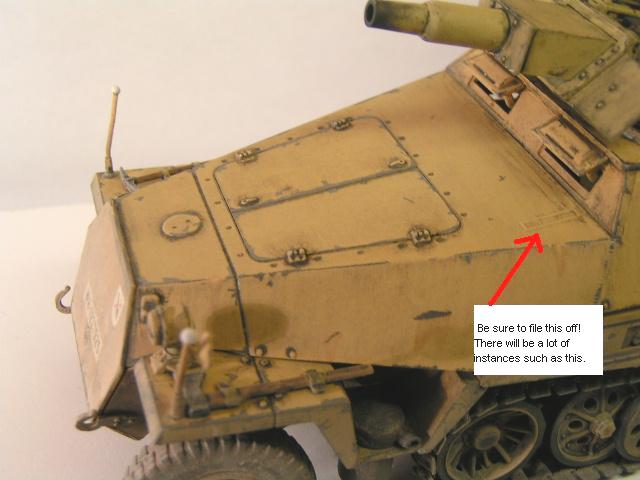
Assembling the Interior moves along quite quickly, even considering the number of small parts that have to be glued to the Walls and Driver's Area. Some parts of the Walls have lips where other parts are to be attached according to what version you are building, so pay special attention to sand these off if your version does not have a part to be placed there. You will find the entire model this way, but I guess that is to be expected from a kit that lets you build three versions of the same subject. I found this out the hard way when I noticed the spot where the IR device was to be mounted in the Falke version was not sanded off. Ooops!
Extreme caution should be taken with removing the Securing Latches for the Rear Doors from the sprue as they can be easily snapped in half. This happened to me both times.
KwK 75mm Cannon
This is a pretty straightforward Assembly. The Expended Round Receiver Tub (Part G25) needs to be attached very carefully, as it doesnt want to sit perfectly to where its supposed to be glued so use extra caution in placement. I found that attaching the finally finished Cannon to its Mount (Part R16) was a bit difficult as the receiving hole is not big enough. This is easily remedied by giving the receiving hole a couple of rotations with the tip of a hobby knife to open it up a bit wider.Tracks
When deciding on what type of halftrack you are building, be sure to pay attention to the two types of tracks available. The individual links on the sprue are the early versions, and the individual links provided in the Clear Bag are for the later version style tracks. For some reason Dragon dubbed the bagged tracks "EZ Tracks" and are supposed to let the modeller create the tracks by just snapping them together. Although they were a bit of a pain at times I do recommend using a ruler to build them up against. They werent as bad as I feared they would be. They do tend to come apart at the most inopportune times, but a little dab of glue on the ends and they are good to go.Painting and Weathering
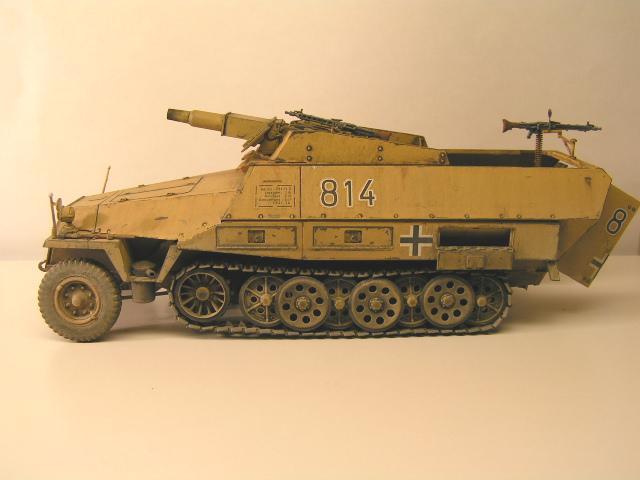
I kept my model in four separate subassemblies for ease of painting: lower half with Interior, Upper Superstructure, Tires and the Tracks. I started with the lower half with Interior by giving it a light coat of white automotive primer. When this was dry I gave it a final spray and let sit overnight. In the morning I looked over my small collection of acrylics and tried to find a color that would closest resemble Dunkelgelb. I went with Dreamcoats "Cloudberry Tan", (yes, Craft Paints! I'm only getting started in this Hobby!) figuring that with some properly placed washes I could come as close to the real thing as possible. I gave the piece a total of four coats to finally achieve a nice, even flow of paint onto the model. The problem with trying to spray one big coat onto the model is that you would probably end up with too much paint pooling in areas, thus hiding detail so go slowly and use several light coats.Interior parts such as Gearshifts, etc were painted black and then dry brushed with Gun Metal to give it that worn look. The wooden seat was painted a Dark Brown then dry-brushed with three successively lighter shades of Brown finally a Raw Sienna wash was run over it. After it dried sufficiently, I sprayed it with a nice coat of Testors Dullcote. When this was dry, I very carefully applied a black oil wash in the recesses to give the part it more depth and shadow. The leather padding was painted a semi-gloss Black, and when dried it was dry-brushed with Burnt Sienna to give it that worn leather look. Other parts such as the Fire Extinguisher were painted accordingly. The Floor was given a wash of Mars Black oil paint and set to dry.
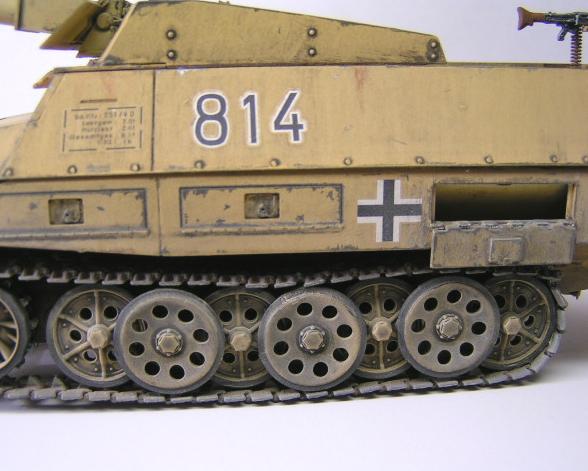
The Upper Hull and Back Doors had the decals applied and was given a coat of Dullcote. I washed the part with a thicker than usual Wash (6:1 ratio) of Mars Black oil paint and Thinner. I let it dry completely overnight then the next day I took an old cloth rag (a clean one!) and dipped the tip of it in Thinner. This was then run with top-to-bottom motions on the Upper Hull so as to remove the Black Wash from the places I didnt want it. This allowed me greater control over how much depth I wanted to give certain parts. Places like recesses and other little nooks and crannies were left with more Wash on than the rest of the model. Be careful though, you can still eat thru the Dullcote and right through the Paint if you use too much pressure and Thinner!
When the model had dried enough, I took an ordinary pencil and put wear and tear marks over various places of the entire model. The trick is to not overdo it, but at the same time dont neglect places that would show obvious wear. The next step is to give the model and thin Wash of Mars Black oil paint (to remove some of the shine) and then apply a Wash of Raw Umber on the lower parts of the model.
The model was given a THIN spray of Buff and left to dry. The lower half of the model was given three more light coats, each coat blending more of the model together to give it a uniform look and to break up any contrasts.
The tracks were primed and sprayed with Flat Black acrylic. A Wash of Dark Brown pastel was added, and various parts were dry-brushed with Testors Steel. I finished the tracks with a light spray of Medium Brown.
Voila!


About the Author


All Rights Reserved. Please read our Conditions of Use and Privacy Policy.