

1⁄35FIAT Topolino
12
Comments
Introduction
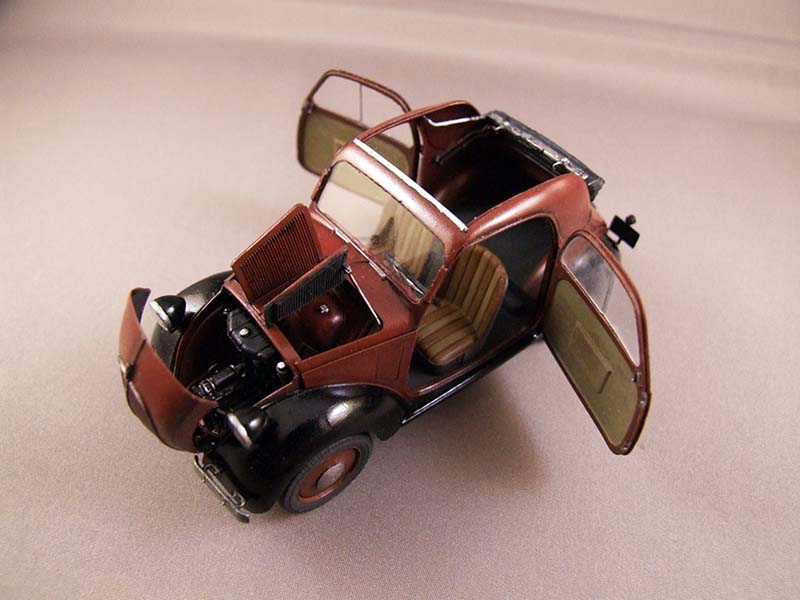
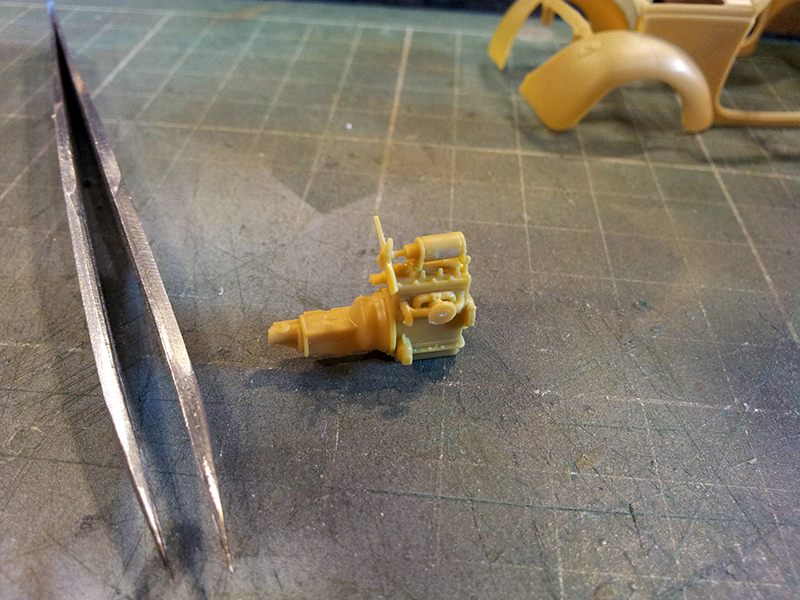
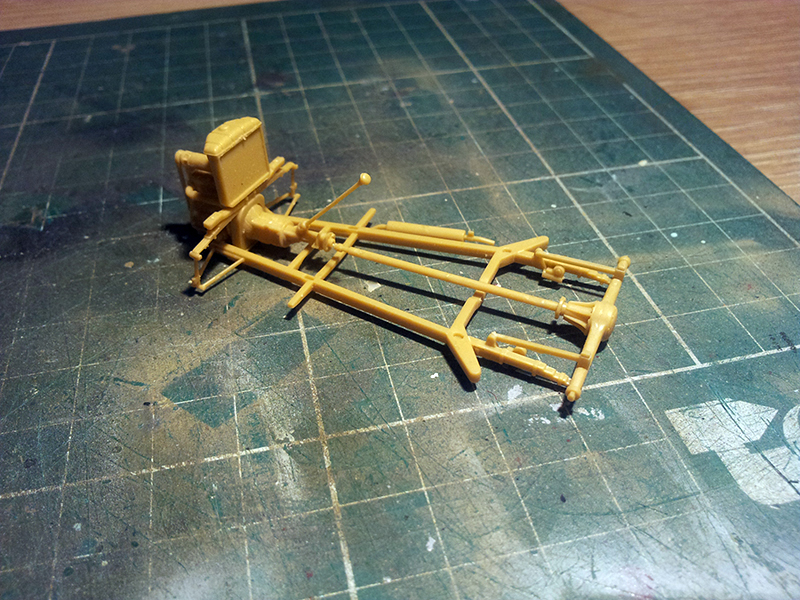
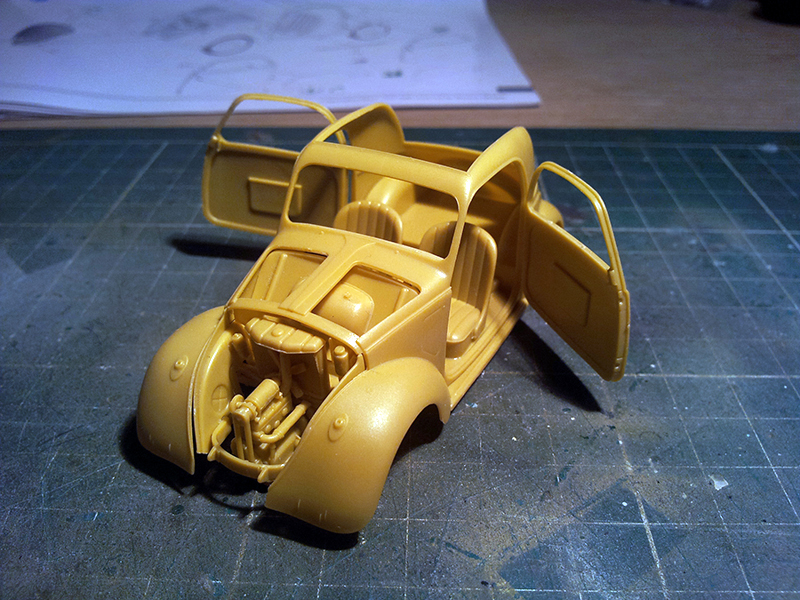
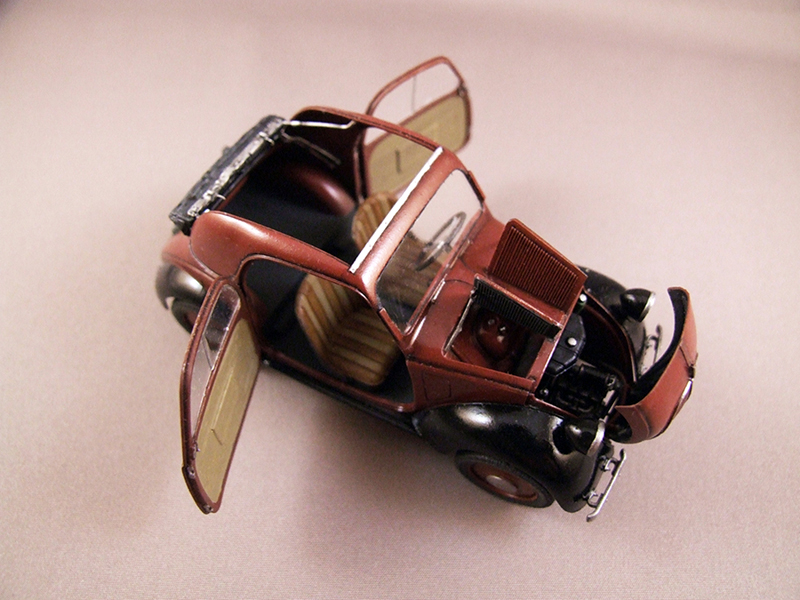
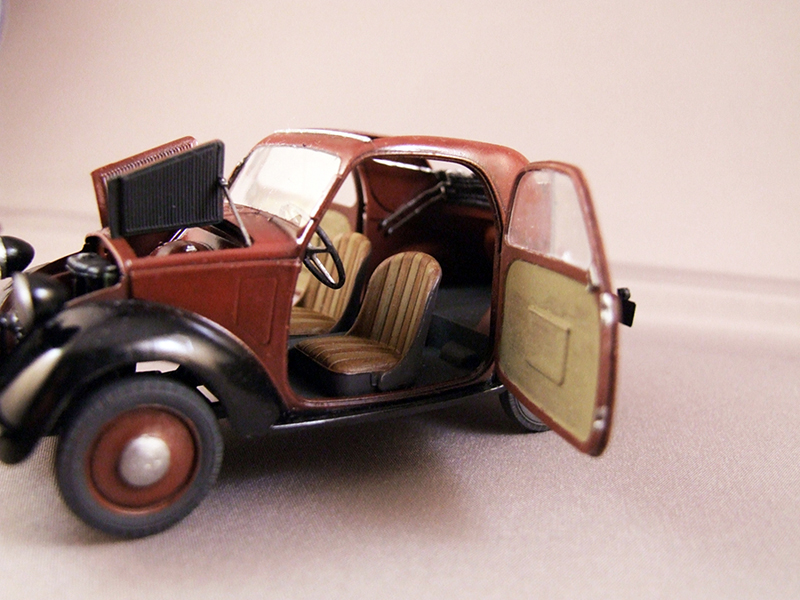
Ever since I saw the FIAT Topolino from Model Victoria I wanted to build one. There was only one drawback and that was its price. A nice kit for sure. But also a very little kit so I was a bit hesitant. Then Tamiya came out with the Simca 5 which was a big surprise coming from that company and thought of buying it and use that instead. So I had a look-see in the box at an event and was a bit dissapointed in what it offered. A nice car but very simplified. At a very high price as well seeing what is in the box. Not long after that Bronco Models anounced that they were going to add a Topolino to their range of 1/35th scale kits. Starting with a militarised Topolino in Service with the Afrika Korps. Followed shortly after by a Civilian convertible version of that kit. The civilian version of the kit (kit# CB-35165) was reviewed by Rick Cooper; a link to that review can be found at the end of this feature. Check out the sprue shots in Rick's review. There is a lot to see. summing it up the kit has 121 parts which seems a little amount by Bronco Models standards but keep in mind this is a very small car. Its nickname was the Topolino which is Italian for Little Mouse. And even in real life this vehicle was about the size of a tub of butter. This kit already has more then twice the part amount of the Tamiya Simca 5 (50 parts) which is essentially the same vehicle but license built by the French. So yeah considering the size of the vehicle the kit definately has a lot of parts. As an addition to Ricks review: I could go searching online to check on accuracy but I have friend who works at a FIAT Garage and is a bit of an expert on classic cars. So I went to the garage and showed it to the guys there. Paperwork and manuals were pulled out of the archives and it was fun to see that bunch of mechanics pour over the kit. Their opinion was that the kit is as perfect as can be. The engine you see above is a perfect scale rendition of the 1936 0.6 litre side valve, 4 cilinder engine that the topolino was fitted out with. Pretty much matching in size and details. The only thing you need to add is wiring but that is really only a concern when you leave the engine hatches open. Otherwise the whole engine area will be unseen. Dimension wise it is spot on as well. The 1:1 1936 Topolino is 321,5 cm long. Which translates to +/- 9,1 cm in 35th scale. And once the bumpers are added it is pretty much exactly that. In width it seems Bronco Models did their homework as well. 1:1 scale the width is 127,5 cm which is in scale 3,6 cm and again Bronco Models is spot on.The Build
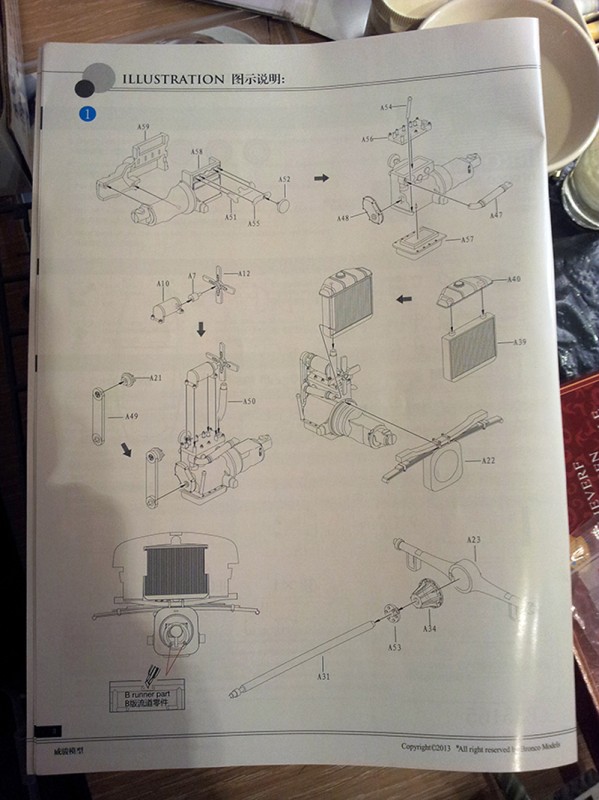
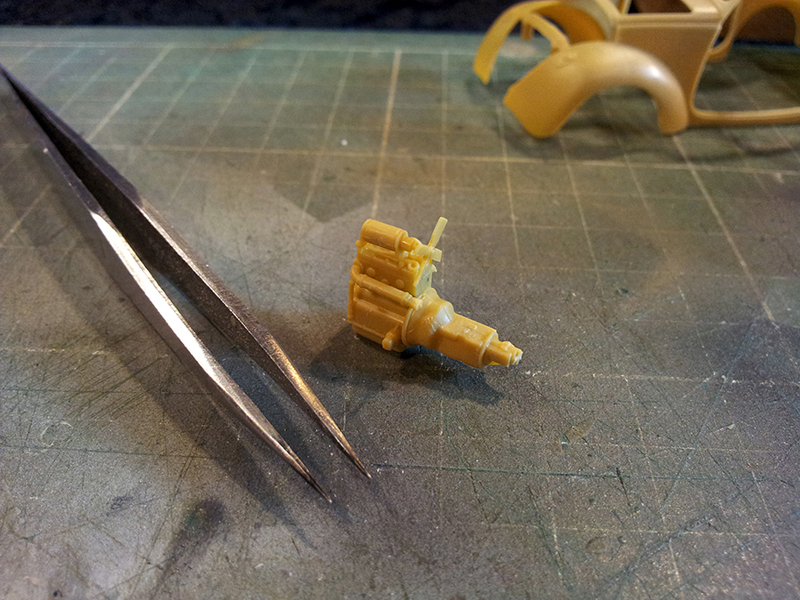
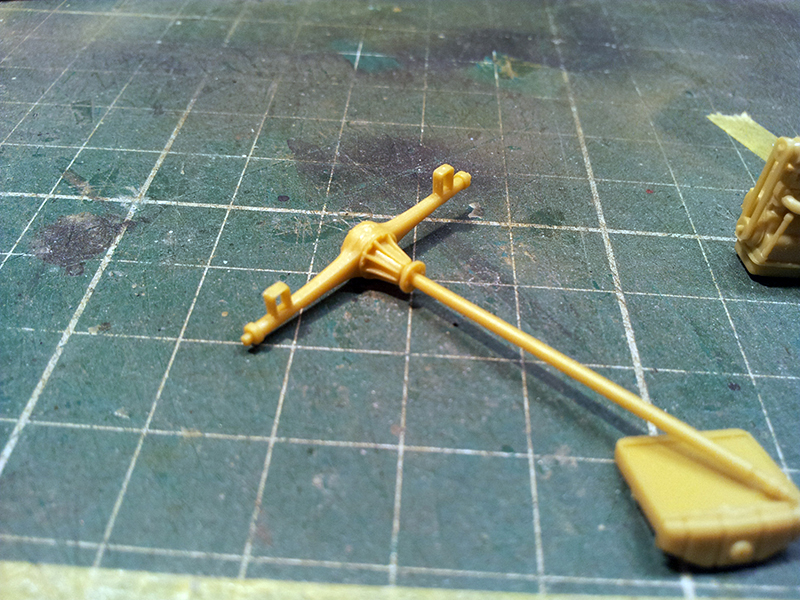
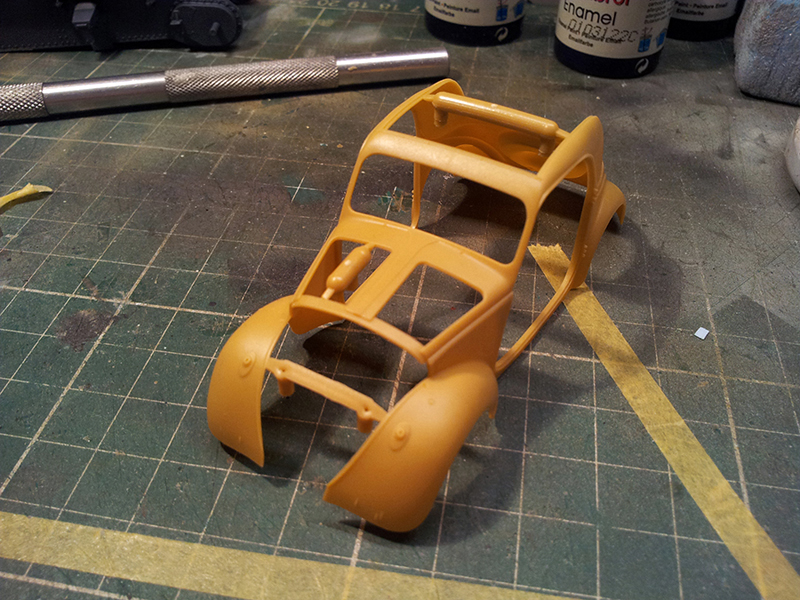
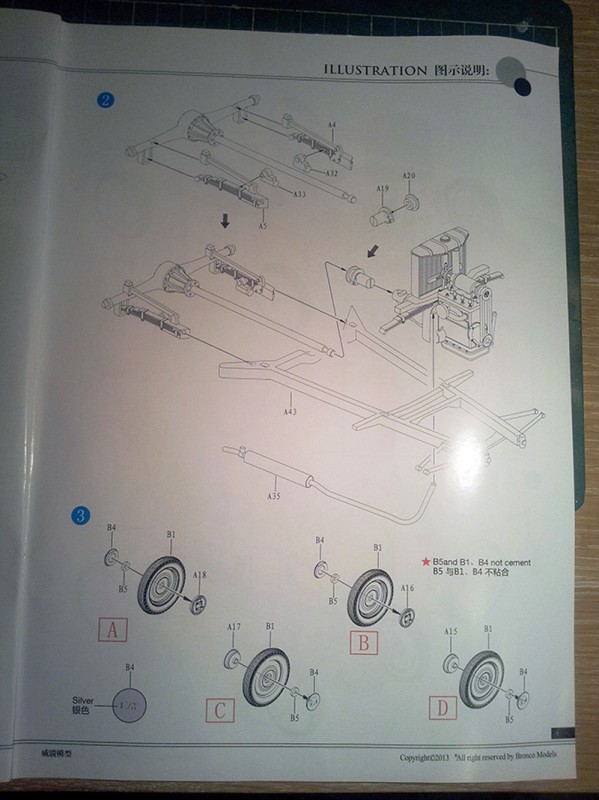
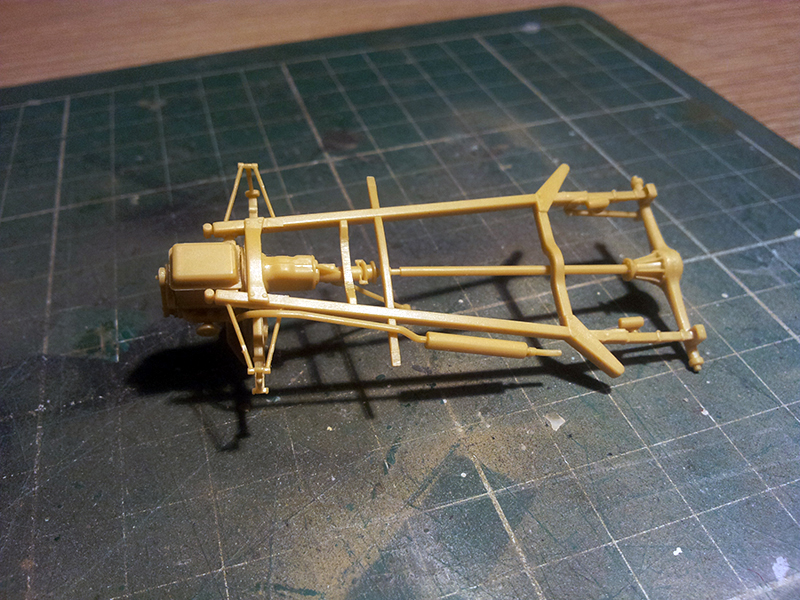
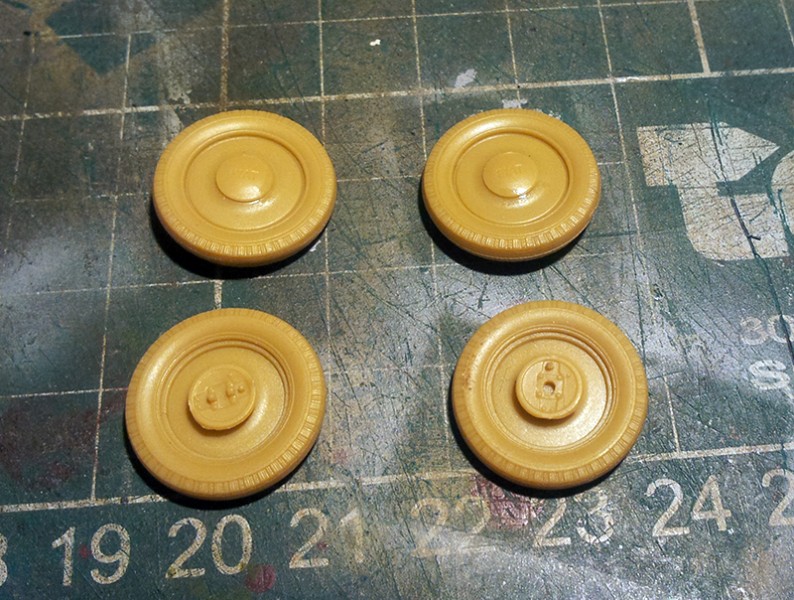
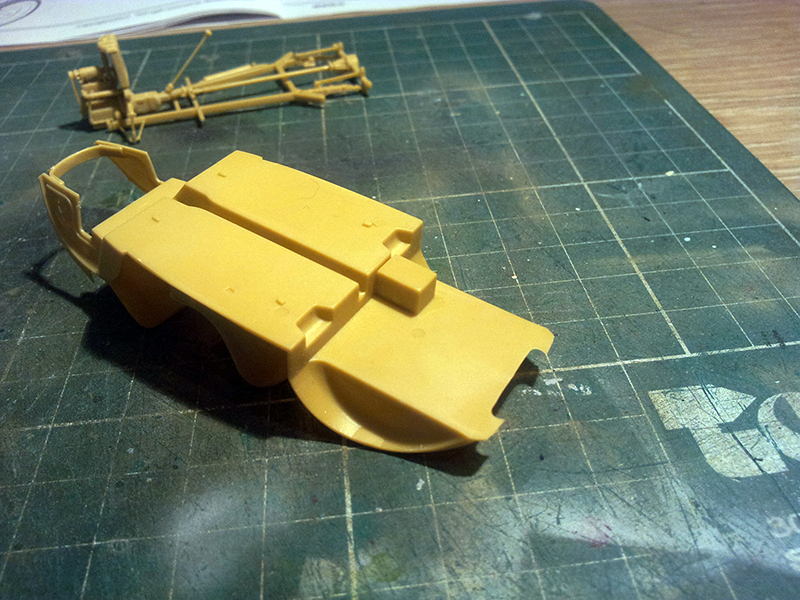
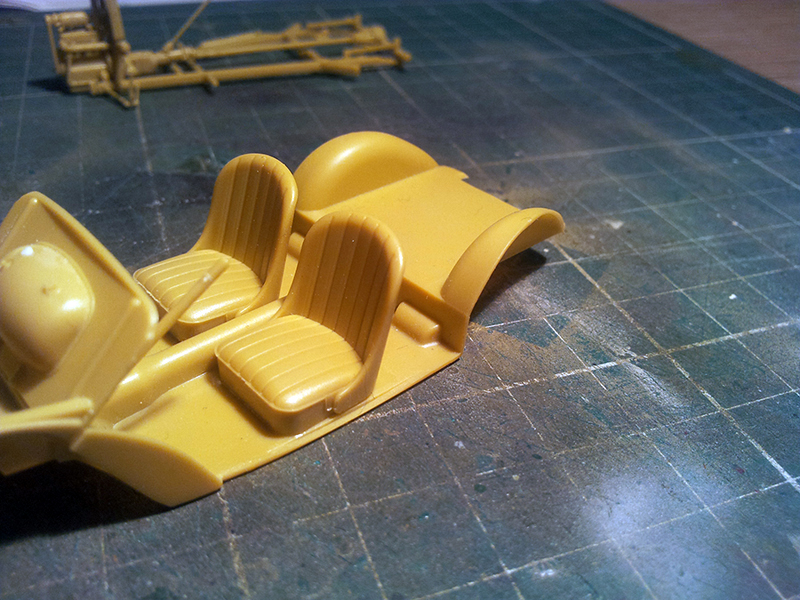
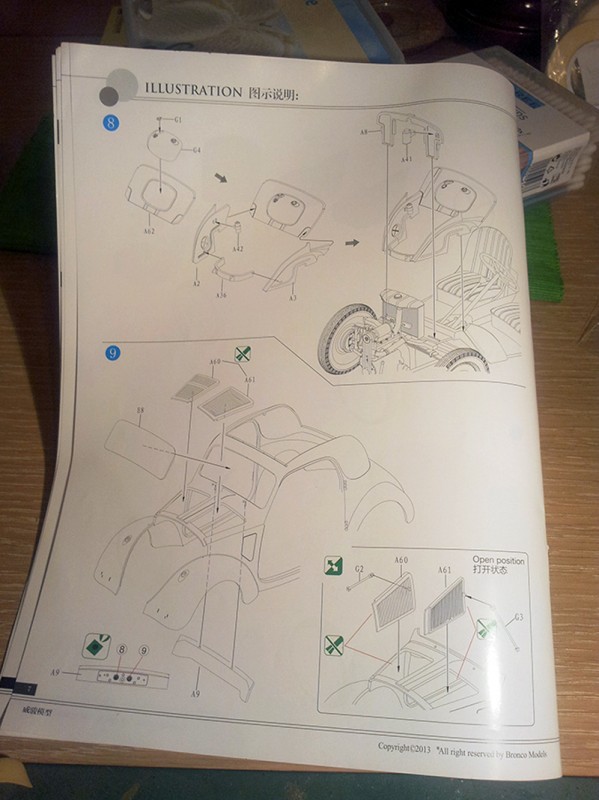
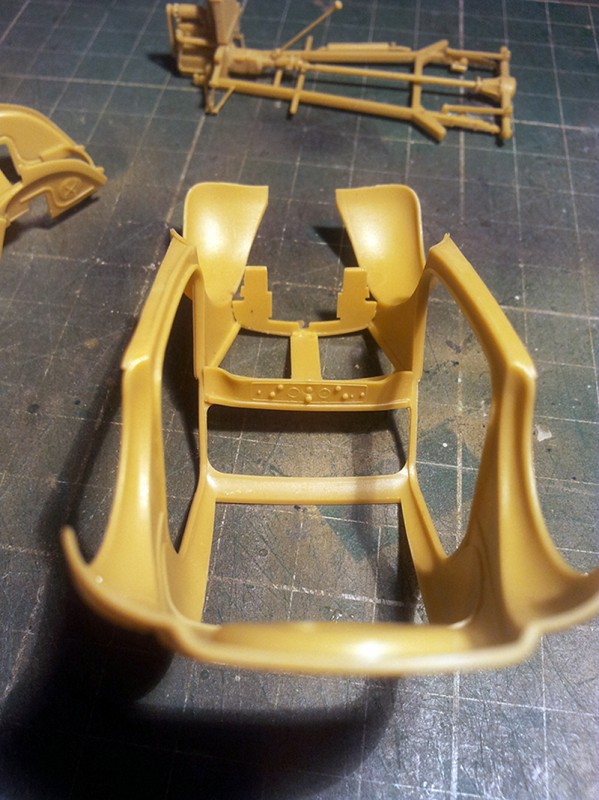
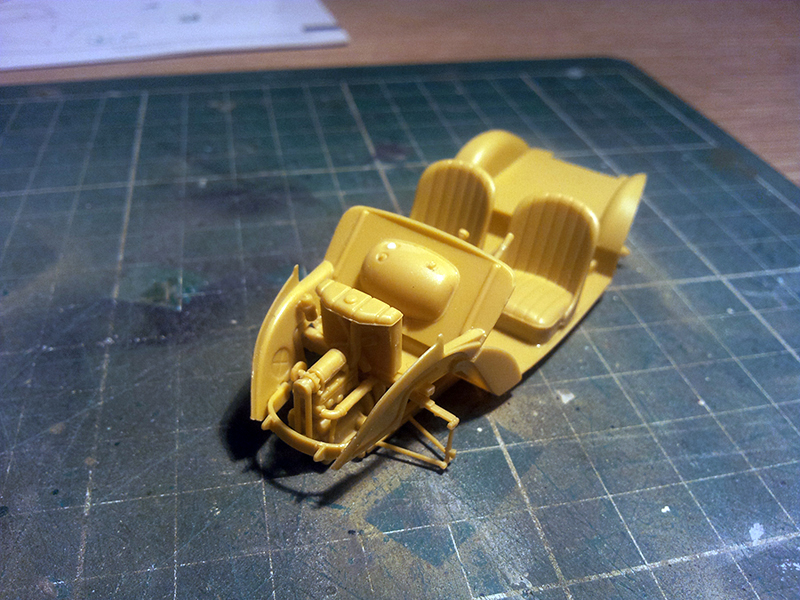
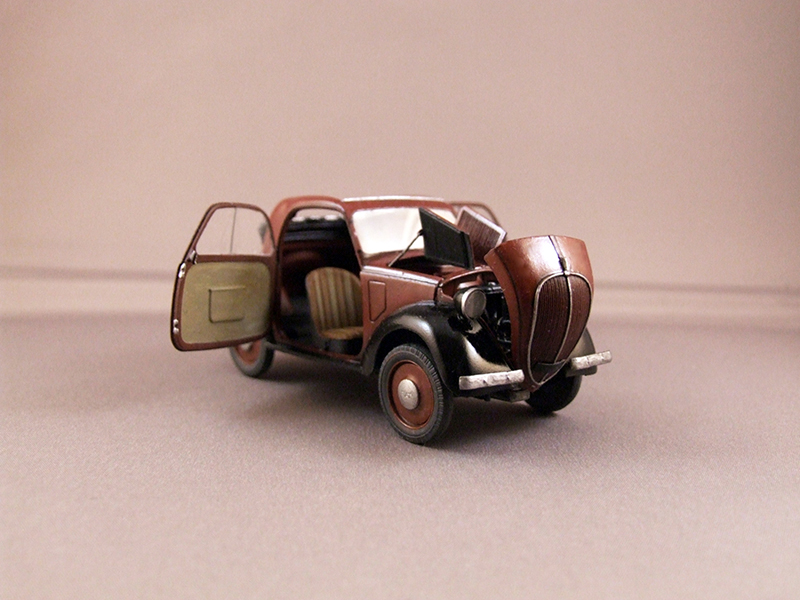
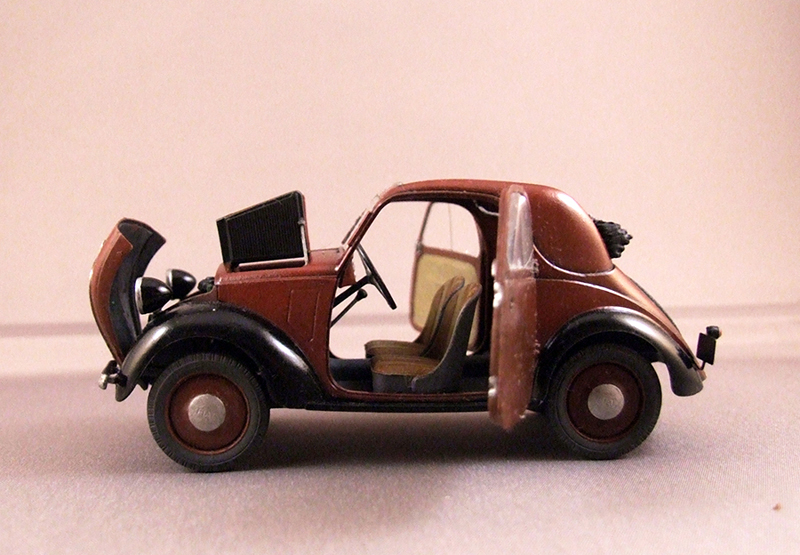
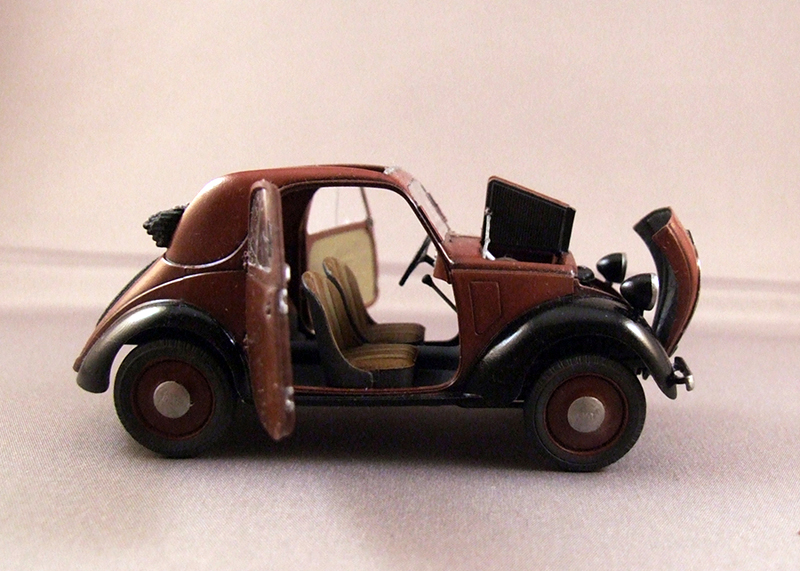
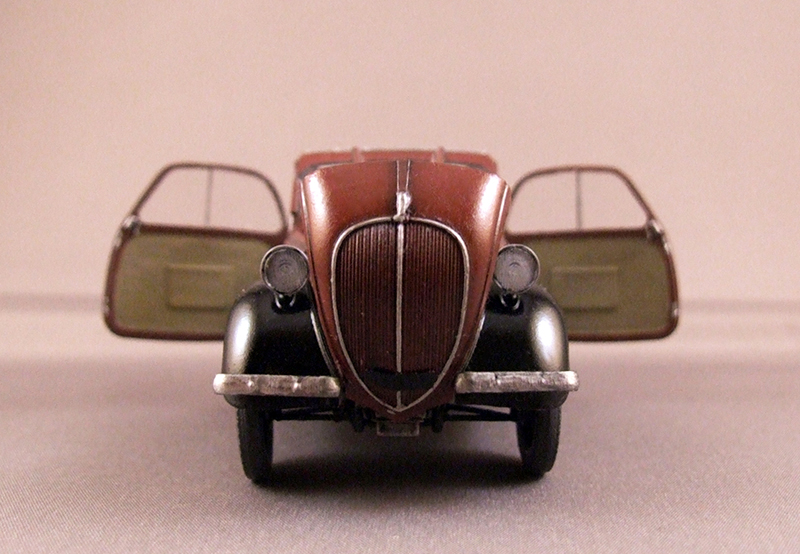
Step 1 This stage deals completely with the engine, radiator and parts of the suspension. No real problems here. The detail on the parts that form the engine is tremendous but all that detail makes for a high part count and a lot of those parts are very small. The result of that is that you will spend some time on your knees on the ground to find parts that managed to escape the grip of your tweezers. You also have to add 2 small bolts on the back end of the transmission. These bolts have to be shaved off the sprue. In my opinion these could have been molded onto the parts. I decided to leave them off since they will not be visible once you have finished the car. After step one you will have a few subassemblies being the 2 cm long engine, the rear axle with driveshaft. The front leafspring that the engine sits on and the radiator. Fun fact: At 23 parts the used part count at this point is already nearly half that of the Tamiya Simca 5. And we are still dealing with the engine so far Step 2 Here the Engine is mated to the chassis, and the assembly of the wheels. Everything is pretty straightforard and no problems were encountered. At first I decided to leave everything separate in sub-assemblies for the ease of painting but looking at it a bit later I found there was plenty of room to get the brush in after I glued the chassis, rear axle, engine etc together. The wheels are works of art. Nice sharp details. Incredibly fine threadpattern and to finish it off nice hubcaps with the FIAT logo embossed in them as per the real thing. From here on I decided to stop following the instruction booklet because I had to mix up the steps to make sub-assemblies that would make it easier for me to paint them. Seats, gas and brake pedals and the steering wheel got added. The pedals are again tiny and had to spend some time below the bench to retrieve them. Continuing with the insides of the enginebay and the firewall. Again really nice details. I managed to lose one part... the fuel filler cap (tiny). Which I replaced it with a disc cut from styrene rod. On the inside of the carriage I added the dashboard. A little note here. If you plan to make this kit with the roof closedIt is probably best that you paint and add decals to this before glueing it to the inside because it is pretty hard to reach otherwise. During the last build steps my phone died and since it is my primary device for making my pictures it took the last batch of pics regarding this project with it. So below is a rundown from memory. The canvas roof is well rendered with nice folds. Take care with the rods of the roof frame they are very thin and you have to take care cutting them off the sprue and cleaning them up. They break very easily. Also the kit comes with a few photo etched parts that together form the clamps that hold the bonnet in place. I waited till the end to glue them on but due to handling it further along the way I managed to lose all 4 parts. Keep these off till after you have finished painting the little car to not end up in the same situation. I left off the FIAT badge on the hood as well for the simple reason that Bronco added the wrong photo etched plate in the kit. The instructions show it with a shield (which is correct). On the photo etched sheet however is a rectangular plate. Problem here is that FIAT changed the rectangular plate with the tall letters to a tall shield with tall letters in 1931. So by the time they started producing the Topolino in 1936 these logo shields were already in full use for some years. I guess Bronco Models took the dimensions and details from a restored Topolino of which the owner used the rectangular plate. SO I decided to leave it off. Painting The built part of the Topolino is finished. So it was time for paint. First I primed everything with Tamiya primer from the Rattlecan. And then the vehicle was painted with Tamiya Acrylics. The chassis got a coat of gloss black. The engine was painted with several aluminium colors from the Citadel range. Details were painted in several colors and the engine received a wash with diluted black oilpaint. Then it was time to paint the bodywork. I decided for the ladybug 2-tone as I think this is the most handsome way to show this vehicle and it was one of the factory colors that Fiat delivered these little cars in. First I painted the black. Then I maske dit off and airbrushed the red. I did not want to have a bright red. So I mixed a bit of black into it to make it a more bordeaux-ish color. Details were painted by brush with Humbrol enamel, Citadel paint and oilpaint. A nice example of this are the seats that were painted in humbrol sand color first and then I coated them with diluted raw umber oilpaint. Let that sit for a while and with a brush moist with thinner I removed every other band on the seats to uncover the sandcolor underneath.Conclusion
This was a kit that I really enjoyed building. The details are perfect. And as we come to expect from Bronco Models incredibly fine as well. This means you need to take a lot of care with cutting them off the sprue and cleaning them up. They break very easily. Aside from that I think this is one of the most handsome little vehicles that I have ever built. It is one of the most realistic scale representations I have ever seen straight from the box.Related articles
Italian Light Civilian Car (Open Top) w/Lady & Dog Live links Open Top Staff Car review Live links Italian Light Civilian Car Review Live links DAK Topolino Staff Car Build Review Live links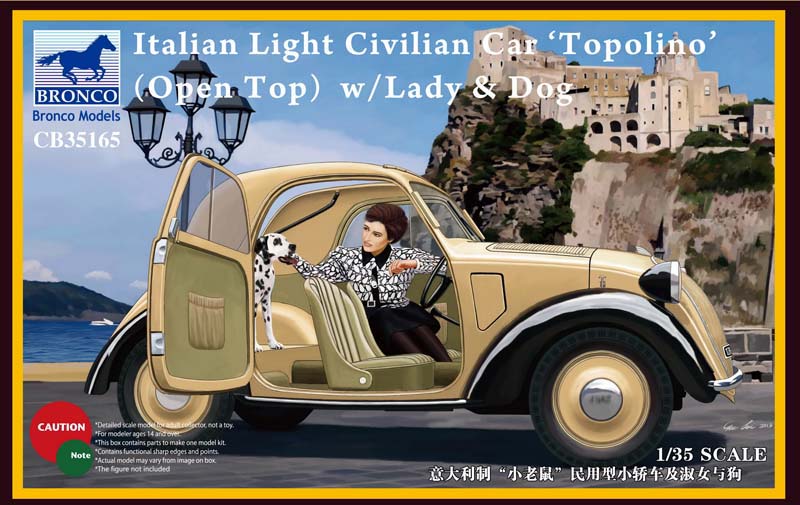


About the Author


FROM: NOORD-HOLLAND, NETHERLANDS
Started modelling when I was about 7 or 8 years old had a little break in between (school, girls partying) and eventually returned when finding this site in 2002. Main interest WW2 German army, wheeled vehicles and radio and communication troops or every other thing that manages to catch my interest...
Comments


Ola Guys
Thanks a lot for the kind words and compliments.
@ Darren
Thanks for putting it online. You have done a great job on it.
@ Tom
The detail over the whole kit is stunning but that little engine is a miniature kit on it's own.
JAN 31, 2014 - 11:52 AM

A great review! It looks like Bronco measured up a topolino from a museum in Connecticut.
JAN 31, 2014 - 12:17 PM

Hi Robert,
Great build review and an excellent finish to what looks like a very worthy kit.
Cheers
Al
JAN 31, 2014 - 08:39 PM
You know that i'm a fan of your work Robert . You did this with great care and the result is definitely nicely done. Greets Kurt
FEB 01, 2014 - 02:44 AM
Ola Guys
Again thanks for the kind words. Really appreciated.
@ Dan
Could very well be allthough there are still a lot of the old Topolino's around. I think a good example should not be hard to find.
@ Alan
I can absolutely recommend this little kit. It is awesome.
@ Thanks Kurt for the kind words.
FEB 02, 2014 - 01:05 AM
Robert, the topolino at the museum is exactly like Bronco's first topolino. Dan
FEB 25, 2014 - 01:59 PM
Ok. Did not know that. Is that the desert topolino you are talking about?
FEB 26, 2014 - 01:09 AM


So... where can I get a 1/35th 426 Keith Black Hemi and a set of drag slicks!!!
FEB 22, 2016 - 07:27 AM
Copyright ©2021 by Robert Blokker. Images and/or videos also by copyright holder unless otherwise noted. The views and opinions expressed herein are solely the views and opinions of the authors and/or contributors to this Web site and do not necessarily represent the views and/or opinions of Armorama, KitMaker Network, or Silver Star Enterrpises. All rights reserved. Originally published on: 2014-01-31 18:28:56. Unique Reads: 12686

WEB HOSTING BY


Copyright ©2021 Armorama and Kitmaker Network, a subsidiary of Silver Star Enterprises
All Rights Reserved. Please read our Conditions of Use and Privacy Policy.
All Rights Reserved. Please read our Conditions of Use and Privacy Policy.