

1⁄35One Shot
3
Comments

One Shot
I would like to start by thanking Steve Keegan for giving me the opportunity to submit my One Shot dio to Armorama. There are a lot of talented individuals on this site and It's quite flattering to be selected to submit my work.Inspiration and Figure
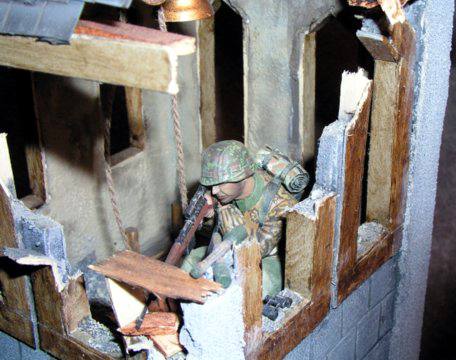
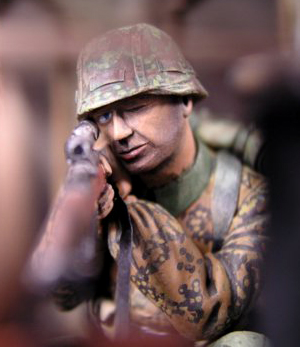
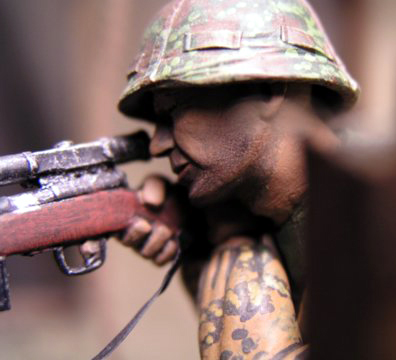
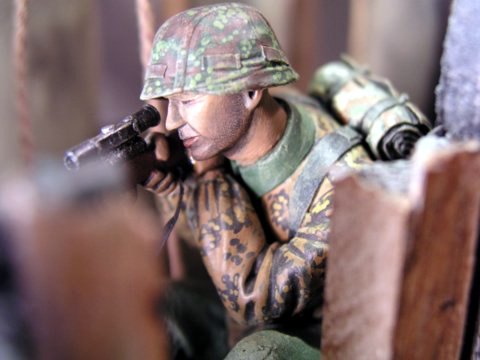
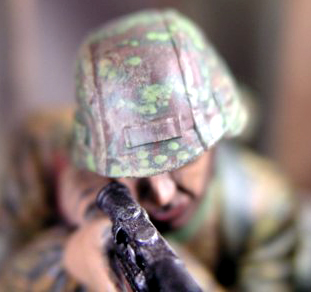
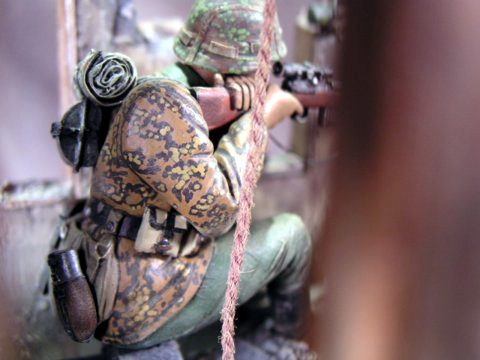
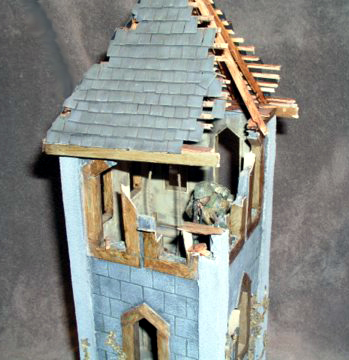
My One Shot dio was centered around the 1/16 scale resin Verlinden kit-#N0796. The inspiration for this dio came from the scene from Saving Private Ryan where the German sniper is hiding in the church tower. I had some minor fit problems with the figure's head and torso/lower body joint, but with a little putty and sanding, it went together just fine. I painted the entire figure with both Model Master and Polly Scale acryls. I used black chalk in thin layers for the beard. I added a strap the the rifle, drilled out the barrel, and drilled out the two ends of the scope. After opening the scope ends, I added a drop of Testors clear cement to replicate the lenses. This adds a nice touch to rifle scopes and other items like binoculars. I found that after painting the figure's pants, they looked too smooth. So I wrapped white first aid tape-a very thin "textured" tape-around his legs making sure to hide all of the seams in areas that would not be seen on the finished model. I then repainted the pants, which now took on a nice wool look.The Bell Tower
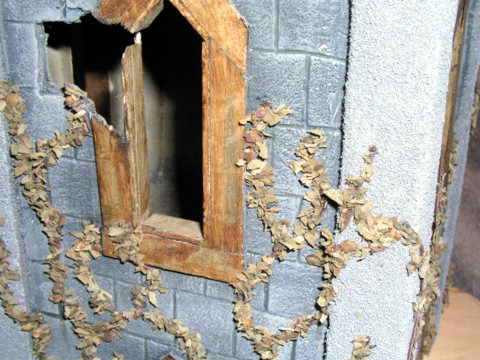
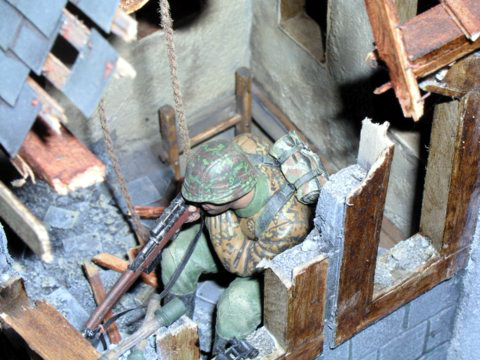
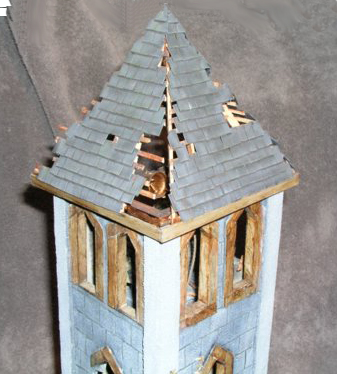
The church's bell tower was completely scratch built using a varity of materials. I started by laying out the walls on posterboard, I drew in windows and shell holes and then cut everything out using a exacto knife. I covered both sides of the walls with a thin layer of plaster. Before the plaster dried, I used a scotch brite sponge to texture the exterior wall-this will help the detail pop out when it's dry brushed. Next I joined two sides to each other-this creates two halves each forming a 90 degree angle. By doing this, I can now design, test fit, and paint the interior. I added an access ladder made from bass wood to one of the interior walls. I also made the joists, floors, windows, and the entire roof structure from bass wood. All of the wood surfaces were colored with Minwax wood stain, followed by a dark wash. After installing the floors, I added piles of debris made from scraps of wood, shingles, and a mix of small stones and dirt that I keep on hand just for such incidents. The interior walls were painted with Polly's Dirty white, and given several thinned washes of Burnt Umber. I then painted and dry brushed the debris piles, and positioned the figure. Next I joined the two halves together using white glue. I added narrow strips of poster board to the corners-this helps with adding support to the tower as well as adding some demension to the overall look. As stated before, the roof structure was made from bass wood. I made the shingles by first gluing two pieces of construction paper together, then I laid out the lines with a straight edge, and proceeded to cut out each shingle. I attached the shingles to the roof with white glue, afterward I went back and drilled small "nail holes" in the shingles that had exposed top edges. I then added nails to the rafters and shingles using small wire I cut down to scale size. The exterior was base coated in a dark gray, and then drybrushed with a lighter shades of gray. The corners were coated with white glue, then covered with play sand. I decided to paint the corners a lighter shade to give the tower a little more color. The last step was to add the ivy, I added the ivy to the walls by first twisting two pieces of wire that is coated with a thread like material together. I cut the wire to size and secured it to the walls with ca glue. Next I covered the wire with thinned white glue and covered it with a mix of tea leaves and herbs. At last I was finished!!last word
This was a fun project. I tried out a lot of new techniques, and learned a few lessons-one important one was that I should have measured my display case before I made the tower because it's about an inch too tall to fit! Oh well. I will just have to talk the wife into a new display case.Thanks again to Armorama for this great opportunity! If anyone out there has any questions or comments, please feel free to contact me.


About the Author


FROM: MARYLAND, UNITED STATES
I started building models as a kid, then I discovered how much fun girls and parties were and left the hobby behind. I came back to building models after finding it easier and less expensive than the girls I was chasing. I love to build 1/35 and 1/16 German armor and figures.
Comments

All i can say about this one is WOW. Excellent job. I love the overall look. The figure is very well done. I love the technique you applied to the pants. Great idea. Gave them a very nice look. I can't wait to see what you come up with next...
Mary (++)
APR 04, 2005 - 02:29 PM

excellent .i really felt watching Saving Private Ryan again . camo patterns look very very good.
congrats Brian
APR 04, 2005 - 08:13 PM

Congrats Brian, This is a real masterpiece. The pants texturing tip seems very useful. Also I like the ivy, easy and fast to realize. Paint job is very very well done over all. Thanks for sharing..
APR 04, 2005 - 08:49 PM
Copyright ©2021 by Brian Paulsen. Images and/or videos also by copyright holder unless otherwise noted. The views and opinions expressed herein are solely the views and opinions of the authors and/or contributors to this Web site and do not necessarily represent the views and/or opinions of Armorama, KitMaker Network, or Silver Star Enterrpises. All rights reserved. Originally published on: 2005-04-05 00:00:00. Unique Reads: 15960

WEB HOSTING BY


Copyright ©2021 Armorama and Kitmaker Network, a subsidiary of Silver Star Enterprises
All Rights Reserved. Please read our Conditions of Use and Privacy Policy.
All Rights Reserved. Please read our Conditions of Use and Privacy Policy.