

1⁄35Building the Dragon Ferdinand
Painting
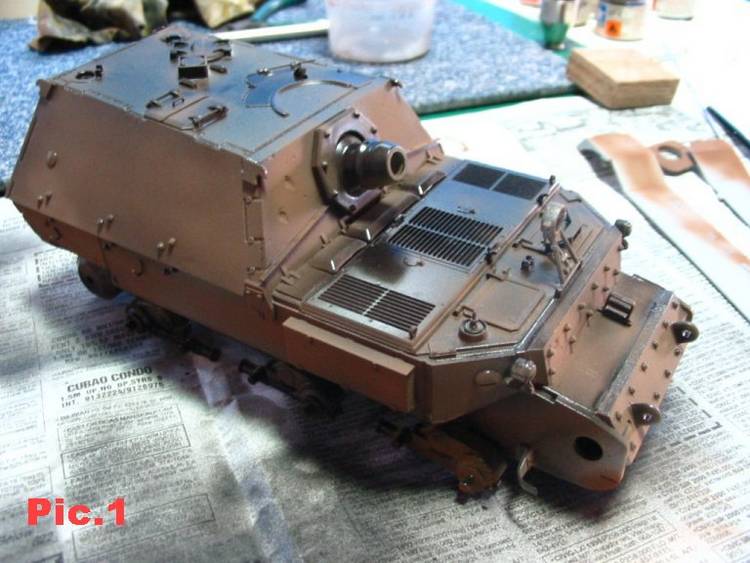
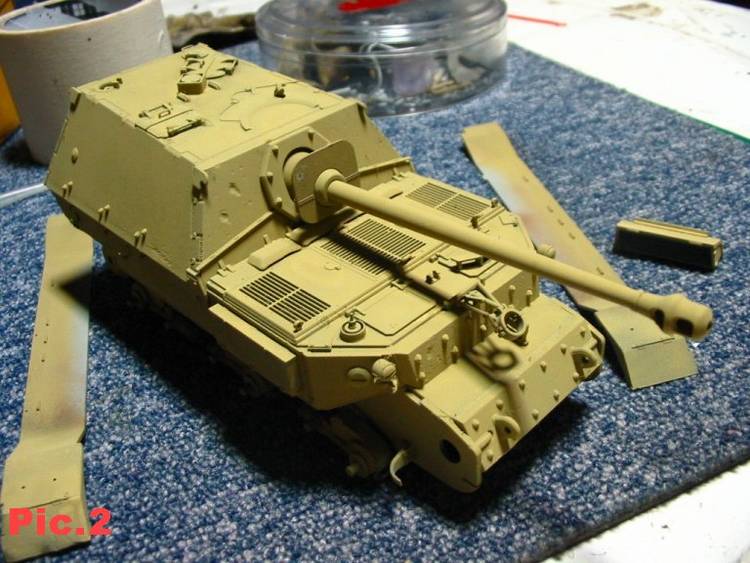
Some areas of the kit were spray painted with Tamiya black spray paint (TS-14) as pre-shading. After the black paint, I also airbrushed red-brown paint (XF-64) on some areas where I plan to simulate paint scratches (see Pic.1). Once all pre-shading was done, the whole kit was painted with Tamiya dark-yellow (XF-60) as base color (see Pic.2).
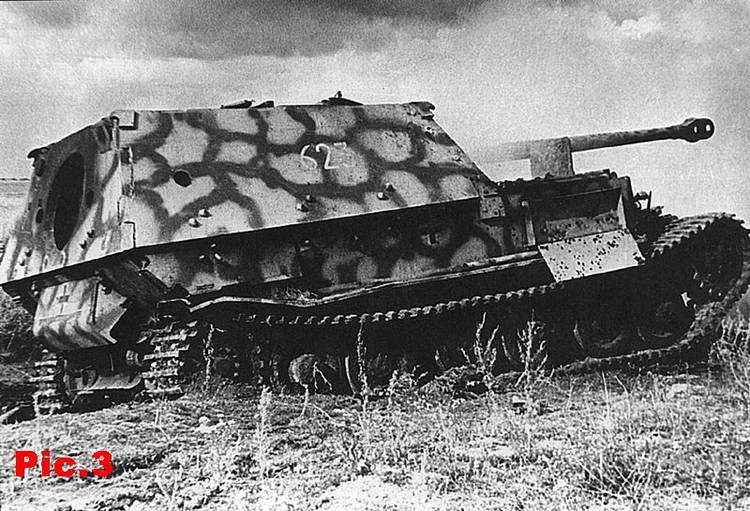
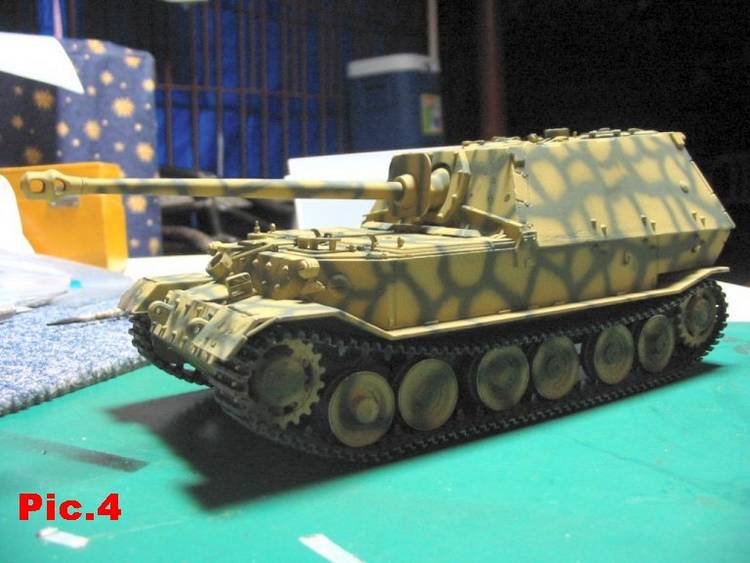
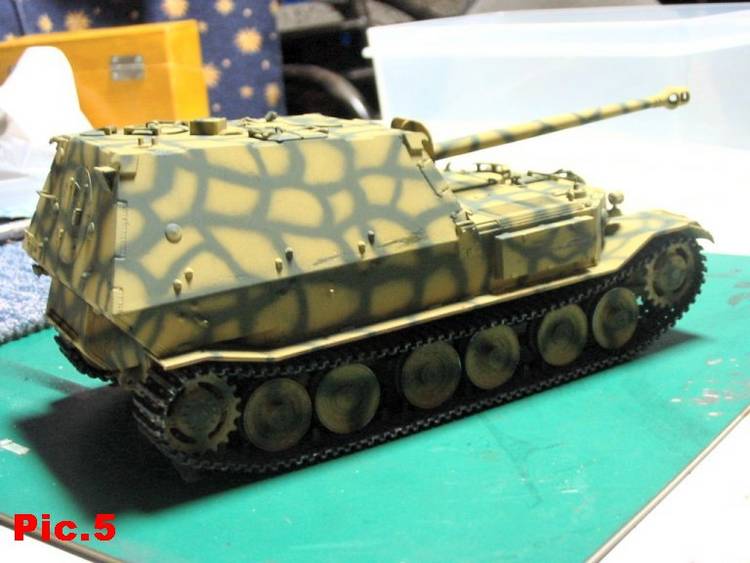
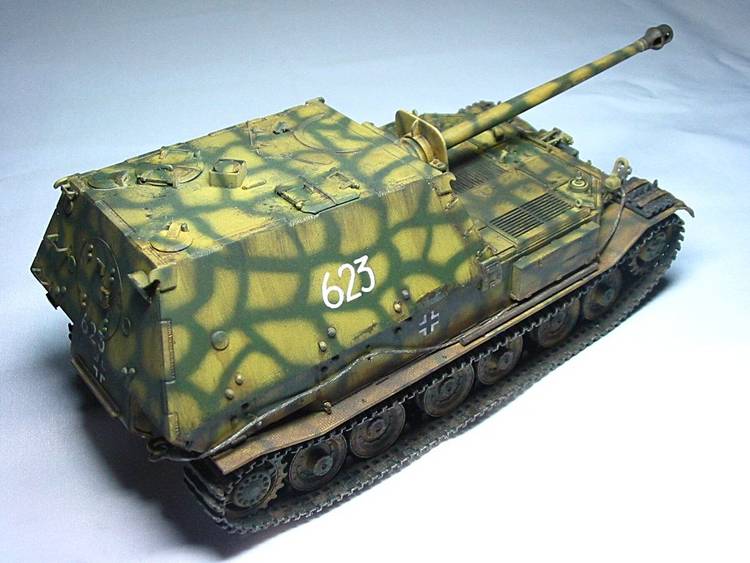
After the base coat was completely dry, I drew an outline of the camouflage pattern on the hull based on the reference photo I got from my research (see Pic.3). I made sure that the pattern lines were very thinly drawn because thick pencil lines would often show-up even when painted over. After I completed penciling the camouflage pattern, I immediately painted over the lines with faded black-green color (85% XF-27 + 15% XF-2) using an airbrush (see Pic.4 & 5). After the camouflage painting was completely dry, I gave the kit a coat of Tamiya clear gloss to seal the finished camouflage paint
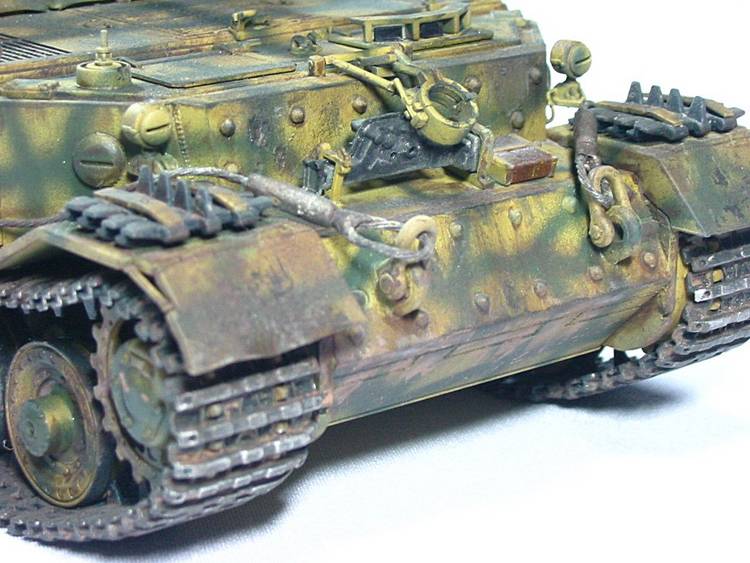
.I painted the rim/edges of the road wheels with metallic gray as opposed to what the instruction indicated; the instruction was incorrect because based on my research, Ferdinands used steel rimmed road wheels, thus black was inappropriate.
The tracks were hand painted using a mixture of flat black, flat blue and red brown (50% XF1 + 20% XF8 + 30% XF64). The mixture gave the tracks a blue steel finish rather than the black color that we often see.
Decals and Tactical Numbers
As mentioned earlier, I wanted to model my Ferdinand from sPzJagAbt 654, but the decals that came with the kit did not support my requirements so I chose to just print my own decal. Unfortunately, I was not able to get my hands on any white decal so I was forced to hand paint the tactical numbers instead. I used the photos gathered from my research as reference for the appropriate size and location of the tactical numbers. I first drew construction lines on the sides of the hull in order to make sure that there is uniformity of height as well as distance per number. The tactical numbers were drawn using a very sharp pencil.
The penciled tactical number outline was painted over by hand with Tamiya white (XF-2) using a very small/thin brush. I applied light and short strokes until the whole outline of the number was completely painted. It took me several passes or layers of paint before the number appeared solid or opaque. After all tactical numbers were painted and dried; the kit received another coat of clear gloss to seal the paints (see Pic.6).
I was supposed to stencil and airbrush the Balkencruz, but the tactical number hand painting process worn me out so I just used the decals that came with the kit.
The kit received a final coat of clear gloss in preparation for weathering.
Weathering
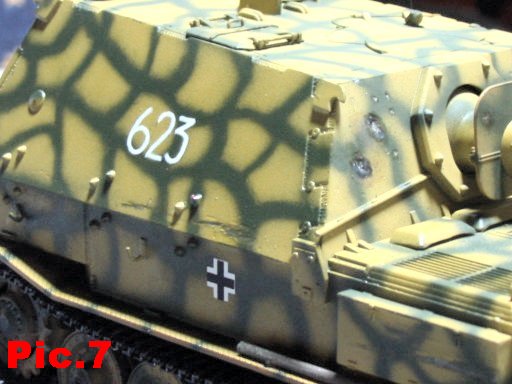
The inner portions of the deflection marks (front plate armor upper hull & front lower hull armor plate) were painted with Tamiya metallic gray (XF-56). The outer edges were painted with a combination of Tamiya gun metal (X-10) and burnt umber oil (see Pic.7).
The glossy characteristics of the Tamiya black spray paint (TS-14) had a big influence on the chipped paint effect. It allowed me to actually simulate chips on the paint by just lightly scratching on the base coat using any sharp object. On areas where a sharp object would not fit, I used very tiny amounts of extra thin Tamiya glue/cement to simulate chipped paint. The extra thin glue removed some of the base coat without damaging the black paint underneath.
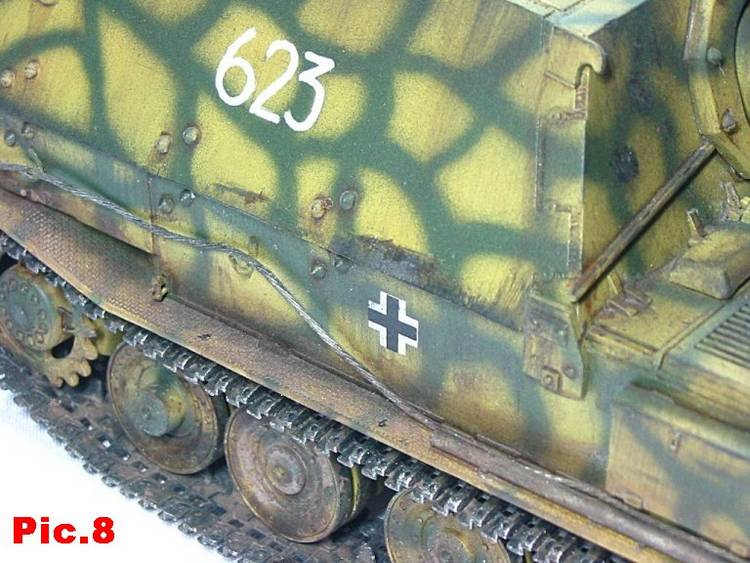
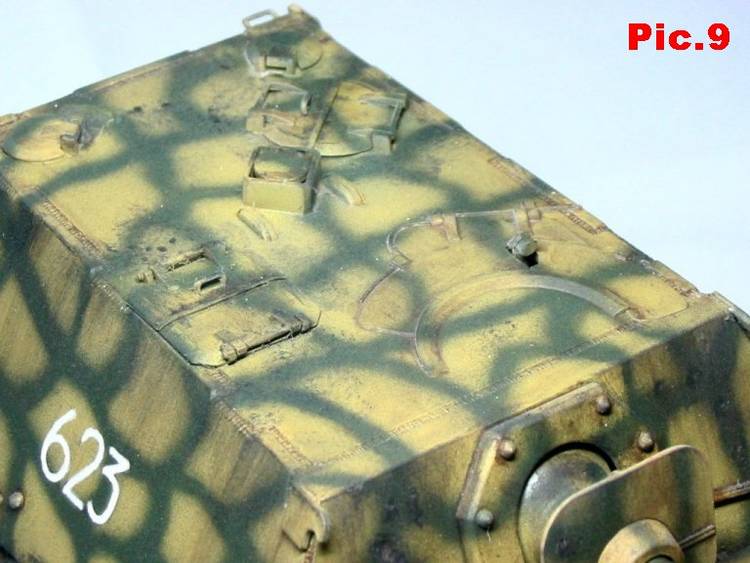
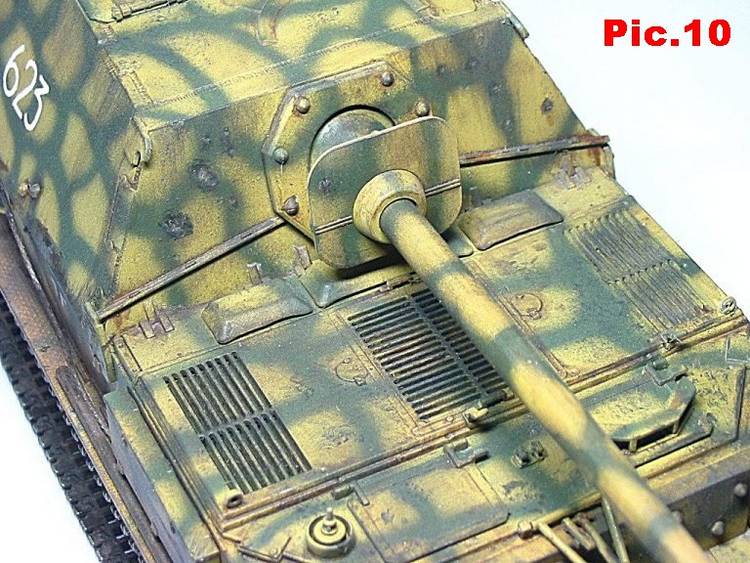
The preliminary layer of rain and watermarks effect was applied by lightly dragging downward a paintbrush with unevenly frayed bristles on all sides of the upper hull superstructure. I repeated the process until the desired effect was achieved. I alternately used Paynes gray and Burn Umber for the rain and watermark colors (see Pic.8). The scruff marks were applied by lightly dabbing (bristles perpendicular to the surface) Paynes gray oil paint using the same old brush to areas normally frequented by Tankers (see Pic.9 & 10). The weld seams, road wheels and bolt heads as well as the nooks and crannies of the tank were given burnt umber oil washes. Rust effects were simulated using thinned Burnt Umber and Burnt Sienna oil paints. Rusts were applied in moderation because Ferdinands were considerably new during the Battle of Kursk. After all oil paints and washes were completely dry (24 hours), I sprayed the kit with Krylon Matt finish to seal the paint and also as preparation for pastel chalk weathering.
I added a second layer of rain and watermarks by lightly dragging downward a paintbrush with unevenly frayed bristles on the all sides of the upper hull superstructure using gray pastel chalks diluted with Isopropyl alcohol. After the mixture dried, I began to remove the excess chalk using a soft bristled paintbrush.
Road wheels, fenders and lower hulls were initially given an acrylic wash mixture of Tamiya flat earth, dark yellow, and Tamiya buff thinned with isopropyl alcohol. After the initial wash was completely dry, the road wheels, fenders and lower hulls received a second wash using earth colored pastel chalks, Tamiya flat earth and isopropyl alcohol. After the pastel wash dried, some of the excess chalks were brushed off using a brush with soft bristles. The process of washing and brushing was repeated until the desired effect was achieved.
The tracks were given two sets of washes. The first wash was an acrylic wash mixture of black and red brown (XF1+XF64) to give it a darker rusty finish. The second wash was a pastel mixture of orange, black and burnt umber diluted with alcohol. After I completed the weathering process, the tracks were dry brushed with Tamiya metallic gray to show wear and tear.
Once all weathering activities were completed, I sealed the paint using Krylon Matt finish.
Conclusion
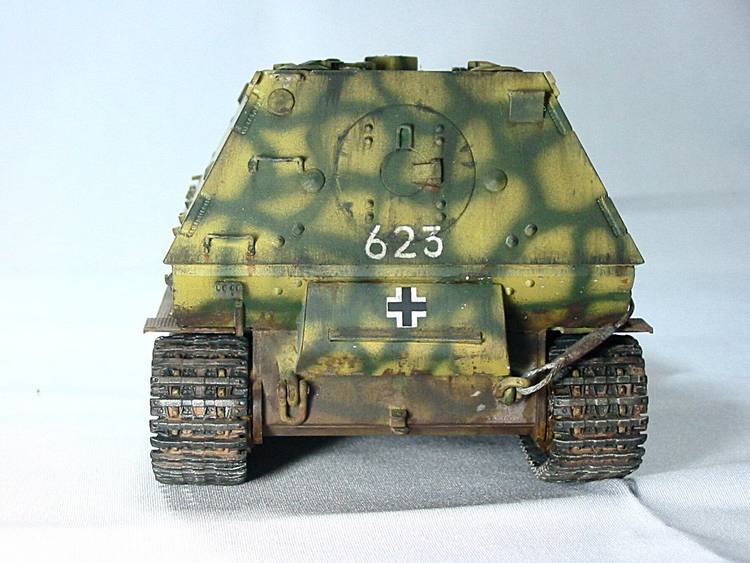
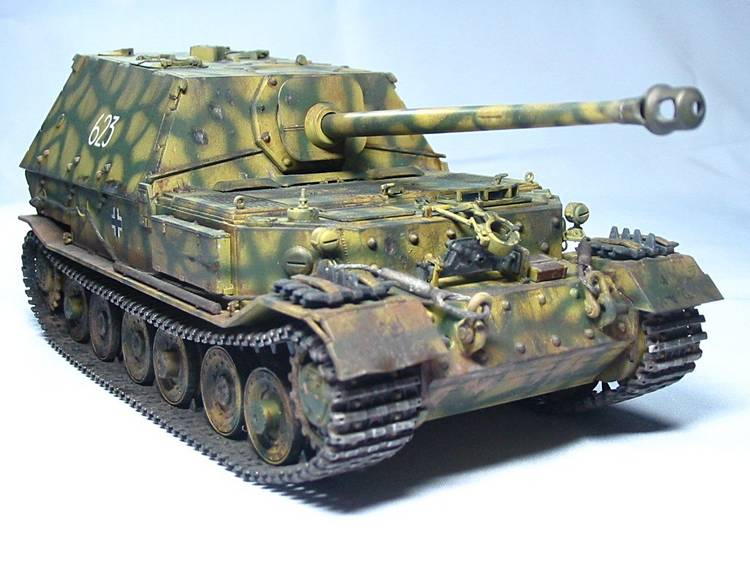
I hope you enjoyed reading the article as I did writing it. Included with this article are some pictures of the completed Dragon Ferdinand.
Arvin Arbolado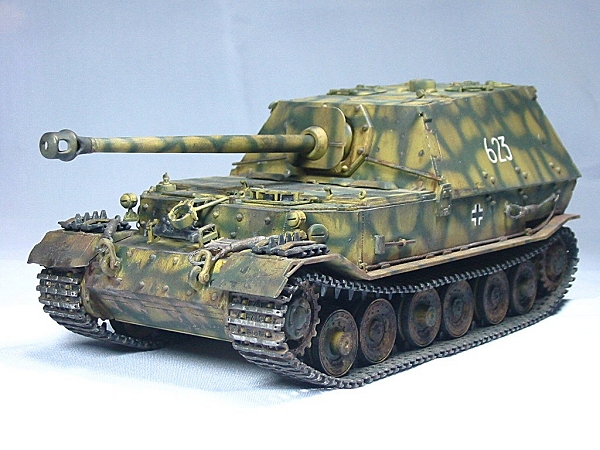


All Rights Reserved. Please read our Conditions of Use and Privacy Policy.