

1⁄35Marsch zur Front - Belgien 1944
40
Comments
Figures:
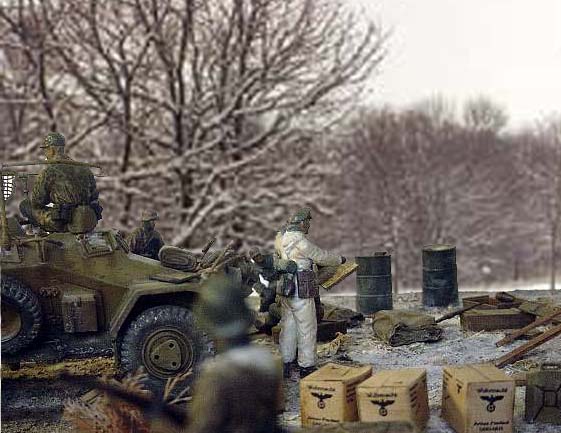
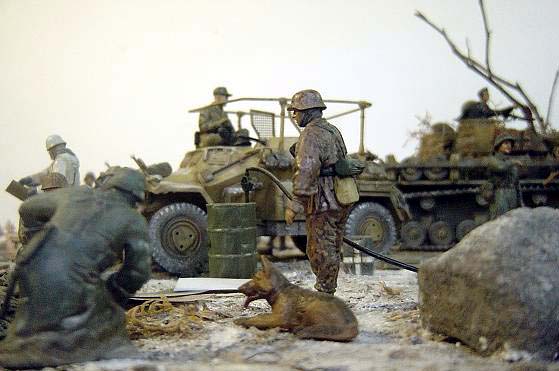
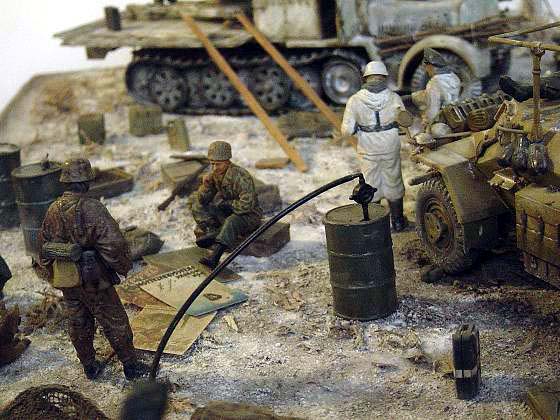
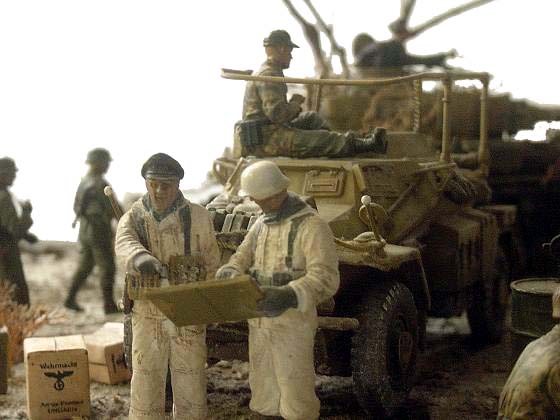
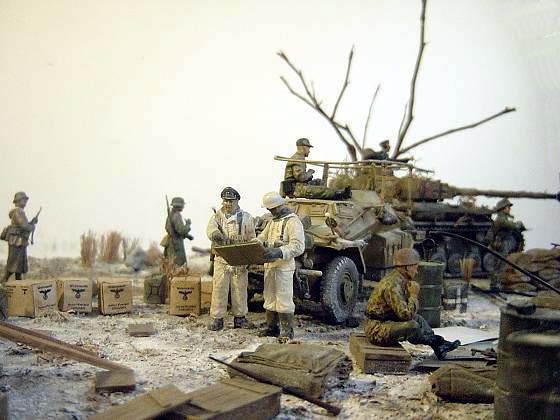
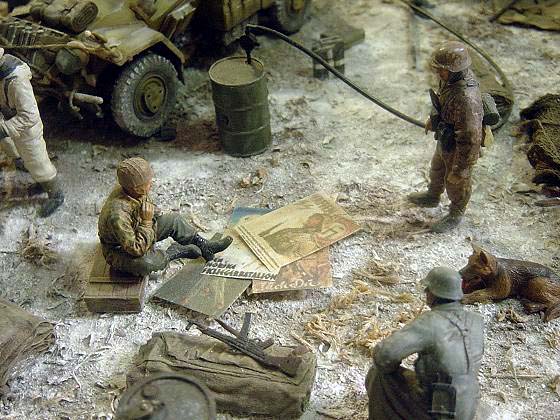
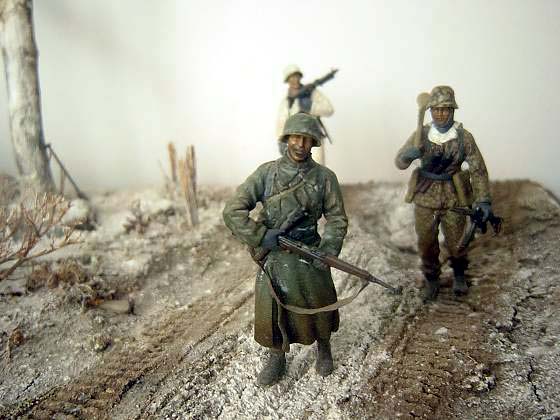
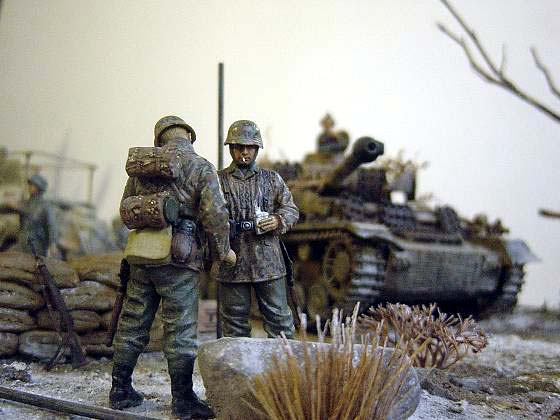
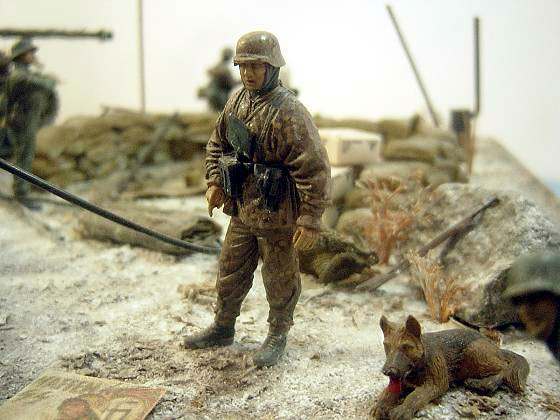
Figures are a mix of Dragon and Tamiya and a Verlinden tank commander courtesy of Blade48mrd. No modification was done although I didn't apply some of the kit-supplied accessories. I figured out that if they are relaxing, then they shouldn't have much accessories on them. Except, of course, for the soldiers marching down the road.I painted them using Mike Bannerman's technique as presented in Missing Lynx. I added a little feature....weathered uniforms. I used different ratios of burnt umber, white and yellow ocher oils to weather the lower part of the uniforms, especially those of the ones walking on the dirt road.
The Emplacement:
Everyone knows how to make sandbags made of epoxy putty, right? Since epoxy putty sets too quickly for me, I made mine using modeling clay. I dipped each sandbag in a diluted white glue and water mix and wrapped it in tissue paper. The tissue paper absorbs the oil of the clay, making it pintable. I glued the sandbags to a C-shaped cardboard template.The sandbags were sprayed with Tamiya buff, washed with burnt umber and dry brushed with light tan. It was filtered again with yellow ocher, and re-dry brushed with light tan.
Trees:
The trees are made from twigs lying around in our yard. After cleaning them, I spray painted them with a very dark brown. Then, I washed them with a burnt umber mix and dry brushed with several shades of brown and tan.Accessories:
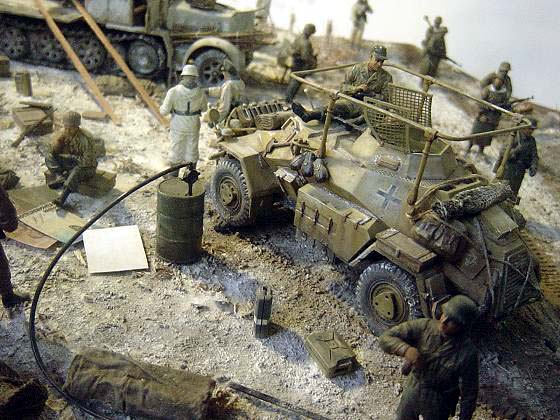
Accessories such as weapons and boxes were from my spare parts box and the kits themselves. Drums were from either Academy's Allied and German Supplies kit or Tamiya's Barrels and Jerry cans. Ration boxes are from Verlinden (thank you Engin).Tarps are made from Kleenex tissues. The black metal tent poles are leftovers of incense sticks that I painted black and dry brushed with chrome silver and graphite.
Groundwork:
The most exciting part! I set up the vehicles, figures and other accessories on the floor. I figured out the size....which turns out to be 18 by 22 inches. This done, I let one of my friends have someone build a base of this size for me.Once the tub-like base was delivered, I started working right away. I glued several pieces of styrofoam of varying thickness, from 1 inch to 1/2 inch. However, I left out a section where the dirt road will be placed. At this time, I glued the trees to the base.
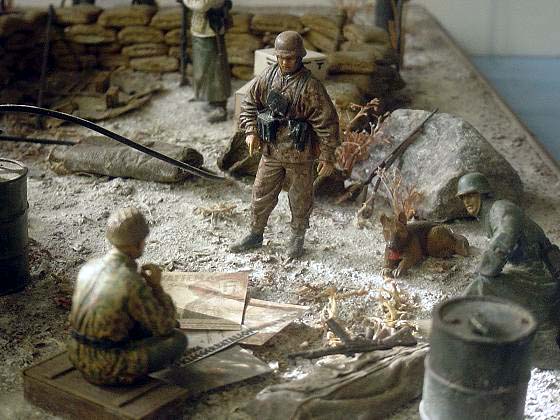
When the glue dried, I applied wall putty (spackle) to seal the styrofoam. I applied it roughly and in uneven layers so that the ground will have an uneven texture. While the spackle was still wet, I installed the rocks. The rocks were scratch built. Hehehe...okay, I'm kidding. They came from our yard.
Before this dried out, I pressed the tires of the armored car and the half-track on the ground to make tracks.
After the spackle dried, I coated the ground with a strong solution of white glue and water. Groundwork was done by sprinkling the styrofoam with sifted garden soil which was microwaved to kill off bacteria. While the soil was still wet, I sprayed a covering solution of white glue and water with a spritz bottle. Immediately, I sprayed the ground with Lysol with antiseptic alcohol so that it would be sterile.
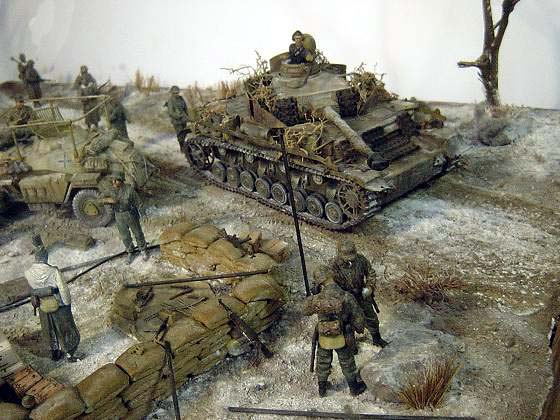
When the ground was dry, I started on the road. I cut off a length of styrofoam which is .25 cm undersize. That means the road has a .25 cm gap from the groundwork beside it. I did this so that when covered with soil, the road will be clearly distinguished from the other groundwork.
I covered the road with spackle, thicker than the other groundwork. Then, I pressed the tracks of the Panzer IV to imprint tracks. When dry, I brushed a strong white glue solution and sifted garden soil on it.
While the soil was drying, I roughened up the center of the road with an old fork.
Detailing the groundwork:
The groundwork itself looked good, but it lacks life. I made an oil wash of burnt umber and black and washed the whole groundwork. When this was dry, I dry brushed the groundwork with the following oil colors: dark tan, light tan, yellow, and grey. When the last color was dry, I dry brushed a lot of white Titanium White oil. This will simulate the snow that has accumulated into crevices and ground.Rocks were washed with various shades of grey and dry brushed with light grey, then white.
Now, the groundwork looks so good that it's almost a shame to add anything to it. Nevertheless, I feel it needed some sort of spark. I got the idea while watching the movie "Behind Enemy Lines" wherein fallen leaves show through the snow.
I coated the dry ground with a white glue solution. Then, I sprinkled McCormic Pizza Seasoning (it's like parsley but it's brown) and chopped up moss, carefully avoiding the dirt road. Mmmm....delicious. I applied a filter of dark brown and yellow to seal up the groundwork.
About the Author


FROM: VISAYAS, PHILIPPINES
Hi. My name is Angela. I'm a vampire and I live in the Philippines. I've been into modeling for 10 years. Mostly, I model World War 2 vehicles and figures but my interst also extend to sci-fi models. Occassionally, I model modern aircraft and AFVs. My dad and brother are very supportive of my hobby ...
Comments
Thank you for the wonderful comments.
I owe it all to you who, through the 8 months of construction on this piece of work, helped me in everything.
As what I said, this dio is dedicated to all of you.
Angela
JUN 01, 2005 - 06:31 PM

wow thats a perfect dio I just one in quick look : The Flak truck's links are little bit on air ! Paintings , weatherings , etc. are really impressive . Good job
NOV 30, 2005 - 12:11 AM

Its never to late to admire such a dio...Wonderful article and dio.
Glad to hear you are keeping it.
NOV 30, 2005 - 12:20 AM
Hey, what a pleasant surprise! I didn't know that someone would still take a look at this dio.
Thank you guys.
Angela
NOV 30, 2005 - 05:49 AM

Impressive.
Well done. I like the B/W photos. Adds some more realism to an already realistic dio.
Congrats.
DEC 01, 2005 - 02:38 AM
It has been quite a while since I visited Armorama.
And I didn't expect that there is still a person looking at this diorama.
Thank you.
NOV 06, 2006 - 11:20 AM

great work angela,
i like it a lot!!!!
do you remember that we both got a quite the same idea on this ardennes dio?
but my dio didnt make it to finish coz ive lost some of the important material for the dio during the process of moving back to my parents house. frm my apartment..
ive lost all 28 figures...and some other stuffs as well. all in one box.
i also lost numbers of vehicles and unopened boxes of models.
it was so dissapointing knowing that ur model is not in all the boxes u've packed.
here the link to some of the last pictures of my lost battalion
visit this link LINK
or click on the link below
NOV 13, 2006 - 03:32 PM

Good Morning Angela,
Great Diorama, I was wondering if it was possible for you to email me the PDF on painting German Figures.
Mark
JAN 09, 2013 - 11:23 AM
Well , i remember Angela from my early years on Armorama, but this is a long time ago. This thread is very old to and you will probably not get an answer as Angela is not here any more
JAN 09, 2013 - 07:18 PM
Copyright ©2021 by Angela. Images and/or videos also by copyright holder unless otherwise noted. The views and opinions expressed herein are solely the views and opinions of the authors and/or contributors to this Web site and do not necessarily represent the views and/or opinions of Armorama, KitMaker Network, or Silver Star Enterrpises. All rights reserved. Originally published on: 2005-05-23 00:00:00. Unique Reads: 20808

WEB HOSTING BY


Copyright ©2021 Armorama and Kitmaker Network, a subsidiary of Silver Star Enterprises
All Rights Reserved. Please read our Conditions of Use and Privacy Policy.
All Rights Reserved. Please read our Conditions of Use and Privacy Policy.