1⁄35Have a nice day
4
Comments
Introduction
So, What’s Wrong With the Basic Trumpeter BTR-50..? …in all honesty, nothing… if you want the rarer, early version of the BTR-50. The kit is a very easy (weekend?) build straight out of the box. Detail throughout is good, but can be improved. There are a few pictures of these and walk arounds out there on the web, but pictures of the early model in use are rare. I like worn, used and abused vehicles, so I managed to find a few pictures of vehicles as used by the Iraqi Army. These showed later versions, which deviated from the version supplied by Trumpeter in two main areas: 1. The nose on the latter version is elongated and ‘sharper’ than the earlier model. The fittings remain much the same. 2. The engine deck is raised on the latter model to overcome flooding problems experienced on the earlier versions. The exhaust outlet and engine air take remain at the original height. Obviously, I’ve also fitted a ZU23-2 a 23 mm Anti Aircraft weapon, as seen in a few pictures I’ve managed to find, but this isn’t a requirement and the basic superstructure upper fittings should suffice for a latter model. You’ll also note that only the left track is fitted, but more about that later…The Build
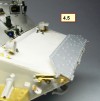
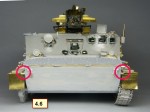
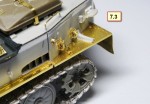
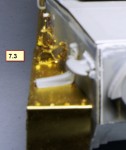
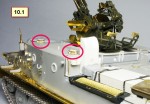
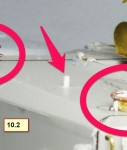
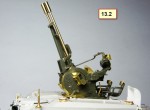
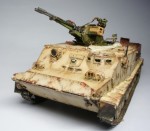
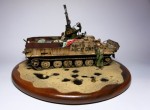
Starting with the areas mentioned above: Authors Note: All images in brackets (1.1, 2.1, 3.2 refer to the images below). 1. Before putting any plastic together I removed the engine deck complete (1). This was achieved by heavy scribing from the inside (1.2). One the engine deck was removed I carefully cut out the exhaust outlet and air intake in one piece. The sides of the rear engine deck were then raised by 2 mm (it should be 1.7 mm but I had 1 mm plastic strips to use). These were sanded smooth and painted over with Mr Surfacer 1000 to fill any small gaps. The same needs to be done around the exhaust outlet and engine intake piece to allow this part to sit at its original level. A small wall, fitted at approx 45 degrees need to be added around the exhaust outlet with 3 tie down points at the front (1.3). 2. After cutting away the upper large hatch fittings (to allow the 23 mm gun to be fitted) I glued the lower and upper hull halves. I then used thin plastic card stock over the top of the existing nose to get the extension built. I used small blobs of blue-tac to stick the plastic stock to the existing nose to allow for adjustments before flooding the area with thick super glue and baking soda. This was then sanded down around the edges to give a smooth finish. From a level – the lower plate should rise up at 40 degrees. Again, from a level the upper plate should drop down by 8 degrees (2.1, 2.2 & 2.3). Please note that the various plans for this vehicle found on the internet all show different angles so research carefully! 3. Once the upper and lower hulls were fitted, it became apparent that by raising the engine deck, the rear wall and door at the back of the upper superstructure were now 2 mm too high. I removed 2 mm from the bottom of the wall and adjusted the various fittings on the wall to fit the new height. The walk arounds mentioned above were very helpful in this area. I also removed 2 mm lengthways from the door by cutting the door in half and removing 1 mm from each half. This was then glued back together and smoothed to hide the seam. I re-drilled the viewing port (?) which was lost when removing the 2 mm strip. I also added the rain guard to the door, as shown on latter models – this was made from thin plastic card stock (3.1) With the two major changes mentioned above most of the remaining changes and detailing revolve around the fixtures and fittings. I used the Voyager etched brass set for the fenders, most of the tool clamps and other fixtures. 4. Starting at the front, the kit lights, tow hooks and splash plate (bow (?)) were detailed using the Voyager set (4.1 & 4.2). The lights were also fitted with cabling and hull exit points for the wire made from punched disks etched brass (4.3). The Voyager light guards are fiddly and delicate, but are worth the effort. With a bit of careful fitting, and the use of miniature brass rivets, the splash plate can be made to work (4.4 & 4.5). At the front corners there should be a spring loaded clip fitted to either side. I scratch built these using plastic stock and brass rod (4.6). I removed the front hatch ‘bump stop’ from the upper right corner and replaced this with a small piece of plastic rod on the upper superstructure (4.7). 5. At the front of the superstructure I drilled out the various periscope housings and fitted etched periscopes from the spares box. I completed these by placing small rectangles of pearlescent wrapping paper to give the effect of optics (5.1). The search light was fitted with cabling and hull exit point as above – I left off the guard as most pictures I have show this missing; I fitted guard mounting points from brass tube (5.2). 6. Moving to the right side: I added spare track mounting points from brass tube and fitted plastic disks around the viewing ports – some pictures show these fitted, others don’t (6.1). 7. The left side: I first fitted plastic disks around the viewing ports as per the right side. The antenna pot was then built from plastic tube and a spare Voyager antenna fitting – the one supplied in the Voyager kit doesn’t look right from the walk around pictures. Cabling was also added. Again, all tools were left off and clamps from the Voyager set used (7.1). The kit and Voyager set both miss the pick-axe fitted to the left side. The fittings for this were added from the spares box. A bracket for the folded down antenna also need to be added above the pick-axe fittings (7.2). I added the brackets from the Voyager set for the cylindrical tube to the rear side below the engine decks (7.3) and the plug/socket assembly from plastic stock in the same area. 8. The rear plate: I left off kit parts A22, as I could find and pictures of them fitted (I don’t have a clue what they are). The rear tow hook needs some detailing and shaping as the kit supplied part is too square (8.1 & 8.2). I also added the convoy light, again, seen fitted to some vehicles but not on others (8.3). 9. Engine deck: I left off the 2 rails fitted either side of the engine door – I couldn’t find any pictures of these fitted on latter models. I am however going to put stowage on the rear deck so this are will be hidden anyway if I’ve got this wrong. I fitted brass handles to replace the plastic kit ones and added some tie downs from etched brass. I also fitted what I believe to be a cover for the engine air intake (periscope looking item at rear left of superstructure). This is only shown in 2 pictures I have, so what is built here is very much an educated guess based on experience. The modified air intake is primarily built from plastic card stock, with fittings also added from the same based on the one picture I have of this fitting. Looking at the fitting it seems that this part would be a temporary air intake, probably used when wading to stop the air intake becoming flooded – so I added straps over the top to allow for easy removal by the crew (9.2 &9.3). I also added the extra fuel filling point (?) onto the rearmost plate (9.3). I also changed the fuel pannier to an old style one on the right side. I think this came from an old AEF Designs set (9.4). 10. The upper superstructure was built as per the kit instructions with a few of the Voyager fittings added. I also fitted the two small round air filters (part of the NBC fittings?) build from plastic stock, brass rivets and etched brass grill. Amazingly each of these filters is made from 16 separate parts! (10.1). I also removed the small square ‘bump stops’ either side of the large double hatches and replaced with thin plastic rod. Pictures show these to be circular, not square (10.2). At this point I also added the AA gun floor from thick plastic sheet, dropped 1 mm into the large opening at the rear of the upper superstructure. I cut a 26 mm circular hole onto the centre of this to accommodate the bottom of the ZU-23-2. 11. Across the whole of the model I added weld lines using the Archer Raised Weld Lines Resin transfers. There were easy to use although a bit delicate. These were primarily added to areas where I had sanded off previous detail, although I also added weld lines to the top of the superstructure where they are missed by Trumpeter (11.1). 12. Tracks (Breath deeply Ian, breath deeply…): The kit tracks are the rubber band type, and look far too thin. I decided to go with the Masterclub ones as I got them cheap from E-Bay. I have to say that I’ve used all brands of metal, plastic and resin tracks in the past. I don’t know why, but I just didn’t get on with the Masterclub ones. When I tried to fit the impossibly small resin pins to the metal tracks they repeatedly snapped. In the end I drilled out all the holes; then, by using the rig shown, managed to get the resin pins fitted (12.1 & 12.2). I also had to use some metal wire as I had snapped/lost too many pins. This did however take a very long time (2 weeks of on and off building…). The resin sprocket is a nice addition but I also noted that many of the tracks were either bent or had teeth snapped off. A bit of careful TLC managed to rescue one complete side, but at the time of this write-up I was still missing 15 from the right side. I contacted Masterclub and happily they supplied replacements… 13. ZU-23-2 AA Gun: Despite 3 months of searching, I cannot find any detail of how the gun is mounted to the BTR. The few pictures I have show that it seems to be fitted pretty much level with the base of the gun inside the superstructure. The gun was built with the Voyager etched brass set ‘from the box’ (13.1 & 13.2) I steered away from super detailing, as the tracks had pretty much sucked out all of my enthusiasm for modelling. Obviously you don’t need to build the mounting cradle for the gun as it will fit straight onto the previously fitted base inside the superstructure. So, that’s all that’s required! Despite all of the detail above this is quite an easy conversion/update. I’m still undecided as to whether to fit the steel plates around the engine deck as shown in 2 of the pictures I have. It was painted in a plain sand, heavily weathered and placed on a scenic base. I finally added a spot of graffiti complete with the tanker that painted it.Kits & AM Used
Trumpeter 01582 BTR-50PK APC Voyager PE35483 Modern Russian BTR-50PK APC MasterClub MCMTL35047 Tracks and Drive Sprockets for PT-76, BTR-50, ASU-85 Meng VS004 Pickup w/ZU23-2 (Gun Only) Voyager PE35580 Modern Pick UP w/ZU-23-2 Master Model ZU-23-2 'Sergey' 23mm barrels RB Model 1:35 23mm ammunition for ZU-23-2 "Sergey" & other 23mm AA (seen in the final images)References
Armorama BTR-50PK Kit review Live links BTR-50 Walk Arounds & Pictures Used in This Build Dish Models Live links Toadmans Tank Pictures Live links Valka Forum Image Live links Internet Image Live links Internet Image Live links Internet Image Live links Internet Image Live linksComments
Your build log is one of the best I've seen. Put together well, easily followed, and the step-by-step w/photos is a winner for me. And speaking of winners, that BTR sure is!! Great job!
JUN 13, 2015 - 05:41 AM
Great work Brian,
Excellent weathering,nice detail on the stowage and the figure with the spray can just tops it off.
Tom
JUN 14, 2015 - 01:00 AM
Copyright ©2021 by Ian Barraclough. Images and/or videos also by copyright holder unless otherwise noted. The views and opinions expressed herein are solely the views and opinions of the authors and/or contributors to this Web site and do not necessarily represent the views and/or opinions of Armorama, KitMaker Network, or Silver Star Enterrpises. All rights reserved. Originally published on: 2015-06-13 14:25:01. Unique Reads: 13603


