

1⁄35Chieftain Tanks in Iran
23
Comments
Chieftain tanks in Iran
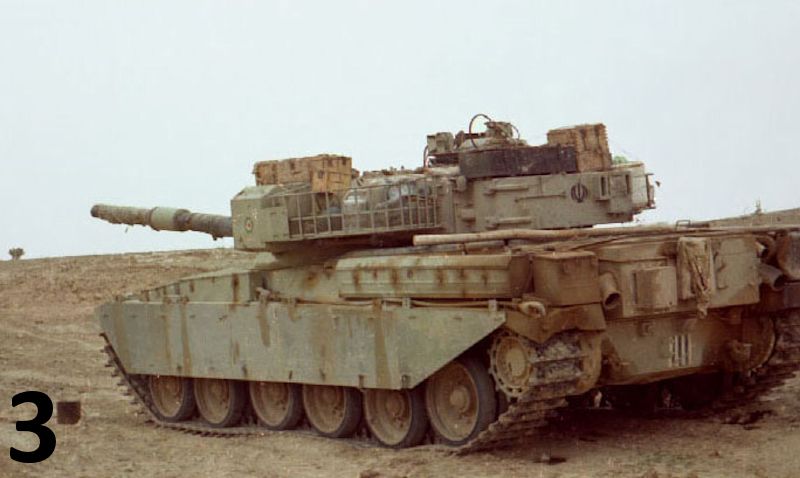
Iran was the biggest owner of the Chieftain MBT in 70s and 80s. Iran bought around 1000 of this tank during the Shah period, many of the tanks were the special Mk-3P version for Iran, the letter P standing for Persia, and also the Iranian Army had Mk-5P, AVLB, and ARV versions of Chieftain too. In the southern part of Iran, which is desert (Khozestan province), the Chieftain engine did not work so well, so Iran ordered a new tank from Britain; this led to the first updated Chieftain for Iran, with a better 1200HP engine and a new laser targeting system, the project being called Shir-1 (Lion-1). The second update was a whole new tank, with new armor and other new technology, named Shir-2 (Lion-2), but following the Iranian revolution the projects were shut down. Britain continued to develop the Shir-2 tank project, which led to the building of the Challenger-1 MBT tank. Picture 1. When war started, the Iranian armys main tank was the Chieftain, though the army also had M60A1, M48A5 and M47M too. In the desert of Khozestan province, Chieftains fought with Iraqi T-55 and T-62 tanks face to face. Although the Chieftain was less maneuverable against the fast T-55s and T-62s, the main gun of the Chieftain was a game changer; the 120mm L11 gun had good accuracy and it could fire long range shots, making huge losses to Iraqi tanks, stopping them at the gate of Ahwaz city (the capital city of Khuzestan province). A few Chieftains are still in service with the Iranian army. Pictures 2 and 3The kit
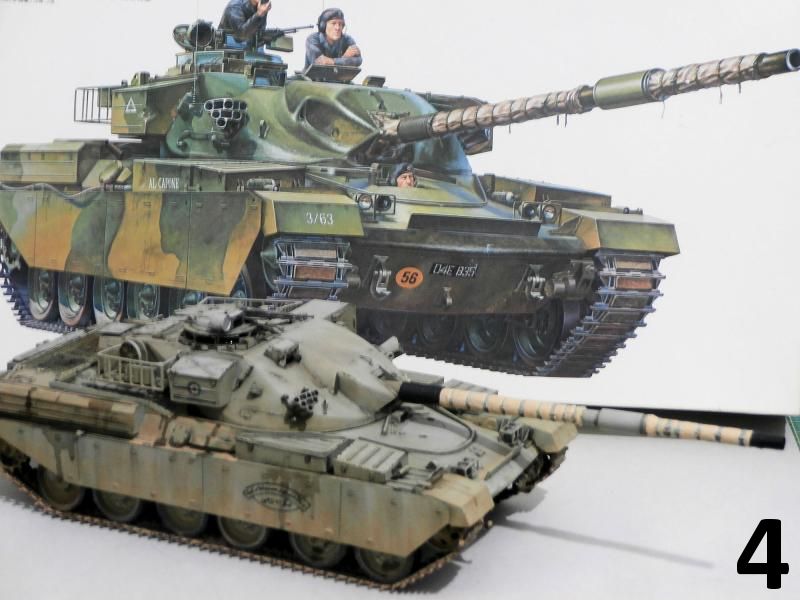
Tamiyas old kits are made in the 70s, and its not so accurate but is an enjoyable kit to build. On the box Tamiya wrote Chieftain Mk-5 but its wrong, the version you get is a Mk-3, and as I said, Iranian Chieftain Mk-3s were the Mk-3P which had a few parts from the Mk-5 version. I built this kit for a friend and he wanted the kit to be built as it came, with no changes. Picture 4. So I build the kit out of the box, assembling was good and fast but some parts need more sanding and putty work.Painting
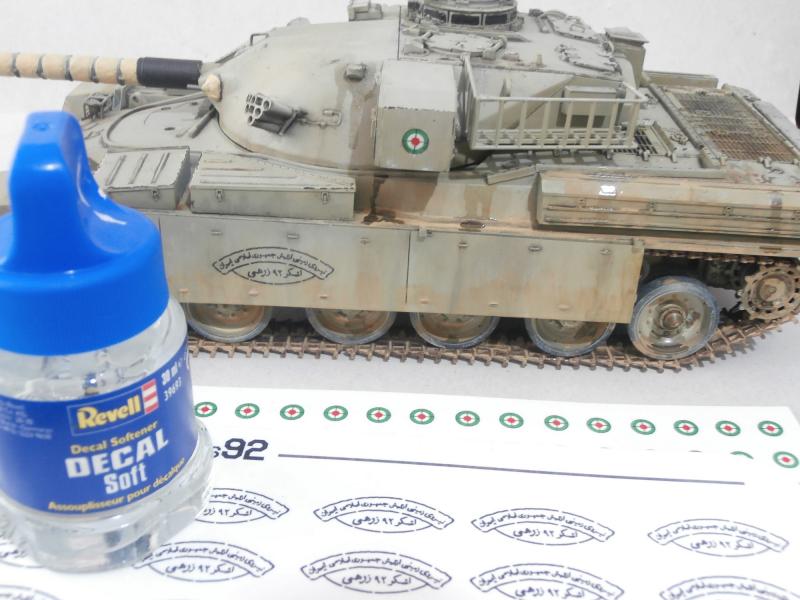
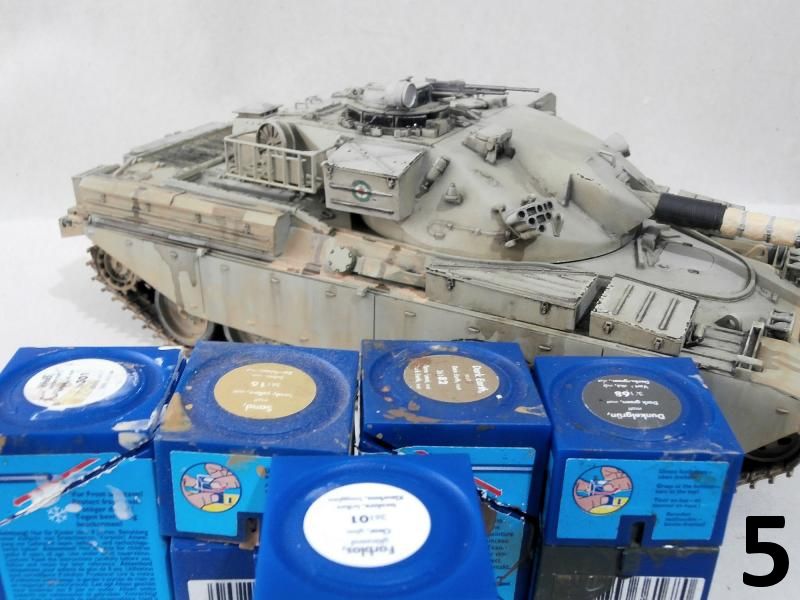
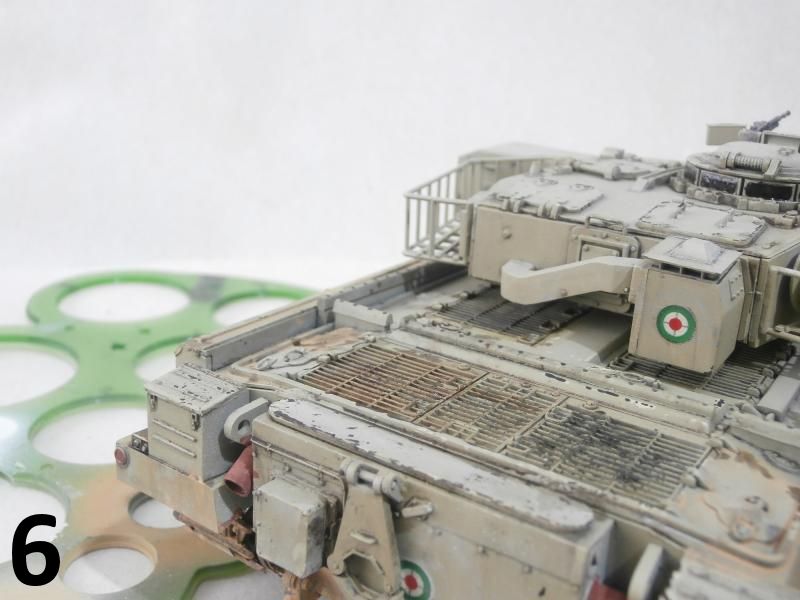
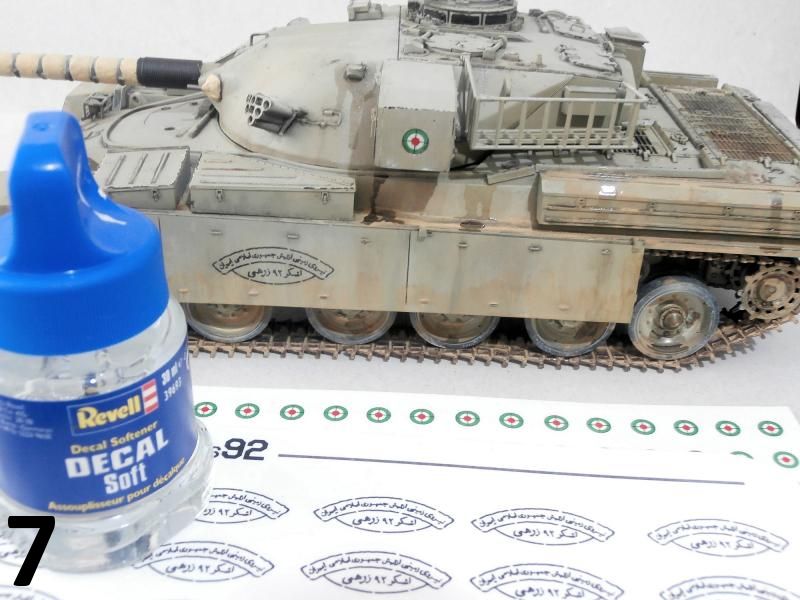
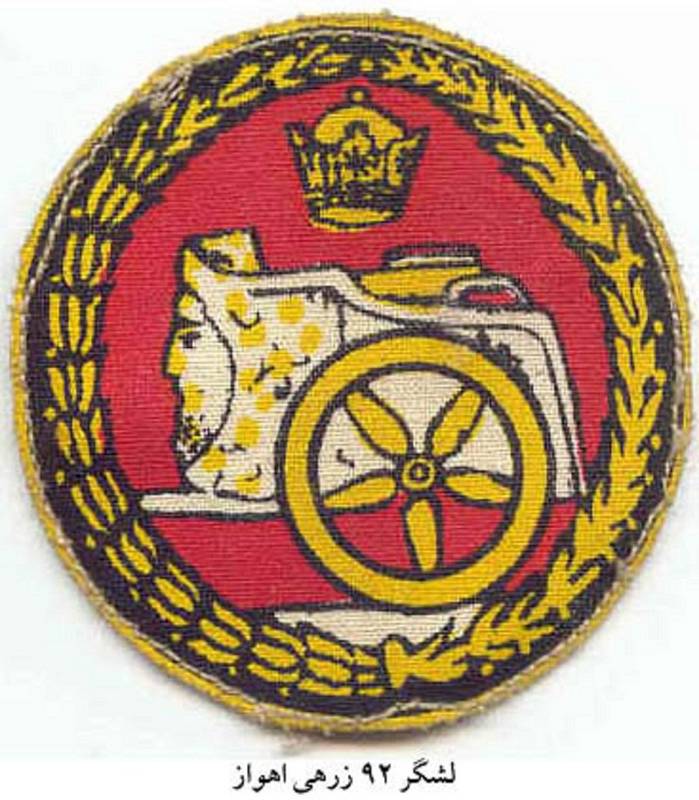
Picture 5. I always had a sample of Iranian army standard khaki color, as seen on Iranian army MBTs and AFVs from 1960 to 1990, and its a special color just right for Iranian terrain; its very close to the IDF color of the 70s and 80s, but I make the color by mixing other colors. The most available acrylic colors you can find in Iran are Revell aqua colors. First I mix the Revell sand color with light brown and then add lots of matt white and mix them together with 50% thinner; after this mix then I start to add a few drops of dark green to give me a very, very soft green look. Then I always add gloss clear to my mixing color to make a satin look and an ideal base for adding decals and the application of washes. First I primed my model with primer, and then built up thin layers of the color which I had made. I let the paint dry for 24 hours and then apply the decals. My decals are home-made, and because my printer doesnt print white colors, for the roundels, with the help of circle templates (Picture 6) I make round white dots by airbrush and then add the decal, softening the decal with softener. My friend wants his tank to be from the Iranian army 92nd Armored division, so I put the 92nd Armored division marking on the model. Picture 7.Weathering
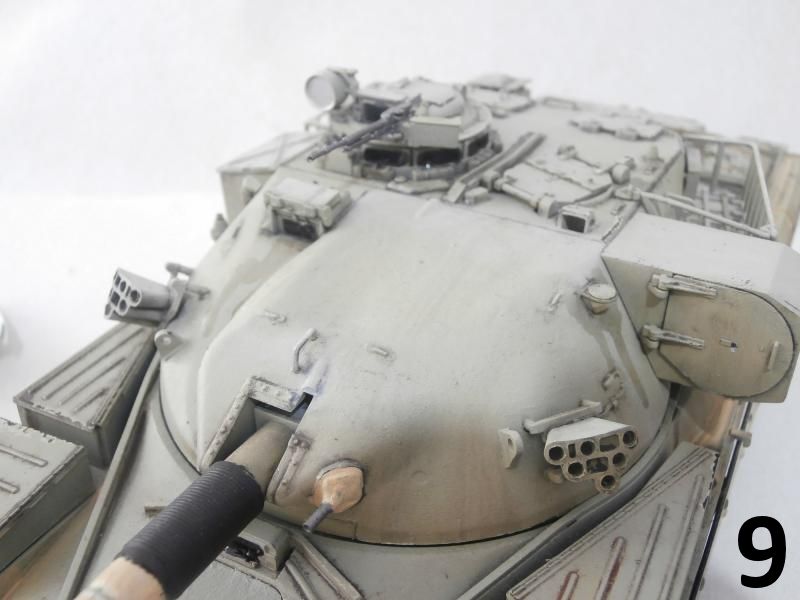
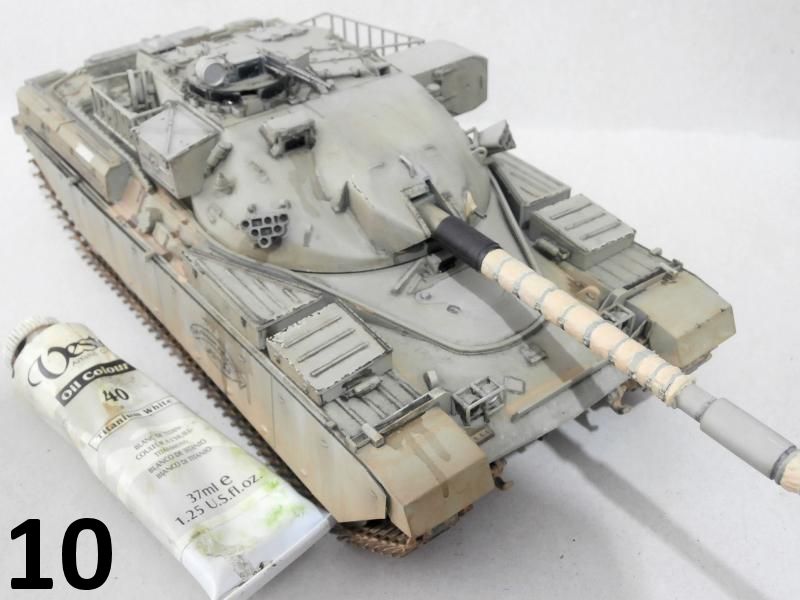
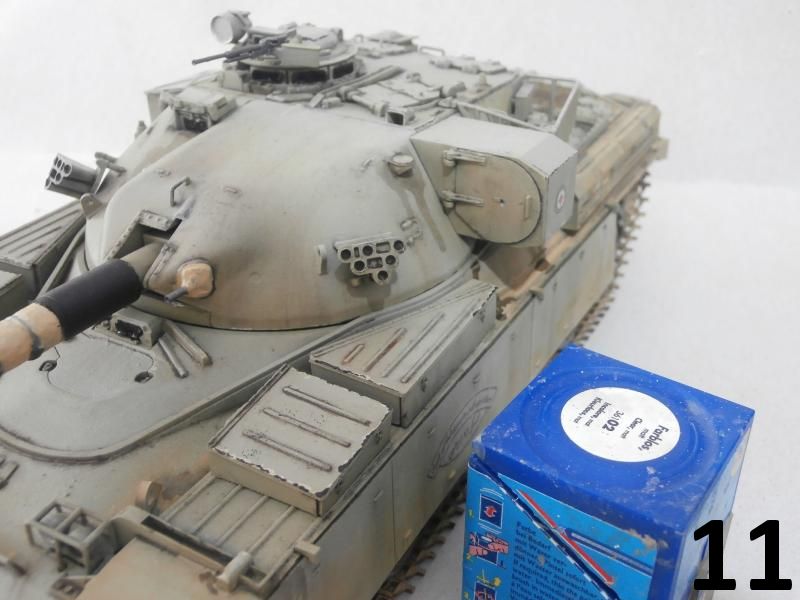
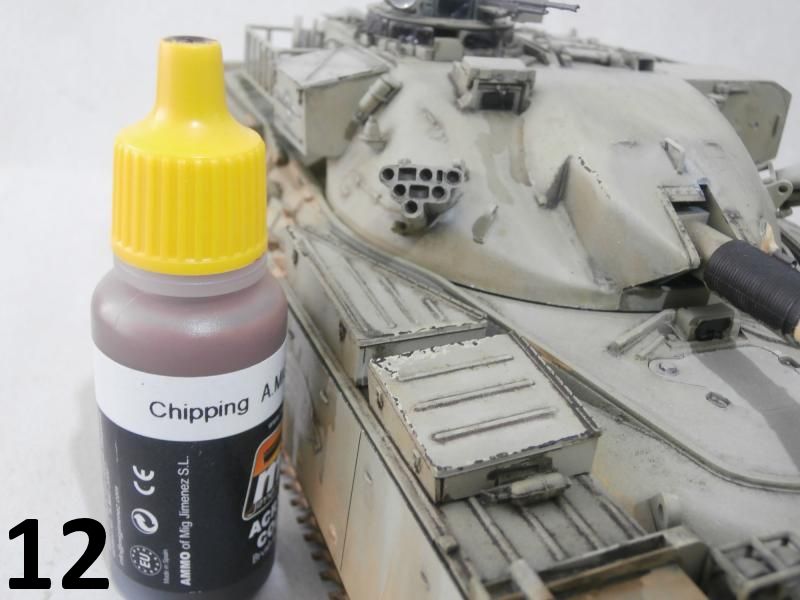
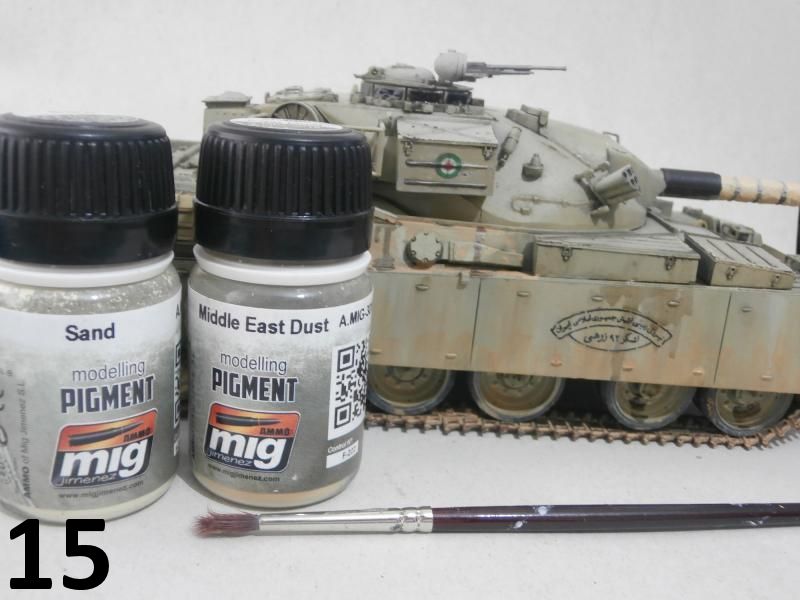
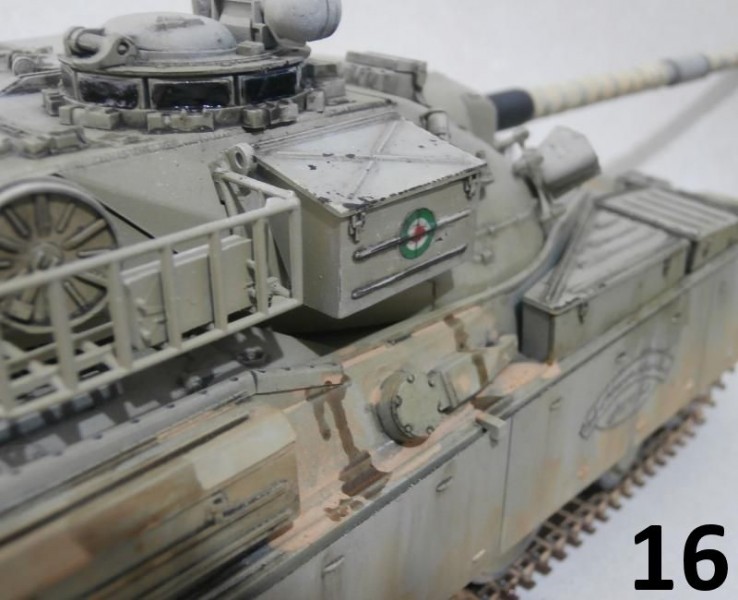
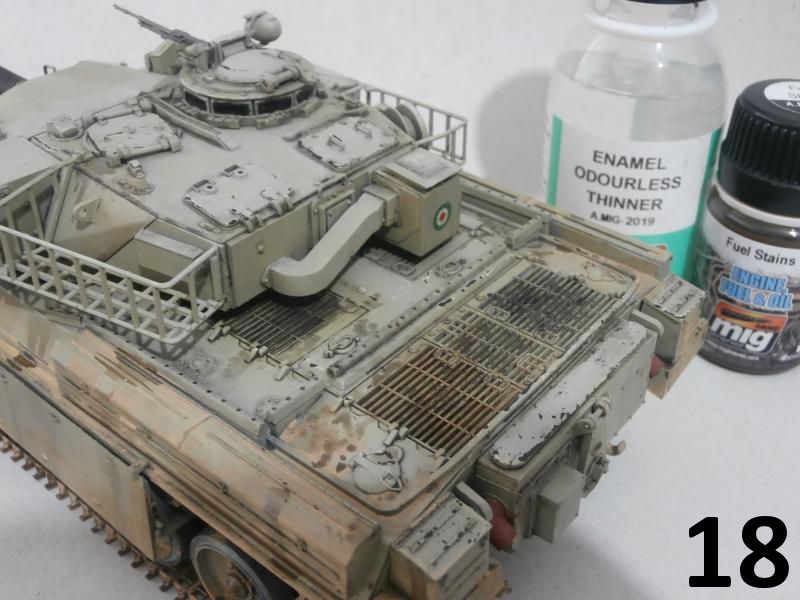
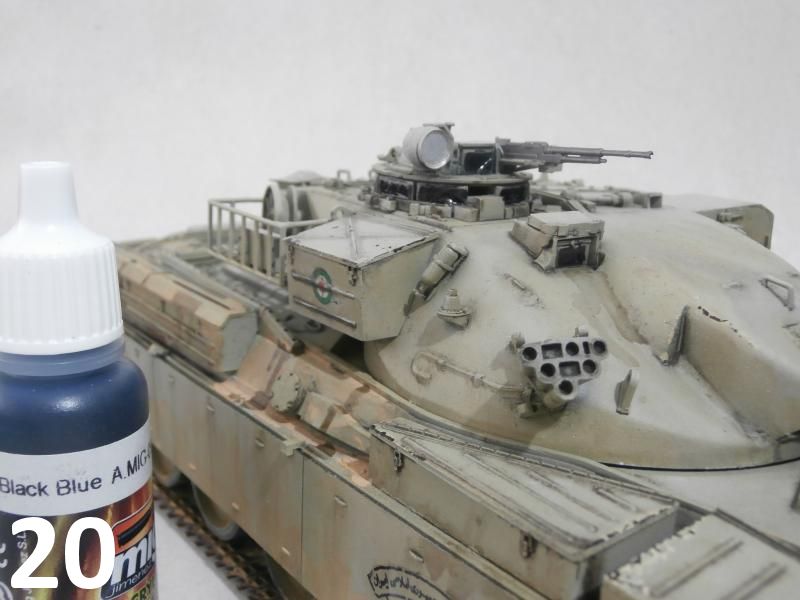
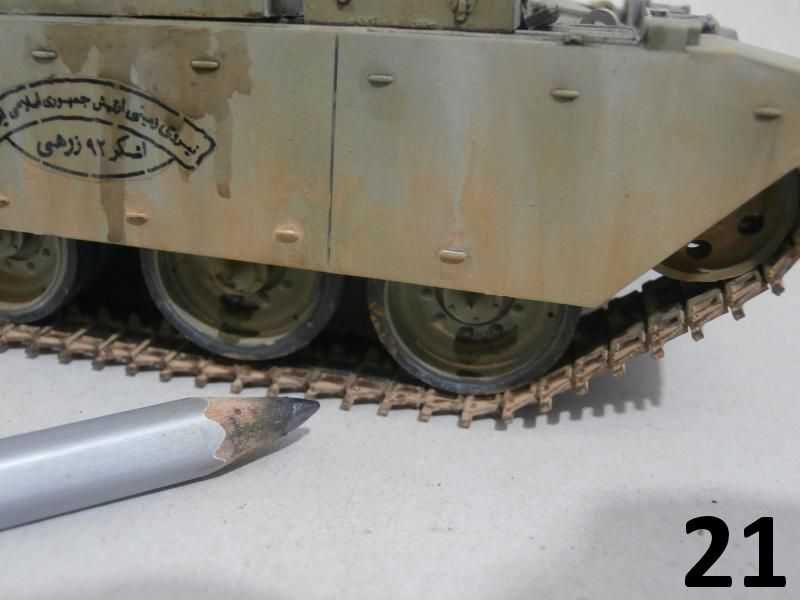
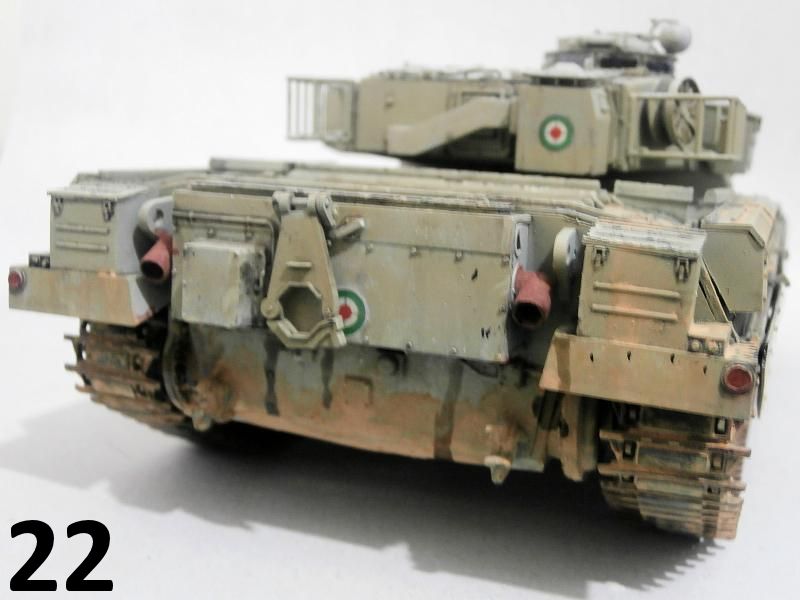
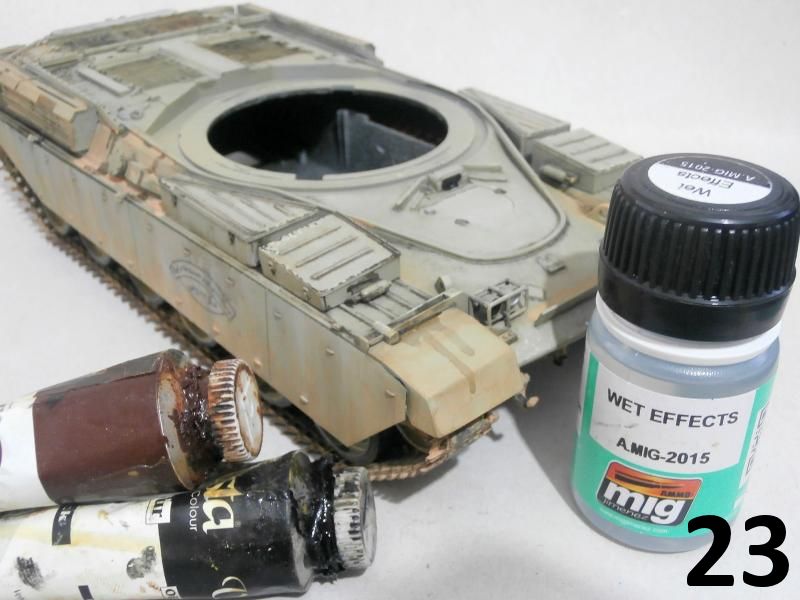
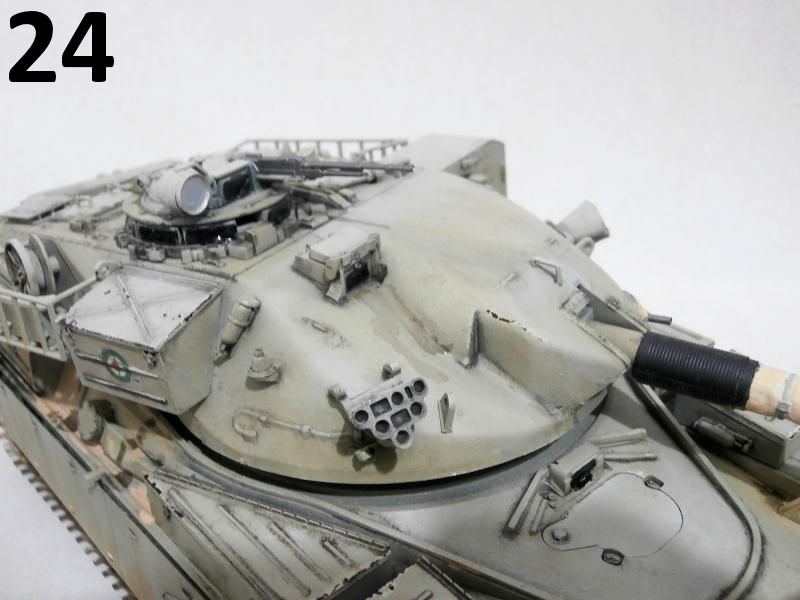
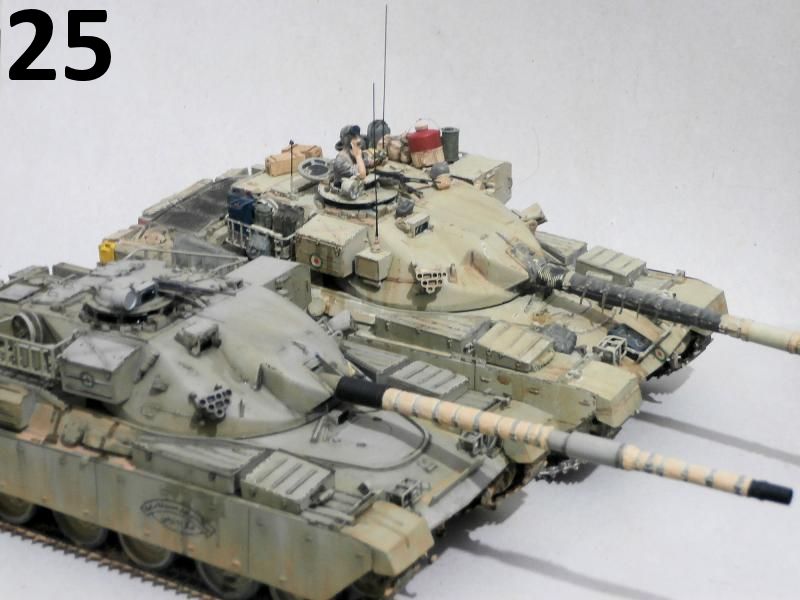
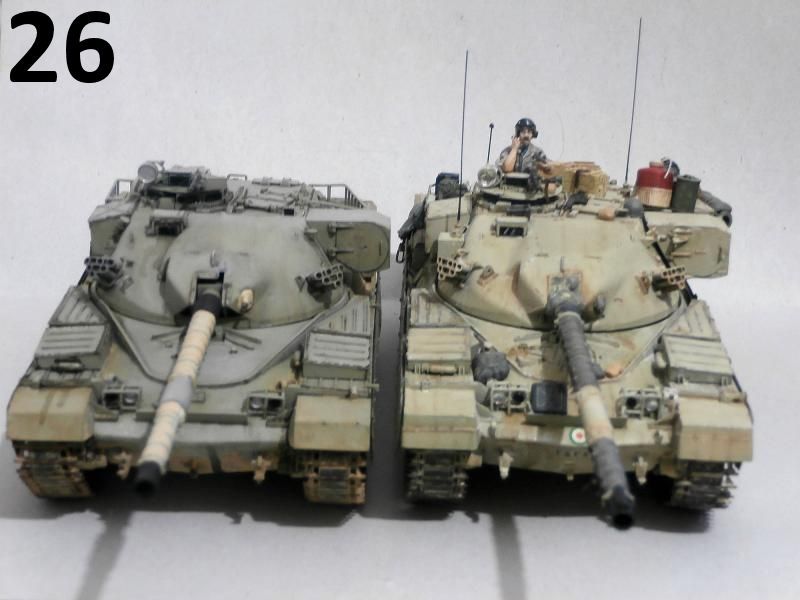
For weathering my first step is adding dark washes on shadow parts and around the details. I love the oil colors, so I mix 50%-50% black and dark brown oil color and thin it with 70% of thinner, and with a fine brush add it to the model. Picture 8. After a few hours the wash is dry, and with cotton and a brush moistened with thinner I remove excess wash, but in some areas, with a flat brush, I use the excess of the wash for streaking. Picture 9. After Im done with washes, I use white oil color to highlight areas which are exposed to sun; I just add a small dot of paint and with a moistened brush start mopping the color. Picture 10. After washing and mopping I add a coat of clear matt to the model to protect the decals and washes and also to give an ideal base for dusting and pigments. Picture 11. But before making dust, I use Ammo of Mig color to make chipping in some areas; with a piece of sponge and a different color, I make fine small chippings over the engine cover and other parts. Pictures 12 and 13. For dusting, first I make a thin mixture of white-yellow and ochre oil color and I add it to the side skirts and those areas which I think are dusty, then after drying I use a flat brush and gently make vertical movements. Next I mix two different pigments from Ammo of Mig and add it to the model with an old brush, and then with a big round brush I blend them until they give me the look that I want. Pictures 14, 15 and 16. I always make wet effects and stain oil effects over the pigment because its logical and shows very well. First I make the wet effect with Ammo of Mig wet effect and a very, very thin mixture of black and brown oil colors, then with a fine brush I streak the effect in a mostly vertical way. Pictures 17, 24 and 23. For a satin oil effect I use Ammo of Mig products too, I make a highly diluted mixture and start adding it to the model; at first you may just be able to see the effect, but after adding more layers you will see it, and then for last step of satin oil I use a pointy brush and add small dots of the product without diluting it. Pictures 18, 19 and 22. For the last touches I use Ammo of Mig crystal colors to paint the periscopes, and also I use graphite pencil on the rubber part of the tracks. Pictures 20 and 21. At the end you can also see my Takom Chieftain Mk-5P, which I recently built for my personal collection, next to the Tamiya Chieftain; the Takom kit is a very superb and accurate model of this Iranian Army subject. Pictures 25 and 26. You can see more photos of my Takom Chieftain here. Thank you for reading, I hope you liked it. Vorya Heidaryan.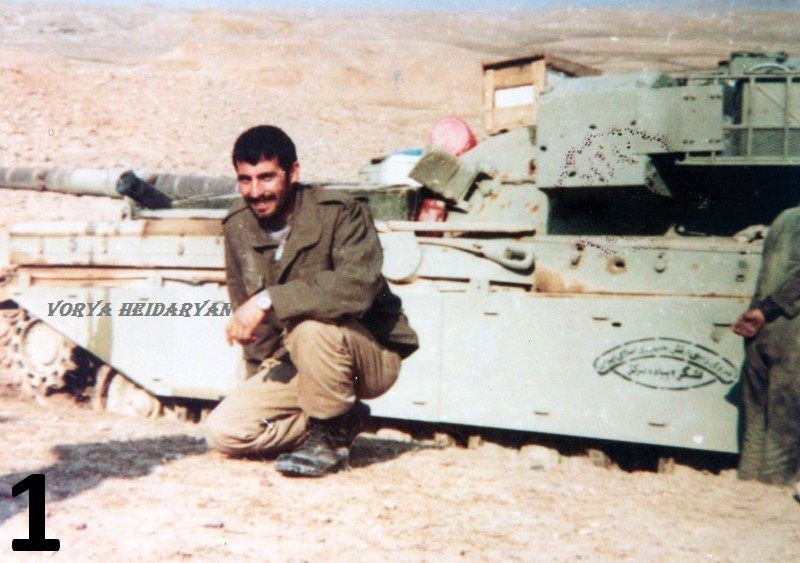


About the Author

FROM: IRAN / فارسى
I start building models about 6 years ago.first i loved iranian air force birds and now i like to build AFVs in 1/35 scale.
Comments
Great build! Nice to hear a little bit of the history as well.
Thanks for sharing
MAR 12, 2016 - 03:39 PM
Great stuff, Vorya! I'm planing to build an Iranian Chieftain myself, your article came right in time. So, you reckon IDF's '70's-'80's Sand Grey would be a good match ? What is written on the sideskirts ?
Israel
MAR 12, 2016 - 04:26 PM

Thanks , Yes you can use Sand Grey but add few drops of green too or give the model after painting soft green filter .
The sideskirts decal is about the division of this tank .Iran army 92nd Armored division.I hope see your Chieftain model soon .cheers
MAR 12, 2016 - 11:31 PM


Just picked up Takoms Mk 5/5P kit and want to do it as Iranian Chieftain.So Model master IDF Armor Sand will work as starter coat? Very nice build V.
APR 20, 2016 - 04:06 PM
Just picked up Takoms Mk 5/5P kit and want to do it as Iranian Chieftain.So Model master IDF Armor Sand will work as starter coat? Very nice build V. [/quote]
Thank you .It's great kit you will love it .yes you can use IDF Armor Sand and also add few drop of green as well.
APR 27, 2016 - 12:44 AM

didn't know UIran had some of the Mk 3 versions. There's hope for the Tamiya one lingering in my stash!
MAY 01, 2016 - 04:30 PM
Hi, congratulations.. beautifully weathered.. great build. Hope we get to see more of your work.. : ).
Kip.
MAY 03, 2016 - 10:23 AM
Copyright ©2021 by Vorya Heidaryan. Images and/or videos also by copyright holder unless otherwise noted. The views and opinions expressed herein are solely the views and opinions of the authors and/or contributors to this Web site and do not necessarily represent the views and/or opinions of Armorama, KitMaker Network, or Silver Star Enterrpises. All rights reserved. Originally published on: 2016-03-02 05:40:00. Unique Reads: 16798

WEB HOSTING BY


Copyright ©2021 Armorama and Kitmaker Network, a subsidiary of Silver Star Enterprises
All Rights Reserved. Please read our Conditions of Use and Privacy Policy.
All Rights Reserved. Please read our Conditions of Use and Privacy Policy.