

1⁄35Donetsk Road Warrior
13
Comments
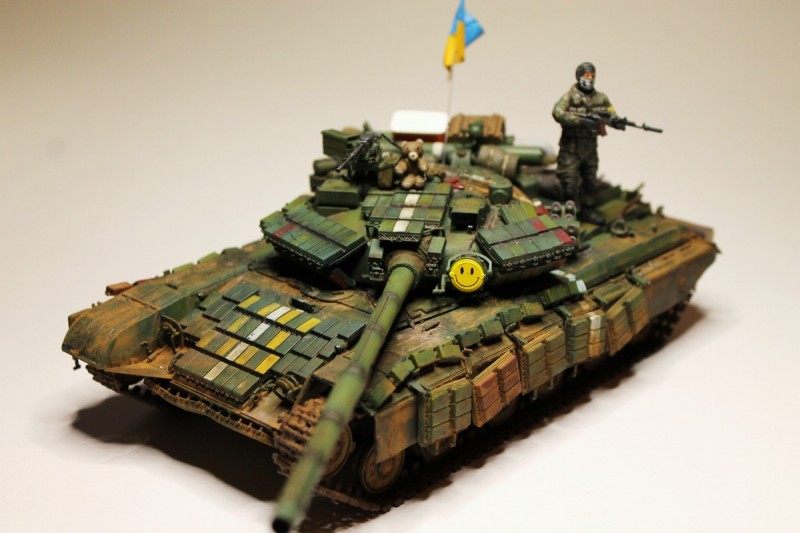
I decided recently to undertake a project from the ongoing Ukraine War since Echelon decals has recently released several decal sheets depicting vehicles from both Ukrainian and Novorossian Forces. I had the 1/35th scale Trumpeter T-64BV in the stash so I decided to build one of the vehicles depicted on one of Echelons new sheets, #356195. This particular Ukrainian T-64 was adorned with a large smiley face on the light cover so I decided to build that vehicle.
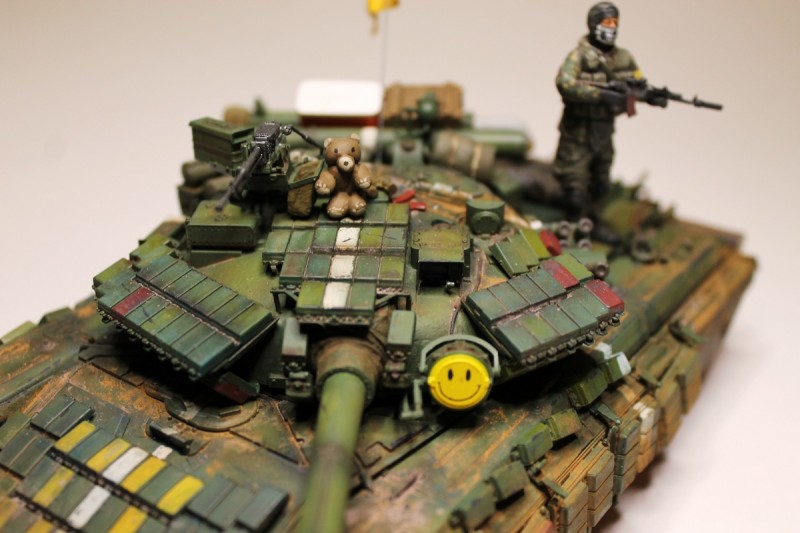
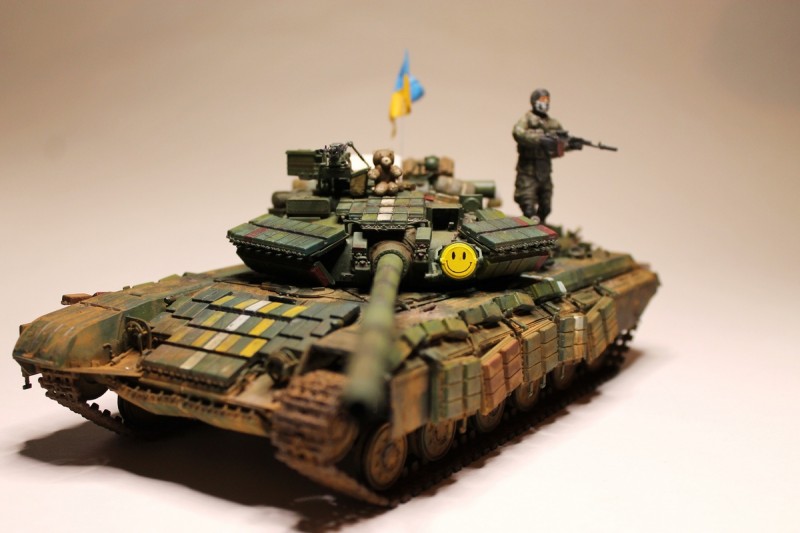
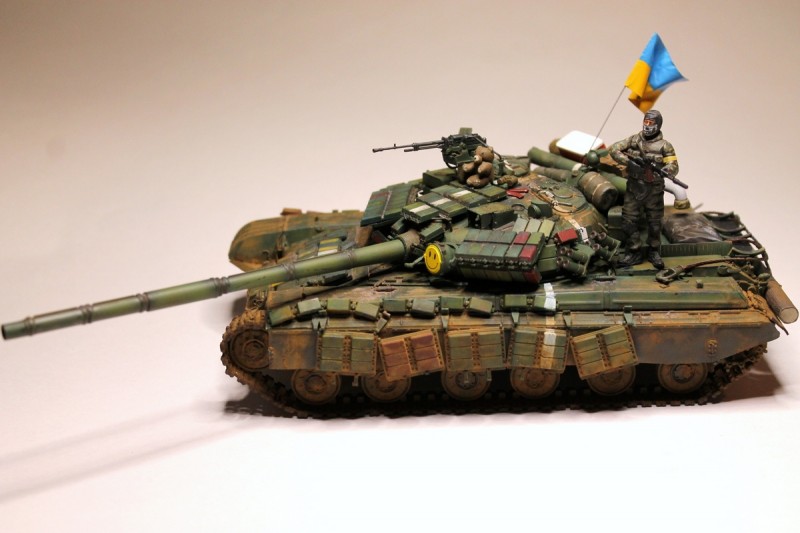
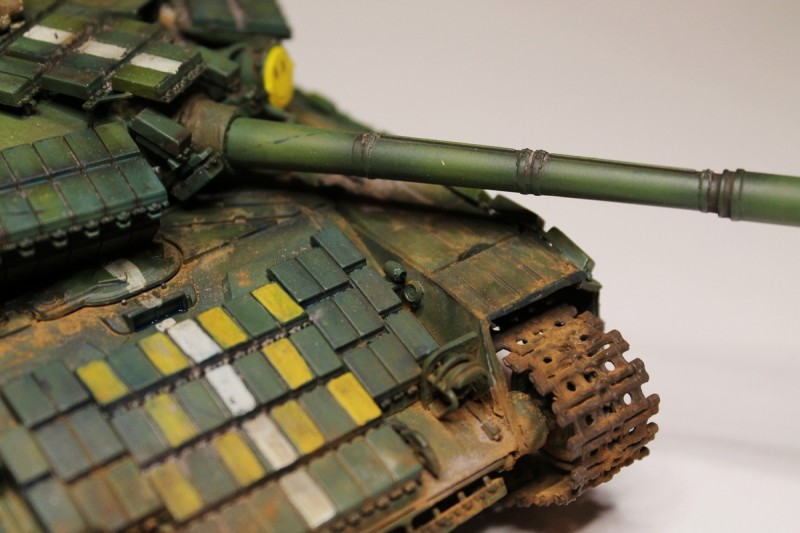
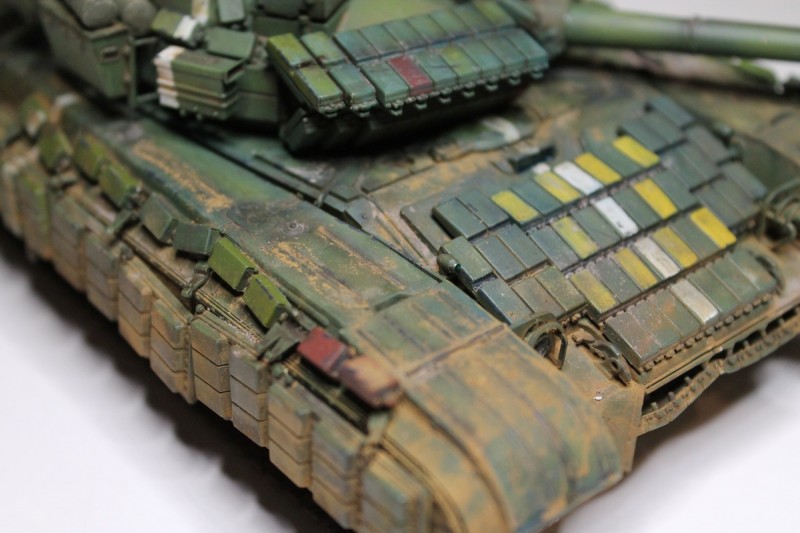
This particular offering of the T-64 features a large amount of parts and the full reactive armor suite is provided. Construction went well but the armor mounts were very complicated, especially on the turret. There were a large amount of reference photos available on the internet and most of these indicated these vehicles were very worn and battle-weary. I removed the left front fender and bent the right rear side-skirt to reflect this. I also cut the side-skirt reactive armor into separate portions since these sections appeared to be hanging off at odd angles in the actual photos. Several photo-etch frets are provided in the kit and these details provided a really nice accent to the kit. I thought the quality of the molding was really crisp and this was brought to light when the model was primed. Several vinyl parts are provided as well, namely the traction log and the gun mantlet cover. I primed the tank with Model Master Enamel Primer. Once that was done, I began work on the top coat. The tank I chose to build appeared to be overall green, judging by the profile provided on the Echelon Decal instructions. I painted the model with Model Master Russian Armor Green. Once that was applied, I post shaded with the same color which had been lightened with Testors Insignia Yellow. This gave the vehicle more of a medium green appearance, like in the photos. I then post shaded some spots with Model Master Olive Drab, also lightened with Insignia Yellow. This gave the vehicle a very mottled medium green appearance. The reactive armor bricks showed to be varying colors on the real vehicles. The Echelon instructions indicated this particular tank had its frontal reactive armor bricks painted in a yellow pair of five dice pattern so I hand painted those bricks with Model Master Chromate Yellow. I also painted some of the bricks with Gunze Brown to indicate units which had been replaced, possibly from T-64s in the brown and green scheme. In addition, this vehicle showed to have the topside white ID cross painted on it so this was done, by hand, with Vallejo German Winter White. Scratches and chips were applied with a small brush and Vallejo Smoke was used for that. The link-and length tracks were painted with Vallejo Track Primer.
There were only three decals for the model which were the smiley face on the light cover and two Ukrainian Army stencils on the fenders. I only had to use one of those since the left fender had been removed. The decals laid down well with Micro Sol Setting Solution. I then began work on the weathering. First, I airbrushed on Tamiya Smoke to all the panel lines and recessed areas. The model was given a bath of Burnt Umber which was diluted heavily with Mineral Spirits. The intent here was to add a very faint, general filter. Following that, I added a pin wash of Burnt Umber and Mineral Spirits to all the panel lines and recessed areas. I also added some CREATEFX Oil/Grease Stain to fuel caps and areas around the engine. Photos indicated heavy exhaust stains around the rear of the vehicle so I replicated this by airbrushing on Model Master Aircraft Interior Black. I then added the dirt and grime to the vehicle and this was accomplished with a heavy application of MIG and CMK Light Earth and Industrial Dirt pigments. This was then affixed with a mineral spirits application.
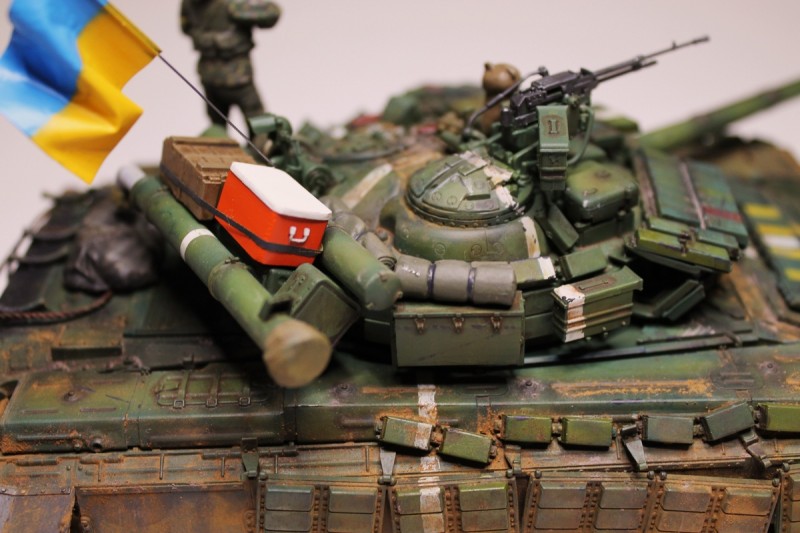
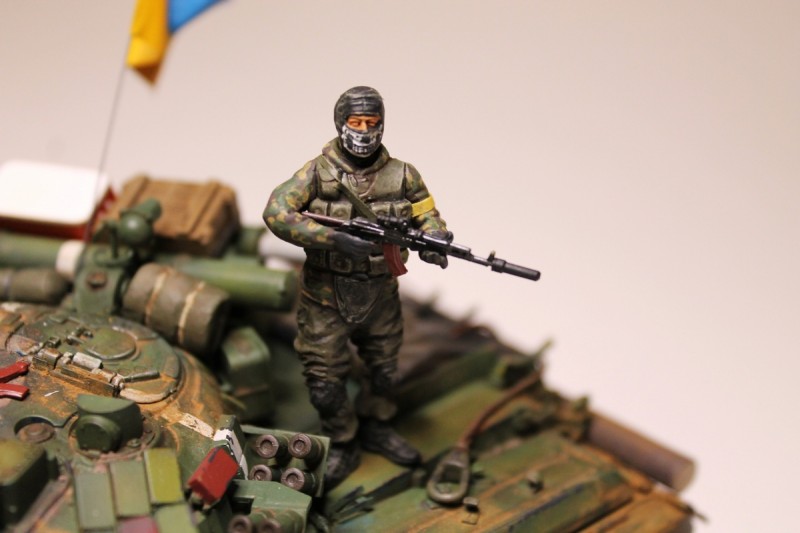
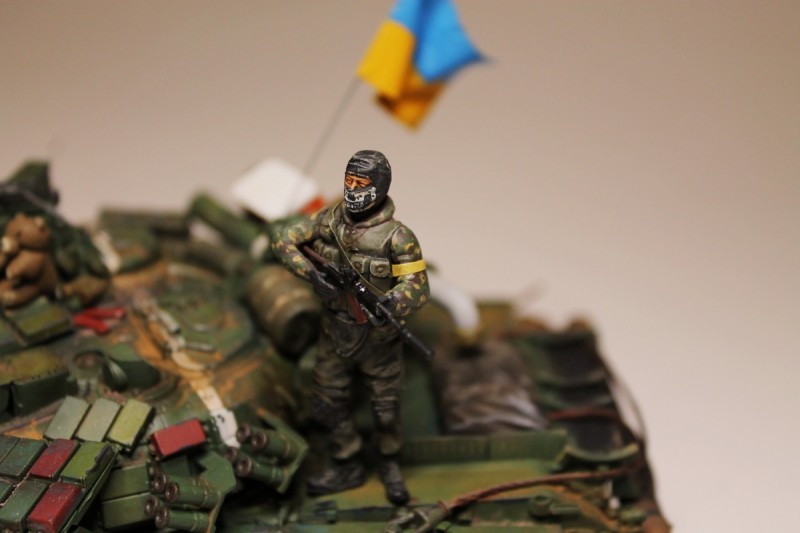
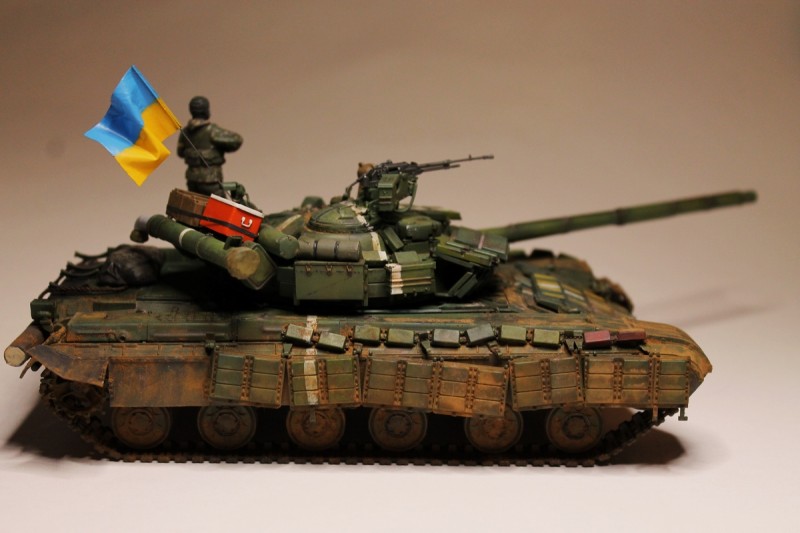
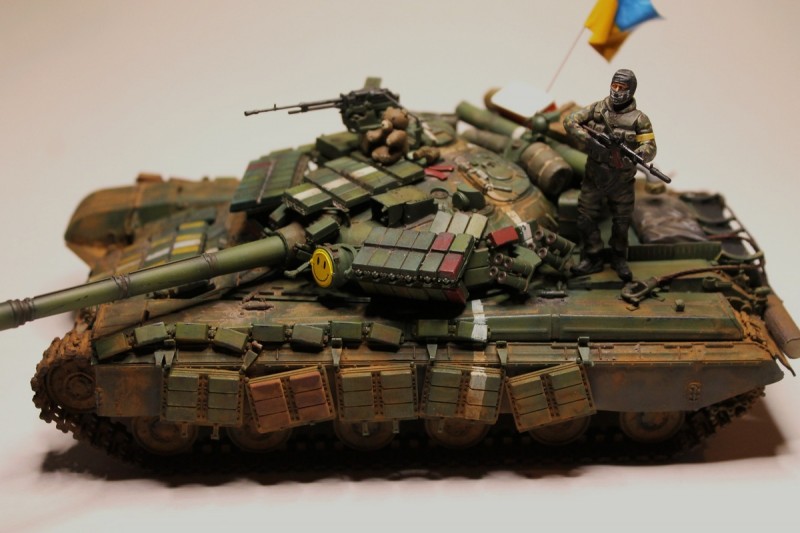
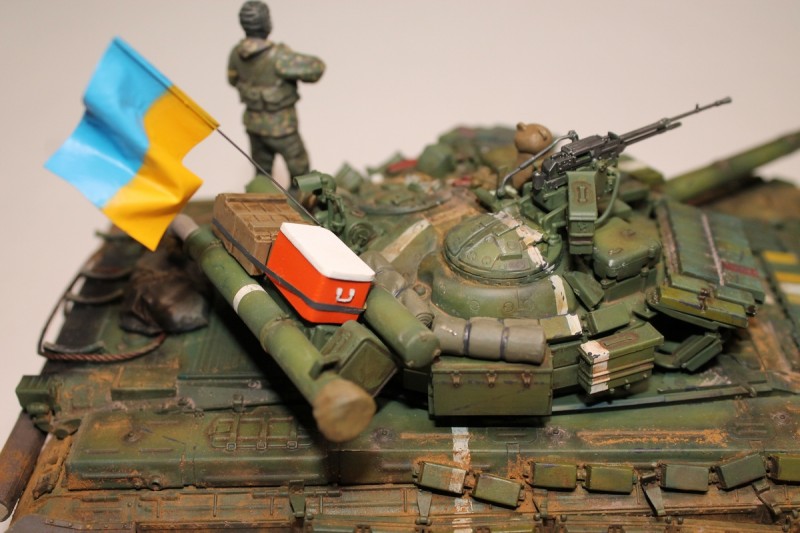
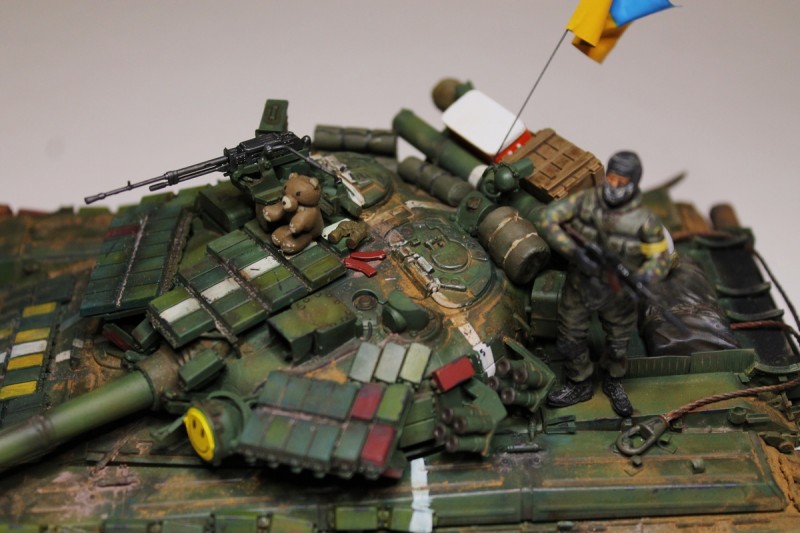
I then added stowage to the vehicle. Various bedrolls and crates were used from the spares box. I wanted to add some color to the tank so I scratch built a large cooler out of sheet stock. This was painted orange and the lid was painted white. Two handles were added from the unused parts of the T-64 kit. One of the internet photos I found showed a Ukrainian T-64 with a large teddy bear strapped to the searchlight cover. I decided to replicate that on my build so I fashioned Ted out of modeling clay and sealed him with diluted contractors glue. Following that, he was painted RAF Earth Brown and his paws and nose was painted with Vallejo Tan. Since I didnt want to block out the smiley face on the turret, Ted was affixed to the top armor next to the MG. I also wanted to add a figure to the tank. Photos indicated Ukrainian soldiers wearing a wide variety of uniforms and camo patterns so I used the BDU-clothed legs from a Trumpeter Stryker kit. I then added a torso from a Zvezda Spetsnaz set and topped him off with a resin head featuring a balaclava mask. The soldier was then painted with Vallejo Paints. I noticed in photos that the skull balaclava masks seemed to be fairly common in that conflict so I decided to replicate that on the soldier. I painted the general shape with Vallejo German Winter White and then drew in the teeth and jaw holes with a Micron .005 ink pen. A Dragon AKS-74 rifle was added to the figure and this was accented with a Verlinden resin ACOG and a scratch built suppressor.
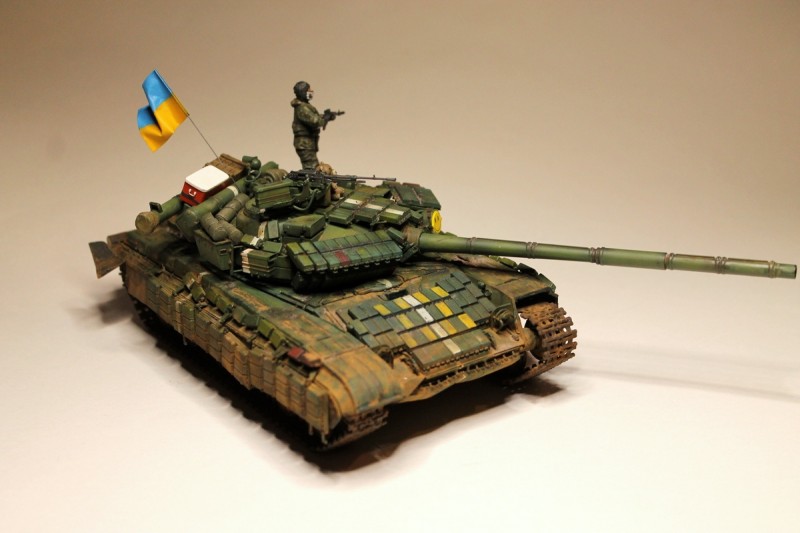
Lastly, a Ukrainian flag was added to the antenna. The flag was made out of lead foil which was painted blue and yellow. All in all, this was a complicated but enjoyable build of a war-weary tank from the headlines.


About the Author


FROM: , UNITED STATES
I have been modeling for about forty years and enjoy building 1/32 scale and 1/48th scale aircraft as well as an occasional piece of 1/35th scale armor. I love building modern USN/USMC subjects as well as RAF/RCAF/RAAF/FAA prop driven and jet subjects.
Comments

Great build! Tanks from this conflict certainly have a lot of soul.
APR 26, 2016 - 07:53 PM

Yeah! Great work. The smiley and the teddy - kinda quirky-ironic yet that's what really gives this model personality. Super!
APR 26, 2016 - 08:13 PM

Thank you Michael and Andromeda 673. Michael, you are correct; vehicles from this conflict are excellent subjects to model. Plus, there are so many reference photos available on the Internet. Echelon Decals has done an admirable job of producing decals for some very interesting vehicles from both sides in this conflict. These vehicles and crews undergo a lot of hardship and heartache.
Best wishes,
Ian
APR 26, 2016 - 08:15 PM
Thanks Frederick. Here is the inspiration photo for the bear. (For illustrative purposes only, no infringement intended).
Best wishes,
Ian


APR 26, 2016 - 08:20 PM

Ian- I am pretty much blown away by this build. The BV is my favorite of the T-64 variants and it is just amazing to see it built and finished in such a unique way as this. The overall green paint work and white identification stripes are really nicely done and chipped to look well worn- the various colors on the ERA blocks also draw the eye nicely around the tank. The weathering is pretty top notch too- the whole thing looks pretty battered, weary and dirty. The stowage, teddy bear, smiley face artwork and the carefully constructed soldier standing on the rear deck also really add to the overall piece. Thanks for sharing it with us!
APR 26, 2016 - 09:58 PM

Karl and Voryah---Thanks so much for the kind words. Karl, I agree about the T-64. I always loved the lines of that one, especially the shape of the turret and how it looks with the small diameter road wheels. It was always kind of over-shadowed by it's big cousin, the T-72.
Best wishes,
Ian
APR 27, 2016 - 01:07 AM

Thanks, Monte. Fashioning "Ted" was really a fun part of the build.
Best wishes,
Ian
APR 27, 2016 - 05:47 AM
Copyright ©2021 by Ian. Images and/or videos also by copyright holder unless otherwise noted. The views and opinions expressed herein are solely the views and opinions of the authors and/or contributors to this Web site and do not necessarily represent the views and/or opinions of Armorama, KitMaker Network, or Silver Star Enterrpises. All rights reserved. Originally published on: 2016-04-26 13:52:12. Unique Reads: 8955

WEB HOSTING BY


Copyright ©2021 Armorama and Kitmaker Network, a subsidiary of Silver Star Enterprises
All Rights Reserved. Please read our Conditions of Use and Privacy Policy.
All Rights Reserved. Please read our Conditions of Use and Privacy Policy.