

1⁄35SU-122 Early Production Build
4
Comments
Introduction
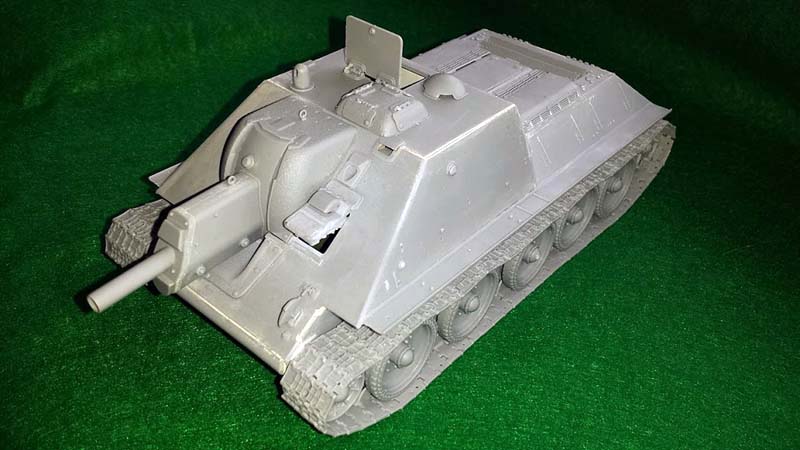
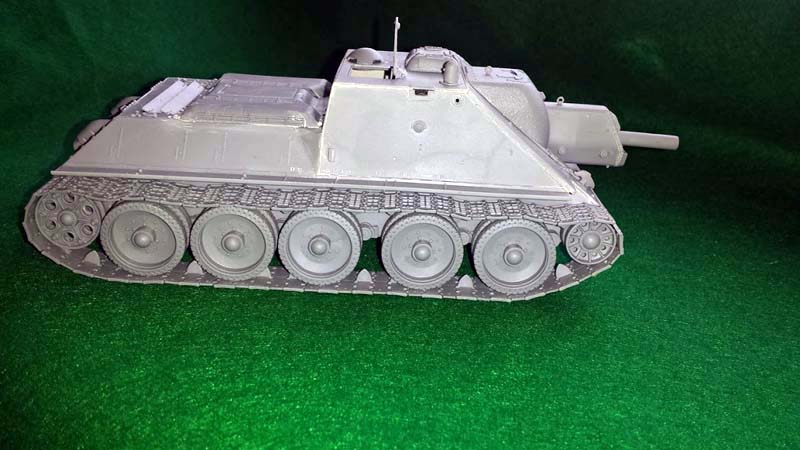
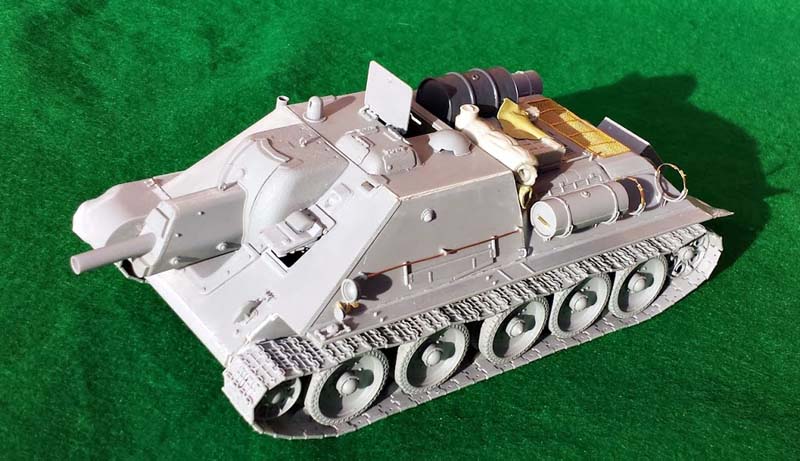
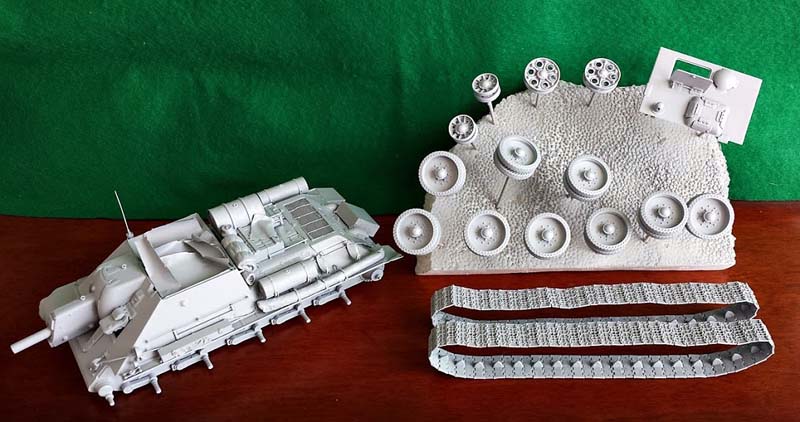
Recently MiniArt released a new very interesting couple of soviet self propelled guns: SU-122 and SU-85. The kits are available with full interior or without it. I built a simpler version without interior. All parts are new moulds, so the quality of MiniArt product is on high level. Details are sharp and crisp, everything fits together very well. MiniArt also include a nice fret of PE parts and really well done track links, one of the best plastic tracks that I ever made. Only one thing that I can complain about are really tiny parts which are hard to cut off from the sprue and clean up, but on the other side out of the box we have superb detailed kit. Besides this the kit is great and I can really recommend this kit, but due to a lot of fine parts the kit is really for more experienced modellers. If somebody need to read more about kit I can recommend this review : https://armorama.kitmaker.net/modules.php?op=modload&name=Reviews&file=index&req=showcontent&id=12534The Build
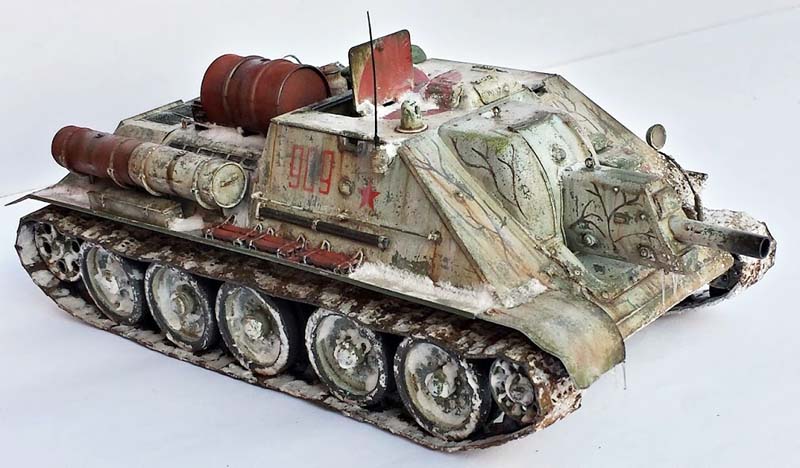
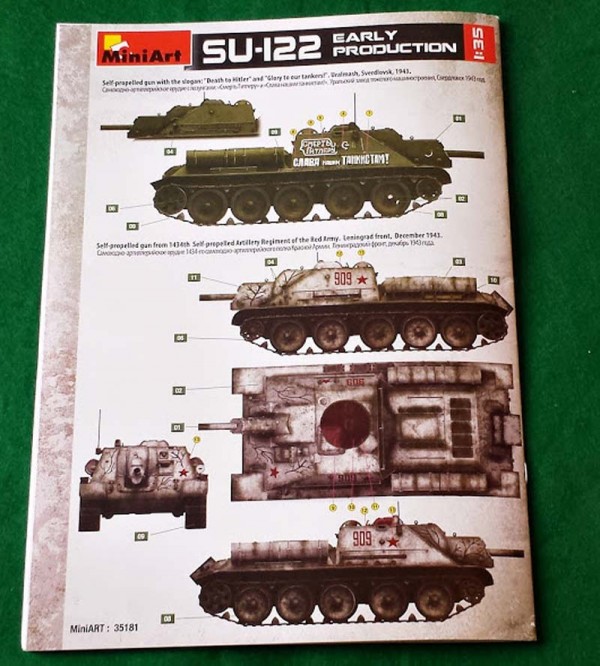
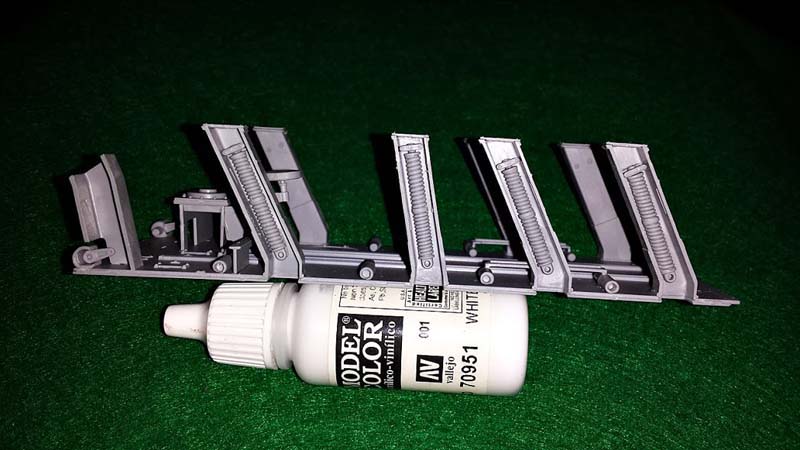
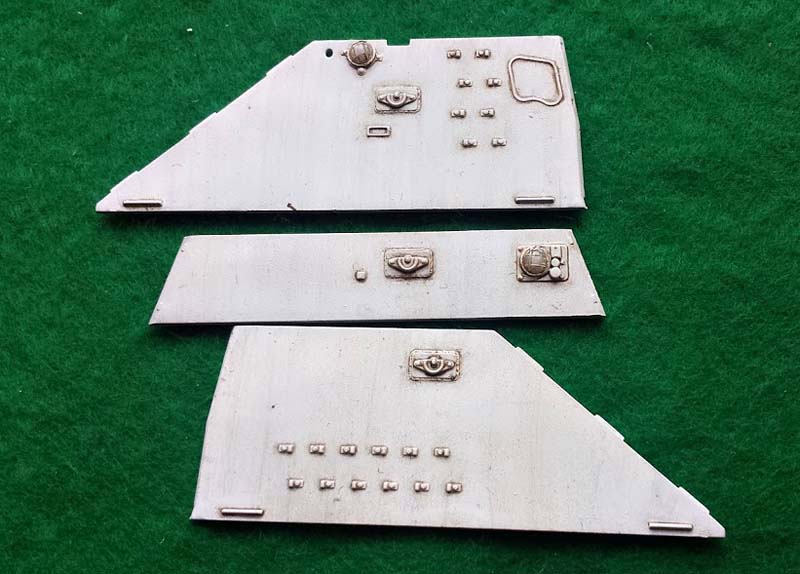
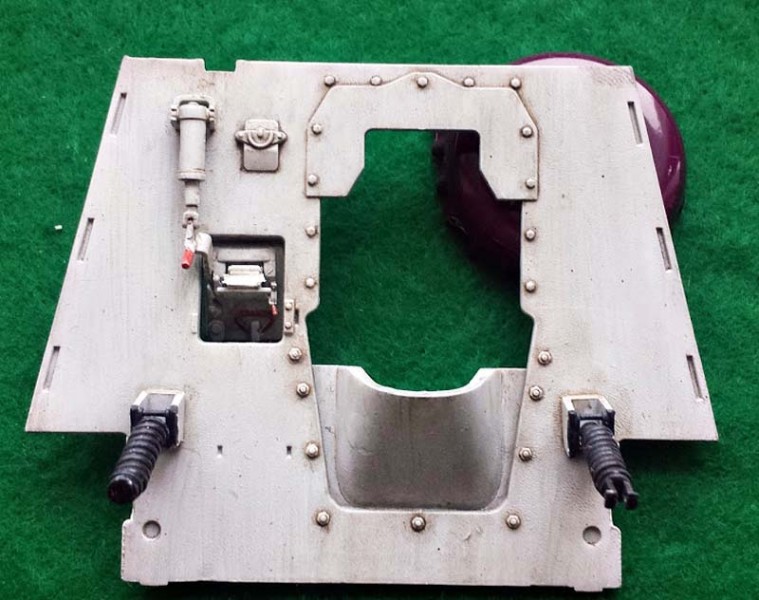
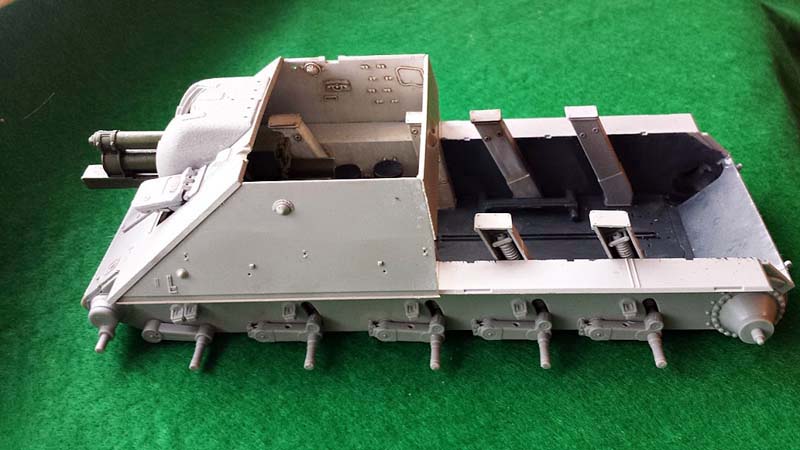
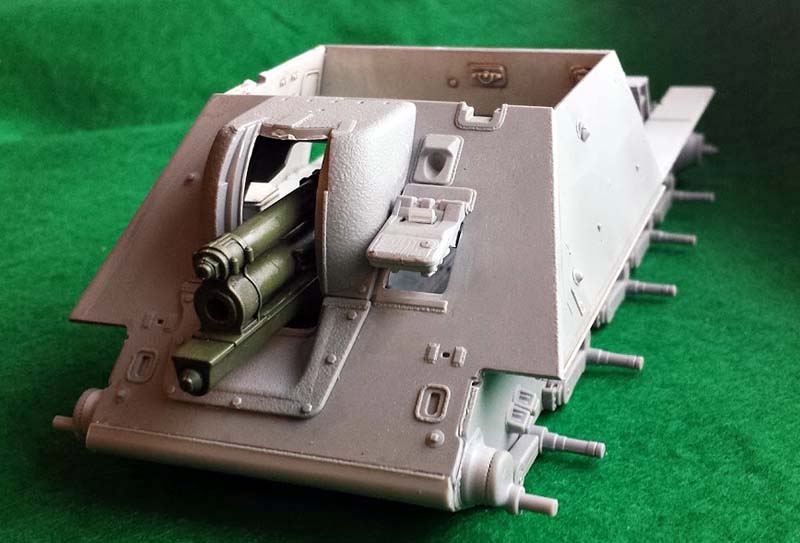
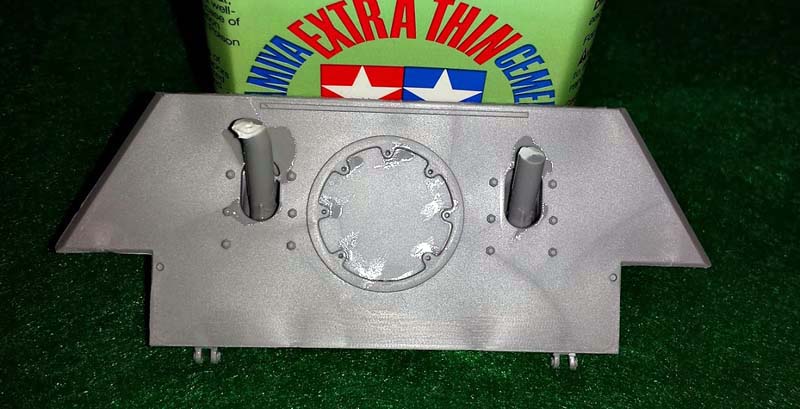
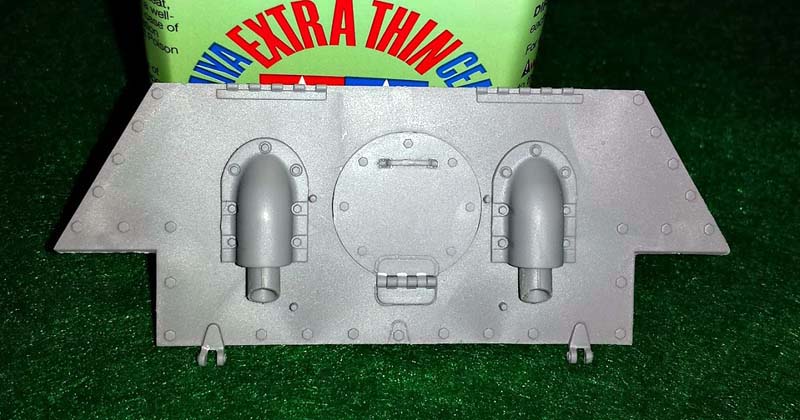
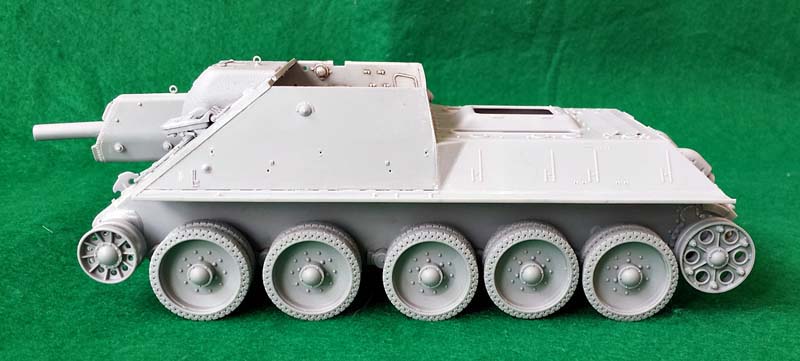
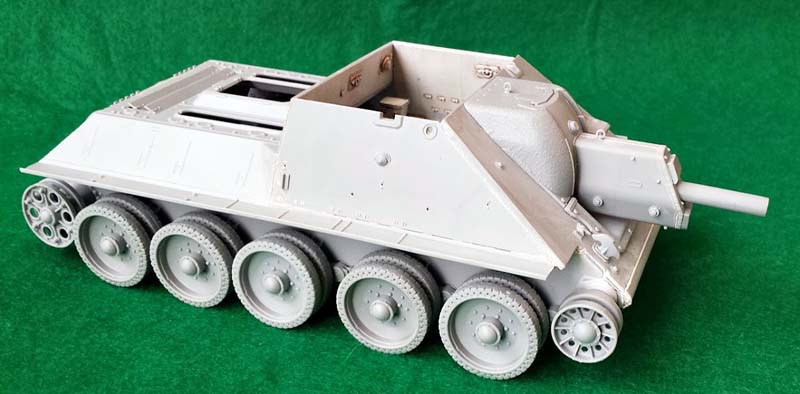
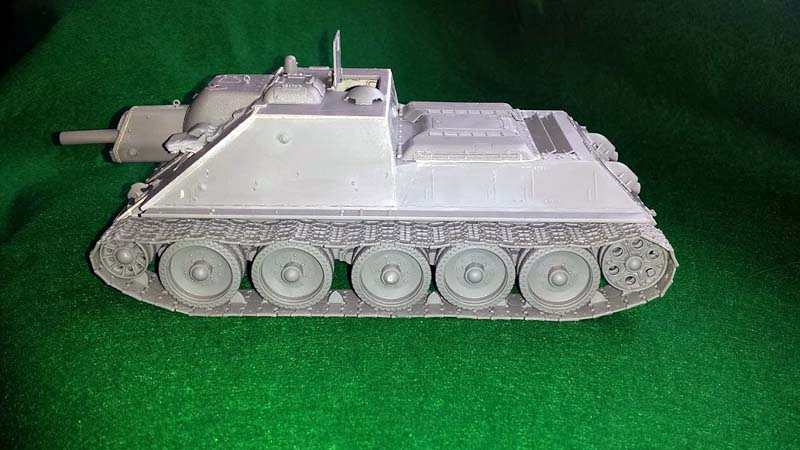
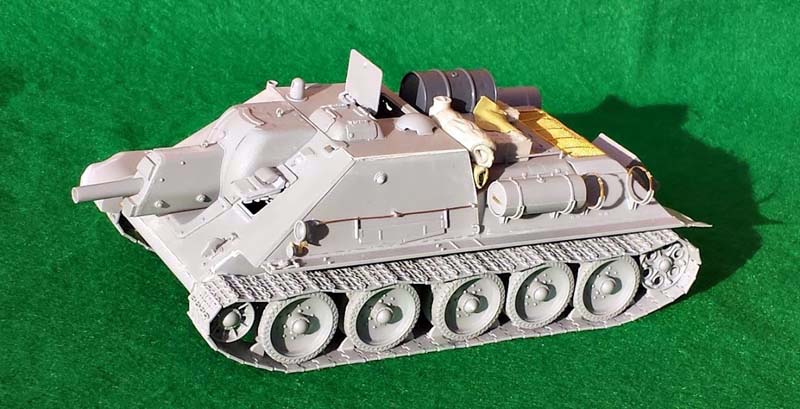
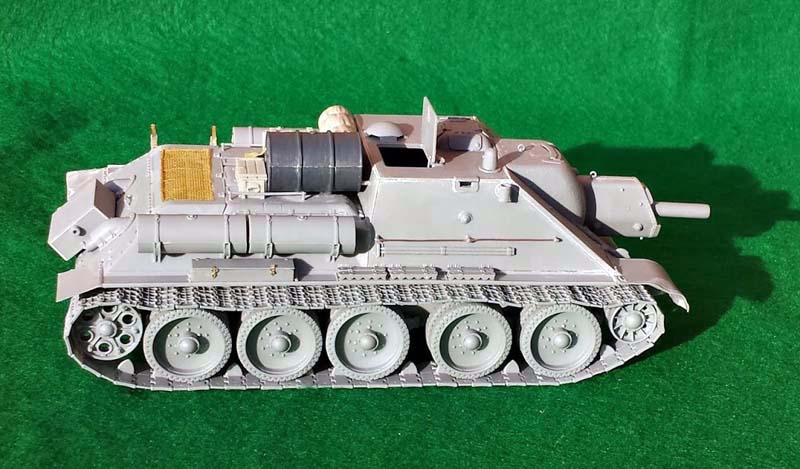
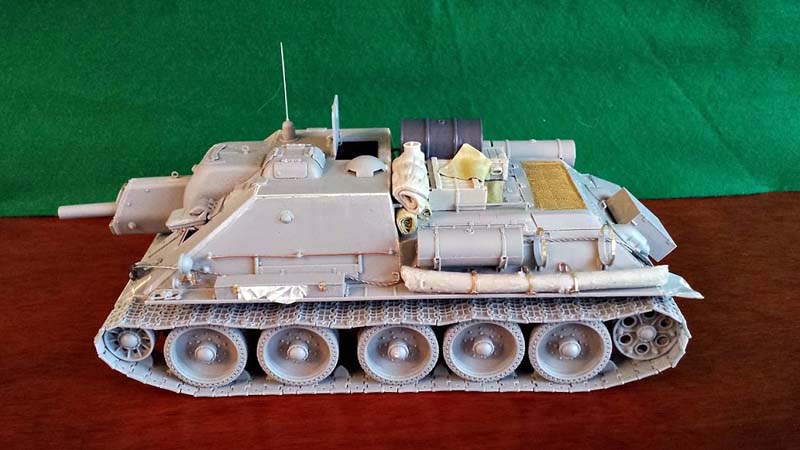
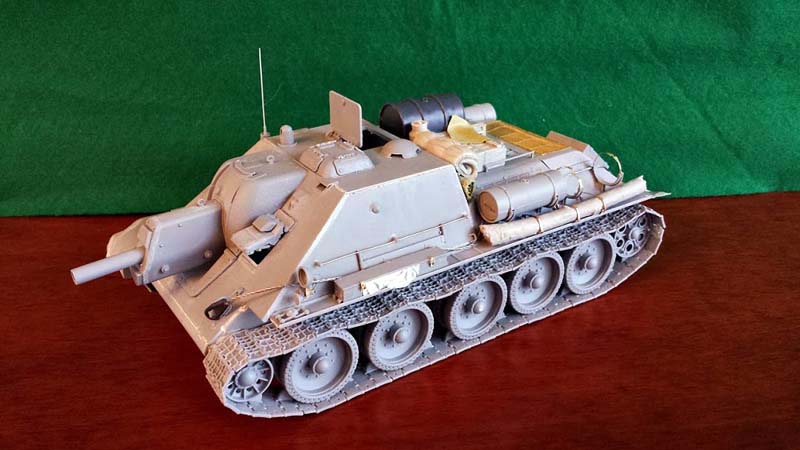
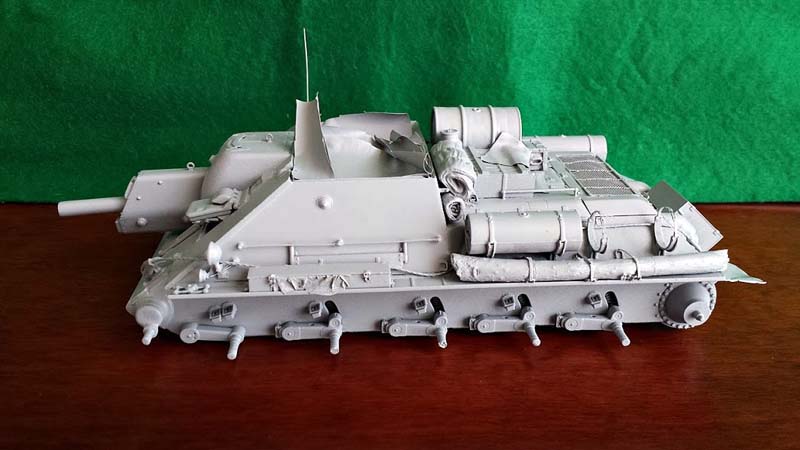
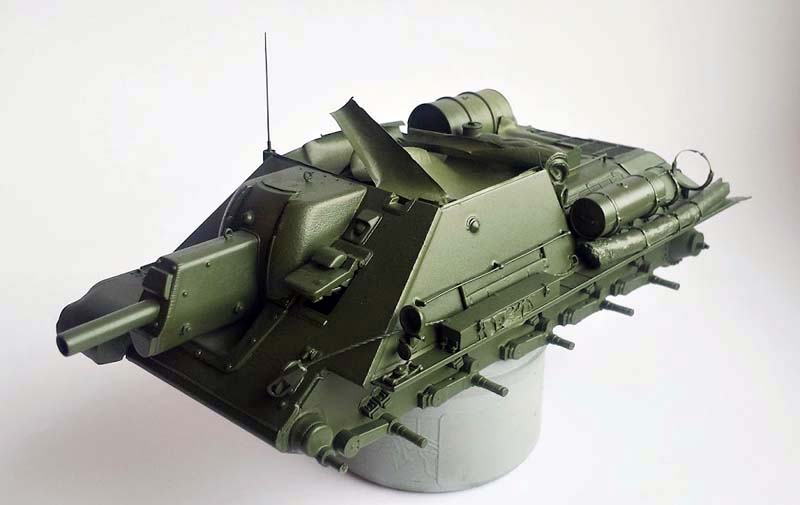
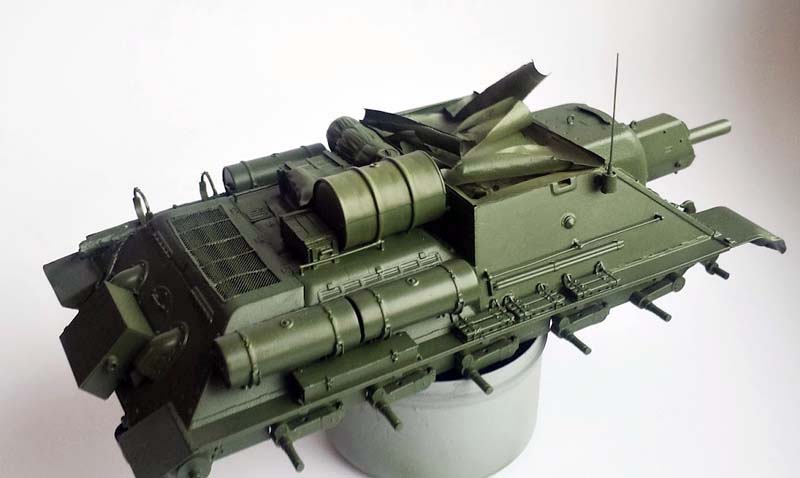
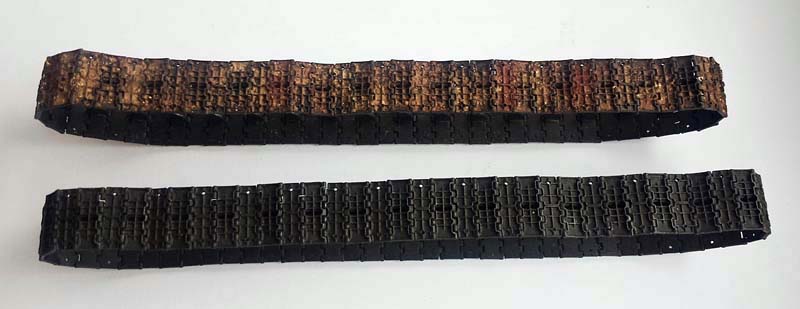
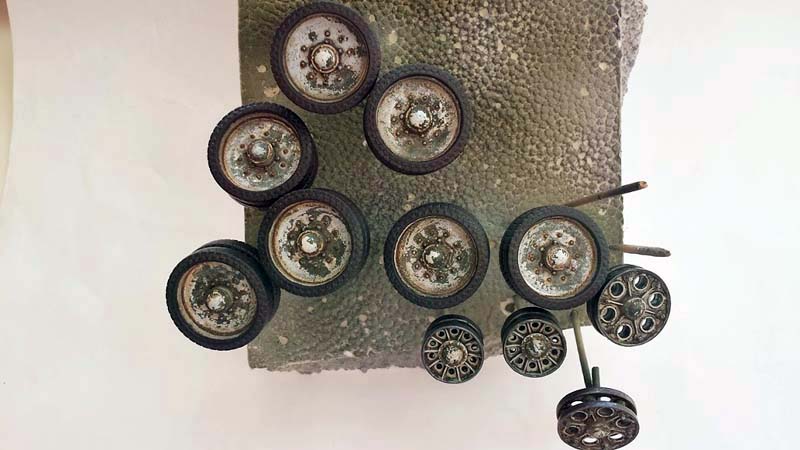
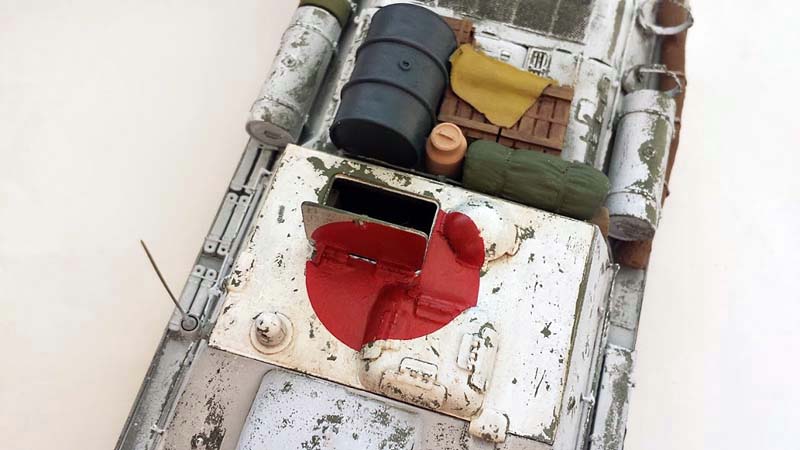
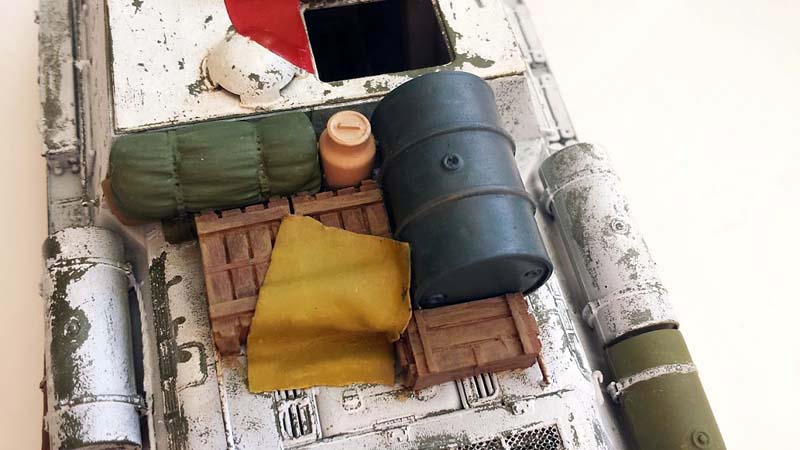
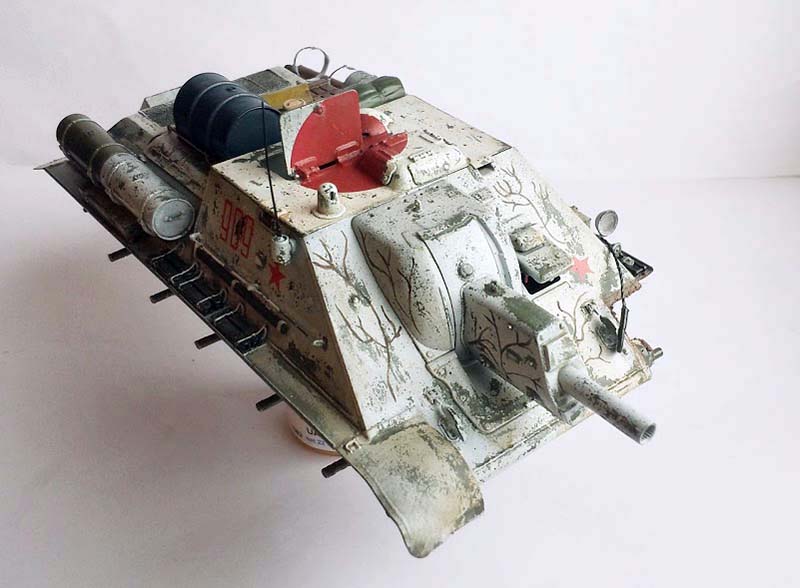
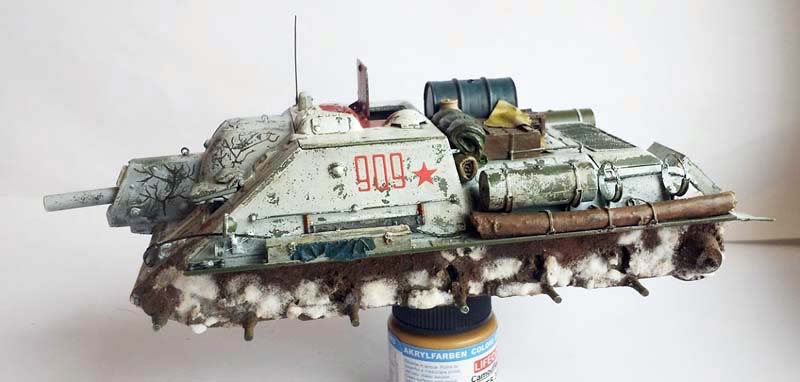
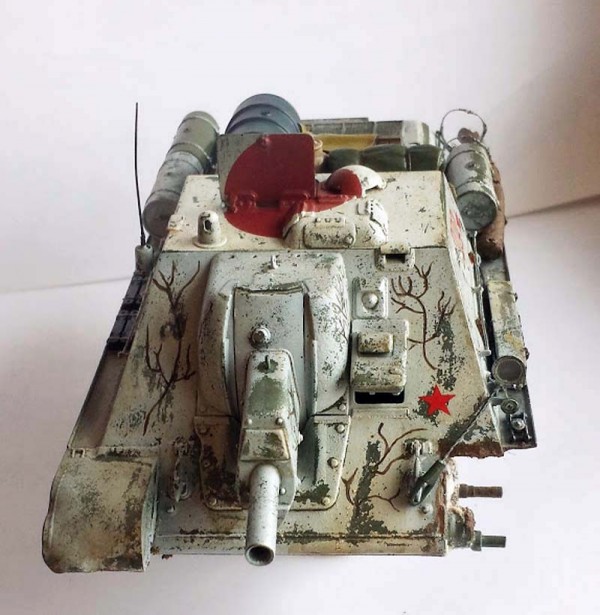
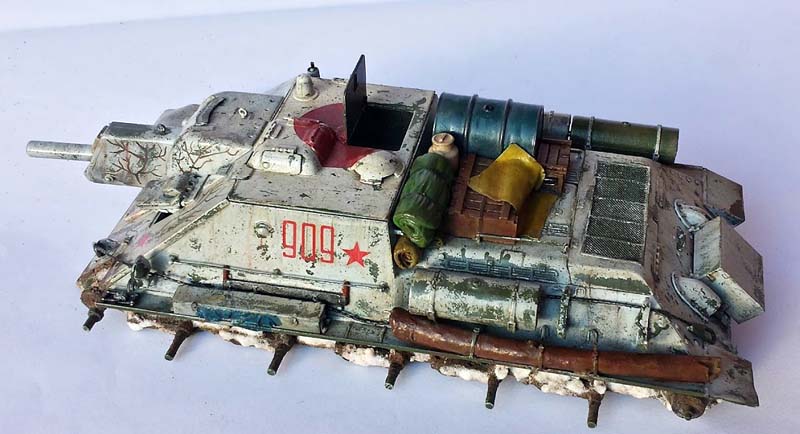
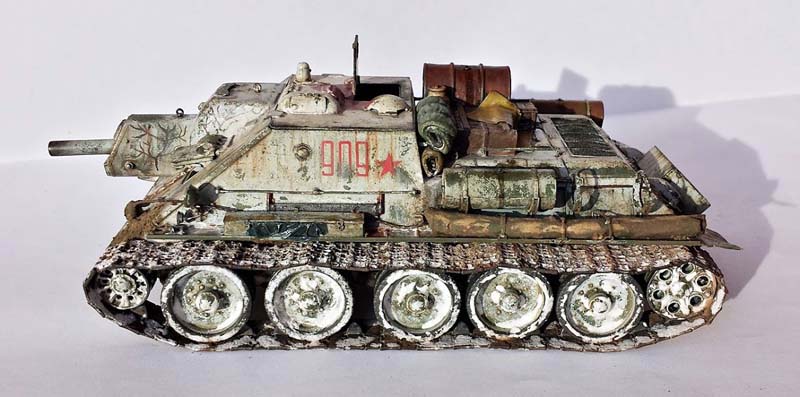
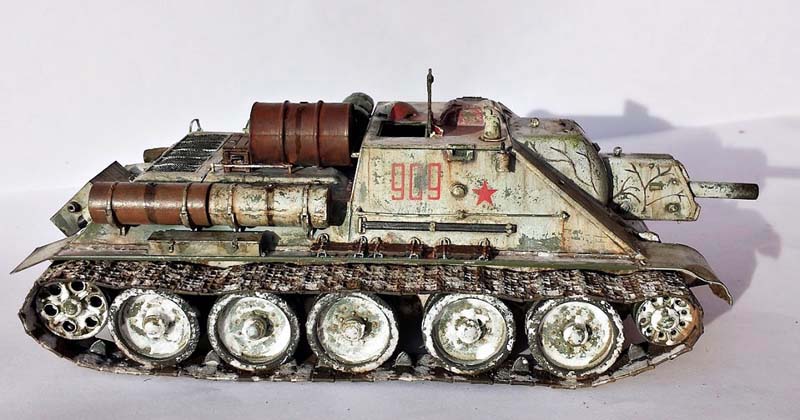
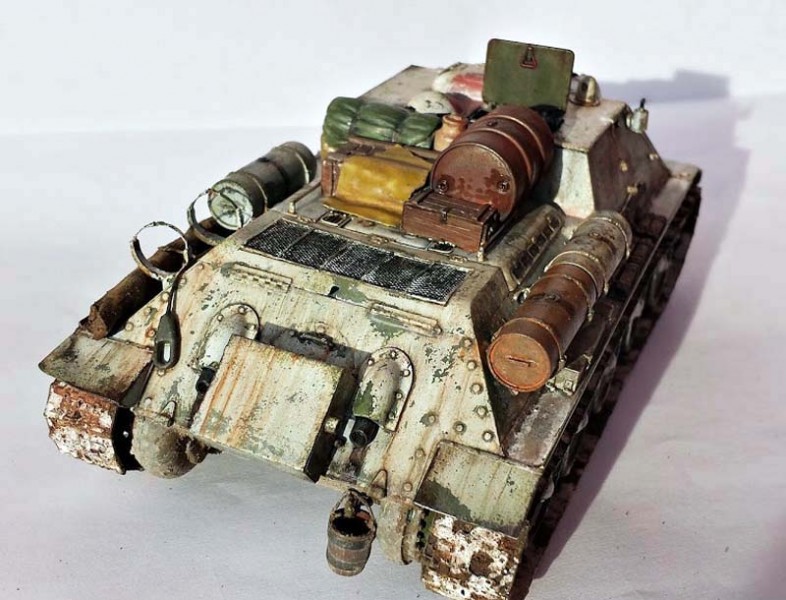
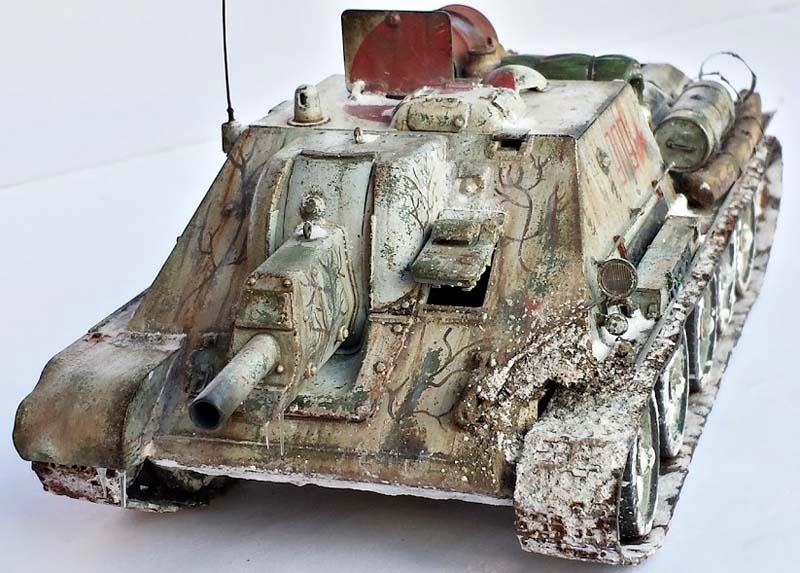
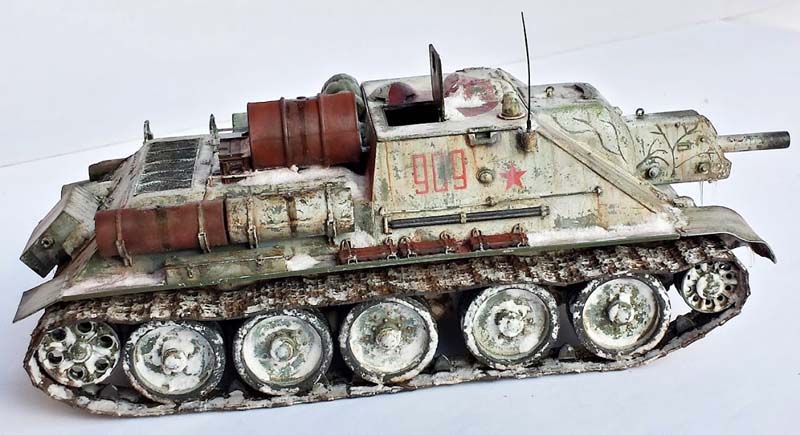
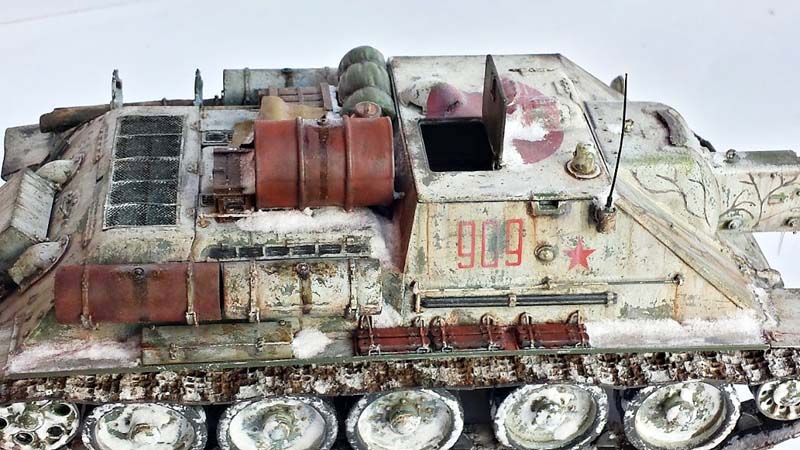
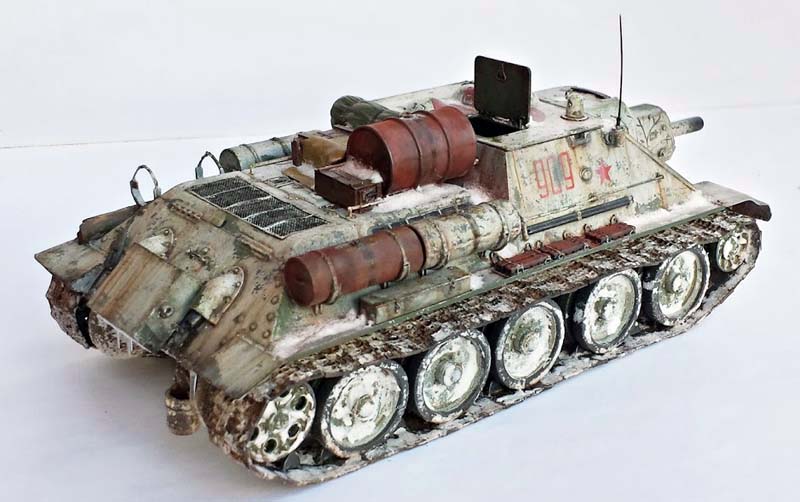
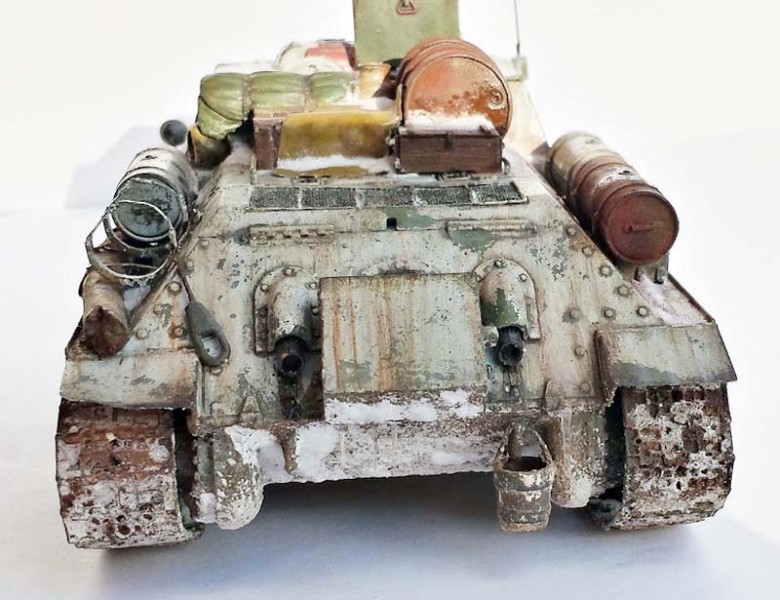
Before I started the assembly I was wondering what painting scheme I should choose. MiniArt provide decals for four vehicles, three are green 4BO coloured and one is in winter camouflage with original tree pattern on the front. The most interesting variant for me was a winter camouflaged vehicle with big stowage box on the rear plate, so I decided to build this version. Despite the fact, that this is a simpler version of the kit, it also has a partial interior so the few first steps in the instruction show how to build the floor, suspension springs and interior. All parts fit together without any issues and so I assembled them quickly. I decided to leave the hatch on the roof open and so I started painting the interior. To make this build easier and faster I also prepared to paint all parts which require to be painted with white interior colour, so I prepared to paint the walls of fighting compartment and the front glacis plate. To degrease these parts I cleaned them with warm water and dishwashing liquid, next I sprayed them with two coats of grey primer. I use a spray primer to paint plastic car parts, it's much cheaper than typical modelling primer but they provide a nice, smooth surface. When the primer was dry I airbrushed a few thin coats of Vallejo white colour. Next I painted all details, applied grey acrylic filter, oil fading and wash. To make the wash I used a MIG Neutral Wash. The white parts of the interior was ready so I started to paint the floor and gun mounting, the painting process was similar with one exception: on the darker parts I used a black AK wash. Then I started to build the gun breech. It's a little simplified in comparison with the kit with full interior so the build goes fast, two halves fit together very well, what's more no filler was required, some sanding was enough to remove the connecting line. The gun mount and breech was painted with Vallejo Russian green and washed with AK black wash. With all parts of the interior finished, so I glued the gun breech in place and connected the side walls with front plate and lower hull together. My next goal was to finish the main parts of the hull, so I glued the main upper hull part and the rear plate. Everything fits together very well, only the exhaust pipes need a little bit of work. MiniArt give us the box exhausts from kit with interior, they must be cut but when we do it the only way to mount them is to glue them directly to the rear deck. Then I moved on to the exterior build, first up was the suspension arms, wheels and front plate details with the gun details. The main gun barrel is a slide molded one piece part, so only a little bit of sanding was required and it look good, especially the rifling inside the gun looks really cool. The wheels assembly was a little bit time consuming because each road wheel consists of four parts: front and rear half, lid and plastic bushing. It should be mentioned, that the wheels detail in comparison with the real vehicle is very good and overall they are nicely molded. With the vehicle stood on its own wheels I started working on the tracks. MiniArt state that they are workable, I was very curious if this is true as so far all single track links I have used were permanently glued together. While working with them I noticed that the pins inside each link are so tiny and fragile, they easily broke and so I glued all links together, just like ordinary separate track links. Now they aren't workable but still look pretty good, one of the best plastic tracks that I ever build. If you are interested in how I build tracks with separate links I follow this process. First, I prepare all links, clean them and check the fitting. When all links are ready I just connect all of the links for one track and glue them with Tamiya Extra Thin, this must be done fairly quickly because the track needs to still be flexible when we finish the assembly. The next step is wrapping and forming the track around the drive sprocket, idler wheel and road wheels. The last step is creating the sag effect. To do this I used the cotton buds and just put them between the track and fender. Leave the track until the cement is fully cured before removing them for painting. While the track was drying I build the roof with the open hatch and interior details. I didnt build it earlier because I decided to leave this part unglued to retain the possibility to remove it and look inside the vehicle. The roof didn't fit perfectly but a little bit of putty did the job. With almost all of the main parts of the vehicle now assembled I started to work on all of the smaller details. First I made the front and rear mudguards. To make the look of the vehicle little bit more interesting I removed one front fender and added some damage to the other. Then I made two tool boxes, the multipart photo etch clasps on them were really hard to assembly. On the front tool box I added a piece of tarp. I made it from a piece of a tissue soaked in varnish. Next I mounted the saw, antenna mount and other details on side walls. I replaced the plastic handrail on the vehicle with copper wire because the plastic part has many sprue gates and when I tried removing them the plastic part cracked; also I added the wires to the front light and to the horn. For the engine screen MiniArt provides two types of parts. First is full plastic molded, it is not bad but the second option with photo etch screen is much better. Of course I chose the second variant despite minor problems with the assembly I was really happy with the final look. MiniArt gives us the possibility to choose between the spare fuel tanks. We can use the tanks with plastic straps molded on it or without them and use photo etch straps, but the option with PE straps is available for only two tanks. I decided to use three tanks with plastic straps and in place for the fourth fuel tank I used photo etch straps without the tank, just one spare fuel tank was removed by the crew or in the field workshop. To finish the rear of the tank I added the big container for the crew equipment, the instruction shows that this part is only for the winter paint scheme. Assembly of this element was pretty straightforward and easy, only the bolt heads required some attention because these bolts are separately molded and they need to be shaved off from the sprue and glued on place. With almost all of the parts of the box attached I got the idea to add a few items to the engine deck to make the finished model a bit more interesting. I found in my stash some resin and plastic parts like ammo boxes, milk container, German 200ltr barrel and some other stowage. I also used Milliput Standard Grey to make a piece of blanket. On the rear tow hook I placed a wooden bucket. The tow cable came from a Dragon kit. The last thing to finish the assembly was the anti-slip pads and wooden log on the fender. I glued them in place and used the photo etch straps to fasten them. The antenna rod was the last part glued to the model, when it was fitted I could say that the assembly is definitely finished.Painting and Weathering
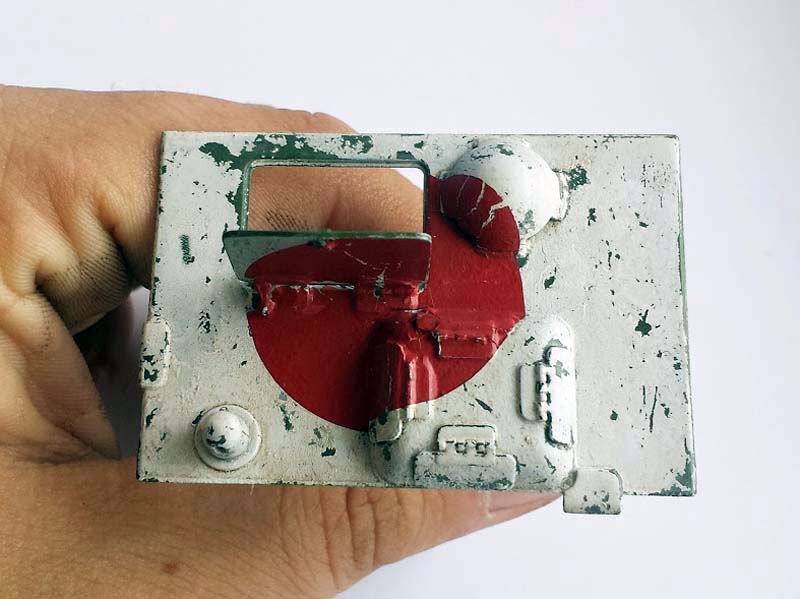
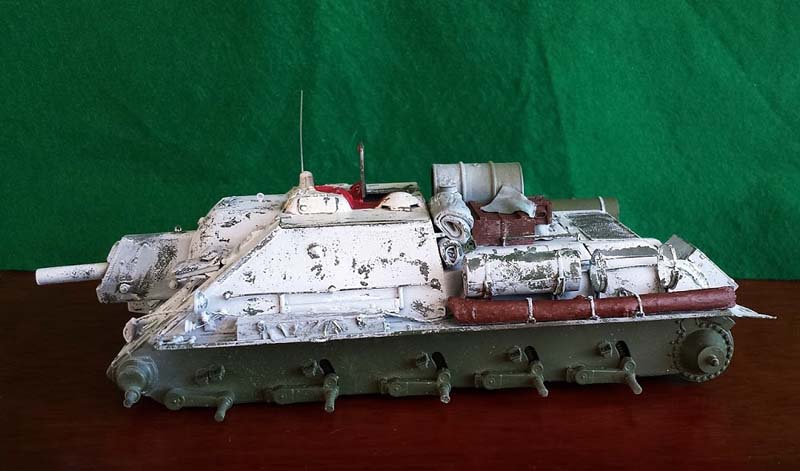
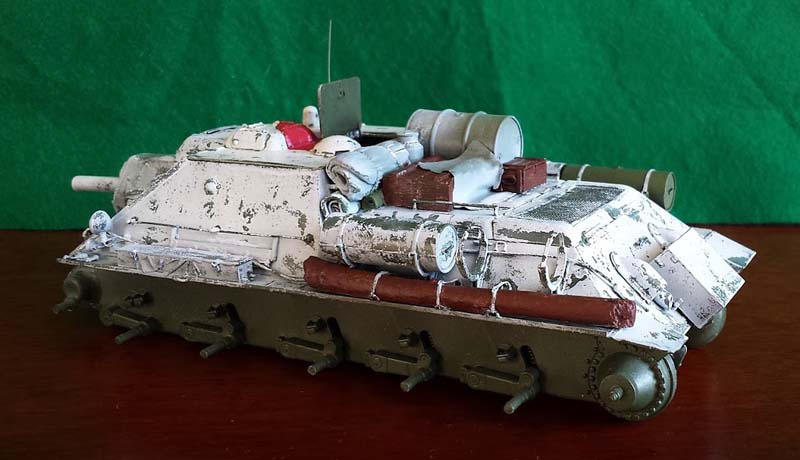
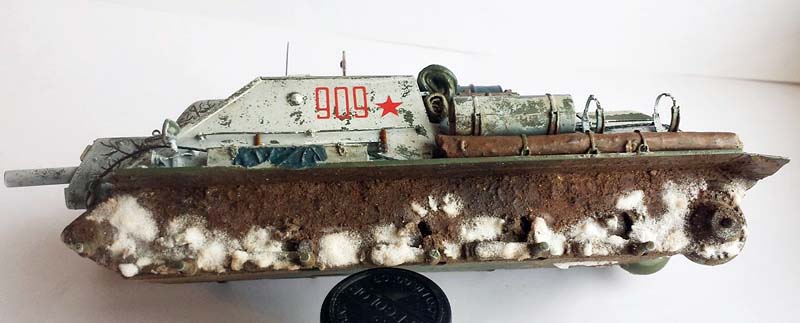
As stated previously I want to paint this model with white winter camouflage. First, I removed the tracks and wheels to have access to all the nooks and crannies of the model. Before painting the model should be well cleaned and degreased. To do this, I washed the model in warm water with dishwashing liquid. Next step is primer, I used spray primer. Motip - Dupli- Color is the best for me. I applied two thin layers, a second layer I painted 15 minutes after the first layer. Primer should thoroughly cover the entire model, but be careful not to flood the details. When the primer was dry I started applying the base colour. To paint my SU I used acrylics form Vallejo: Russian Green and US Interior Yellow to lighten the base colour. I didn't use any painting techniques because green colour is only a base and most of it will be covered with the white colour, so I just covered the entire surface of the model with two layers of Russian Green mixed with US Interior Yellow. To do the white winter camouflage I used AK Chipping Fluid. It's very simple way to get a nice-looking winter camo. First, to protect the base colour I sprayed a gloss varnish over the entire model. When it was dry I applied two thin layer of Chipping Fluid and just after the surface was dry I painted all model with Vallejo white colour. I sprayed more paint on flat surfaces and less on edges hatches and where the white colour could rub off. When the white paint was dry I started adding the chips and scratches. I used an old stiff brush, moistened in warm water and scraped the paint until satisfied with the result. I wanted to achieve the effect of an old camouflage so I removed a lot of white paint. The next step was filters, they are great to add some variety to base colour and put out the contrast between the white and green. I used two of them: grey Mig enamel filter and green AK filter for NATO tanks. The grey I used over the whole model and the green only in a few places. I repeated the same process with the wheels and painted the rubber parts using Vallejo dark rubber paint. While the filters were drying I painted all of the details and stowage on the vehicle. The hardest thing to paint was the wooden ammunition boxes and log on the fender. I applied to them a few layers of different brown shades. To give the log a more interesting and used appearance I removed some of the paint with sandpaper and added paint to replicate a fresh wood colour. All of the metal details like tow cable, anti-slip pads were painted black and dry brushed with AK gun metal matalizer. I also decided to paint green on one of the spare fuel tank. When all of the detail was painted I sprayed two layers of gloss varnish and started applying decals for the tank belonging to the 1434th Self-Propelled Artillery Regiment serving in Leningrad. To apply decals I used microscale liquids: Micro Set and Micro Sol. I cut individual elements from a sheet and put them in warm water. In the meantime, I applied a fluid Micro Set in a place where I will put the decal. When it is located in correct place I impose on the decal Microscale Sol liquid. After 5 minutes I pressed the decal with a clean stick and remove air bubbles. When all of the decals were placed I again sprayed gloss varnish on the entire model. Work with smaller decals was fast and pretty easy but the big red circle on the roof disappointed me. It broke into pieces so I mixed the brown and red acrylic paint and when the colour was the same as the decal I repainted the circle to make it looks much better. With the decals applied I painted the tree branches on the gun mantlet and front plate of the vehicle. I used small round brush and Vallejo brown colour. I'm not the best hand painter but I'm happy with the result. Then I started my favourite part of modelling: oils and weathering. I used white, yellow, green and brown oil paints and did the fading. This technique is really simple and creates a nice looking effect of dirt and streaks. I just put dots of different colours oil paints and blend them in horizontal direction with flat brush moistened in white spirit. While the oils were drying I made some mud and snow effect on the hull. To create a realistic mud I mixed brown and sand pigments, plaster, a little bit of electrostatic grass and AK Earth Effect enamel. I put the mud on the model with the old stiff brush and when it was almost dry I painted some streaks and wet places using AK Fresh Mud and AK Fuel Stains effect. To add a better winter look I decided to add some snow so I mixed PVA glue diluted with water and baking soda. I applied this mixture on the model and sprinkled the soda on it and blew away the excess. The next step of weathering was the wash. I used Mig Neutral Wash, grey colour which fits very well with winter camouflage and highlight all of the details. When the wash was done I added some chipping and streaks. To add paint chipping I use two techniques, first is a sponge technique. I soak the sponge in the paint and touching the model leave small irregular chips. I use AK Chipping Colour paint Next technique is painting chips by brush. I used a small round brush 000 and simply hand paint the chips. It is difficult to paint a good chips, the best way to achieve a good result is using both of this techniques. For the streaks I used two AK Interactive products: Winter Streaking Grime and Rust Streaks. I used small brush and painted the vertical lines on all horizontal surfaces and next I blend them with flat brush and white spirit. After drying I can repeat the process until the satisfied with the effect. Next I mounted the wheels and tracks. Before I repeated the same painting process with the wheels (primer-green base-gloss varnish- AK Chipping Fluid- white colour-filters-wash) and painted the rubber tread using Vallejo dark rubber paint. I also painted the tracks. First I applied grey primer, next I paint all tracks with the black colour, dry brushed them with gunmetal and washed using AK track wash. When the track was dry I applied a mix of different pigments and fixed with AK pigment fixer. After installing the chassis I had only a few things to do to finish the model. I added the snow on the wheels tracks and several other places where it could accumulate. In place where the front fender is removed I made mud and snow splashes. Also some mud was added on the wooden log. On the barrels I added some rust effect and fuel stains. To make a winter cold look I added a few icicles. I made them from clear sprues. I warmed the piece of sprue over a flame, stretched, properly cut and glued in place with cyanoacrylate glue. The last final touch was adding some soot on the main gun. The SU-122 was finished.Conclusion
Overall the SU-122 from MiniArt is a great kit. It allows you build out of the box an interesting vehicle with a very good level of detail. Even if you build a simpler version without interior there is many tiny, fragile part so I can recommend this kit for more experienced modeller and I'm sure they will have a good time, just as I did during the build of this kit.


About the Author


FROM: CALIFORNIA, UNITED STATES
My name is Matt Szefer. I'm doing scale models from six years. Most of them is WWII millitary vehicles in 1:35 scale.
Comments

I have seen interpretations of this camouflage scheme from others, but I have to say yours is the best I have come across. Well done and highly enjoyable!
JAN 03, 2017 - 09:54 PM
excellent job!! great weathering and camo finish! might have to put this kit on my wish list
JAN 03, 2017 - 09:58 PM

Great paint job and weathering of a unique camouflage scheme.
Thanks for sharing
JAN 06, 2017 - 09:10 PM
Copyright ©2021 by Matt Szefer. Images and/or videos also by copyright holder unless otherwise noted. The views and opinions expressed herein are solely the views and opinions of the authors and/or contributors to this Web site and do not necessarily represent the views and/or opinions of Armorama, KitMaker Network, or Silver Star Enterrpises. All rights reserved. Originally published on: 2017-01-04 08:19:55. Unique Reads: 13736

WEB HOSTING BY


Copyright ©2021 Armorama and Kitmaker Network, a subsidiary of Silver Star Enterprises
All Rights Reserved. Please read our Conditions of Use and Privacy Policy.
All Rights Reserved. Please read our Conditions of Use and Privacy Policy.