

1⁄35Marder I 7.5cm Pak.40/1
13
Comments
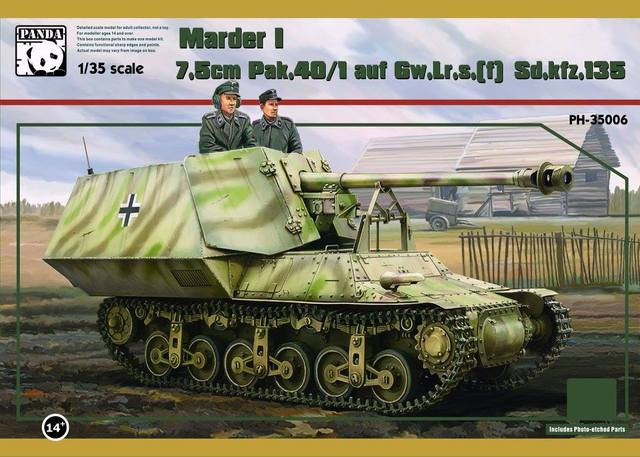
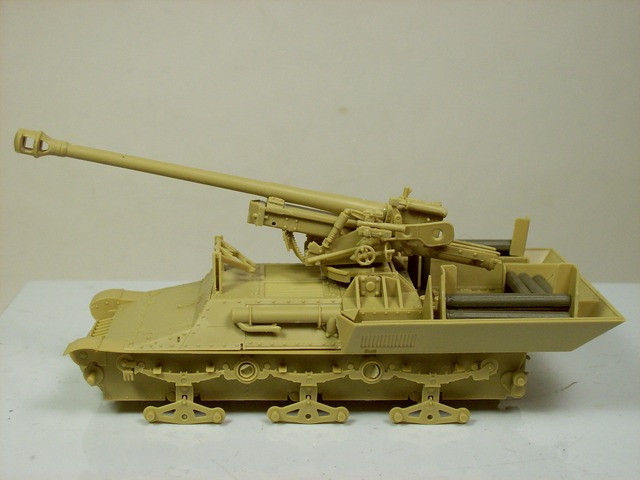
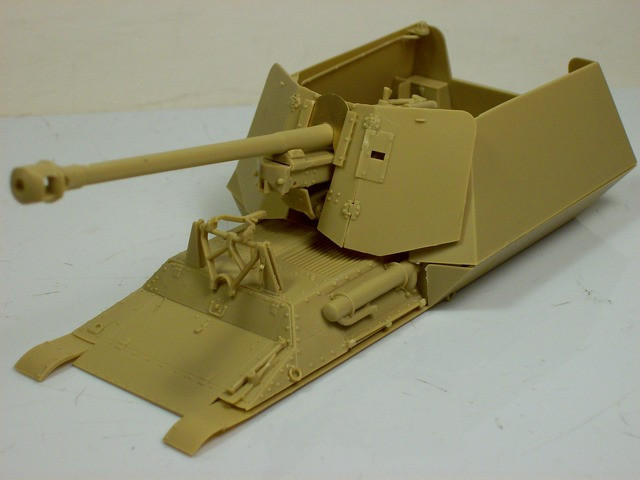
Thanks to Darren and the publisher of the Kitmaker Network along with Panda Hobbys, I had the pleasure of doing a little build review building their new Marder I 7.5cm Pak.40/1 ausf. Gw.Lr.s.(f) Sd.Kfz.135. As I progress through the building of this model, I have an early version of the Marder I from RPM to make a comparison to. After doing some research on this subject, I thought a Belgian Resistance Force version that was captured in Antwerp Sept.1944 was a good idea to have a go with.
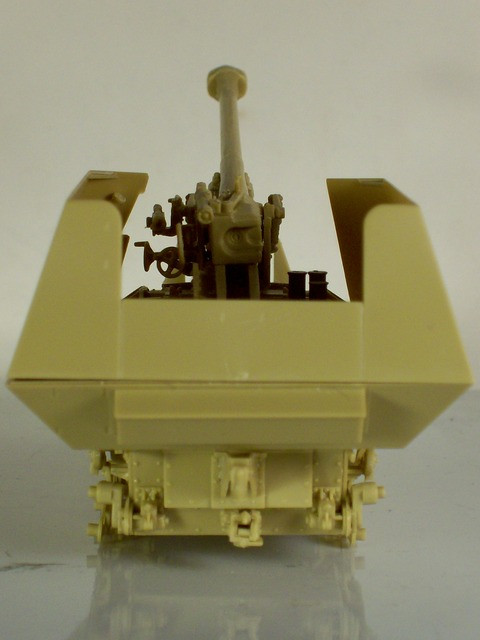
The Marder I 7.5cm Pak.40/1 ausf. Gw.Lr.s.(f) Sd.Kfz.135 comes complete with five sprues of styrene parts, one photo etch sheet, one decal sheet, a color guide and a full set of instructions for completing this model. Having a close look at the sprues, I found only some minor flash on a few parts that a sharp knife will make short work of. The mold blocks were aligned perfectly so if there is any seam ridges light sanding will remove those. As for knockout marks, I think most if not all will not be visible but there are some that have that half spur that might interfere with assembly and will need to be snipped off. The detail is crisp and clean. The provided instructions are presented in a black and white exploded view format and are clear and easy to follow. Along the way, I made notes about discrepancies with the instructions and/or the kit itself.
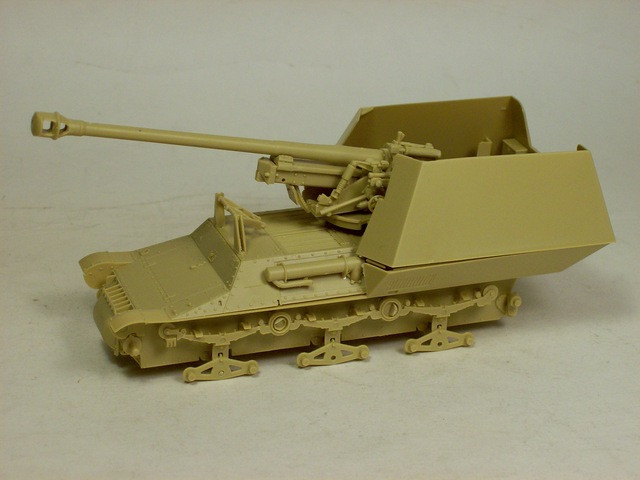
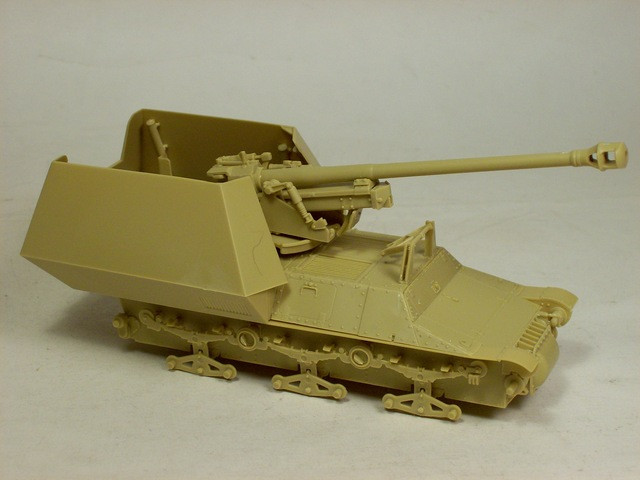
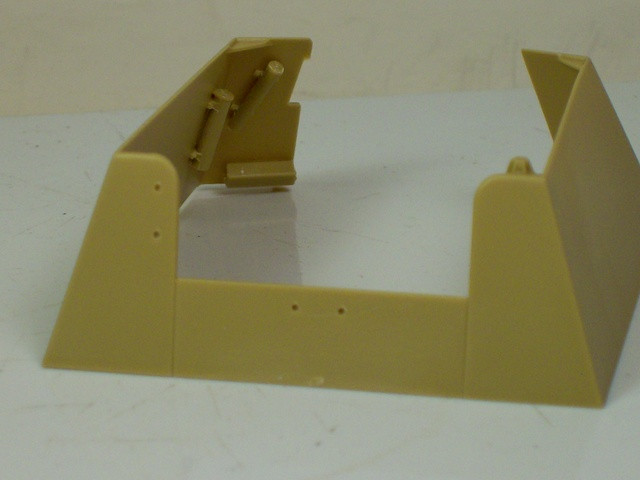
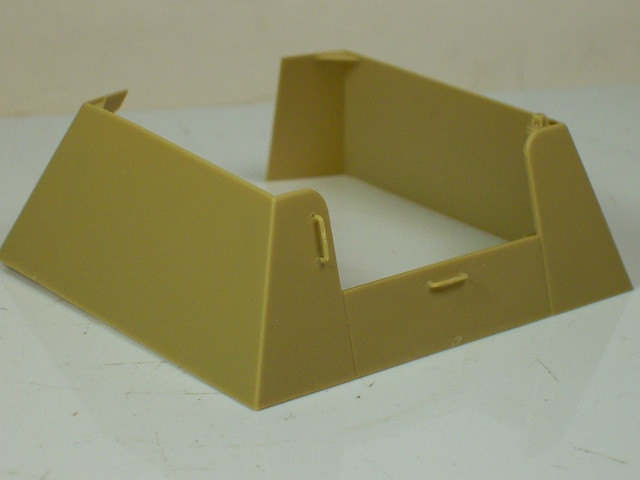
For the first part of the build, the lower hull assembly needed to be built. So far all of the part numbers jive with the instructions and the fit of those parts have been great except for the lower hull side to the floor plate where I had to do a little relief sanding. One other thing I wasn't expecting, was the travel lock mounting holes that are spotted on the underside of the upper hull needing to be drilled out.
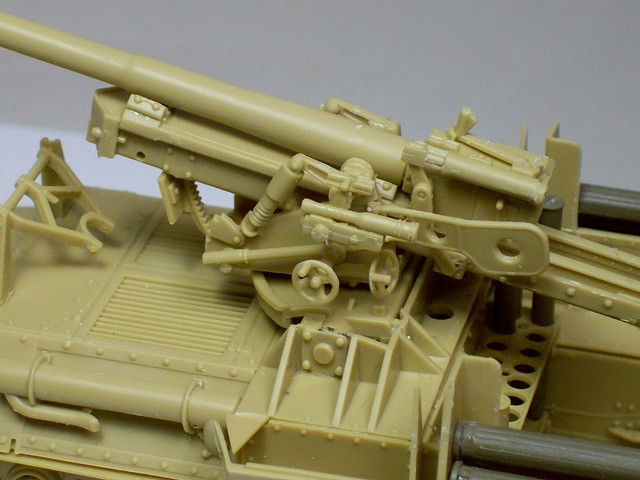
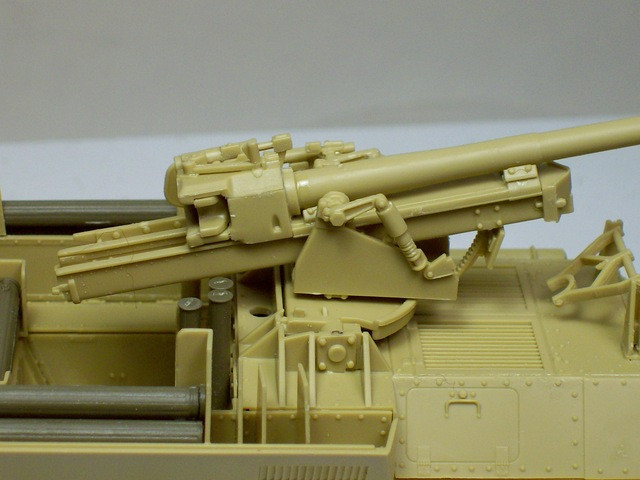
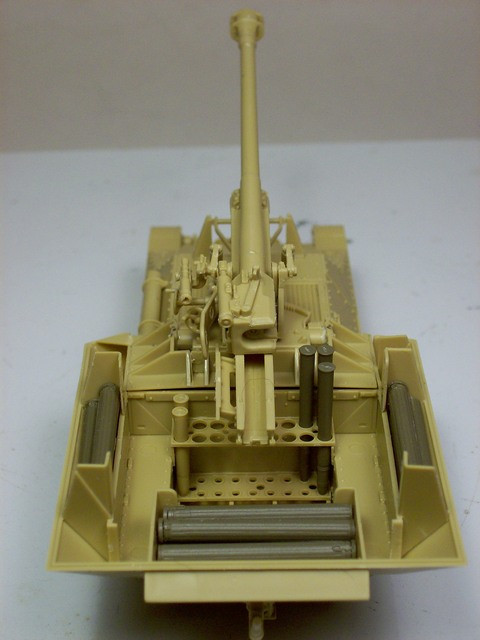
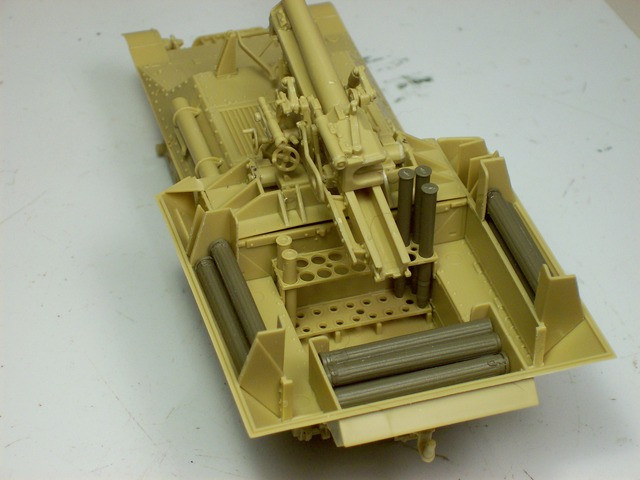
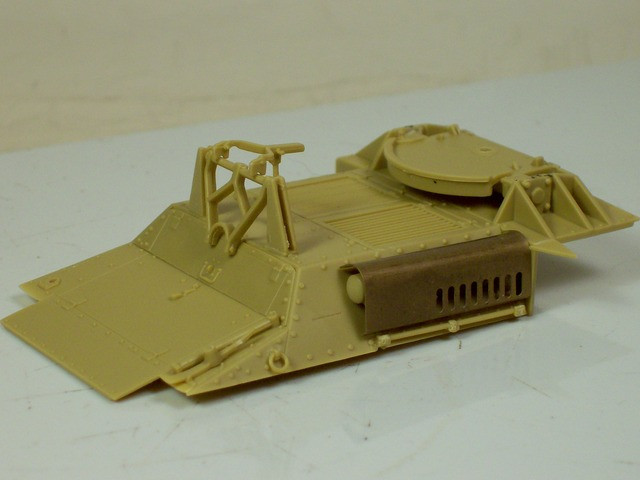
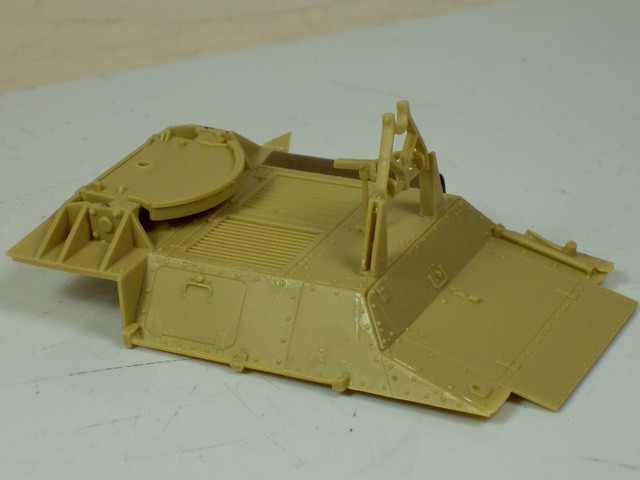
The provided 7.5mm Pak 40 is not too shabby in my opinion and assembled relatively easy. Moving along, the gun pit, or fighting compartment, is staring to take shape as well. I decided to add shells and shipping containers are from the AFV Club 7.5cm PaK40 accessory set I had in the stash. I don't think the kit is that difficult to build even for the newer builder if they pay attention and dry fit as they progress. Just remember it's not made by Tamiya.
When making my personal comparison between the Panda Hobby Marder and the one previously offered by RPM, the Panda kit has better fit and crisper details. The suspension is better engineered for those that are all thumbs and the PaK40 has better detail and a one piece barrel. Clean up of parts is not near as bad as the RPM kit.
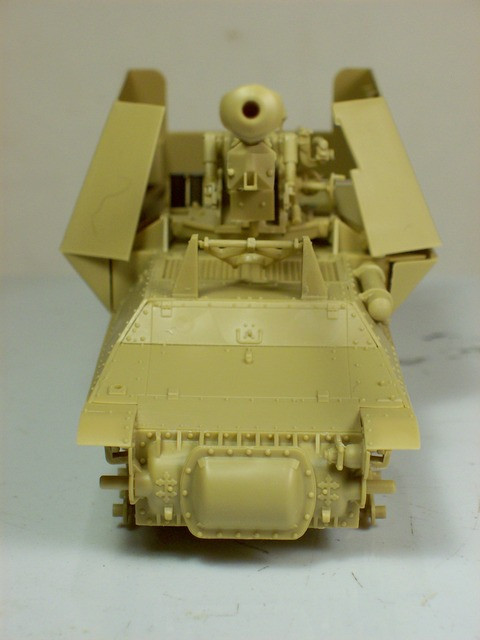
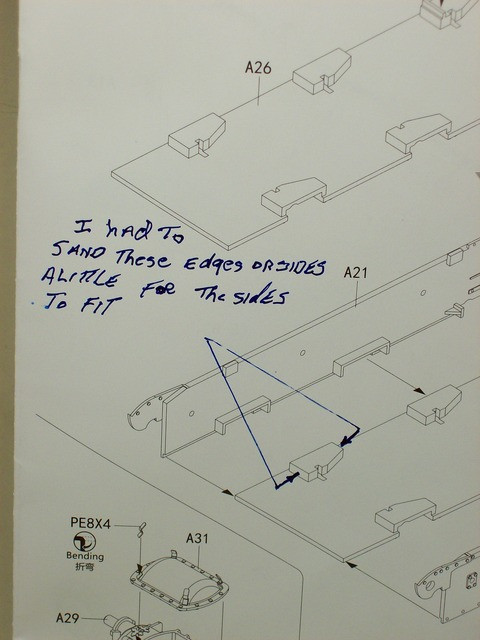
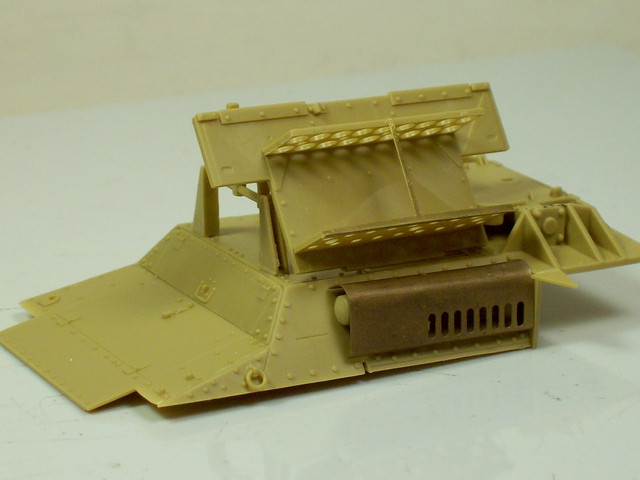
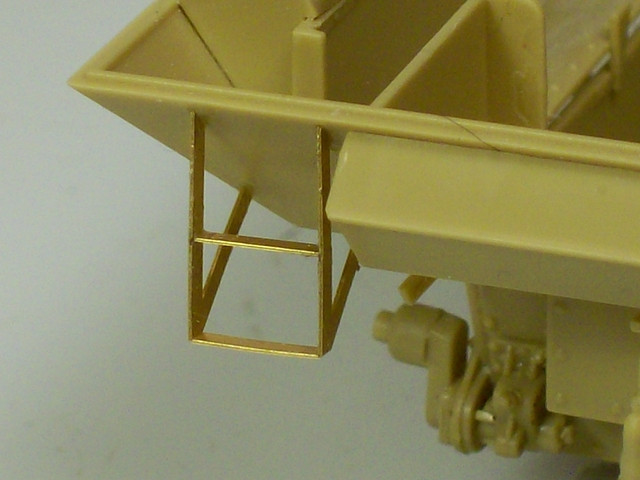
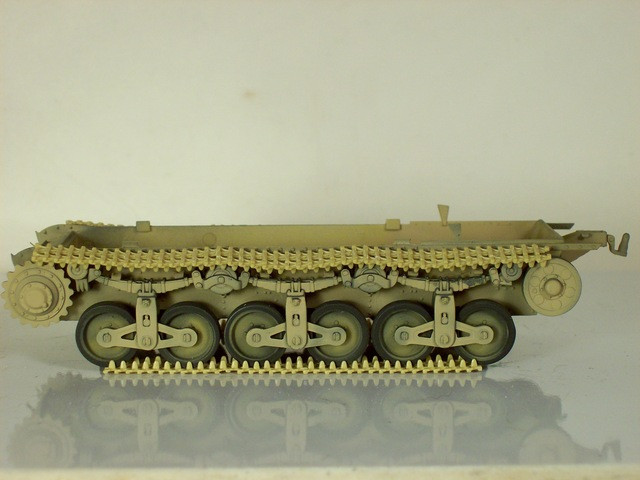
With only a few more parts to install on the Marder it was time to bend up some photo etch and begin assembly of the tracks. Not only is there a track jig, there's also one for forming the photo etch silencer/muffler cover; good deal Panda. I recommend that you anneal the cover first so it's easier to form the photo etch part around the provided jig. The hand grips on the rear of the fighting compartment walls only have tiny surface installation marks so I drilled holes for a stronger glue grip but not all the way through mine you. This work will pay off as I won't have to worry about breaking them off while handling. After finishing the travel lock, I placed the tie down rings and tools. PLEASE NOTE: If you want the travel lock workable don't glue that arm that faces to the rear to the saddle cross beam but just glue to the vertical post. The gun armor shield worked out nicely as well. There are two upper shield photo etch braces where you have to place a half twist at the top, but these were nothing fancy to do. The road wheel assembly was cleaned up and dry fitted together. I finished installing the remainder of the photo etch parts. The rear step ladder, tow cable stowage brackets (BTW: NO tow cable supplied within the kit!), and the filler plates on the right front corner of the fighting compartment. While the Gator Grip Glue I use for the photo etch parts dried, I went ahead and started on a job that might turn people away from buying this kit, the tracks!
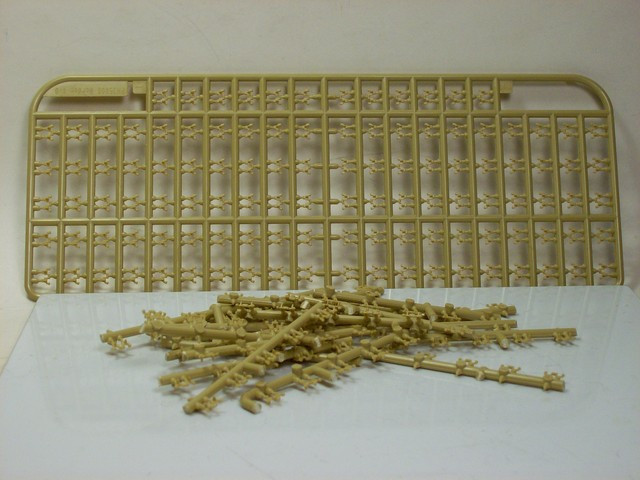
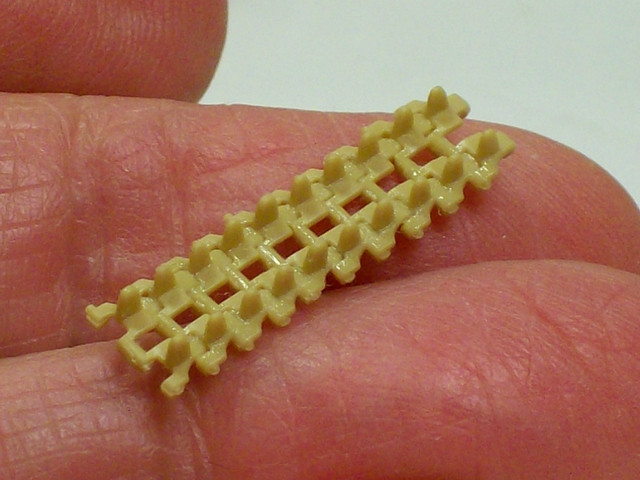
The track links are very small, but if you're able to snip the injection gates off real close sanding the nibs is very easy and goes quickly. Following the instructions, there is a calling for 107 links per side. I put together both road wheel bottom runs in about two hours. That's removing the links from the sprues, cleaning up and gluing the links together. To break up the building process a bit, I began some painting. While the paint was drying, I built the top run of the tracks using the provided jig. After the paint cured for something like eight hours the road wheel assemblies were installed.
The Marder I 7.5cm Pak.40/1 ausf. Gw.Lr.s.(f) Sd.Kfz.135 comes complete with five sprues of styrene parts, one photo etch sheet, one decal sheet, a color guide and a full set of instructions for completing this model. Having a close look at the sprues, I found only some minor flash on a few parts that a sharp knife will make short work of. The mold blocks were aligned perfectly so if there is any seam ridges light sanding will remove those. As for knockout marks, I think most if not all will not be visible but there are some that have that half spur that might interfere with assembly and will need to be snipped off. The detail is crisp and clean. The provided instructions are presented in a black and white exploded view format and are clear and easy to follow. Along the way, I made notes about discrepancies with the instructions and/or the kit itself.
For the first part of the build, the lower hull assembly needed to be built. So far all of the part numbers jive with the instructions and the fit of those parts have been great except for the lower hull side to the floor plate where I had to do a little relief sanding. One other thing I wasn't expecting, was the travel lock mounting holes that are spotted on the underside of the upper hull needing to be drilled out.
The provided 7.5mm Pak 40 is not too shabby in my opinion and assembled relatively easy. Moving along, the gun pit, or fighting compartment, is staring to take shape as well. I decided to add shells and shipping containers are from the AFV Club 7.5cm PaK40 accessory set I had in the stash. I don't think the kit is that difficult to build even for the newer builder if they pay attention and dry fit as they progress. Just remember it's not made by Tamiya.
When making my personal comparison between the Panda Hobby Marder and the one previously offered by RPM, the Panda kit has better fit and crisper details. The suspension is better engineered for those that are all thumbs and the PaK40 has better detail and a one piece barrel. Clean up of parts is not near as bad as the RPM kit.
With only a few more parts to install on the Marder it was time to bend up some photo etch and begin assembly of the tracks. Not only is there a track jig, there's also one for forming the photo etch silencer/muffler cover; good deal Panda. I recommend that you anneal the cover first so it's easier to form the photo etch part around the provided jig. The hand grips on the rear of the fighting compartment walls only have tiny surface installation marks so I drilled holes for a stronger glue grip but not all the way through mine you. This work will pay off as I won't have to worry about breaking them off while handling. After finishing the travel lock, I placed the tie down rings and tools. PLEASE NOTE: If you want the travel lock workable don't glue that arm that faces to the rear to the saddle cross beam but just glue to the vertical post. The gun armor shield worked out nicely as well. There are two upper shield photo etch braces where you have to place a half twist at the top, but these were nothing fancy to do. The road wheel assembly was cleaned up and dry fitted together. I finished installing the remainder of the photo etch parts. The rear step ladder, tow cable stowage brackets (BTW: NO tow cable supplied within the kit!), and the filler plates on the right front corner of the fighting compartment. While the Gator Grip Glue I use for the photo etch parts dried, I went ahead and started on a job that might turn people away from buying this kit, the tracks!
The track links are very small, but if you're able to snip the injection gates off real close sanding the nibs is very easy and goes quickly. Following the instructions, there is a calling for 107 links per side. I put together both road wheel bottom runs in about two hours. That's removing the links from the sprues, cleaning up and gluing the links together. To break up the building process a bit, I began some painting. While the paint was drying, I built the top run of the tracks using the provided jig. After the paint cured for something like eight hours the road wheel assemblies were installed.


About the Author


Comments

Thanks Tony! ...now I might have to buy even more Marders. Also, I'm wondering what references you used for the Belgian Resistance Force. I had a Great Uncle who was in the resistance in Mechelen, and would love any info on captured vehicles, etc.
FEB 15, 2017 - 03:09 AM

LINK
I'll have to do a search to find the small amount I ran across during my research which wasn't very much.
One person even identified where the picture was taken because he lives there I think.
Tony lee
FEB 15, 2017 - 03:27 AM

Nice to see that someone's finally offering a good kit of this elusive beastie!
FEB 15, 2017 - 03:50 AM
Thanks for the nice review of a rather unusual beast (well it is actually a reused "Beutepanzer")... it's kind of funny to make it a re-captured Belgium one, makes it kind of "coming home to the troops"
One thing I noticed, though (and sorry for being a smartass here)is you calling it "ausf." which would be the short term for "Ausführung" (edition or model), whereas it was actually "auf" which means "on" -> "7.5 PAK auf GW" means 7.5 PAK (Panzerabwehrkanone) ON Gefechtswagen (fighting vehicle).
FEB 15, 2017 - 01:51 PM
I concur on that detail. Small as it is. But then the whole vehicle in real life is no bigger than a mini van. Yes, I am rambling. Its one of those days...
FEB 16, 2017 - 01:57 AM
Sorry about the nomenclature guys I only speak Tennessee Redneck.
Thanks All
Tony lee
FEB 16, 2017 - 09:19 AM
No problem, just wanted to clarify it in order to share my knowledge, coming from being a native German speaker... but here my wisdom on this vehicle ends already
FEB 16, 2017 - 01:45 PM
's alright. It is a bit of an odd duck of a vehicle, but then what would you expect crossing a French utility vehicle with an effective (if slightly oversized) gun. Ungainly would be the kindest, accurate word that comes to mind.
FEB 17, 2017 - 07:59 AM

With such details, hope that Panda will able to release the kit of Marder II and III soon
APR 04, 2017 - 09:09 PM

Copyright ©2021 by Tony Watts. Images and/or videos also by copyright holder unless otherwise noted. The views and opinions expressed herein are solely the views and opinions of the authors and/or contributors to this Web site and do not necessarily represent the views and/or opinions of Armorama, KitMaker Network, or Silver Star Enterrpises. All rights reserved. Originally published on: 2017-02-15 09:03:26. Unique Reads: 21706

WEB HOSTING BY


Copyright ©2021 Armorama and Kitmaker Network, a subsidiary of Silver Star Enterprises
All Rights Reserved. Please read our Conditions of Use and Privacy Policy.
All Rights Reserved. Please read our Conditions of Use and Privacy Policy.