1⁄35Dragon Panzer IV E
58
Comments
stages 2 to 6
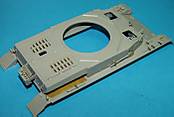
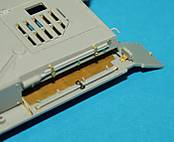
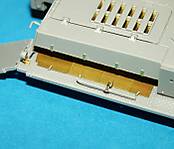
Fixing of the running gear to the lower hull, along with the rear hull and smoke generator. And engine grills. Construction of these provided no difficulties, although it is worth noting here that on the inside of the hull there is a locating ring moulded on that helps to locate the turret later. Only it doesn’t. It’s in the wrong place where it is, bang in the middle. The turret is correctly offset to the left, but for some reason Dragon has moulded this ring centrally. You can safely remove it, it makes no difference later on, but will prove a major problem if you leave it where it is. I removed it and left part F36 out. The construction of the drive housings was amazing! The possibilities for dioramas involving maintenance crews and damaged tanks are incredible! There is detail moulded on the inside of the drive housings....AND...the gear wheels inside the housings are faithfully reproduced, so you can see what I mean about dioramas! The detail in this area of the kit is breathtaking!Dragon provide two different types of armoured guard for the drive housing, and if you choose to use the one piece guards be prepared to use what are probably some of the smallest injection moulded parts you have ever seen. The conical bolts which have to be added are tiny!
The smoke generator for the rear of the tank can be modelled either open or closed, and five tiny photo etched ‘chains’ are supplied, which need only be fitted when modelled open as they will not be seen if modelled closed. I don’t think this is correct for the DAK version, although I’m not sure, but it looked so good I had to put it on mine!
For fitting the engine slats to the inside of the upper hull, I advise you strongly to dry fit more than once, and then do it again. There is supposed to be a problem with a small gap here, but after fitting mine I was more than happy with their apearance.
stages 7 to 9
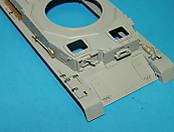
The hull deck! The tank was really starting to look the part now! Construction in these stages begins with the front of the fighting compartment. Dragon supply all the vision blocks, periscopes etc, as clear parts, and they all fit exactly as intended by Dragon. The layout of the rear deck over the engines is different dependent on which version you are depicting, so careful attention to the instruction sheet here! There are some beautiful photo etch parts for fitting under the engine slats, again, different dependent on version. In stage 8 you have to decide which additional armour pieces to use, and some of the upper hull walls will need holes drilling to accommodate these, so please read through the instructions carefully!The front Machine gun is gorgeous, and even comes with a spent ammunition bag, which is not mentioned on the instructions so don’t forget to use it! All hatches can be depicted open or closed, and show appropriate detail on their inner faces, but remember, apart from the turret, there is very little in the way of internal detail present, so it might be better to have the lower hull ‘buttoned’ up. It will come in handy for all the aftermarket engines and transmissions that will inevitably appear though!
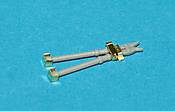
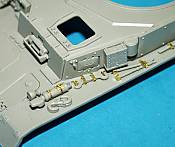
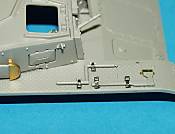
At the end of the stage the fenders are shown be fixed to the upper hull. Firstly, Dragon supply two sets of fenders, one set with holes for locating all the tools with moulded on clamps, and one set without the holes for those of you that would like to use the photo etched clamps and fitting that are also supplied. If you feel confident about using tiny photo etched parts then use the fenders without holes, the PE clamps really stand out and look great! Both sets of fenders have the tread plate pattern moulded underneath too! I would seriously consider not joining the fenders to the lower hull at this stage though, as even a small mis-alignment could create major fit problems later.
stages 10 & 11
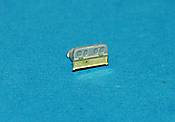
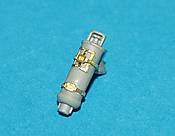
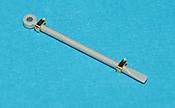
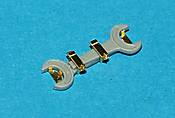
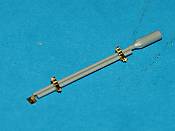
This is basically all photo etch! It’s where you get to spend a good few hours bending brass (if you have chosen this option). If you do choose to go down this road, then you should be aware that I found a few problems. Now some of these could be due to something I did wrong. I think they’re faults in the kit, even though they’re only tiny things that can easily be put right.Firstly, the headlights. You are given the option of replacing the conduit to these with PE parts. Don’t. The styrene parts are the correct profile, PE would be too ‘flat’. As far as all the PE replacement clamps go, I had problems with the jack clamps, which I think are too short. I just cannot see how they can be made to fit around the jack. I ended up making some replacement ones from an old PE fret. I decided not to use the PE step for the fender, although it looks as though it will work OK. The type of clamp that has the ‘U’ shaped handle I replaced with Eduard clamps, as the Dragon ones build in much the same way as the Aber ones, and I just find these too difficult to build properly. I experienced the same problem of the PE being too short with the clamps for the towing clevis. I actually gave up on these and used the ones with the moulded on clamps.
In stage 11 I lined the antennae trough with foil, since it was impossible to remove some pin marks inside it. Eventually I decided to model the antennae down anyway so it wouldn’t have mattered. I did give up on attaching the shovel though....there just wasn’t any room for it! The spare track holders made up for it though, they look absolutely great. Also in stage 11 there are two small pre-bent wires to be fitted at the rear of each fender. I’m no Panzer IV expert and I have no idea what these actually are. I fitted them, and much later on when joining the hull deck to the lower hull I sort of guessed their purpose, they actually clip around the towing hooks on the lower hull. They proved so strong and ‘springy’ I actually ended up removing them!
stages 12 to 15
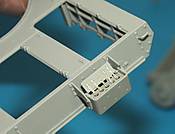
Here we begin constructing the turret and main gun. Construction begins with the cupola, which yes you’ve guessed it, is beautiful again! You have got to leave this open, the detail of the periscopes is amazing and will look fantastic once painted. You are given the option of having the periscopes open or closed. Next comes the turret bin. Again this can be modelled opened or closed, and if it is to be modelled open then you can add some PE parts supplied to make it look the business! Dragon are really thinking out of the box with all the options they are including to aid the modeller who likes to depict his model ‘doing something’. There are some very nice PE hasps supplied for the bin, but again, I found I could not attach the small padlocks because the hasps themselves were not long enough.Stage 13 continues with building the turret suspended floor, which is basic but is enough to allow you to raise the hatches. Stage 14 & 15 begin the construction of the gun, and you have the option of using the styrene or aluminium barrel supplied. When constructing the gun, you will find it easier if you firstly attach F30 to F12, and also place F10 over the mantlet, F22 before placing F12.
Comments
Hi Xavier,
Sharing our information, are you?
This is in defense of the sites which get samples from manufacturers. Truth be told, it is difficult to find someone who is expert, or at least knowledgeable, in all subjects. Keep this in mind since many vendors do not ask what samples they should send, they just do. For example, it took me a while (and some money spent) to gather the necessary references to be able to review Dragon's aircraft carrier kits which I was sent. I did not find anyone with the combination of skills (which include photography) so I could send it to them.
As for number 2, yes...I have been left scratching my head sometimes as well!
Three is very important and a reason why some knowledgeable modelers I know do not get samples forwarded by me. Photography is important. In some cases, I will photograph the sprues and then send the kit. By reading the submitted text, I will know if the kit was actually built since I PREFER build reviews. This goes towards your fifth point as well. Test fitting of major parts is the least to expect.
The fourth point is the most difficult. Every modeler I know has a reference library. Sadly, there are occasions where this library is not up to date. Not everyone has the wherewithal to buy the latest books on a particular subject. So the accuracy check you find is limited to what the reviewer had at hand. For this reason, I ask that all reviews include a list of references used. Note that the sites you mentioned include them? So even if some item is not accurate, the reviewer can point out that it was to the references they used. No one is perfect and we should not expect them to be.
Value was not mentioned. This is a personal thing, just like the overall opinion. For example, (even if the kit was sent for free) how do you feel paying full price for the kit? Again, there are many factors here since a kit’s price may be different in other areas of the World.
So I ask that reviewers state the facts, where they got the facts, show us some images so we can form our own opinions and give me theirs (which I may or may not agree with).
What to do when inaccuracies are found? Point them out and how to overcome them. Let the reader decide if they wish to go through the trouble, if at all. An example is this Panzer IV Ausf E. Many improvements can be made to it, while I plan to do all I find; some may do some and others none at all. It is a beautiful kit. Here is where opinions some into play. Some modelers will not bother trying to improve the kit and revel in all (and there is plenty!) that is right. Some may be thrilled at the value, all the goodies including such a wonderful figure. Some may be disappointed since they are in the quest for the perfect kit (a very long quest, of that I am sure), and others may see the inaccuracies, fix them, and be so happy at having added their touch to a wonderful model.
Note that I do not represent any one site. I have posted my reviews here (mostly aircraft, books, or in Spanish) and Track-Link (only armor in English). I do get samples from many vendors and pass them on to reviewers such as Christopher Wilson, Konrad Schreiber, and others.
Regards,
Saúl García
NOV 12, 2005 - 05:03 AM
Hey all armor freaks
Being an old man in Panzers, I started some 35 odd years ago doing a conversion of a Nichimo Panzer IV F1 into an E version, things certainly have changed since then , I have on and off, been doing some early German Panzers up to 1942, or more correctly the later months of 1942. Seeeing the new releases of Dragons good looking version, yet only in review form makes me wonder, why no one, or at least only a few have mentioned the Tristar version, or perhaps I haven't found it yet
Modellers today are more “picky“ than earlier, in their search for precise detail, where, at least here in Denmark, people sat pride in correcting errors, and getting a more “correct“ model, that was the difference between mediocre models and “the super models“, ring a familar bell
We have certainly been spoiled by the manufacters these last years, now I only need some soft skin early german vehicles.
By the way a SUPER SITE with lots of good stuff for almost every taste.
Greetings to all contributers from Denmark
NOV 14, 2005 - 08:52 AM
I have tried to refrain from posting in this thread, and instead have allowed others to use it as a 'platform' for airing their grievances, real or imaginary, against firstly Dragon, presumably for making a fantastic kit which some people have no problems with, and secondly, against reviewers they see as less perfect than themselves. I'm just glad that this great site can provide this sort of person with somehwhere to post. :-) :-) :-) By the way Xavier, great links on the Glacis.....I particularly like the knock out pins which you've left for their 'visual' effect.
Vinnie
NOV 14, 2005 - 09:10 AM
just do your thing Vinnie,i like what you are doing and with me a lot of other peeps on this site.my understanding was that you buy most of the kits you builld/review and simply thanking dragon just because they made them and not because they have you in their pocket.i only say this once;vinnie is for real in my book.on to the next build/review/feature or what else that you all do.
cheers mate.
jeroen................
NOV 14, 2005 - 10:47 AM
Hi Vinnie ,
I just purchased this kit and can't wait to start building it. Luckily, I also found your "resume" on this gorgeous kit.I printed everything...promise, I won't sell it. Anyways, thank you for your usual input, you are always a "teacher".Glad that you are on board.Looking forward reading some more from your future experiences,
Claude aka diamonds088
NOV 17, 2005 - 04:15 PM
Vinnie,
Thanks for this build, just bought this kit as a xmas present to myself. I wonder if you could outline your advice when it comes to what to assemble or not when it comes to painting. This is the most advanced kit I have built, and after two days I am trudging away on the bogeys still.
I am also new to airbrushing so any advice as to what parts I should or shouldn't attach for painting would be appreciated.
P.S. I also don't have the steady hands required to hand paint tools and the like once attached!
DEC 30, 2005 - 02:28 AM
I believed that a feature was just a journal of a builder's experience with the kit. It is not a critique to historical accuracy or detail. It is simply a diary of the person's building experience. If the kit is full of inaccuracies but yet easy to put together, the feature will more than likely be favorable. If filling a gap or sanding a few parts is enjoyable to the builder the feature will likely be favorable.
A review is probably done by a person (but not always)with an interest in that subject and will comment on the accuracies. These would be a little more critical about the way a part looks or how it fits together because it is a technical inspection.
It is also my understanding that for Armorama, the samples go to a few central people who them randomly redistribute them to numerous volunteers with no say in what type of sample they receive. So for an individual, there is no benefit in "flowering" a review because he/she cannot curry favor for additional sample kit in the future from any manufacture.
DEC 30, 2005 - 02:54 AM
Well am just taking a brake from doing the suspension on this kit,done one side,first off i was scratching my head for about 30 minutes trying to put all the pieces together,well i worked it out in the end.easy when you know how
i think the kit is top notch in my book,but what do i know ,i just build them i dont know the right measurements to a panzer or any other kit and i dont realy care,as long as your happy with it thats all that matters
people should just build the god dam kit and admire the the work thats gone into producing such a fine model.
so its thanks to dragon and tom cockel for this dream of a kit,the beers are on me
cheers karl
DEC 30, 2005 - 03:15 AM
Excellent review. Felt like I was building the kit too.
I can't wait to get my new glasses so I can see again and get me one of these!
Cheers, MSW
JAN 01, 2006 - 10:19 PM
Hi Vinnie - Al here.
I work in the same profession as you and only started modelling again in late 2005.
I had a similar pointless comment on a question I posted recently about LCVP's.
I like many others model for fun and whilst accuracy is important one can only do ones best.
The reviews provided by yourself and others are invaluable to me and many others.
I say good luck to you if Dragon think highly enough of your skills to send you a free kit to review. I've been pestering them for months to increase their range of British vehicles and figures and if they sent me a kit (based on an idea I had given them) I'd be delighted.
Keep up the good work.
Al
JAN 01, 2006 - 11:25 PM
Copyright ©2021 by Vinnie Branigan. Images and/or videos also by copyright holder unless otherwise noted. The views and opinions expressed herein are solely the views and opinions of the authors and/or contributors to this Web site and do not necessarily represent the views and/or opinions of Armorama, KitMaker Network, or Silver Star Enterrpises. All rights reserved. Originally published on: 2005-10-22 00:00:00. Unique Reads: 34595


