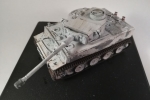
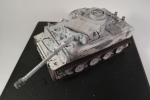
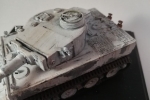
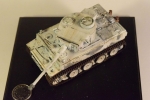
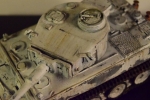
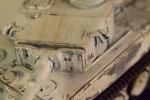
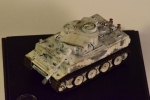
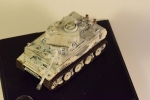
Macro photography of scale models
This article will be somewhat long, but hopefully useful. It started out when I took a couple of comparison photos using different cameras, and things went downhill from there… I’m trying to cover a lot of things from equipment to settings; I do hope it will be clear and easy to understand regardless. I try to mention the basics and provide links for further reading; this series is meant to be an introduction to key concepts rather than a comprehensive tutorial. Take whatever you need from it - you don’t have to follow a step-by-step procedure.
As a disclaimer: this is how it should be done; it does not necessarily mean my own photos are the epitomes of perfection…
Photographing models is essentially studio macro photography. You can do it cheap, even with a reasonably good phone camera (to certain limits), or you can go the whole nine yards, and use a DSLR with a dedicated macro lens - or choose an option in between. I’ll try to list all the viable options so you can make a decision easier. Macro photography is an incredibly interesting branch of photography, and not just when it comes to plastic. It is essentially the photography of small objects. (Shameless self promotion: I run a blog on macro photos.) Things that you learn by taking photos of your placid and immobile models will enable you to take some pretty cool photos of the less than placid and definitely not immobile wildlife living in your backyard.
It also affects how much weathering you want to do. There’s always a question of how much is too much, but apart from personal taste, it’s worth keeping in mind that your model will look different on a photo than in real life thanks to the above mentioned effect. To put it strongly you can either build for the camera or for the eye. The camera essentially brings the observer close to the model- therefore subtle weathering, which is hardly noticeable when looking at the model with the naked eye, will stand out more; and weathering that you thought looked great and natural on the model when you looked at it from hands length, will look over-done on a photo.
Smart phone cameras
Smartphones caused a revolution in photography; now everyone and their aunt are taking photos like mad. Newer models of phones are equipped with cameras of remarkable quality; for photos destined to be published on the web these cameras might be just enough. Megapixels mean next to nothing, though. A 12 megapixel phone camera is not going to take better photos than a 9 megapixel DSLR; just the opposite. A phone camera’s sensor is fraction of the size of a decent DSLR’s; the optics is also going to be severely limited by the very small optical parts. A DSLR will have larger sensor, better optics; it will always come out with better quality photos. Same is true to a lesser extent with compact and bridge cameras: optics and sensor size matters. A lot. As I said, for web-only publication it might not matter that much, but the difference is always going to be visible. Sometimes when I can’t be bothered to set everything up, and I snap in-progress photos using my phone. This is a less-than-perfect solution, and it’s quite obvious which photos were taken with my phone and which were taken by the DSLR I use. (If I had space to have a permanent photo corner, I would not be tempted to use the smartphone at all.) That said, the photos taken by phone cameras are not horrible at all.
Compact cameras and Bridge cameras
These cameras are perfectly capable of taking good quality photos of models. The sensors are smaller than the DSLR sensors, the optics are usually not that good quality as a £1000+ Nikkor objective’s, but the question is: do you really need that good of a lens for this job? (You might, but most of us do not.) For the laymen (meaning: you and I) these cameras will be perfectly suitable. You can set the most important things yourself: ISO/shutter speed/aperture/white balance, and they can also shoot RAW. (Most photographers shoot in RAW format, because even though these images are gargantuan in size they offer the best option for post processing; they also do not lose information like JPEGs do. I use RAW for almost all my photos, except when I photograph scale models… JPEG is perfectly suitable for web-publishing.) These cameras also normally have a dedicated macro setting (which really is just an aperture/shutter speed setting that was deemed to be “optimal” for macro), and can do most of the jobs you need.
Bridge cameras, as the name suggests, are a transition between compact and DSLR cameras. They give you almost as much flexibility and almost as good quality as DSLRs, but they are smaller and easier to use. They normally have one monstrous zoom lens that can give you wide-field as well as a 300X telephoto option (for which you’d need to spend at least a two thousand GBP DSLR lens to achieve), and can also take front lenses (discussed later) to give you even more flexibility. To be perfectly honest I’m jealous of the 300X zoom on the Fuji bridge camera my wife has; my paltry 200mm telephoto cannot hold a candle to its sheer magnification. (However the image quality of my camera is vastly superior.) When I took a photo of the last supermoon with my fancy D3300 (OK, it’s not fancy as far as DSLRs go, but it is fancy as far as this comparison goes), 200mm lens and a tripod, and then switched to the 300X zoom held in hand, it was infinitely easier to take a great-looking photo of the moon using the Fuji. I managed to shoot a great photo without fiddling with the settings – whereas it took me several tries to find an aperture setting where the bright moon did not oversaturate the photo on the Nikon. I honestly can say that a bridge camera is perfectly good for most amateur photographers like myself; I just had a DSLR fetish I needed to satisfy.
“Real macro” -meaning 1:1 image production- might be out of the league of these cameras, but you rarely need magnification that large. As mentioned, bridge cameras (and some compacts) can mount front lenses, which can bring you to this realm, though.
Mirrorless/DSLR
Well, these are the “serious” cameras. It’s the whole nine yards: expensive pieces of equipment, interchangeable lenses, large sensors. There are different classes within the DSLR world, of course: medium format, full-frame, APS, etc. based on the sensor size. If you decide to invest in a DSLR, you probably should read up on these; for our purposes it’s enough to say that the smaller sensor DSLRs -like the Nikon D3300 I use-, are cheaper and smaller, and are perfectly enough for our (and most other) purposes. (Not to mention the lenses are cheaper, too.) Don’t forget, bigger is not always better; you actually have to carry that camera around, so you need to consider your needs real carefully before you blow your money on medium format body.
If you have limited resources it’s better to spend on the objectives than on the camera body. If the glass is good quality it does not matter much if the photo was taken using a D3300 or a D5.
The real advantage of a DSLR is the high quality and the flexibility; you have a lot of options to produce macro photos -see in below (Not all of them are expensive.)
As a disclaimer: this is how it should be done; it does not necessarily mean my own photos are the epitomes of perfection…
Photographing models is essentially studio macro photography. You can do it cheap, even with a reasonably good phone camera (to certain limits), or you can go the whole nine yards, and use a DSLR with a dedicated macro lens - or choose an option in between. I’ll try to list all the viable options so you can make a decision easier. Macro photography is an incredibly interesting branch of photography, and not just when it comes to plastic. It is essentially the photography of small objects. (Shameless self promotion: I run a blog on macro photos.) Things that you learn by taking photos of your placid and immobile models will enable you to take some pretty cool photos of the less than placid and definitely not immobile wildlife living in your backyard.
Painting and photographing models
There’s also a related issue to mention which is less technical, and more philosophical. The camera sees things differently when it comes to macro photography. Tiny irregularities, mistakes stand out incredibly well on a photo- simply because the camera’s point of view is much closer to the model than you eyes’. While you look at the model as if you were looking at it from a distance (one reason for factoring in the scale effect when painting the model), the camera “looks” at it as if you were standing right next to it. The level of detail, the weathering, everything will look different. This can be used to your advantage: you can take photos of the model during the build and check for problems; issues with seam-lines, uneven brushstrokes, etc. will be noticeable. Things that you hardly see when you look at the model, will stand out like a sore thumb.It also affects how much weathering you want to do. There’s always a question of how much is too much, but apart from personal taste, it’s worth keeping in mind that your model will look different on a photo than in real life thanks to the above mentioned effect. To put it strongly you can either build for the camera or for the eye. The camera essentially brings the observer close to the model- therefore subtle weathering, which is hardly noticeable when looking at the model with the naked eye, will stand out more; and weathering that you thought looked great and natural on the model when you looked at it from hands length, will look over-done on a photo.
Cameras
There are several options to capture the light coming from your model. You can use film cameras (not suggested, but certainly possible), or you can choose from the wide range of digital cameras. In some respect it does not really matter which one you choose (within a range, of course); but it’s important to be aware that DPI does not really matter when choosing an option. Same with megapixels (which is the common unit for smartphone/DSLR resolution). There is more to a camera than just the resolution: the sensor and the optics are the two fundamental things that will determine the quality of the photos.Smart phone cameras
Smartphones caused a revolution in photography; now everyone and their aunt are taking photos like mad. Newer models of phones are equipped with cameras of remarkable quality; for photos destined to be published on the web these cameras might be just enough. Megapixels mean next to nothing, though. A 12 megapixel phone camera is not going to take better photos than a 9 megapixel DSLR; just the opposite. A phone camera’s sensor is fraction of the size of a decent DSLR’s; the optics is also going to be severely limited by the very small optical parts. A DSLR will have larger sensor, better optics; it will always come out with better quality photos. Same is true to a lesser extent with compact and bridge cameras: optics and sensor size matters. A lot. As I said, for web-only publication it might not matter that much, but the difference is always going to be visible. Sometimes when I can’t be bothered to set everything up, and I snap in-progress photos using my phone. This is a less-than-perfect solution, and it’s quite obvious which photos were taken with my phone and which were taken by the DSLR I use. (If I had space to have a permanent photo corner, I would not be tempted to use the smartphone at all.) That said, the photos taken by phone cameras are not horrible at all.
Compact cameras and Bridge cameras
These cameras are perfectly capable of taking good quality photos of models. The sensors are smaller than the DSLR sensors, the optics are usually not that good quality as a £1000+ Nikkor objective’s, but the question is: do you really need that good of a lens for this job? (You might, but most of us do not.) For the laymen (meaning: you and I) these cameras will be perfectly suitable. You can set the most important things yourself: ISO/shutter speed/aperture/white balance, and they can also shoot RAW. (Most photographers shoot in RAW format, because even though these images are gargantuan in size they offer the best option for post processing; they also do not lose information like JPEGs do. I use RAW for almost all my photos, except when I photograph scale models… JPEG is perfectly suitable for web-publishing.) These cameras also normally have a dedicated macro setting (which really is just an aperture/shutter speed setting that was deemed to be “optimal” for macro), and can do most of the jobs you need.
Bridge cameras, as the name suggests, are a transition between compact and DSLR cameras. They give you almost as much flexibility and almost as good quality as DSLRs, but they are smaller and easier to use. They normally have one monstrous zoom lens that can give you wide-field as well as a 300X telephoto option (for which you’d need to spend at least a two thousand GBP DSLR lens to achieve), and can also take front lenses (discussed later) to give you even more flexibility. To be perfectly honest I’m jealous of the 300X zoom on the Fuji bridge camera my wife has; my paltry 200mm telephoto cannot hold a candle to its sheer magnification. (However the image quality of my camera is vastly superior.) When I took a photo of the last supermoon with my fancy D3300 (OK, it’s not fancy as far as DSLRs go, but it is fancy as far as this comparison goes), 200mm lens and a tripod, and then switched to the 300X zoom held in hand, it was infinitely easier to take a great-looking photo of the moon using the Fuji. I managed to shoot a great photo without fiddling with the settings – whereas it took me several tries to find an aperture setting where the bright moon did not oversaturate the photo on the Nikon. I honestly can say that a bridge camera is perfectly good for most amateur photographers like myself; I just had a DSLR fetish I needed to satisfy.
“Real macro” -meaning 1:1 image production- might be out of the league of these cameras, but you rarely need magnification that large. As mentioned, bridge cameras (and some compacts) can mount front lenses, which can bring you to this realm, though.
Mirrorless/DSLR
Well, these are the “serious” cameras. It’s the whole nine yards: expensive pieces of equipment, interchangeable lenses, large sensors. There are different classes within the DSLR world, of course: medium format, full-frame, APS, etc. based on the sensor size. If you decide to invest in a DSLR, you probably should read up on these; for our purposes it’s enough to say that the smaller sensor DSLRs -like the Nikon D3300 I use-, are cheaper and smaller, and are perfectly enough for our (and most other) purposes. (Not to mention the lenses are cheaper, too.) Don’t forget, bigger is not always better; you actually have to carry that camera around, so you need to consider your needs real carefully before you blow your money on medium format body.
If you have limited resources it’s better to spend on the objectives than on the camera body. If the glass is good quality it does not matter much if the photo was taken using a D3300 or a D5.
The real advantage of a DSLR is the high quality and the flexibility; you have a lot of options to produce macro photos -see in below (Not all of them are expensive.)
Copyright ©2021 by Andras. Images and/or videos also by copyright holder unless otherwise noted. The views and opinions expressed herein are solely the views and opinions of the authors and/or contributors to this Web site and do not necessarily represent the views and/or opinions of Armorama, KitMaker Network, or Silver Star Enterrpises. All rights reserved. Originally published on: 2018-03-15 18:23:51. Unique Reads: 30681


