

1⁄35Lion of Babylon
3
Comments
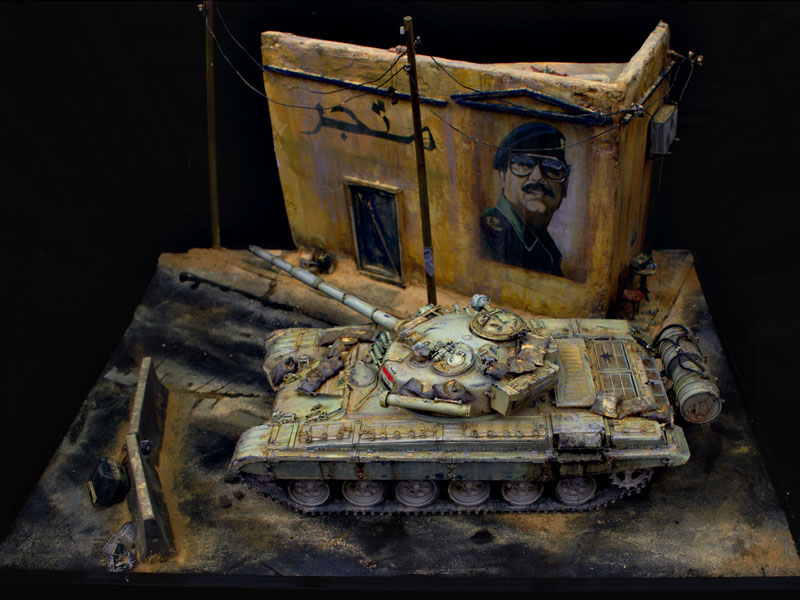
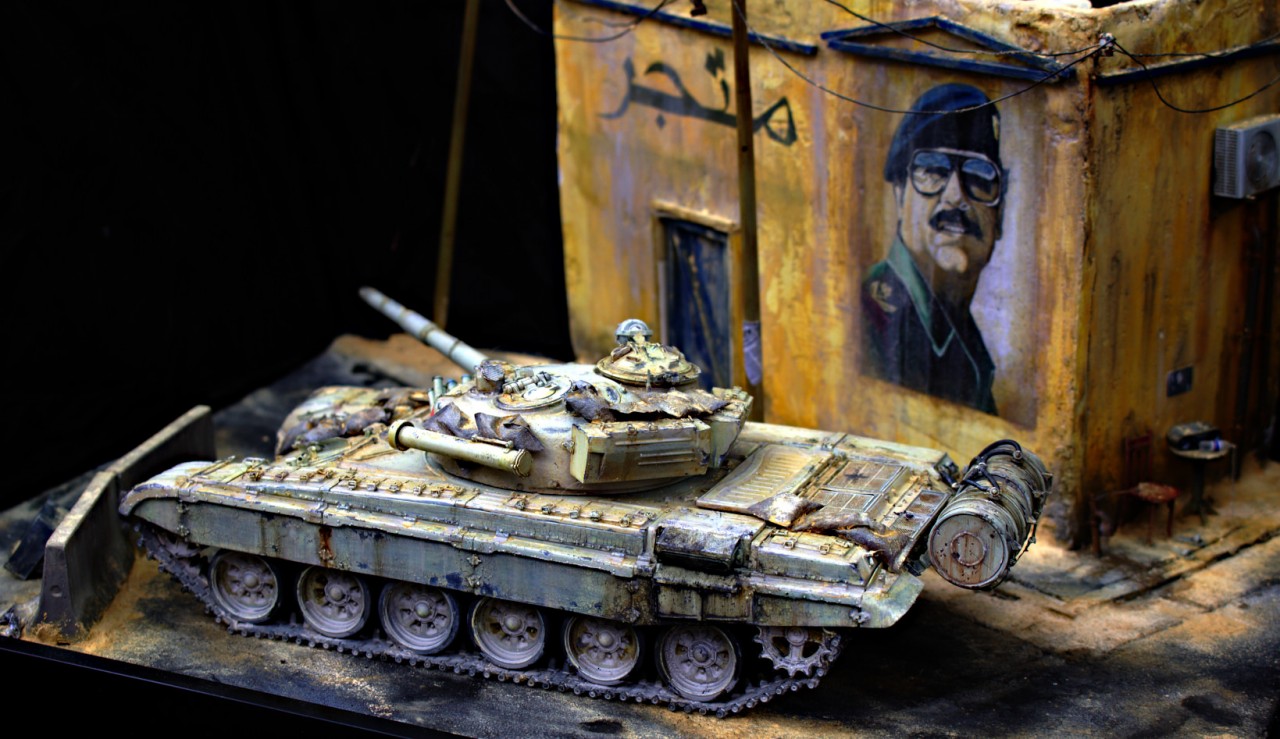
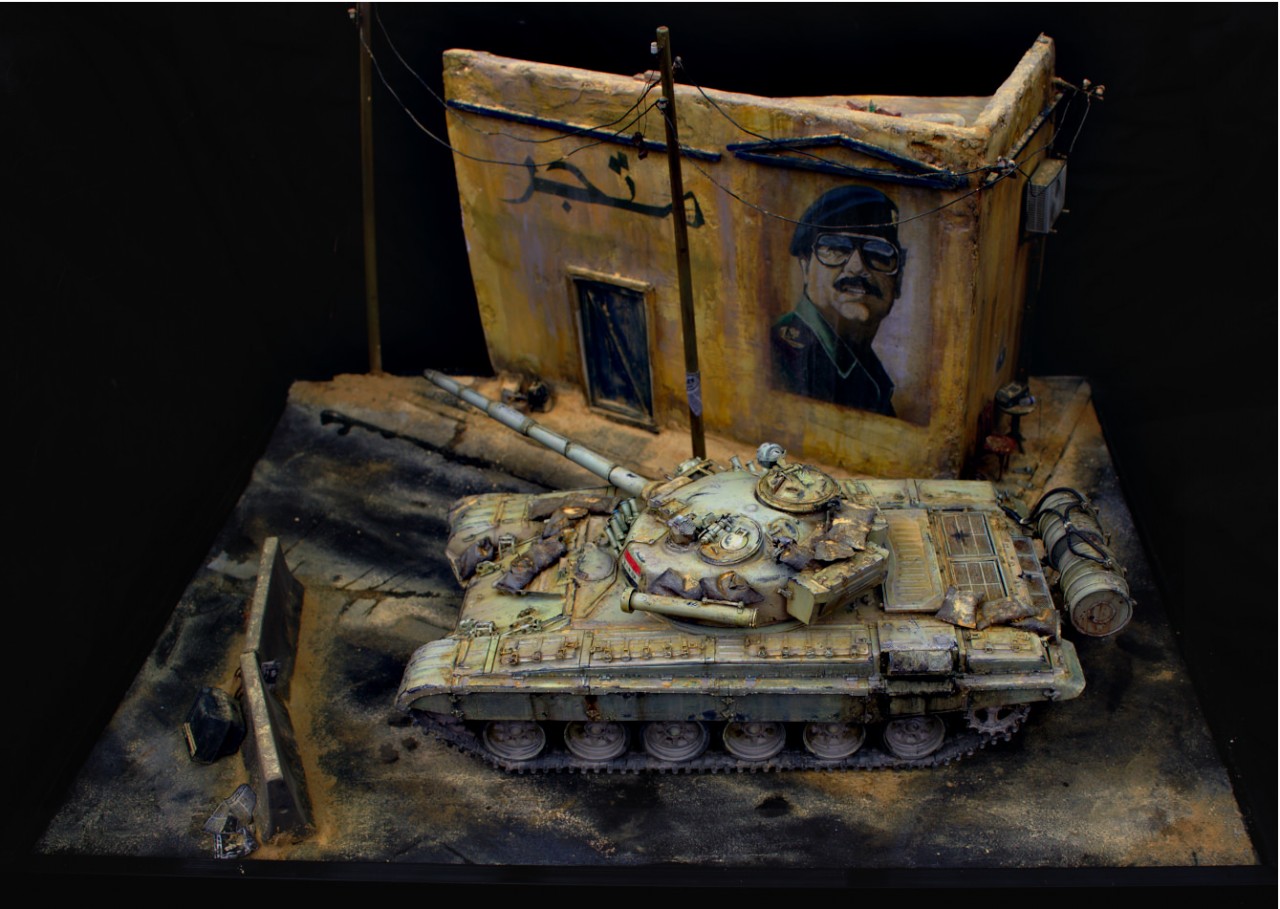
Iraqi T-72M1 The Lion of Babylon diorama.
Introduction.
I was building an M1 Abrams kit when I thought about possibly having an Iraqi tank in a diorama with the M1. I set about doing some research on which tanks the M1's were likely to have encountered when I first heard of the Lion of Babylon. The name was what caught my attention. Such a grandiose name must describe a powerful vehicle....right?While the Abrams never became a diorama, the Lion of Babylon's name stuck in my mind. As I tried to research, it became very clear there is very little information available for this tank variant, and there is lots of misinformation out there.
Here is what I have managed to stitch together Iraq had purchased a few hundred T-72M1's (export version of the T-72) from Poland. Being export versions, these vehicles omitted many of the features and quality controls of the Russian T-72. In the late 1980s, Saddam wanted more of these tanks, but importing them would be more difficult as Iraq was placed under an arms embargo during the Iran-Iraq war. This is where things get muddy...
For about a year, between 1989 and 1990, Iraq implemented a project to build their own T-72's. They imported as many parts as they could, and tried producing the rest themselves. It is disputed if any Lion of Babylon tanks were actually built, with the number being between 0 and 100. What is known is if any had been produced, they would be vastly inferior to the T-72, and T-72M1.
The story of the Lion of Babylon is one I found extremely interesting and I wanted to try to model one using the most accurate information I could, and the best kits of the subject I could find.
Construction
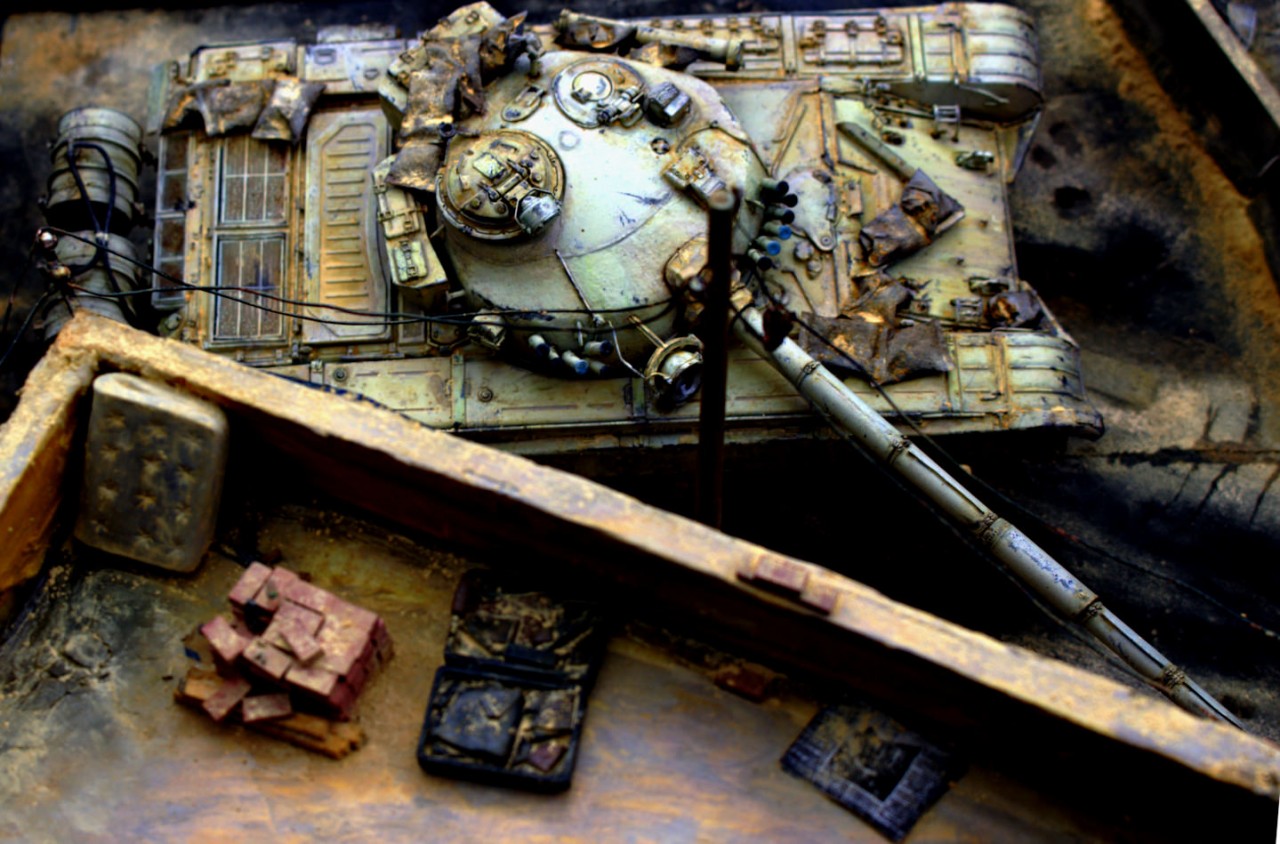
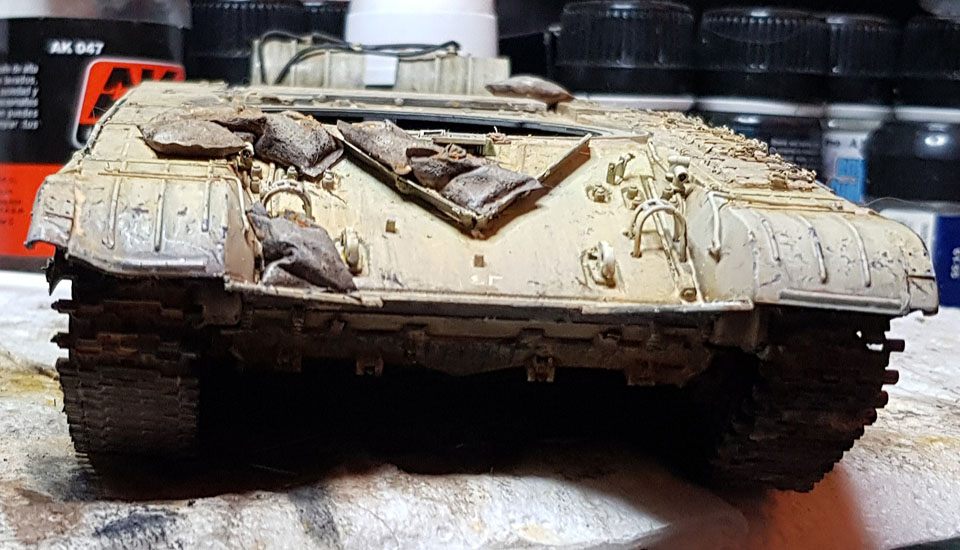
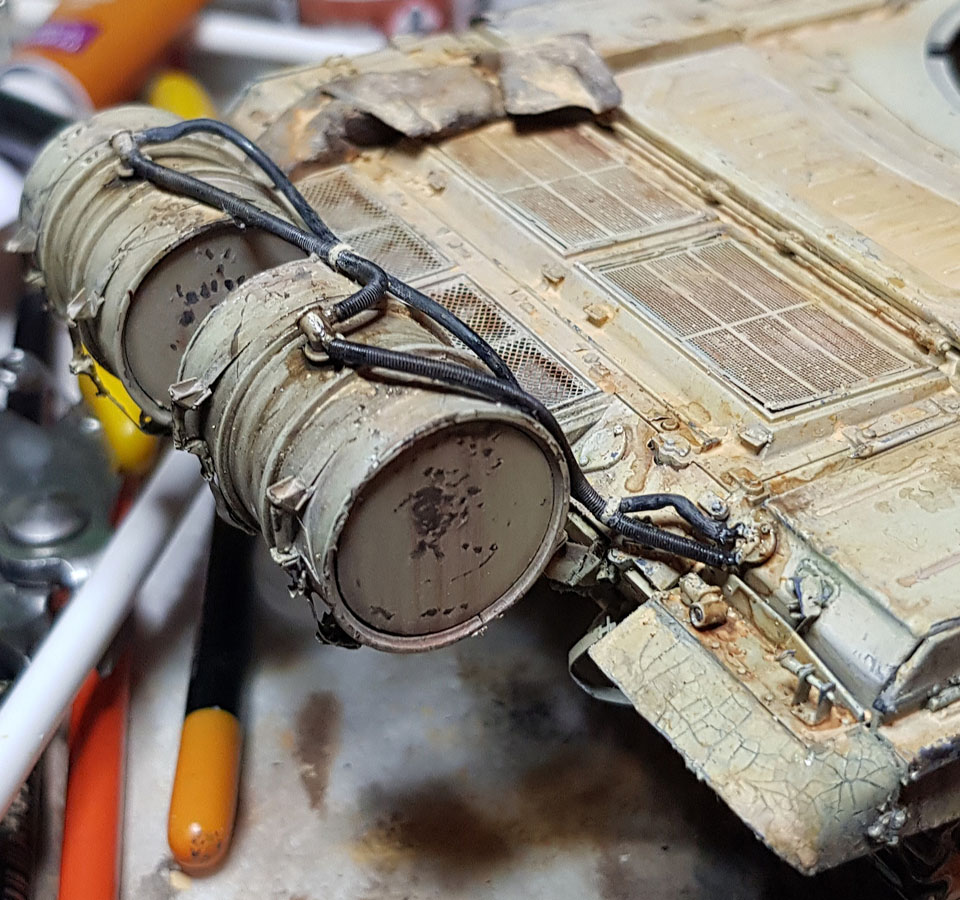
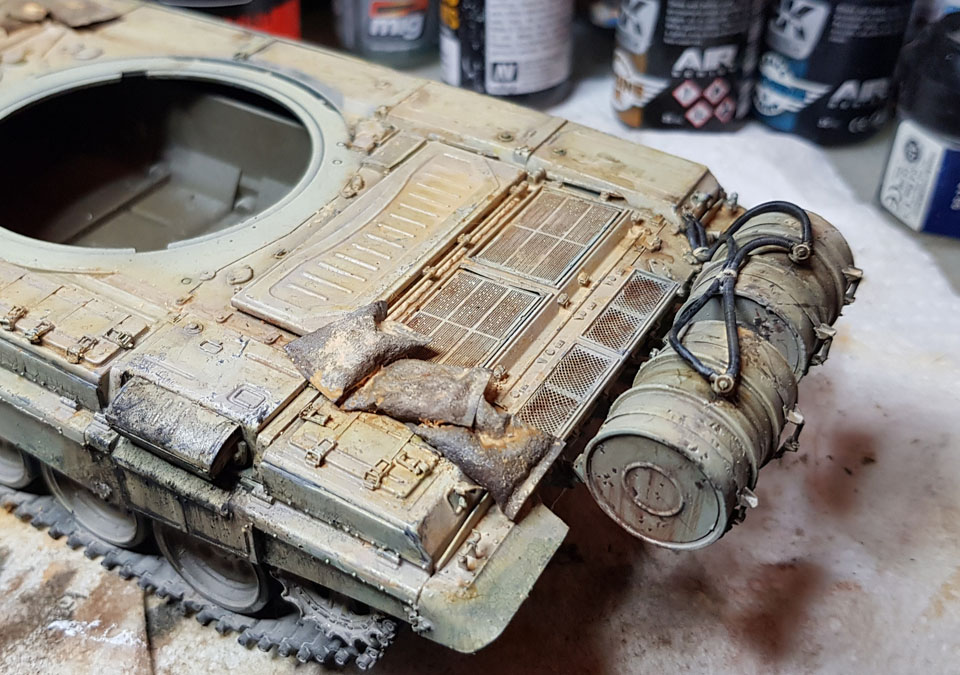
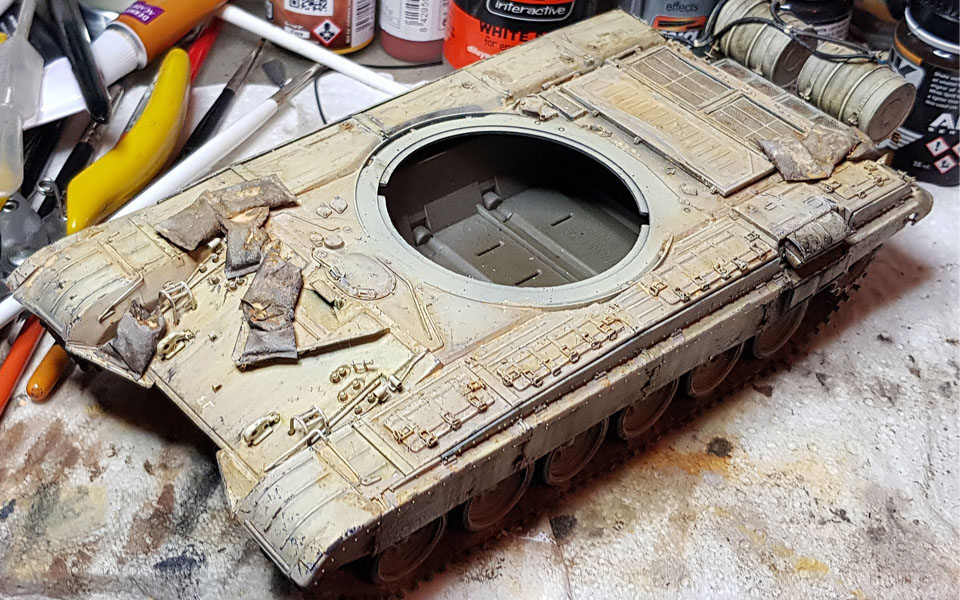
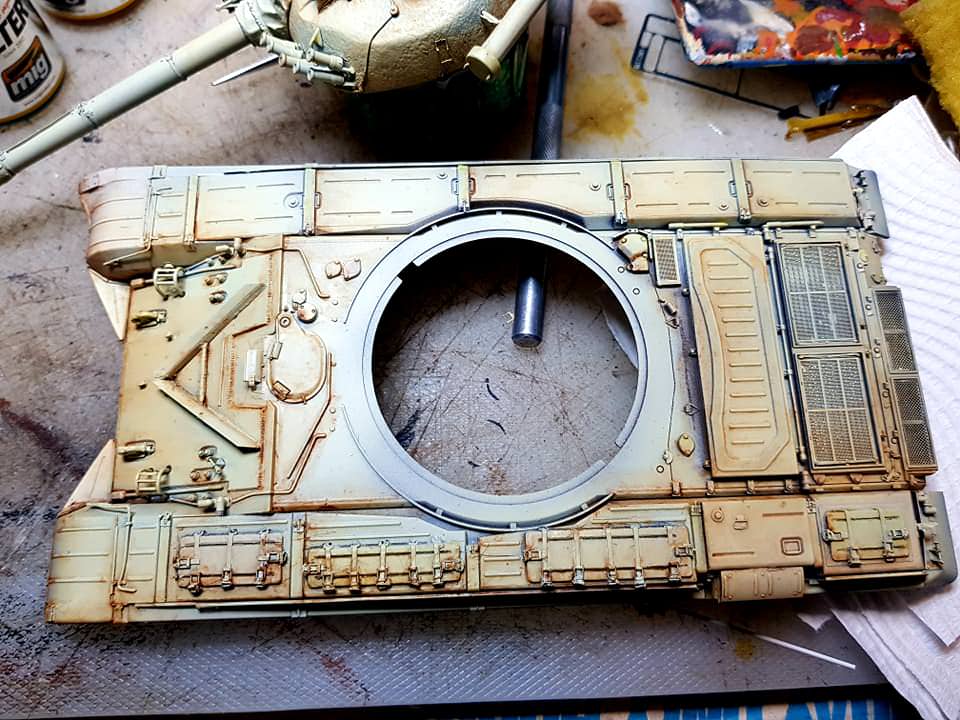
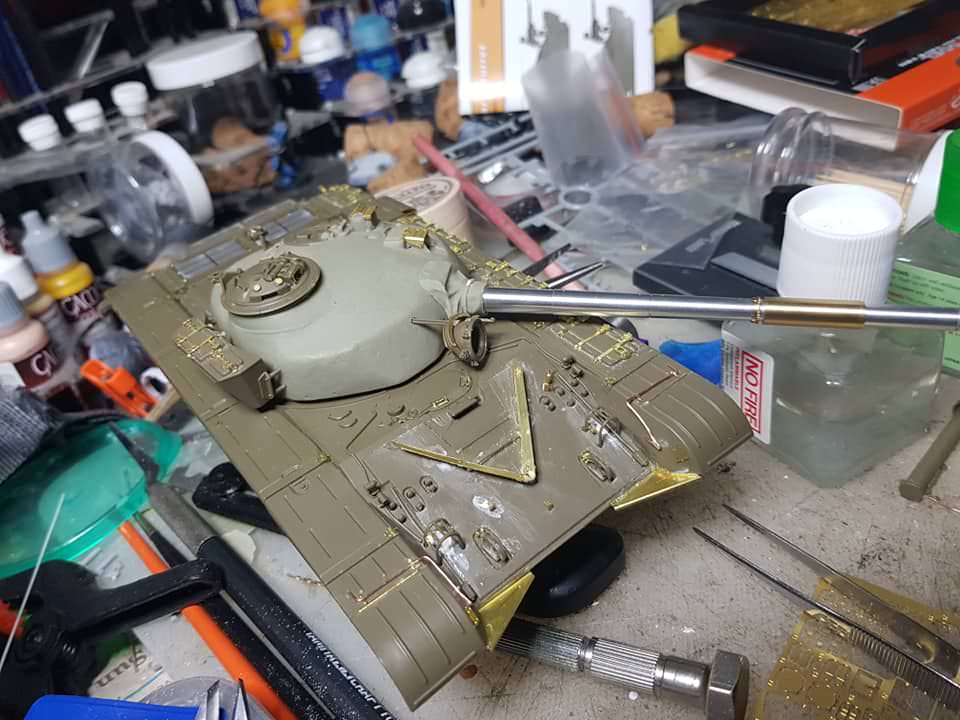
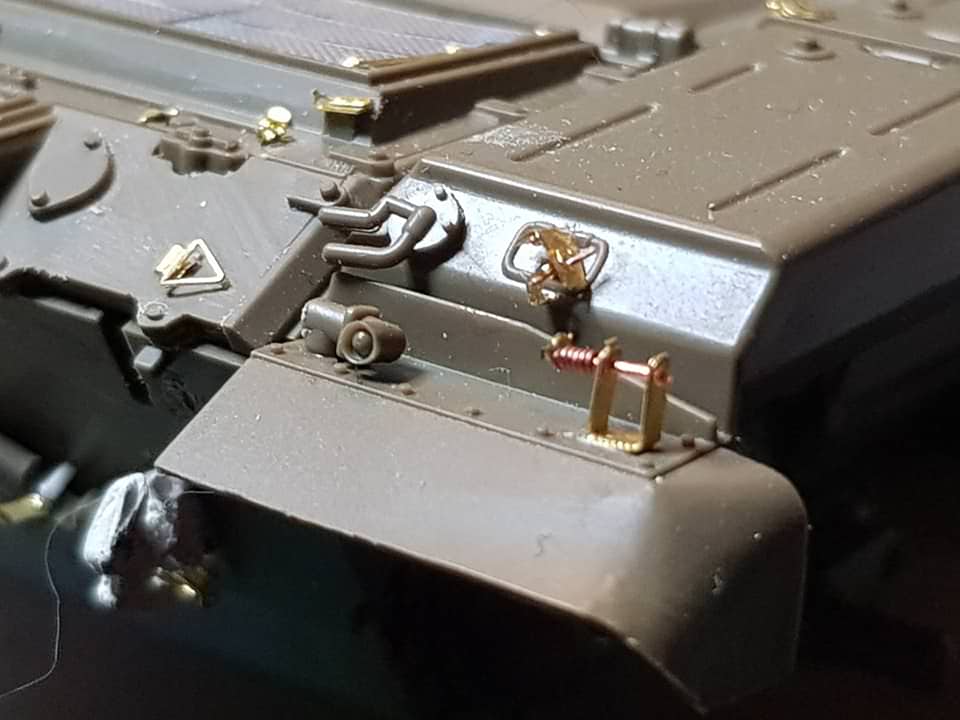
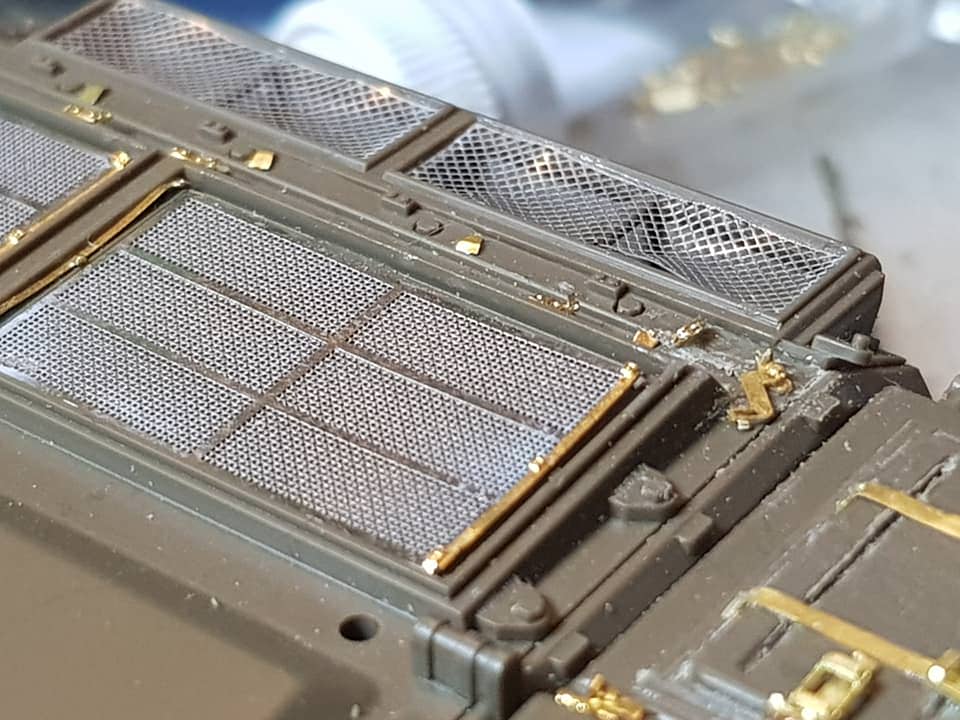
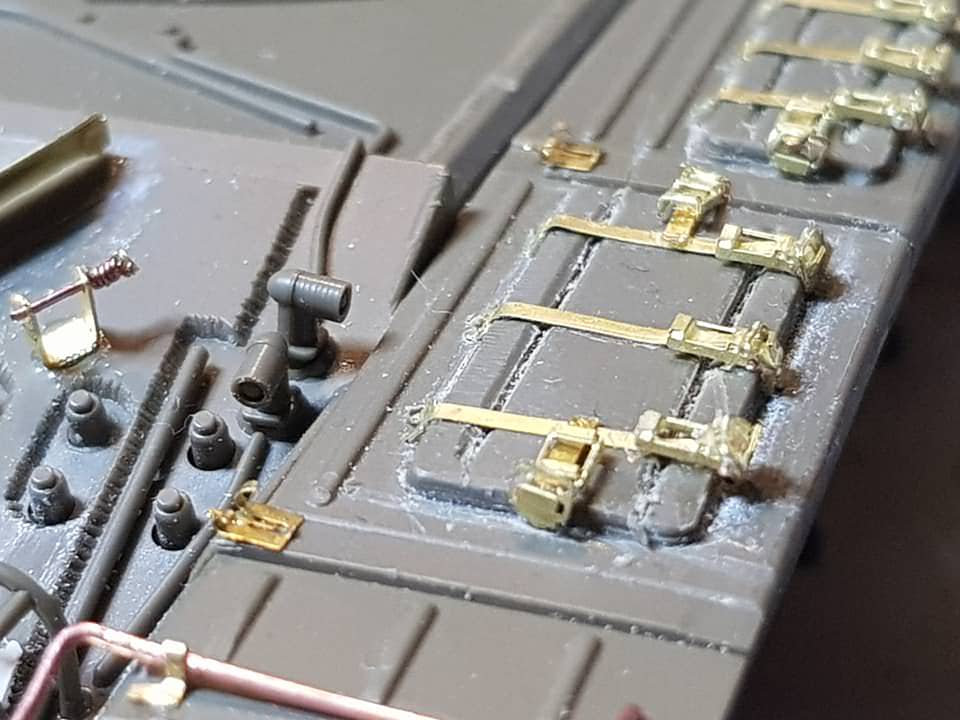
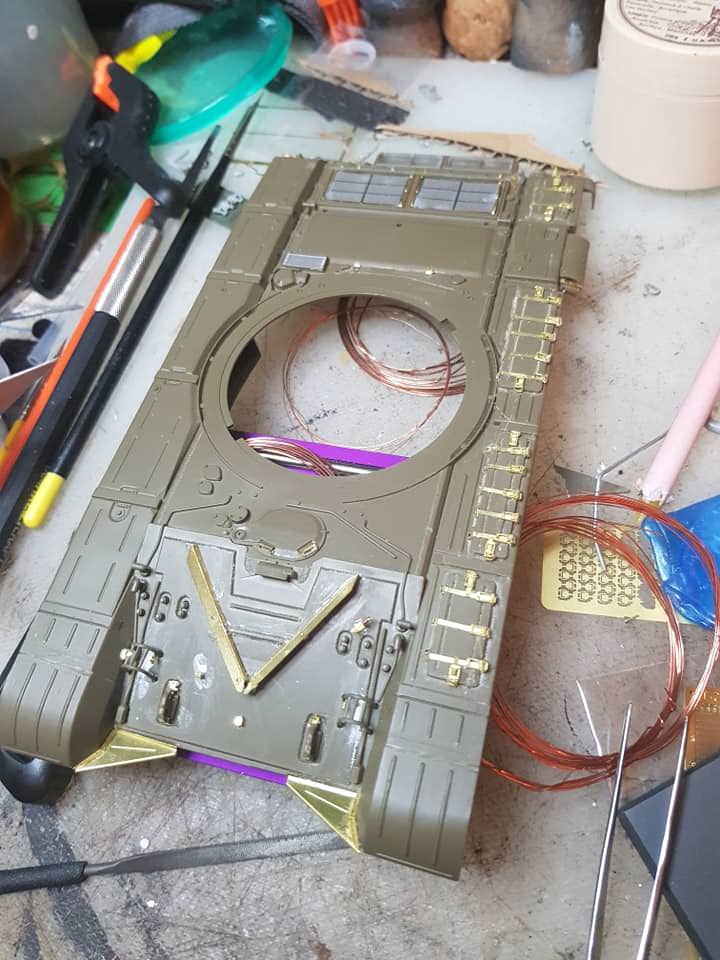
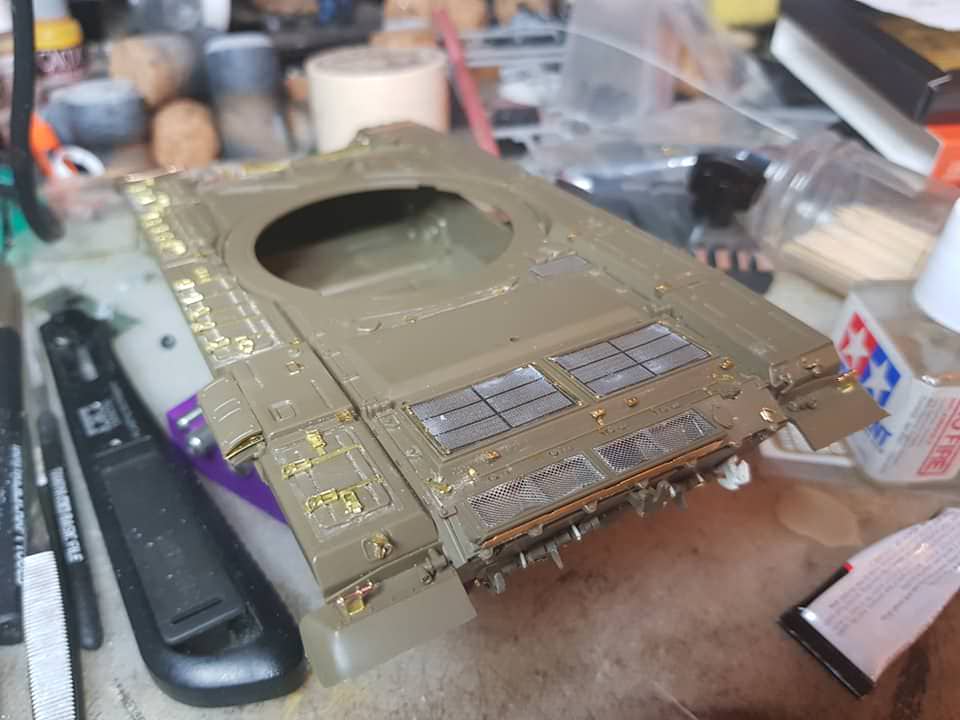
For such a niche vehicle, I was surprised to find there was actually a kit produced in 1/35th by Kiri. This kit is quite old, and from what I understand, fairly inaccurate. This left me the option of converting the Tamiya T-72M1. The largest complaint with the Tamiya kit is the turret shape. This is fairly warped, and looked difficult to correct. Thankfully, I found a resin turret by SBS Models. This was used with the Voyager PE upgrade set for the T-72M1, and the turned barrel also by Voyager. I used Meng's workable tracks for the T-72 instead of the old rubber band tracks supplied with the Tamiya kit.Initial construction involved removing the molded on clasps on the hull, and replacing them with the PE clasps. My PE skills need a bit of work, but bent clasps were not uncommon on these, so my mistakes aren't totally inaccurate. Using copper wire, I added some other small details like power conduits on the turret and springs on the tow cable clamps.
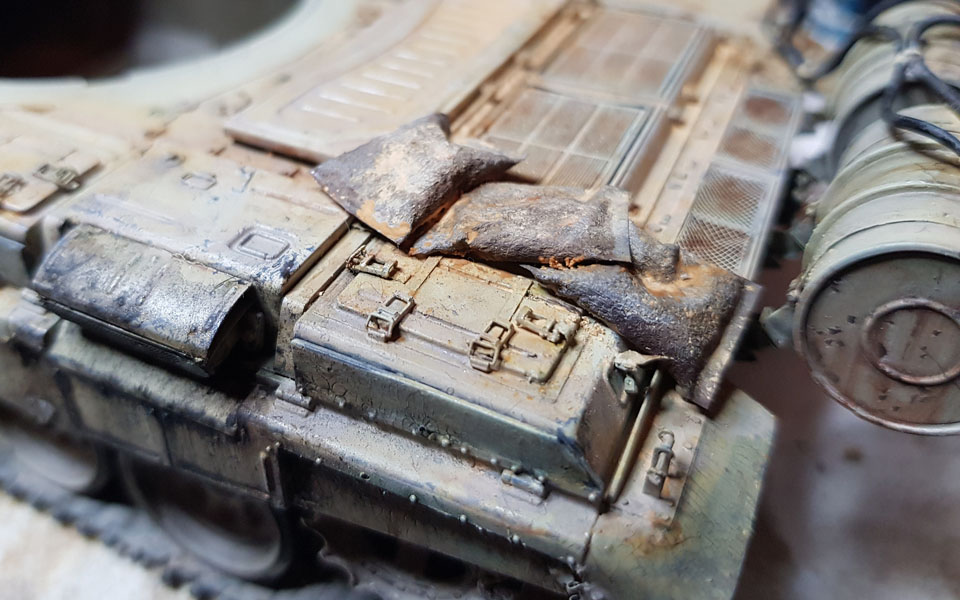
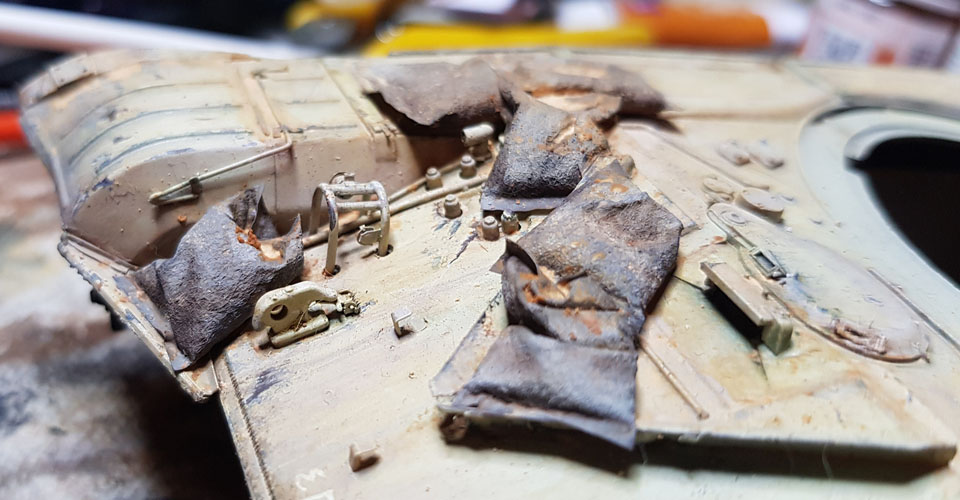
I omitted the front headlights as these looked to be missing based on photos of tanks claimed to be Lions. I also bent one of the front fenders, and left one of the dust flaps off the side to show a little wear and tear.
I'd also seen some photos showing the Iraqis using sandbags to supplement the Lion's poor armour, so I replicated this using GreenStuff World's flexible sandbags. These are great, you just soak them in thinned down PVA glue, and then shape them directly on the vehicle. I laid some cling film over the vehicle first, then shaped the sandbags. I used an eye dropper to apply the PVA over the sandbags. Doing it this way, I was able to shape the bags easier, and I was able to remove the dry sandbags to be painted separately.
Painting
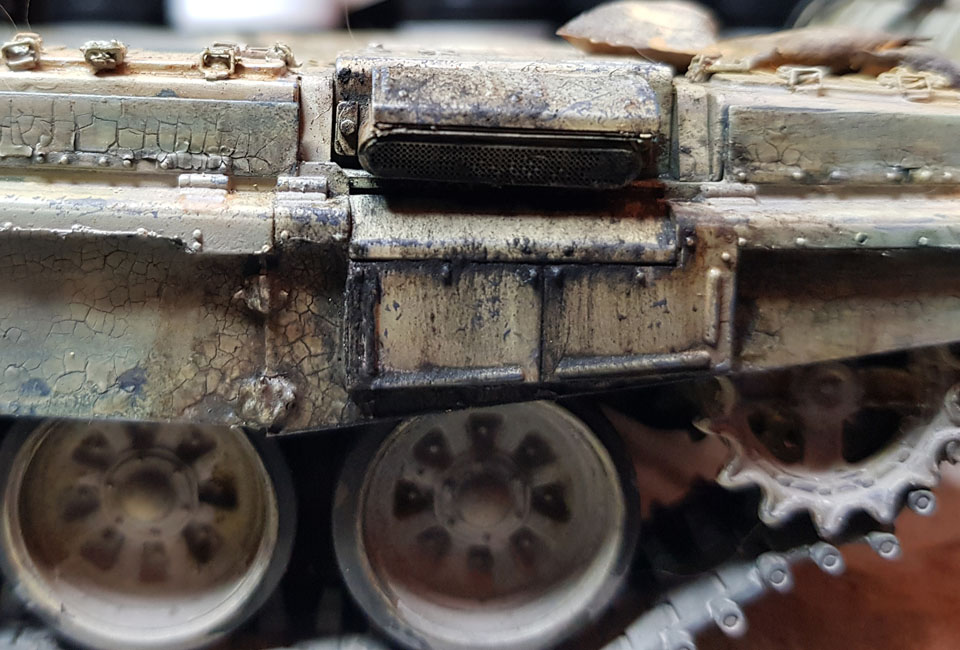
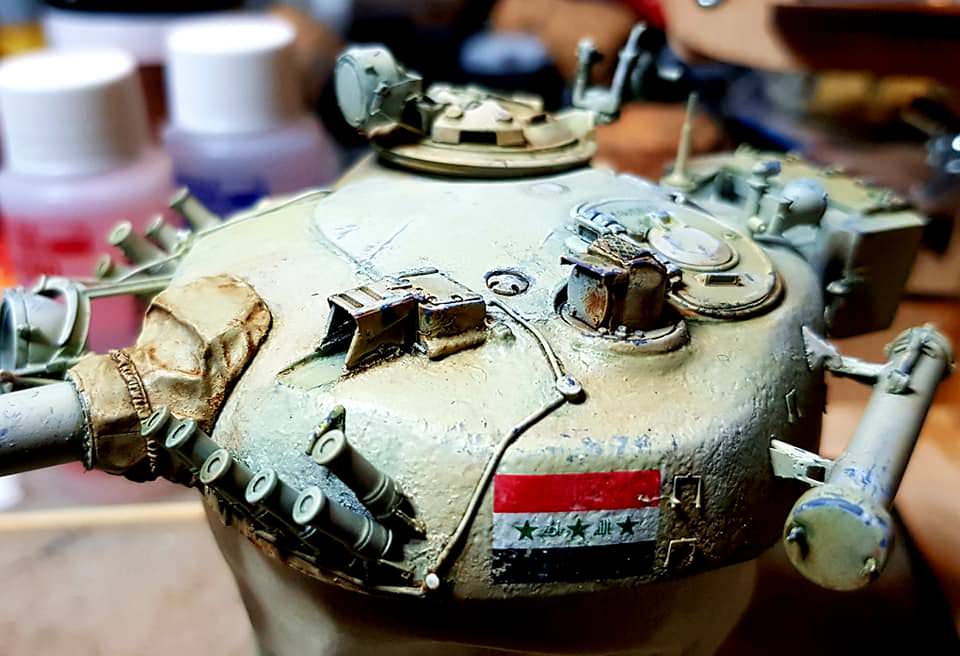
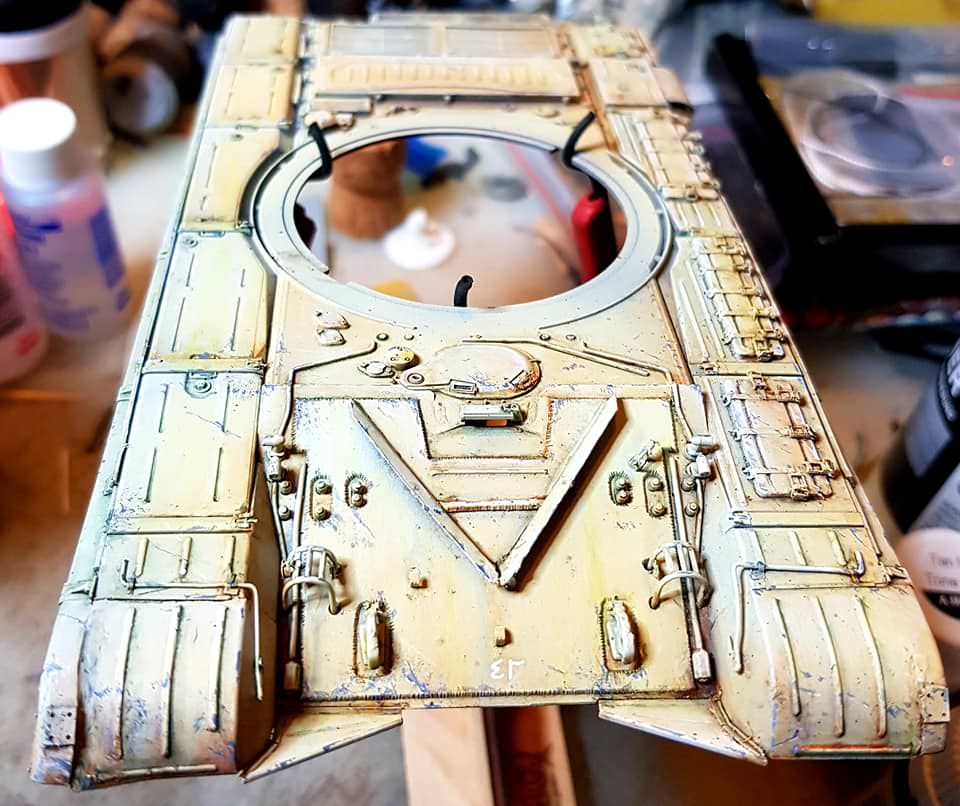
I started off with a coat of Vallejo black primer, then a coat of Vallejo Iraqi Sand. I wanted to break up the blocks of sand colour on the vehicle. I picked up some MIG filters and applied these to single panels and details.I used Derwent oil paints for the pin wash, first with Black then Burnt Umber. I continued using Burnt Umber to add shadows, and Medium Yellow and White to add highlights.
The chipping was then gone using a small brush and Vallejo Sombre Grey. I took the Iraqi Sand base colour and added a thin line on the bottom of the large chips to force the 3D effect.
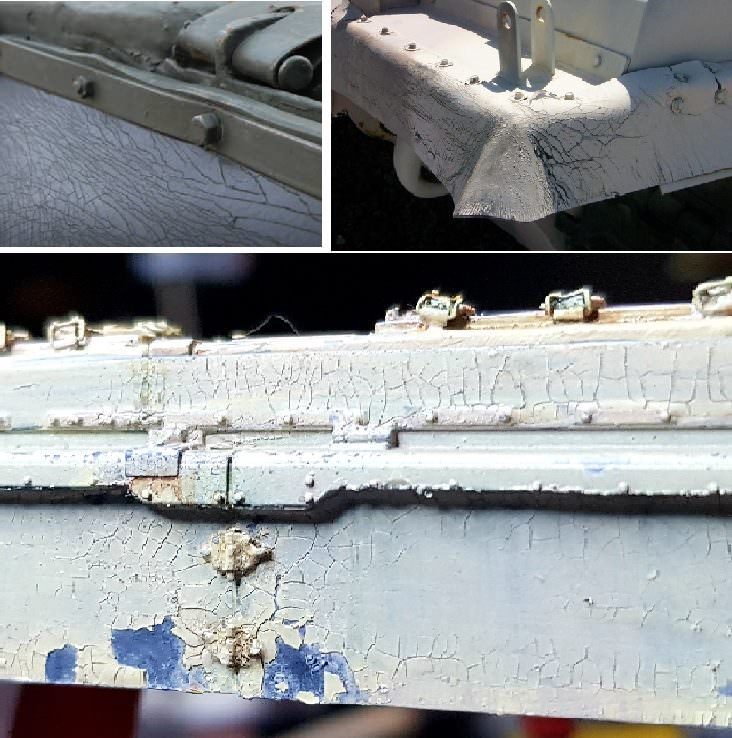
At this stage I started experimenting with mixing my own filters. I wanted to try to control warm and cool tones, so applied very thin purple, blue, red and lemon yellow to try to make the shadows feel cooler, while the hi lights feel warmer. I had noticed on some photos, the mud guards looked to be flexible rubber and painted over with the tank's colour. This causes the paint to crack and chip over time creating an interesting effect. I replicated this using Vallejo's chipping medium.
Weathering
I went over the whole vehicle with MIG's enamel dust effects, mixing it with some Derwent's Burnt Umber for areas I thought moisture might accumulate. I used MIG's enamel streaking effects on vertical surfaces to add some rain marks, and rust streaking especially on the rear fuel tanks. AK's fuel stain effects was used on the rear fuel tank area to replicate fuel spillage. I applied it in varying layers, each being less diluted. This makes it appear fresher, or older depending on what look I wanted.I used different dry pigments over the enamel effects to replicate sand and dust sticking to crevasses and around the sandbags.
Diorama Base
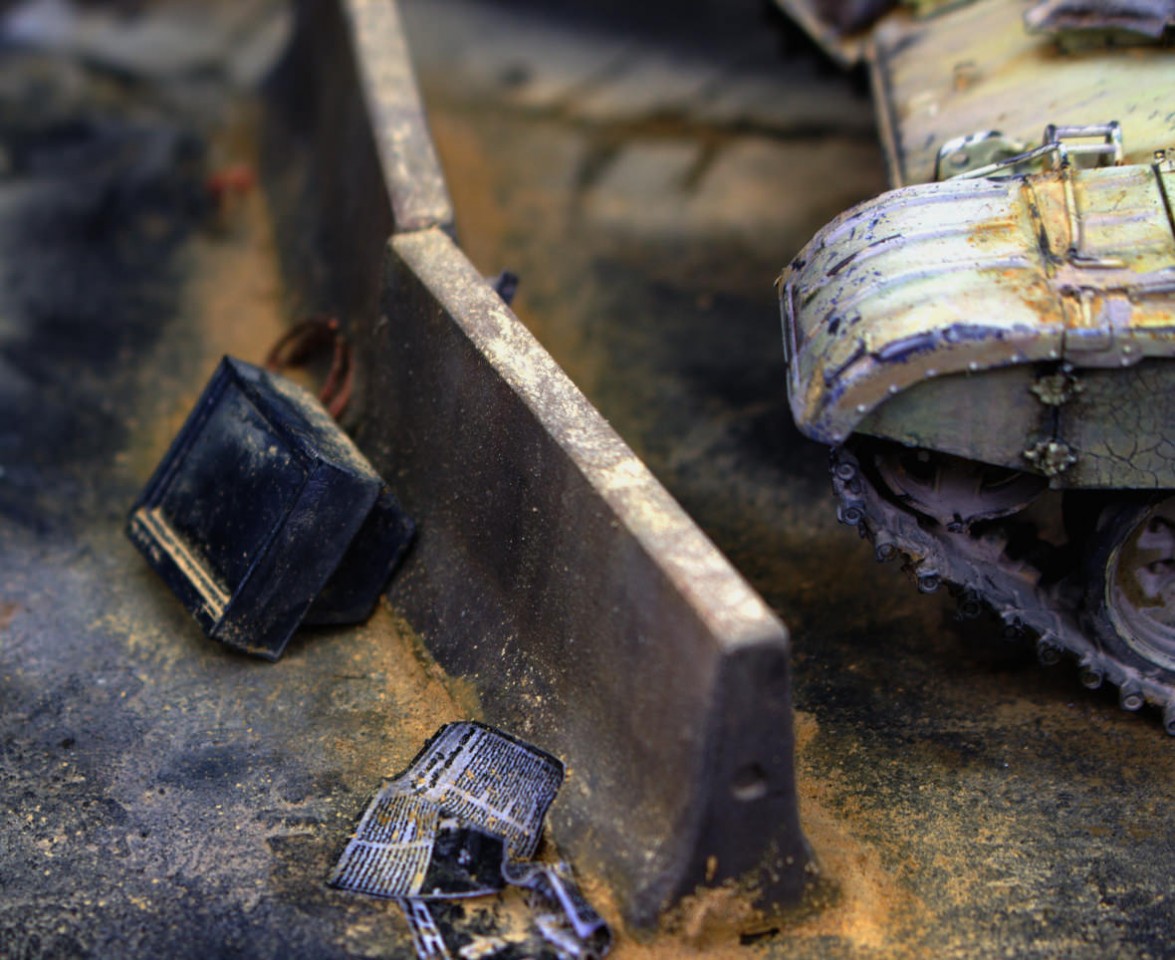
I wanted to show a pre-1990 Iraq, so didn't want damaged buildings, or bullet holes everywhere. Using cardboard I created the side walk and gutter, basing it on photos I had found online and Google Earth.The building was made with cardboard and foam core, then covered in plaster filler. The door, frame and rain guard over the mural were created from balsa. I wanted to tell little stories in the diorama. I wanted it to look as though someone may have used the roof of the store for nefarious purposes. I added a folded mattress and suitcase from Verlinden's Middle Eastern War Loot set. The bricks are from Greenough world and came pre coloured. I only had to add some dry pigment.
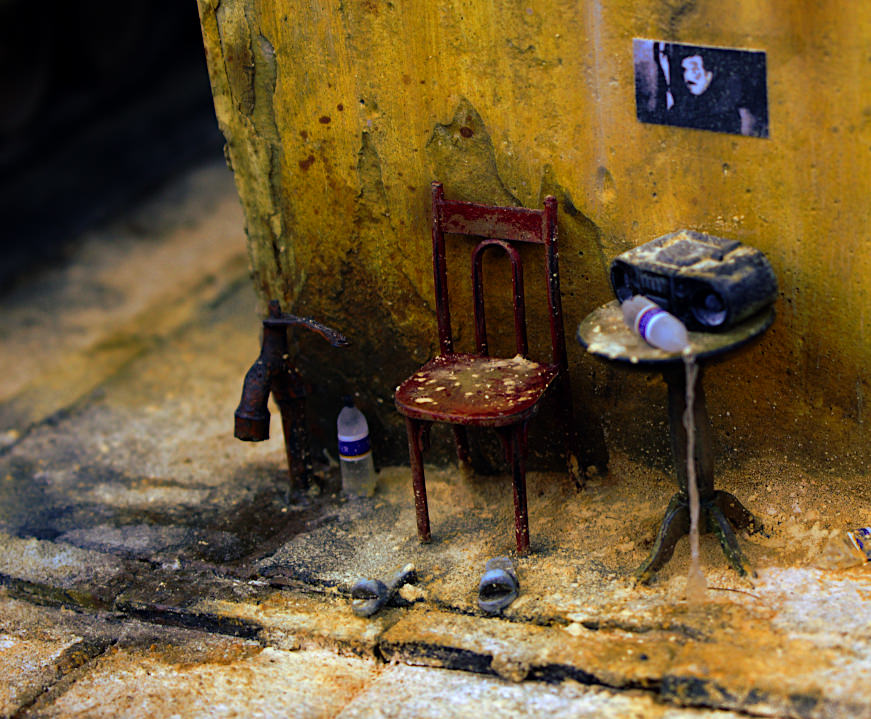
Throughout the diorama I used Royal Model's water bottles. These come clear, with decals and look very good once placed.
Around the corner of the shop, I wanted to show someone was there very recently, and had left in a hurry. To show this, I used the chair and table from Meng's Middle Eastern Street Set, but had a pair of sandals left in front of the chair. I used more of Royal models water bottles here, one of which is tipped over and its contents, pouring out. This was done by painting s thin layer of gloss varnish onto cling film, then peeling it off once dry. More varnish was used to attach the strip from the bottle, to the ground. More gloss varnish was used to create a small puddle around the table.
To add a little more interest, I scratch built some pipes, and a tap. I was thinking about how I could build the facet on the tap. I was reminded of some people removing the facet, then screwing it back on when needed. This makes it difficult for water thieves, who could easily get past this by using a wrench.
I used the Staler power pole's to try to add a vertical feature. The power lines are copper wire, and the lead to the air con unit from Meng's Middle Eastern set. The other side of the building was always going to have the tank, and the mural, so I didn't need too many more details here. I added a barrier, television and various pieces of newspaper to make it seem realising, but not too dense.
Mural
Besides the tank, the mural was the only other part I was sure I was going to do from the start. This is deceptively easy, and while I've not seen anyone else do it this way, I can't be the first to figure it out.Its sort of cheating, because all it is, is a printed out picture of a mural found in Iraq, and then added the wall with multiple layers of thinned PVA glue, then painted over. The result is a very convincing mural, that looks freehand painted.
Conclusion
In the end, I'm very happy with the result. All in all this diorama took me about 6 months to complete. During the time I learned a lot about many aspects of modelling I'd either never tried, or had limited experience in. I feel that my modelling skills have improved noticeably over the course of a single project.


About the Author


FROM: VICTORIA, AUSTRALIA
I'm a 34 year old modeler from Melbourne, Australia. I am focused on armor models, particularly German, WW2 era. I have been modeling for about 20 years and like to always have something on my bench.
Comments


Absolutely Awesome!
Incredible work, Thank you for the inspiration to try new stuff.
JAN 06, 2019 - 02:17 AM

Cheers mate, glad you like it!
Thanks! I'm very happy to hear you took inspiration from it!
JAN 06, 2019 - 06:56 AM
Copyright ©2021 by Steven Eldridge. Images and/or videos also by copyright holder unless otherwise noted. The views and opinions expressed herein are solely the views and opinions of the authors and/or contributors to this Web site and do not necessarily represent the views and/or opinions of Armorama, KitMaker Network, or Silver Star Enterrpises. All rights reserved. Originally published on: 2018-12-31 17:09:03. Unique Reads: 7569

WEB HOSTING BY


Copyright ©2021 Armorama and Kitmaker Network, a subsidiary of Silver Star Enterprises
All Rights Reserved. Please read our Conditions of Use and Privacy Policy.
All Rights Reserved. Please read our Conditions of Use and Privacy Policy.