1⁄35
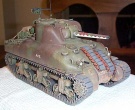
Backdated Nichimo M4A1
 |
Introduction |
This kit started out as a build from the box, but I
was bitten by the conversion bug and decided to backdate this kit to an
early production M4A1with direct vision slots. I havenít built an armor kit
in about 10 years, so I really jumped in, so it seems, over my head and
didn't listen to Rob Gronovius who cautioned me about the kit!
†
 |
The Lower Hull |
I replaced the kit's single piece transmission cover
with a Tank Workshops (TW) 3 piece resin one. However the TW resin was
narrower than the kit hull and barring scratching a new hull, I opted to
modify the resin by sanding off the drive sprocket differential covers and
rivet detail and installing a .030 shim. I replaced the differential covers
with one from an Italeri M4A1 that I built in conjunction. The Italeri ended
up supplying a number of parts as will be explained later. I then added a
.030 strip with bolt detail to cover the separation seams between the
transmission cover top front and hull on the sides. I next turned to the
suspension bogeys. I wanted the earlier M3 suspension so I purchased a set
of TW M3 running gear. DO NOT WASTE YOUR MONEY! They came with more
sinkholes than detail and were molded with the wheel mounting arms and the
trucks as one piece. I did use the return rollers from the set so it wasn't
a total loss of money.
The kits bogies looked ok, but were still not to my liking. So I turned to
the Italeri M4A1 again. Since I was replacing this kits running gear with an
AFV set, I put each bogie in a miter box and cut the sides down, replaced
the removed area with .015 sheet and fabricated the spring "bulges" with
1/4" tube cut in half and covered with .010 sheet. I removed the mounting
pins from the back and used angle strips for mounting guides on the bottom
of each bogey for hull attachment plates. I used the wheels from the Italeri
kit as well, but the drive sprockets came from the Nichimo because I
destroyed the Italeriís with spilled glue. I detailed the rear hull plate
with bits of wire and styrene strips on the air cleaners and added detail to
the rear idler arm mounts and access door handles from office staples and
cable attachment eyes from brass wire, washers punched from sheet and nuts
from heated sprue pushed into an Allen-head set screw. I covered the
motorization holes etc. with sheet and putty and that concluded the lower
hull, so I thought, youíll see what I mean in the next section. Copyright ©2002 - Text and
Photos by Lauren Blakley (chief). All Rights Reserved. |
| Project Photos

†
|
 |
About the Author
About Lauren A. Blakley, ATC, U (Chief)
I started modelling when I was 6 and with a few short breaks here and there due to the Navy, I pretty much havn't stopped. Started with cars, ships, aircraft and then armor. Can't say which is my favorite. Spend most of my time in the navy in the Reconnaissance "Shadow War" business and am looking f...
Copyright ©2021 by Lauren Blakley. Images and/or videos also by copyright holder unless otherwise noted. The views and opinions expressed herein are solely the views and opinions of the authors and/or contributors to this Web site and do not necessarily represent the views and/or opinions of Armorama, KitMaker Network, or Silver Star Enterrpises. All rights reserved.


