1⁄35
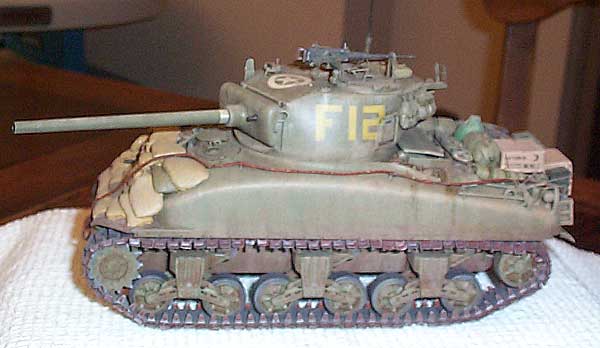
Updating an Italeri M4A1

 |
Beginning |
I was building a Nichimo M4A1 and needed to scrounge
parts from this kit, so I went ahead and decided to build this one in
conjunction. I purchased numerous “update” parts both to replace parts taken
for the other kit and some to improve this kit as well. I don’t bother
counting hours to see how long it takes to build a kit. I count them by
months. Six is what it has taken; now you’ll see why.
 |
The Lower Hull |
I built the hull straight from the box, but replaced
the suspension bogeys with the AFV VVSS set, minus the wheels. They only
have detail on one side so they will become spares for stowage etc. I
purchased Ft. Duquesne’s replacement wheel set and it is well worth every
penny. The detail on them is great and very little cleanup was required on
the set I received. However some of the axle holes needed to be re-drilled,
but this was a minor inconvenience. I also thought the return skids on top
of the AFV set were a little thick, so I cut them off and made new ones from
brass sheet and added Grandt Line nuts. The bottom of the hull needed
sanding to remove the mountings and the AFV bogeys and wheels were installed
with little problems. I left off the drive sprockets and return rollers to
install the indi-link tracks later. We were moving right along now.
Copyright ©2002 - Text and Photos by Lauren Blakley (chief).
All Rights Reserved. |
 |
About the Author
About Lauren A. Blakley, ATC, U (Chief)
I started modelling when I was 6 and with a few short breaks here and there due to the Navy, I pretty much havn't stopped. Started with cars, ships, aircraft and then armor. Can't say which is my favorite. Spend most of my time in the navy in the Reconnaissance "Shadow War" business and am looking f...
Copyright ©2021 by Lauren Blakley. Images and/or videos also by copyright holder unless otherwise noted. The views and opinions expressed herein are solely the views and opinions of the authors and/or contributors to this Web site and do not necessarily represent the views and/or opinions of Armorama, KitMaker Network, or Silver Star Enterrpises. All rights reserved.


