D7 Armoured Dozer - Resicast
England - South East, United Kingdom
Joined: December 04, 2003
KitMaker: 14 posts
Armorama: 13 posts
Posted: Wednesday, April 30, 2008 - 09:11 AM UTC
Hi Alan
As far as I am aware they were hydraulic and any piping was protected by the armour plate formed around the rams. I have the unarmoured version (yet to build) and in that you have to connect the piping to the unprotected rams.
I do recall having one problem in installing the bottom dozer frame to the track carrier frames. If I recall you have to put the pivot pin in from between the main body and the track carrier frames, and the gap is quite narrow, especially when you are trying to line every thing up.
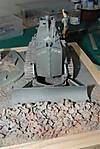
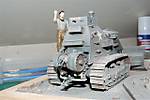
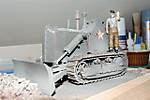
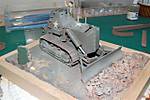
Not very good with the photos but here are a few.
For better views click on my photos.

,

,


England - East Anglia, United Kingdom
Joined: August 12, 2005
KitMaker: 14,499 posts
Armorama: 11,675 posts
Posted: Thursday, May 01, 2008 - 05:06 AM UTC
Hi David,
Nice work on the dozer, thanks for the pics. I can see that getting things to line up will be a bit tricky, there are a few parts to coordinate at once lol, lol. Understand what you mean about the pivot pins, will have a few trial run to see how thinga might work best.
Cheers
Al
'Action this Day'
Winston Spencer Churchill
England - South East, United Kingdom
Joined: December 04, 2003
KitMaker: 14 posts
Armorama: 13 posts
Posted: Friday, May 02, 2008 - 07:34 AM UTC
Al
Nice Centur Dozer. Who's conversion is that AA or Cromwell?
David
England - East Anglia, United Kingdom
Joined: August 12, 2005
KitMaker: 14,499 posts
Armorama: 11,675 posts
Posted: Friday, May 02, 2008 - 07:58 AM UTC
Hi David,
Thanks. The Centaur is the AA conversion set.
Al
'Action this Day'
Winston Spencer Churchill
England - East Anglia, United Kingdom
Joined: August 12, 2005
KitMaker: 14,499 posts
Armorama: 11,675 posts
Posted: Friday, February 06, 2009 - 07:26 AM UTC
Hi Guys,
well it's been just over 11 months since I opened the box on this one. I ran into a few problems mounting the tracks, got depressed and put it to one side whilst I though about it or forgot about it

Anyway, the recent snow kept me away from work for a few days so I decided to get it out and try again.

got the controls and seat mounted this evening and a little work done on the winch. Hard to believe it over a year ago since I started this


.
Al
'Action this Day'
Winston Spencer Churchill
England - West Midlands, United Kingdom
Joined: June 23, 2008
KitMaker: 2,329 posts
Armorama: 2,110 posts
Posted: Friday, February 06, 2009 - 09:14 AM UTC
Great dozer Al I didnt know how i missed thiss one,
What you got planned for the dio for this hunk ?
the kit looks superb resicast do some superb kits

Art isn't just pritty pictures. It's an expression of human rage.
Myanmar
Joined: March 05, 2004
KitMaker: 4,011 posts
Armorama: 1,498 posts
Posted: Friday, February 06, 2009 - 02:41 PM UTC
Glad you're back on it.
I had a dream the other night. It was about various model kit mfgs. making affordable IM styrene kits of unusual subject such as this.

i watched a scale plastic figure crawl along the edge . . . of an exacto blade . . . that's my dream , it's my nightmare . . . . . . . crawling , slithering . . . . . along the edge . . . . . . of an exacto . . . . . blade . . . . and surviving
England - East Anglia, United Kingdom
Joined: August 12, 2005
KitMaker: 14,499 posts
Armorama: 11,675 posts
Posted: Friday, February 06, 2009 - 07:12 PM UTC
Morning James,
It's an unforgiving kit lol.lol, there isn't much room for error as the alignment and spacing of the wheels needs to be exact. Mine wasn't hence the track problem, but with some heat, glue and a lot of bad language I finally go the tracks on. I also managed to snap the axel pins on the rear drive wheels which didn't help matters.
The tracks are link and length, first time I'd tried those and each link has a very delicate top claw, a lot of which I broke off and had to add back on


.
Over confidence on my part and painting a couple of bits I should have left clean also caused me a few problems. All part of the learning experience!!
So....,
That sounds like a positive dream, I have similar connected with Bedfiord and 15cwt Trucks


Thanks for dropping in.
Al
'Action this Day'
Winston Spencer Churchill
England - East Anglia, United Kingdom
Joined: August 12, 2005
KitMaker: 14,499 posts
Armorama: 11,675 posts
Posted: Friday, February 06, 2009 - 10:06 PM UTC
Hi Guys,
Some updates from last night. Added the control levers, and the winch and tow hook. Fixed the RHS track!


Not 100% sure the tow bar is correct but seems to be from what I can find out.
Al
'Action this Day'
Winston Spencer Churchill
England - West Midlands, United Kingdom
Joined: June 23, 2008
KitMaker: 2,329 posts
Armorama: 2,110 posts
Posted: Friday, February 06, 2009 - 11:49 PM UTC
Sounds some what frustraighting alan

never the less she looks a great
But once the Armour is on wouldnt most of the dtail be hidden away?

Art isn't just pritty pictures. It's an expression of human rage.
England - East Anglia, United Kingdom
Joined: August 12, 2005
KitMaker: 14,499 posts
Armorama: 11,675 posts
Posted: Saturday, February 07, 2009 - 12:11 AM UTC
Hi James,
Very true, but good practice for when I get to the open top version

.
Al
'Action this Day'
Winston Spencer Churchill
Wisconsin, United States
Joined: April 17, 2002
KitMaker: 2,314 posts
Armorama: 1,905 posts
Posted: Saturday, February 07, 2009 - 12:13 AM UTC
Al
A beaut. Thanks for all the pics in this thread.
You are the master.
Steve
England - East Anglia, United Kingdom
Joined: August 12, 2005
KitMaker: 14,499 posts
Armorama: 11,675 posts
Posted: Saturday, February 07, 2009 - 02:47 AM UTC
Hi Steve,
Thanks, will have to see how the final build turns out, could all go wrong yet lol, lol.
Al
'Action this Day'
Winston Spencer Churchill
England - East Anglia, United Kingdom
Joined: August 12, 2005
KitMaker: 14,499 posts
Armorama: 11,675 posts
Posted: Saturday, February 07, 2009 - 08:48 PM UTC
Hi Guys,
Some updates on yesterdays progress.
Test fitted the blade last night, drilled out all the holes and checked the pins fitted. You can have the blade straight or at an angle and there is a nice bit of PE to add to the bottom. Also drill out a bit more the recess for the hydraulic arms.
Started on the under or belly armour and gave the inside a first coat of paint.
There are 3 bolt heads on the front chassis that will need to be removed/filed down prior to adding the armour.
Some pics


Al
'Action this Day'
Winston Spencer Churchill
England - West Midlands, United Kingdom
Joined: June 23, 2008
KitMaker: 2,329 posts
Armorama: 2,110 posts
Posted: Sunday, February 08, 2009 - 12:08 AM UTC
Alan i must say it looks superb! I really like dozerblad and the hydrollic rams

keep up the good work!

Art isn't just pritty pictures. It's an expression of human rage.
Victoria, Australia
Joined: May 07, 2003
KitMaker: 4,002 posts
Armorama: 2,947 posts
Posted: Sunday, February 08, 2009 - 12:09 AM UTC
Gday Al
Good to see this one making an appearance again!
Disappointed to hear it wouldn't fit on board, but I reckon it could prove to yield a dynamic scene on the sand with the blade in action

Brad
"There never was a good war, or a bad peace."
Benjamin Franklin
England - East Anglia, United Kingdom
Joined: August 12, 2005
KitMaker: 14,499 posts
Armorama: 11,675 posts
Posted: Sunday, February 08, 2009 - 01:51 AM UTC
Hi guys,
Thanks for dropping in.
It's moving along. Undecided as to whether to put a driver in, leaning out the top or climbing up the side lol, lol.
Cheers
Al
'Action this Day'
Winston Spencer Churchill
England - East Anglia, United Kingdom
Joined: August 12, 2005
KitMaker: 14,499 posts
Armorama: 11,675 posts
Posted: Tuesday, February 10, 2009 - 04:43 AM UTC
Hi Guys,
A few more updates. Drilled out the hydraulic arms a good bit more to give extra movement to the blade, test fitted the armour and added some small fitting there and to the winch.


To give you an idea of size here it is beside the MG Carrier

Al
'Action this Day'
Winston Spencer Churchill
England - West Midlands, United Kingdom
Joined: June 23, 2008
KitMaker: 2,329 posts
Armorama: 2,110 posts
Posted: Tuesday, February 10, 2009 - 05:46 AM UTC
I catn believe the size of it Alan!. It looks great its really coming along, take it no driver inside?

Art isn't just pritty pictures. It's an expression of human rage.
England - East Anglia, United Kingdom
Joined: August 12, 2005
KitMaker: 14,499 posts
Armorama: 11,675 posts
Posted: Tuesday, February 10, 2009 - 06:10 AM UTC
Hi James,
No driver inside at the moment. I have a figure on route but may show the driver standing up in the hatch, or climbing onto the vehicle. Silll undecided at the moment.
Cheers
Al
'Action this Day'
Winston Spencer Churchill
England - West Midlands, United Kingdom
Joined: June 23, 2008
KitMaker: 2,329 posts
Armorama: 2,110 posts
Posted: Tuesday, February 10, 2009 - 06:14 AM UTC
Alan that is probably the best thing to do otherwise your not really going to see him although the top is open, Are you habing it in a diorama?

Art isn't just pritty pictures. It's an expression of human rage.
England - East Anglia, United Kingdom
Joined: August 12, 2005
KitMaker: 14,499 posts
Armorama: 11,675 posts
Posted: Tuesday, February 10, 2009 - 06:27 AM UTC
Hi James,
it's part of the builds for my Nan Red project that I will get to one day

Al
'Action this Day'
Winston Spencer Churchill
England - West Midlands, United Kingdom
Joined: June 23, 2008
KitMaker: 2,329 posts
Armorama: 2,110 posts
Posted: Tuesday, February 10, 2009 - 06:53 AM UTC
Nan reds project ? . whats that?


Art isn't just pritty pictures. It's an expression of human rage.
England - East Anglia, United Kingdom
Joined: August 12, 2005
KitMaker: 14,499 posts
Armorama: 11,675 posts
Posted: Tuesday, February 10, 2009 - 07:02 AM UTC
Hi James,
It's based around the landing of 48 RM Commando in support of the Canadian 3rd Infantry Dvision on Nan Red Beach on D Day.
Al
'Action this Day'
Winston Spencer Churchill
England - West Midlands, United Kingdom
Joined: June 23, 2008
KitMaker: 2,329 posts
Armorama: 2,110 posts
Posted: Tuesday, February 10, 2009 - 07:28 AM UTC
ahh cool

I dont know much about that so i will do some digging on the subject


Art isn't just pritty pictures. It's an expression of human rage.
 ,
, ,
, 


