Hello out there,
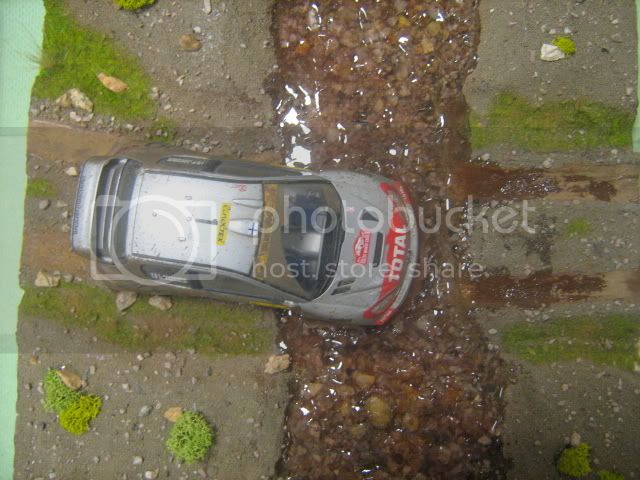
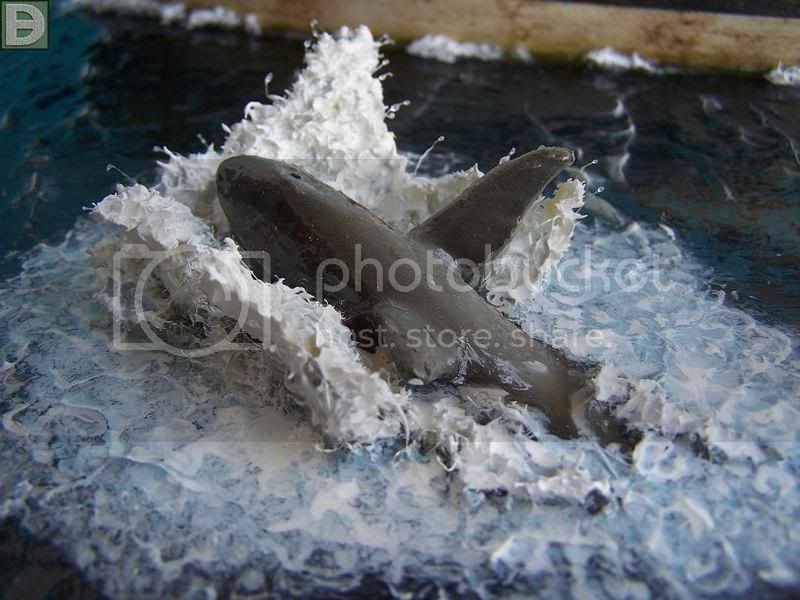
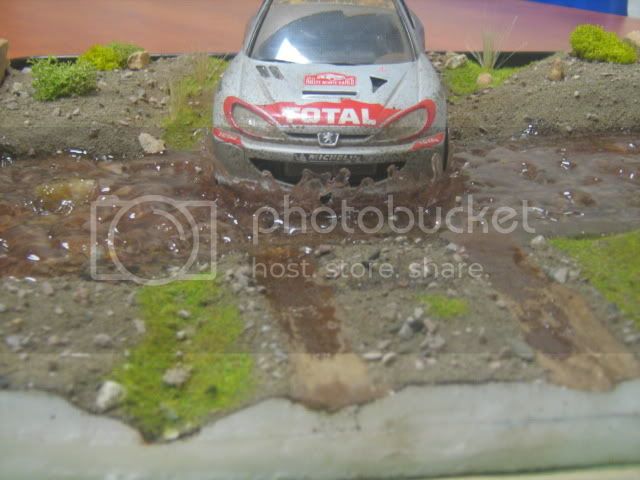
I'm new to these pages and I know its more armor orientated, but I've learnt a lot from these pages and would like to post pics of my first attempt at a WRC diorama. This is also where I need advice or help concerning the water effect. I'm trying to create a realistic "splash" and from the pics you can see that its not looking too real. I noticed a post on the water effects section where there was a shark coming out of the water and that is exactly the kind of effect I would like to simulate, but don't have the knowhow. If there is anyone out there who could give me some tips or tricks how, then I would really appreciate it.
So here's the pics (hope they show up, if not please let me know)
Thanks, Martin.
IMG]http://i250.photobucket.com/albums/gg272/mikum_album/a021.jpg[/IMG]
Hosted by Darren Baker
Help with WIP on a WRC diorama
mmikum
Czech Republic
Joined: December 04, 2007
KitMaker: 2 posts
Armorama: 1 posts
Joined: December 04, 2007
KitMaker: 2 posts
Armorama: 1 posts
Posted: Thursday, February 28, 2008 - 04:38 AM UTC
AJLaFleche
Massachusetts, United States
Joined: May 05, 2002
KitMaker: 8,074 posts
Armorama: 3,293 posts
Joined: May 05, 2002
KitMaker: 8,074 posts
Armorama: 3,293 posts
Posted: Thursday, February 28, 2008 - 06:38 AM UTC
If you can get Woodland Scenics Water Effects over there, that's a good base. If not, plain white glue (elmer's glueall)white in the bottle but dries clear will do. Get a few cotton balls, and pick out some strands. Attach them where you want to show white splashes.
That’s how I got his effect.
PrestonVonStruben
Hawaii, United States
Joined: February 02, 2008
KitMaker: 173 posts
Armorama: 169 posts
Joined: February 02, 2008
KitMaker: 173 posts
Armorama: 169 posts
Posted: Thursday, February 28, 2008 - 02:43 PM UTC
hahahaha nice LOTR lol... thats a first on this site, first car ive seen on armorama too.... anyway back to business. woodland scenics is your best bet. u did a good job on the water. one question though. why is that trail infront of the car wet? did he drive over it already and is coming back to do another run?
Red4
California, United States
Joined: April 01, 2002
KitMaker: 4,287 posts
Armorama: 1,867 posts
Joined: April 01, 2002
KitMaker: 4,287 posts
Armorama: 1,867 posts
Posted: Thursday, February 28, 2008 - 03:08 PM UTC
Quoted Text
Uhhh, maybe becasue there are cars in front of him....."Q"why is that trail infront of the car wet?
slodder
North Carolina, United States
Joined: February 22, 2002
KitMaker: 11,718 posts
Armorama: 7,138 posts
Joined: February 22, 2002
KitMaker: 11,718 posts
Armorama: 7,138 posts
Posted: Thursday, February 28, 2008 - 03:28 PM UTC
KitMaker is an all inclusive network so you end up seeing everything
As for splashes my recomendation would be to first test everything you do with water. You can only do it once in your diorama.
The water part - well I would test a couple of techniques, one is to slowly build up increasingly darker whiter layers of 2 part epoxy or resin. Build it up in a splash looking pattern on the ends of the current water you have now.
To get drips or flying water look to add epoxy to the end of fishing line and embed the line in the base water. You can also use the line as a base for long unbroken strands of splashing water.
What I did in "Sparrow" was to cast water in an aluminum foil mold. Then once it was dry I added white washes of oil paints.
Here
beachbum
Kuala Lumpur, Malaysia
Joined: March 05, 2004
KitMaker: 1,735 posts
Armorama: 586 posts
Joined: March 05, 2004
KitMaker: 1,735 posts
Armorama: 586 posts
Posted: Thursday, February 28, 2008 - 06:34 PM UTC
Welcome to the Dio section Martin.
As Scott mentioned there's a fair bit of useful references in the Kitmaker as well as the Feature section. There was a build log by a fellow modeller on simulating very realistic splashes a while back but being an old guy poor memory I can only recall the scene of someone jumping into the water from a float plane.
At any rate, some if not most water making products have a tendency to self level making creation of splashes difficult. So far I've used 2 products, one being an acrylic glue used to seal glass, acquariums, etc and the other Envirotex Lite. The first is a glue from GE as in General Electric. You can get a glimpse of the glue in Photo #15.
https://hfmodeling.kitmaker.net//features/1207&page=6
About 20-30 minutes or so you can tease the glue when it starts to harden with a toothpick to make splashes provided their not to high. Otherwise add the glue to your existing splash to get some height. This glue will not self level and you can even tint it with acrylic paints such as white to simulate splash. A splash is essentially a disturbance to the water surface which depending on the size of the splash is accompanied by foam. Foam to the human eyeball appears white although water is essentially transparent, well clean, clear water anyway. So adding a tinge of white mixed with the material you plan to use to make the splash around the area of the tyres will help further the illusion of a splash.
Envirotex is generally self levelling but around the time it starts to harden which is about 15-30 minutes time depending on the air temperature you can actually tease it a bit just like the acrylic glue above.
Here's a dio I did a while back using a combo of Envirotex Lite as the base with a little bit of GE Acrylic glue to top it off to simulate splashes against a rock and a semi-submerged branch in a river.
Hope it helps.
As Scott mentioned there's a fair bit of useful references in the Kitmaker as well as the Feature section. There was a build log by a fellow modeller on simulating very realistic splashes a while back but being an old guy poor memory I can only recall the scene of someone jumping into the water from a float plane.
At any rate, some if not most water making products have a tendency to self level making creation of splashes difficult. So far I've used 2 products, one being an acrylic glue used to seal glass, acquariums, etc and the other Envirotex Lite. The first is a glue from GE as in General Electric. You can get a glimpse of the glue in Photo #15.
https://hfmodeling.kitmaker.net//features/1207&page=6
About 20-30 minutes or so you can tease the glue when it starts to harden with a toothpick to make splashes provided their not to high. Otherwise add the glue to your existing splash to get some height. This glue will not self level and you can even tint it with acrylic paints such as white to simulate splash. A splash is essentially a disturbance to the water surface which depending on the size of the splash is accompanied by foam. Foam to the human eyeball appears white although water is essentially transparent, well clean, clear water anyway. So adding a tinge of white mixed with the material you plan to use to make the splash around the area of the tyres will help further the illusion of a splash.
Envirotex is generally self levelling but around the time it starts to harden which is about 15-30 minutes time depending on the air temperature you can actually tease it a bit just like the acrylic glue above.
Here's a dio I did a while back using a combo of Envirotex Lite as the base with a little bit of GE Acrylic glue to top it off to simulate splashes against a rock and a semi-submerged branch in a river.
Hope it helps.
barbacanosa
Baleares, Spain / España
Joined: August 09, 2005
KitMaker: 296 posts
Armorama: 250 posts
Joined: August 09, 2005
KitMaker: 296 posts
Armorama: 250 posts
Posted: Friday, February 29, 2008 - 05:50 AM UTC
And you reply to your courier
I hope you will serve as your diorama I like
And could be very impactful
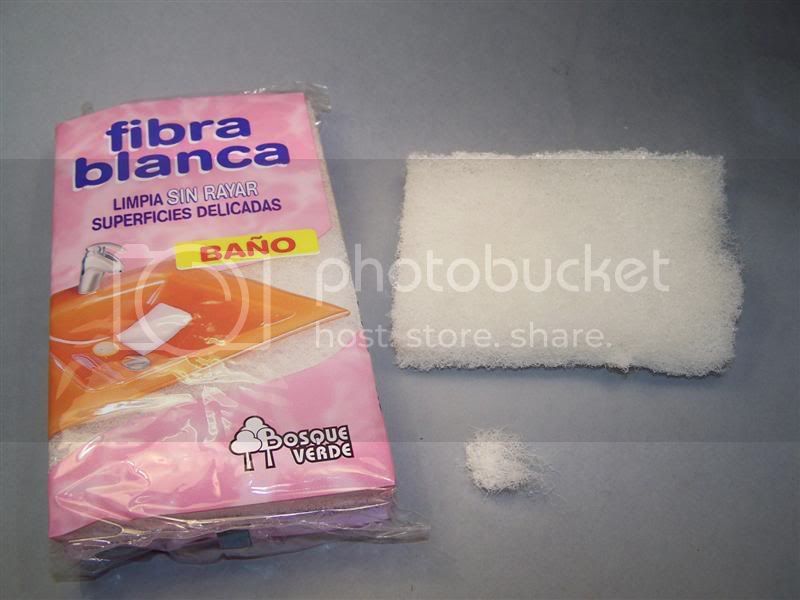
Splashes are made with a kitchen sponge,
the shape is cut and paste it after you apply a layer of oleoaquil (Vallejo what sells cone "water effects), then paint and white glossy varnish, finally some threads of transparent plastic stretched and put a drop of white glue on the tip
Greetings
Domi