Trieste, Italy
Joined: January 01, 2006
KitMaker: 127 posts
Armorama: 93 posts
Posted: Tuesday, March 04, 2008 - 04:42 AM UTC
Colorado, United States
Joined: July 25, 2007
KitMaker: 886 posts
Armorama: 120 posts
Posted: Tuesday, March 04, 2008 - 04:54 AM UTC
very impressive. nice work

Rhone, France
Joined: December 02, 2002
KitMaker: 12,719 posts
Armorama: 12,507 posts
Posted: Tuesday, March 04, 2008 - 05:08 AM UTC
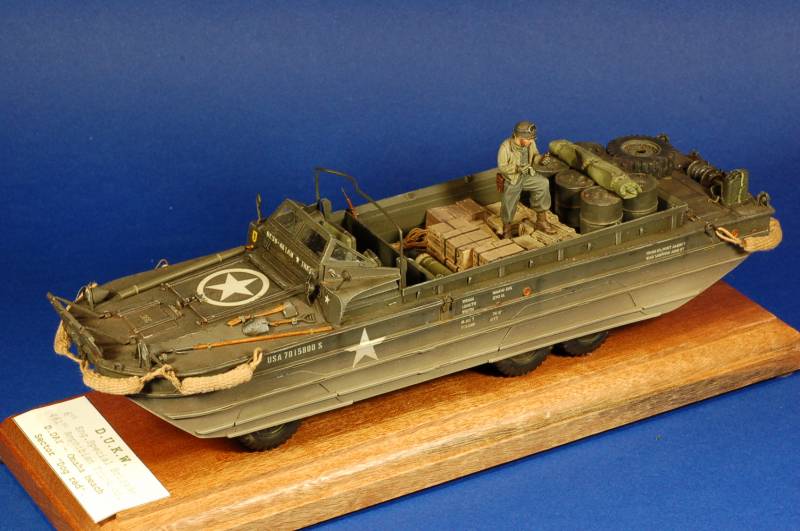
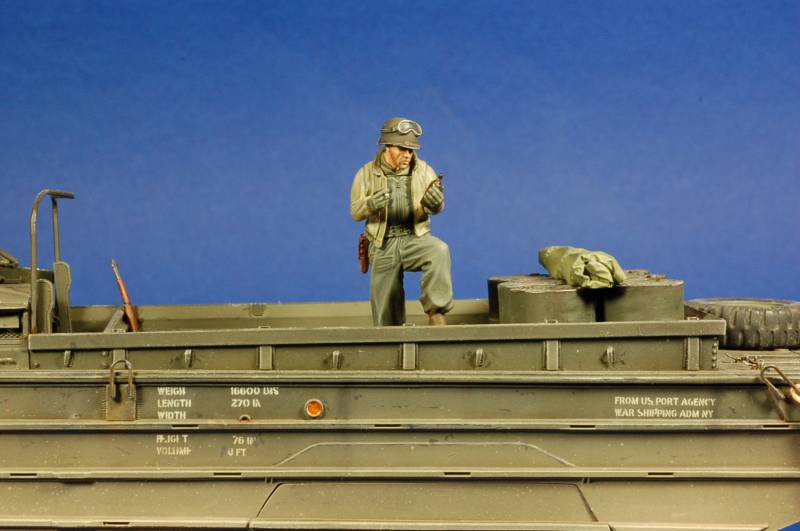
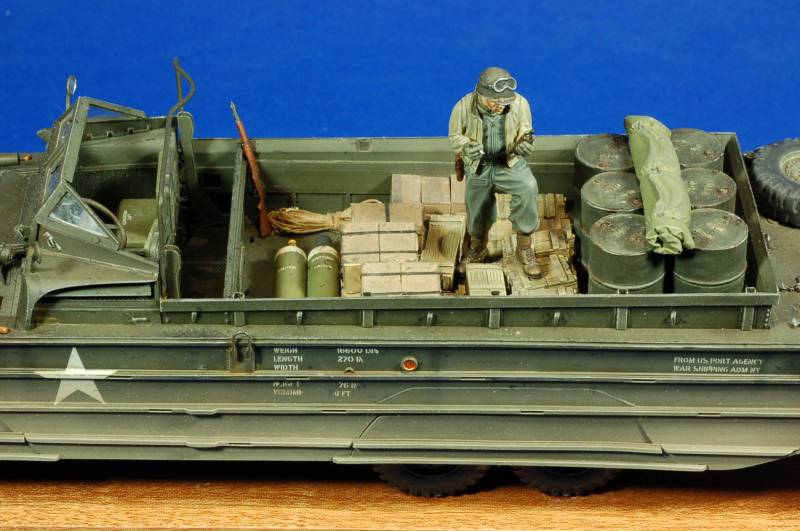
Great job ! I just hope this guy will have no problem smoking near fuels drums, gas bottles and ammo crates

Frenchy
"Find the Bastards, then Pile On"
Col. George W.Patton III 's standing order for the troopers of the 11th Armoured Cavalry Regiment
England - East Anglia, United Kingdom
Joined: August 12, 2005
KitMaker: 14,499 posts
Armorama: 11,675 posts
Posted: Tuesday, March 04, 2008 - 05:25 AM UTC
Hi Tommaso,
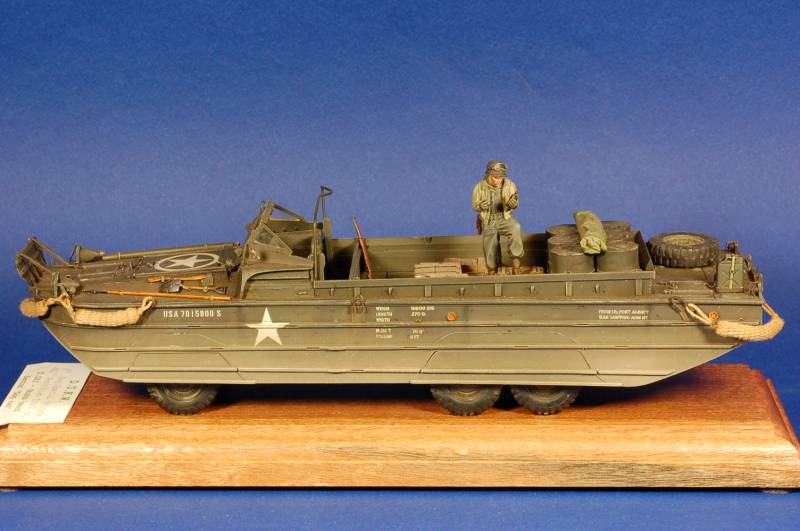
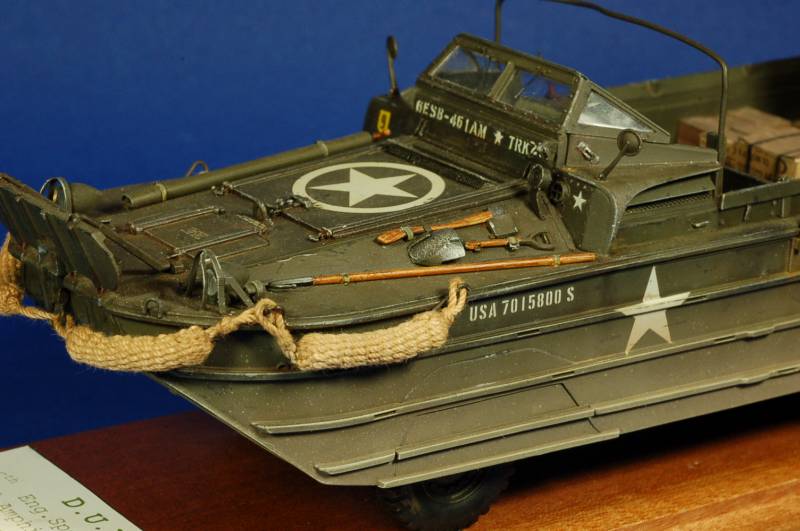
Excellent job on ther DUKW, great stuff. did you use the woven fenders?
Only observation would be the little side vents on the kit. I think they came in very late war, but I could be wrong and there should be a couple of fire extinguishers at the rear of the seats. For US vehicles should the tools also be OD? The mirror on the RHS needs a slight touch up.
Like your finish and the load, The compartment details look brillient, as do the markings and the GI fits the bill nicely. A really great lookin kit.
Great work.
Cheers
Al

'Action this Day'
Winston Spencer Churchill
Singapore / 新加坡
Joined: January 19, 2008
KitMaker: 517 posts
Armorama: 382 posts
Posted: Tuesday, March 04, 2008 - 05:56 AM UTC
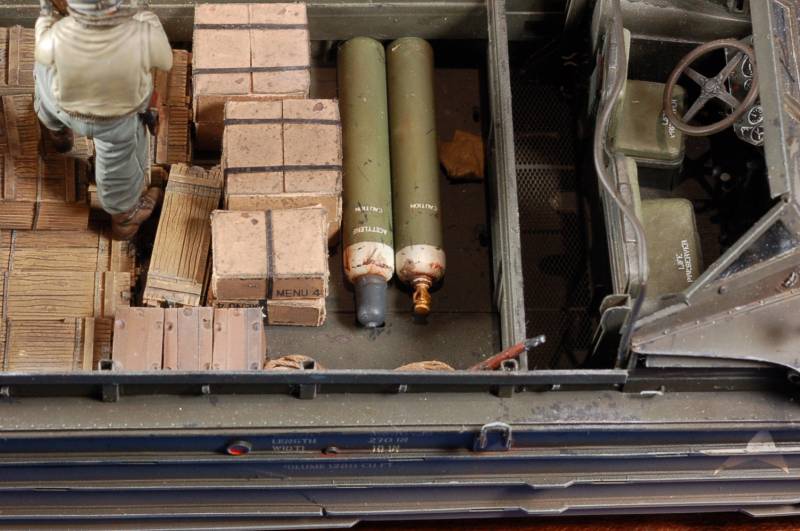
I like the weathering on the gas tanks (are they?)

Lead, follow, or get out of the way.
Illinois, United States
Joined: March 18, 2006
KitMaker: 2,362 posts
Armorama: 2,005 posts
Posted: Tuesday, March 04, 2008 - 06:20 AM UTC
Beautiful model!

North Carolina, United States
Joined: May 03, 2007
KitMaker: 249 posts
Armorama: 230 posts
Posted: Tuesday, March 04, 2008 - 06:27 AM UTC
"There is no avoiding war, it can only be postponed to the advantage of others."
"If you find yourself in a fair fight, you didn't plan your mission properly."
"Better to restrain a noble horse than prod a reluctant mule."
Oost-Vlaanderen, Belgium
Joined: January 17, 2006
KitMaker: 4,194 posts
Armorama: 408 posts
Posted: Tuesday, March 04, 2008 - 06:55 AM UTC
great work
love the way you paint your figures
koen
workbench:
Tamiya Wespe + Miniart groundwork: WIP
Tamiya Cargo Truck: WIP
Vatican City
Joined: October 22, 2006
KitMaker: 44 posts
Armorama: 25 posts
Posted: Tuesday, March 04, 2008 - 07:08 AM UTC
very nice figure looks great
Texas, United States
Joined: May 02, 2006
KitMaker: 5,425 posts
Armorama: 4,659 posts
Posted: Tuesday, March 04, 2008 - 07:21 AM UTC
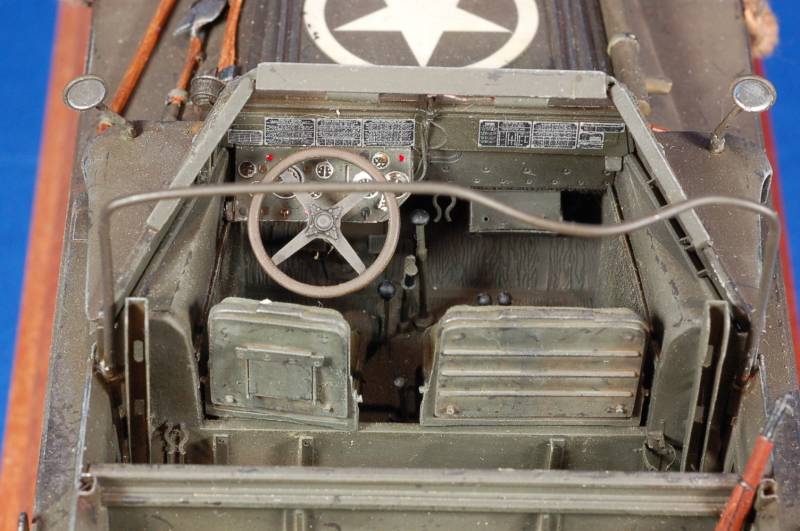
Nice work Tommaso, the driver's area in particular caught my attention. Are the placards dry-transfers or decals?
South Carolina, United States
Joined: January 23, 2008
KitMaker: 1,240 posts
Armorama: 1,192 posts
Posted: Tuesday, March 04, 2008 - 08:34 AM UTC
Excellent model, great detail and well presented...
Please share some information about it.
Keith.
AMPS Member, certified field judge & Always something on the workbench!
England - South West, United Kingdom
Joined: August 07, 2004
KitMaker: 6,391 posts
Armorama: 4,258 posts
Posted: Tuesday, March 04, 2008 - 09:56 AM UTC
Beautiful job Tom, I particularly like the cab, that dash board with all the technical info and instructions looks superb. Is it the Eduard set?
The holes in the strenghting ribs along the hull are indeed post war (as I too found out after I nearly finished the kit...), and you must add something to secure those two gas bottles/cylinders. Leaving them like that is a recipe for disaster.
Can you still give those beautiful rope buffers a wash with diluted PVA glue? It will help them sit that little bit better, and should also get rid of the fluff.
I like those tools. They add a nice bit of contrast, and your wood effect is great.
Thanks for showing it Tom
Henk
The early bird may catch the worm, but the second mouse gets the cheese...
Trieste, Italy
Joined: January 01, 2006
KitMaker: 127 posts
Armorama: 93 posts
Posted: Tuesday, March 04, 2008 - 10:33 AM UTC
Thanks all, for your comments and advices

Alan: yes, fenders are hand-woven bumpers...a Thachweave Products set ( # TW001) from Canada.
Bill & Henk : the technical info placards in the drivers area are dry-transfers, by Archer (#AR35243 ). Dashboard comes from Eduard set ( #2469).


Connecticut, United States
Joined: April 02, 2005
KitMaker: 3,608 posts
Armorama: 3,092 posts
Posted: Tuesday, March 04, 2008 - 10:35 AM UTC
Outstanding work Tom! Excellent in every way. I'm curious about the data plates on the dashboard, too. Are they Archer dry transfers?
Best,
Matt
SSG, INF, USA (Ret.)
"I am waiting for the tanks, and the Americans."
General Philippe Petain, September 1917
Trieste, Italy
Joined: January 01, 2006
KitMaker: 127 posts
Armorama: 93 posts
Posted: Tuesday, March 04, 2008 - 10:57 AM UTC
Massachusetts, United States
Joined: December 30, 2006
KitMaker: 646 posts
Armorama: 473 posts
Posted: Tuesday, March 04, 2008 - 12:14 PM UTC
You do great work, thanks for sharing

Mom and Julie and Aunt Ruth, my dear Godmother, I miss you all and think of you everyday. I'll see you all again sometime:)
Victoria, Australia
Joined: May 07, 2003
KitMaker: 4,002 posts
Armorama: 2,947 posts
Posted: Tuesday, March 04, 2008 - 07:03 PM UTC
'tis a work of art Tommaso, and you are to be proud of it!
The detail and effort you have out into a not-too-often modelled vehicle is super.
As henk mentioned the interior detail is amazing! Do you have competition plans for this beaut?
Cheers
Brad
"There never was a good war, or a bad peace."
Benjamin Franklin
Shanghai, China / 简体
Joined: March 05, 2008
KitMaker: 34 posts
Armorama: 31 posts
Posted: Wednesday, March 05, 2008 - 12:06 AM UTC
Connecticut, United States
Joined: June 12, 2007
KitMaker: 498 posts
Armorama: 406 posts
Posted: Wednesday, March 05, 2008 - 12:35 AM UTC
Great work! I especially like your decent weathering (just right amount), driver's compartment detailing (those placards look fantastic) and of course the figure (it gives the whole thing some depth and spin).
Trieste, Italy
Joined: January 01, 2006
KitMaker: 127 posts
Armorama: 93 posts
Posted: Wednesday, March 05, 2008 - 04:46 AM UTC
Thanks all....Bob, Brad, Huang, Ales,
I'm happy you appreciate my job

Brad, at present I've no competiton plan...maybe in the next contests

Ales, I agree, the placards are fantastic and very realistic. They come from an Archer dry-transfer set. I think Archer makes a lot of amazing and very helpful products!
Tom

#003
Donegal, Ireland
Joined: May 14, 2002
KitMaker: 9,763 posts
Armorama: 7,444 posts
Posted: Wednesday, March 05, 2008 - 05:28 AM UTC
Hi Tom. All is already said ... but worth repeating. A very attractive piece. Lots and lots of excellent details, that really make the viewer look closer. The dashboard looks particularily good, as is the wood effect on the stowage boxes. What are they or who do they come from?
Quoted Text
Only observation would be the little side vents on the kit. I think they came in very late war, but I could be wrong
Luckily I was advised this was a post-war detail, and filled mines in, before painting. Its funny how nearly everybody zones in on this detail now. I know Im very aware of it since, as well.
Henk also correctly mentioned that the buffers could do with a wash with white glue to fix the threads/fluff. This is something that could still be done. they look to be an excellent item, but could do with this little touch.

IPMS Stockholm
"The problem with common sense, is that it is not that common"
Luxembourg
Joined: January 19, 2004
KitMaker: 2,406 posts
Armorama: 2,224 posts
Posted: Wednesday, March 05, 2008 - 06:01 AM UTC
Superbe work, congratulations.
Can you give us some info about your OD painting. How did you weather it.
Thanks
Claude
Ohio, United States
Joined: June 04, 2005
KitMaker: 627 posts
Armorama: 455 posts
Posted: Wednesday, March 05, 2008 - 06:10 AM UTC
FREAKIN AWESOME!!!
Gary


Illinois, United States
Joined: March 18, 2006
KitMaker: 2,362 posts
Armorama: 2,005 posts
Posted: Wednesday, March 05, 2008 - 06:19 AM UTC
Quoted Text
Quoted Text
Only observation would be the little side vents on the kit. I think they came in very late war, but I could be wrong
Luckily I was advised this was a post-war detail, and filled mines in, before painting. Its funny how nearly everybody zones in on this detail now. I know Im very aware of it since, as well.
What side vents are you referring to, the screened areas?
Illinois, United States
Joined: February 01, 2006
KitMaker: 853 posts
Armorama: 515 posts
Posted: Wednesday, March 05, 2008 - 12:42 PM UTC
Nice work Tommaso. I love the way you painted the two gas cylinders. Takes me back to one of my early jobs of hauling them around.

Si Vis Pacem, Parabellum - If you want peace, Prepare for war.
Democracy - two wolves and a sheep voting on what to have for lunch.
Liberty - two wolves and a sheep with an assault rifle.




 Excellent build! Thanks for sharing!!


