_GOTOBOTTOM
Яusso-Soviэt Forum: Cold War Soviet Armor
For discussions related to cold war era Russo-Soviet armor.
BMP-1KSh Potok-1
Jacques
Visit this Community
Minnesota, United States
Joined: March 04, 2003
KitMaker: 4,630 posts
Armorama: 4,498 posts
Posted: Tuesday, March 11, 2008 - 04:51 AM UTC
Short and sweet blog. I have been "working " on this kit for years and it is time to get it done. This will probably help me clear the final hurdles.

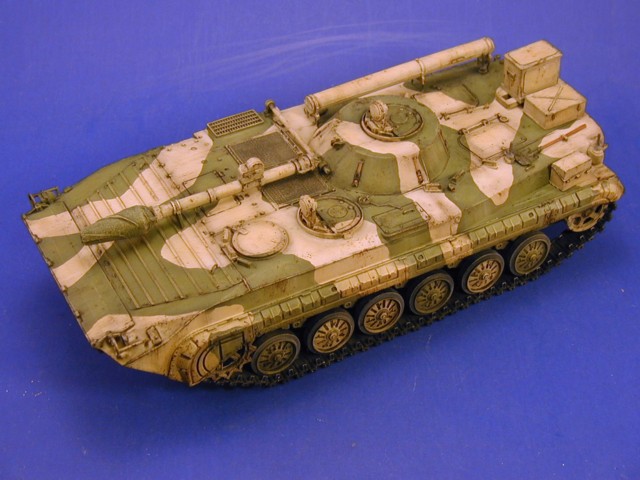
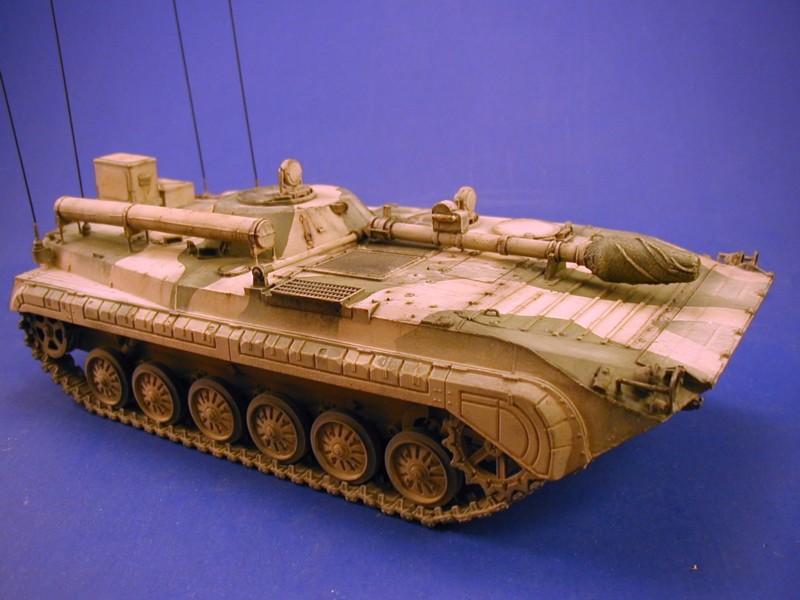
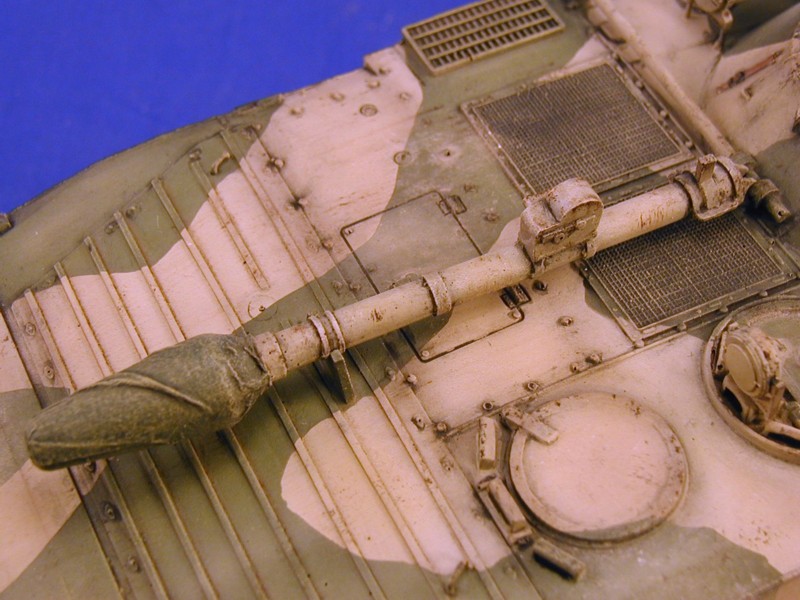
This is a DML BMP-1 with the SP Designs conversion. The only think I added to the conversion is a kleenex "wrap" for the tarp at the end of the antenna. This gives it some more texture and makes it look more like the prototype.


This photo does not show the kleenex tarp.


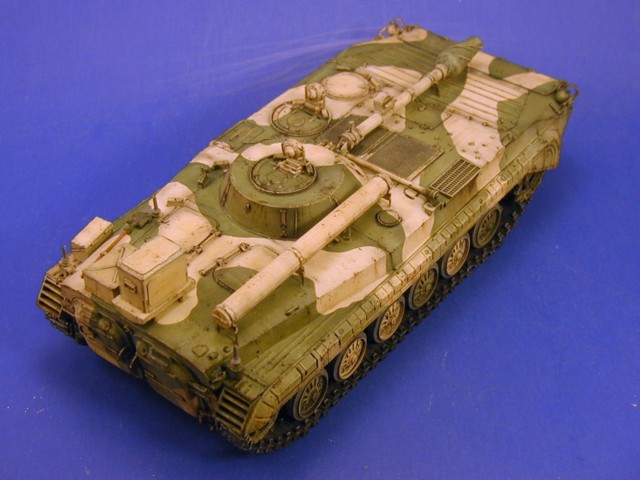
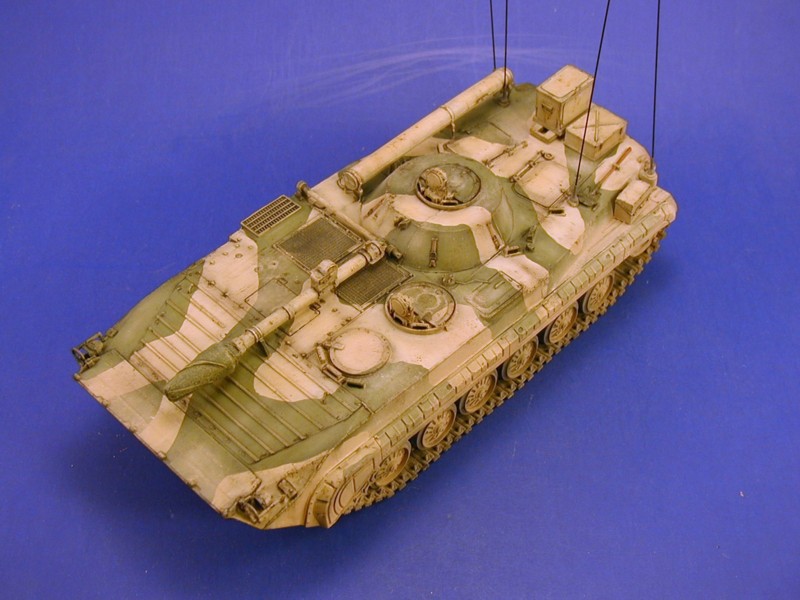
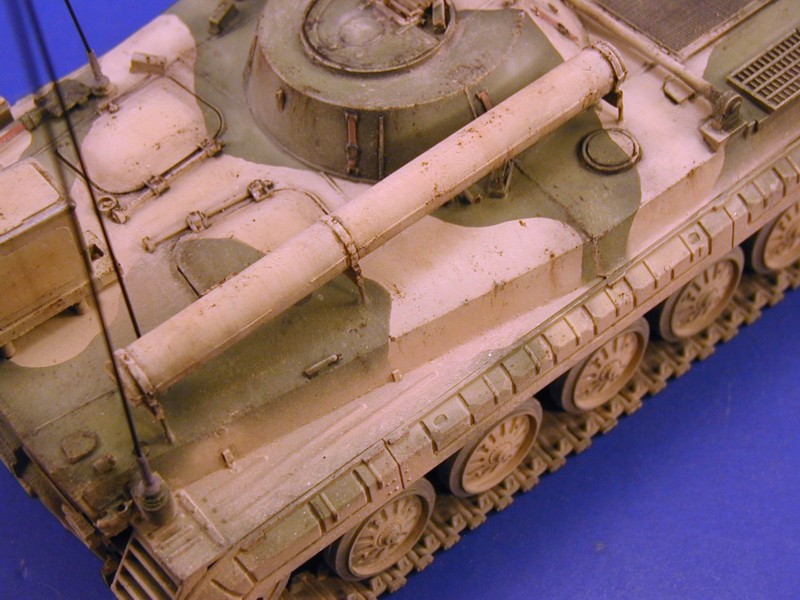
So..., I painted it up the following way:

1. Dark Brown primer

2. Testors US Army / Marines Special Tan pre-shade coat

3. Testors US Army / Marines Special Tan 20% + Testors Sand 80% in a mix of 70% rubbing alchohol to 30% paint. I did highlights with this mix.

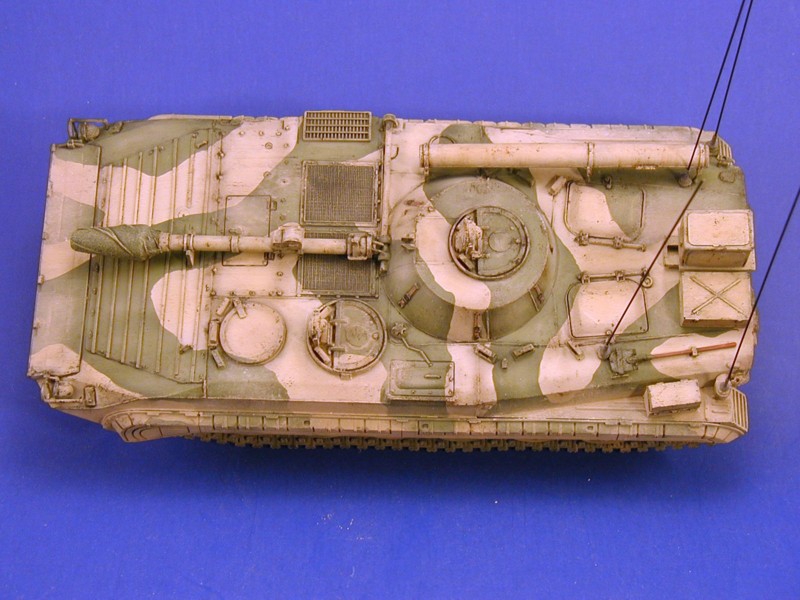
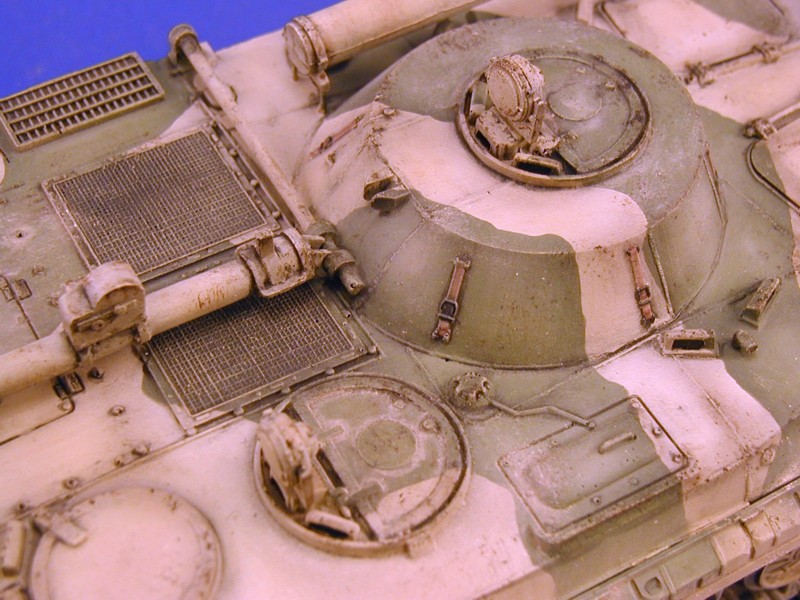
4. Masked off the cammo pattern with silly putty. Yup, it works great.

5. Painted on Testors Dark Green.

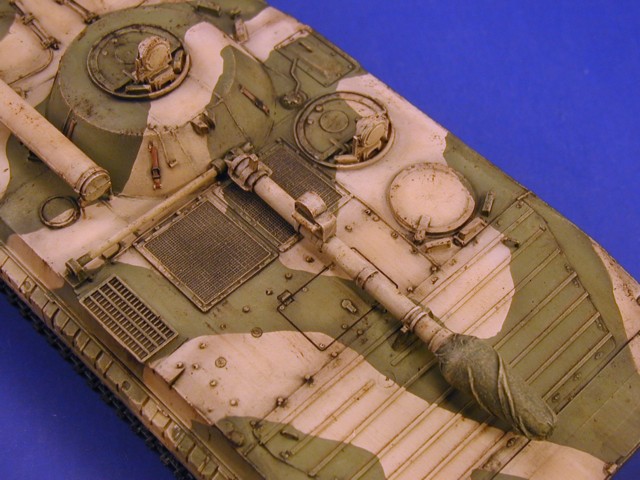
6. WITH THE SILLY PUTTY STILL ON, I used 50% Testors Dark Green + 50% Testors Sand in a mix of 70 alchohol/30 paint to do the highlights of the green.

7. Remove the silly putty and drybrush LIGHTLY with Testors Sand and/or US Army / Marines Special Tan.

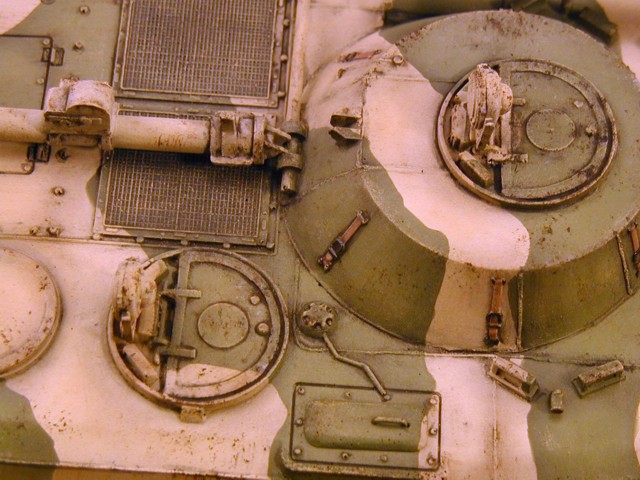
8. Currently painting details. I used black acrylic craft paint for the engine screens, it is easier to use and dries nice and flat. It is also easier to thin and covers better thin. Painted up the shovel. painted the antenna tarp green and then heavily dry brushed it to give it a nice "tarp look" (whatever that is... )


NEXT: More detail painting, then weathering begins!
Yoni_Lev
Visit this Community
Washington, United States
Joined: September 20, 2007
KitMaker: 861 posts
Armorama: 394 posts
Posted: Tuesday, March 11, 2008 - 06:26 AM UTC

Sweet, Jacques! Nice looking camo.

-YL
strathcona
Visit this Community
Alberta, Canada
Joined: January 19, 2007
KitMaker: 30 posts
Armorama: 27 posts
Posted: Tuesday, March 11, 2008 - 09:41 PM UTC
Hello ,
Nice build , I have always been fascinated by Soviet Armor,during the " Cold War " years ,and later ,many of these these vehicles were an " enigma" , to those who were part of NATO , back in the '70's and 80's. Keep up up the great work.

Frank
GaryKato
Visit this Community
California, United States
Joined: December 06, 2004
KitMaker: 3,694 posts
Armorama: 2,693 posts
Posted: Wednesday, March 12, 2008 - 04:03 AM UTC
I especially like the depth to those grills.
Aleksey_Gilevskiy
Visit this Community
Belgorod, Russia
Joined: July 02, 2007
KitMaker: 125 posts
Armorama: 99 posts
Posted: Wednesday, March 12, 2008 - 08:38 AM UTC
Hi Jacques!
Very nice "korobochka"
But I`d like to admit the exhaust port must not be painted matt! There is also a drainage system for oil & water from engine, so the port must be shiny.

I say so because I met such vehicles in our mechanised brigades.

And else, if I were you, I would drybrush the ribbed screen with silver or steel paint. You know, it is opened by crew very frequently
Jacques
Visit this Community
Minnesota, United States
Joined: March 04, 2003
KitMaker: 4,630 posts
Armorama: 4,498 posts
Posted: Wednesday, March 12, 2008 - 10:13 AM UTC

Quoted Text

Hi Jacques!
Very nice "korobochka"
But I`d like to admit the exhaust port must not be painted matt! There is also a drainage system for oil & water from engine, so the port must be shiny.

I say so because I met such vehicles in our mechanised brigades.

And else, if I were you, I would drybrush the ribbed screen with silver or steel paint. You know, it is opened by crew very frequently


So noted Aleksey...very good points. However, i am just getting to that part of the build, so be patient with me!

Also, a lot of photos I have show the drain area and the exhaust port being clean, and they are not all museum or trade show vehicles. I think it may have alot to due with ability to perform maintenance. When on manuevers in the field you cannot clean a vehicle, but once training is done, it is off to the wash rack for a cleaning.

Ask me how I know...
Aleksey_Gilevskiy
Visit this Community
Belgorod, Russia
Joined: July 02, 2007
KitMaker: 125 posts
Armorama: 99 posts
Posted: Thursday, March 13, 2008 - 05:01 AM UTC

Quoted Text


Quoted Text

Hi Jacques!
Very nice "korobochka"
But I`d like to admit the exhaust port must not be painted matt! There is also a drainage system for oil & water from engine, so the port must be shiny.

I say so because I met such vehicles in our mechanised brigades.

And else, if I were you, I would drybrush the ribbed screen with silver or steel paint. You know, it is opened by crew very frequently


So noted Aleksey...very good points. However, i am just getting to that part of the build, so be patient with me!


Ask me how I know...


Well, sorry for being hurrying
Jacques
Visit this Community
Minnesota, United States
Joined: March 04, 2003
KitMaker: 4,630 posts
Armorama: 4,498 posts
Posted: Tuesday, March 18, 2008 - 09:26 AM UTC
With the start of wethering to include:

- wash with oderless turps and burnt umber oil paint

- paint ships added with Paynes gray oil paint using "scrub pad" method and then with Van Dyke Brown oil paint using the "scrub pad" method. I noticed on real vehicles that paint chips seem to start out with just a dark grey look and then, as they oxidize, they turn brown. This method seems to add some depth to the chips. You decide.

- Another wash of oderless turps and burnt umber oil paint, but adding in a bit of Van Dyke Brown on the end tip of the brush and stroked to add the streaks of rust and then I added both white and Naples Yellow to add some fading...all liberally wiped off.

- heavy wash of black pigment and water into all small detail areas, left to dry, and then wiped off with moist Q-tips.

- details are being painted right now...


Reiter960
Visit this Community
California, United States
Joined: June 24, 2007
KitMaker: 503 posts
Armorama: 500 posts
Posted: Tuesday, March 18, 2008 - 09:35 AM UTC
Cool. Those stains and spots are particularly good looking. Maybe a little dust around sides would be good too.
Jacques
Visit this Community
Minnesota, United States
Joined: March 04, 2003
KitMaker: 4,630 posts
Armorama: 4,498 posts
Posted: Tuesday, March 18, 2008 - 09:44 AM UTC

Quoted Text

Cool. Those stains and spots are particularly good looking. Maybe a little dust around sides would be good too.


oh yeah, it's coming. Just giving a in-progress report.
EagleSmack
Visit this Community
Massachusetts, United States
Joined: February 03, 2006
KitMaker: 228 posts
Armorama: 225 posts
Posted: Tuesday, March 25, 2008 - 06:24 AM UTC
I actually had the opportunity to talk with a Czech immigrant here in the US at a cookout. He was in the Czech Army during the Cold War and I asked him how tight was it in a BMP. He said fully loaded you almost had to push the last guy in from the outside with your boots! He said they used to pack them in pretty tight and comfort was not a priority.
Aleksey_Gilevskiy
Visit this Community
Belgorod, Russia
Joined: July 02, 2007
KitMaker: 125 posts
Armorama: 99 posts
Posted: Tuesday, March 25, 2008 - 07:09 AM UTC
a lot of mud
bison126
Visit this Community
Correze, France
Joined: June 10, 2004
KitMaker: 5,329 posts
Armorama: 5,204 posts
Posted: Tuesday, March 25, 2008 - 07:52 PM UTC
Hi Jacques,
this is turning really good. Nice weathering and as usual with SP a nice and different subject.

Keep on the good job!
Olivier
todorovicandreas
Visit this Community
Austria
Joined: May 01, 2007
KitMaker: 608 posts
Armorama: 593 posts
Posted: Tuesday, March 25, 2008 - 10:28 PM UTC
This one looks great Jacques!

I really like your effort with the weathering. Very well done.

Best regards,

Andreas
Jacques
Visit this Community
Minnesota, United States
Joined: March 04, 2003
KitMaker: 4,630 posts
Armorama: 4,498 posts
Posted: Wednesday, March 26, 2008 - 02:33 AM UTC
Ok, this is as far as I am going to go with this model.

First, a look at the start with the base Zvezda version of the kit and the SP Designs parts.


Next, the finished kit:


The final details were painted, things like the periscope glass and the "marching" lights. I painted a THIN (80 - 91% rubbing alcohol / 20 - Tamiya Buff) coat of "dust" next. However, most of the final work was adding the pigments.

I was very pleased with how this one came out and a lot of the "new" techniques I tried worked out really well.

Enjoy.
rinaldi119
Visit this Community
Oregon, United States
Joined: September 22, 2004
KitMaker: 375 posts
Armorama: 282 posts
Posted: Wednesday, March 26, 2008 - 03:46 AM UTC


- paint ships added with Paynes gray oil paint using "scrub pad" method and then with Van Dyke Brown oil paint using the "scrub pad" method. I noticed on real vehicles that paint chips seem to start out with just a dark grey look and then, as they oxidize, they turn brown. This method seems to add some depth to the chips. You decide.

Very nicely done Jacques. Your keen observations on the chips and the application of choice to simulate them are excellent. That last rear upper 3/4 shot really shows them well in scale.

Best,

Mike
 _GOTOTOP