_GOTOBOTTOM
Armor/AFV: British Armor
Discuss all types of British Armor of all eras.
Hosted by Darren Baker
Tasca Firefly NZ Paint/Weather Blog?
fireontheway
Visit this Community
Pennsylvania, United States
Joined: May 17, 2006
KitMaker: 370 posts
Armorama: 368 posts
Posted: Friday, June 13, 2008 - 06:37 AM UTC
I finally decided to build my Tasca Firefly. No pictures during build, but I took these during my painting weathering. I added a Lionmarc barrel, Bison decals, and Legends Stowage set. The basecoat is with Tamiyas Olive Green.


The next step was decals.


Next was Mig Filters, and oil paint weathering on the vertical sides.


fireontheway
Visit this Community
Pennsylvania, United States
Joined: May 17, 2006
KitMaker: 370 posts
Armorama: 368 posts
Posted: Friday, June 13, 2008 - 12:29 PM UTC
I put 5 coats of Mig filters on the model. I had used Goldens Gel medium to the lower hull for caked on mud prior to painting. I used Mig pigments Europe Dust to cover the lower hull, both with Mig Thinner & dry. I also applied the pigment to the sides of the upper hull. I painted the pioneer tools with Model Master enamel "Wood". After this dried I thinned out Burnt Sienna with Linseed oil and applied as a woodgrain.


Hope you like it so far.
FLiPSiDE
Visit this Community
Colorado, United States
Joined: October 08, 2007
KitMaker: 75 posts
Armorama: 72 posts
Posted: Friday, June 13, 2008 - 01:15 PM UTC
Looking really good, very realistic. How did you like the kit? Any problems with building it?
GaryKato
Visit this Community
California, United States
Joined: December 06, 2004
KitMaker: 3,694 posts
Armorama: 2,693 posts
Posted: Friday, June 13, 2008 - 03:21 PM UTC
Looks terrific!
fireontheway
Visit this Community
Pennsylvania, United States
Joined: May 17, 2006
KitMaker: 370 posts
Armorama: 368 posts
Posted: Friday, June 13, 2008 - 04:01 PM UTC
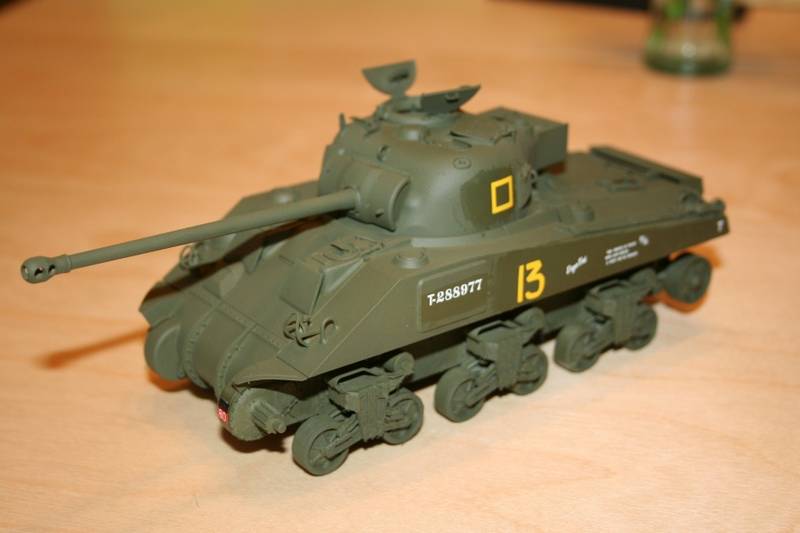
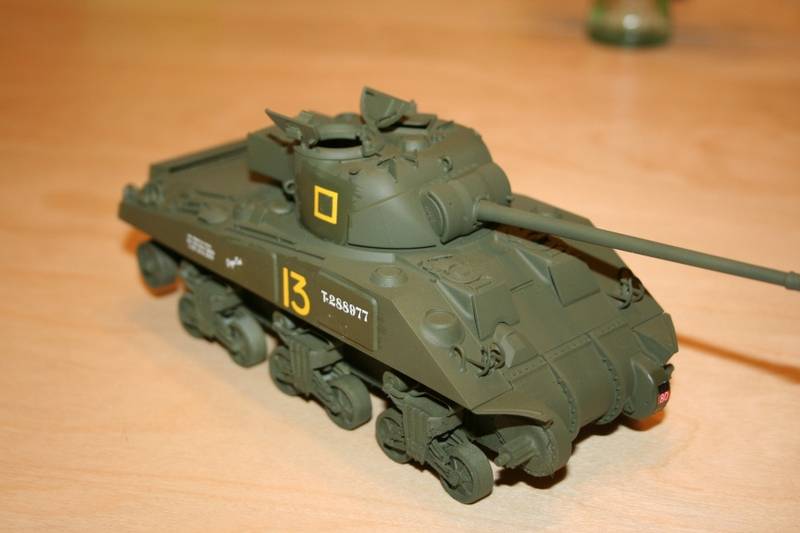
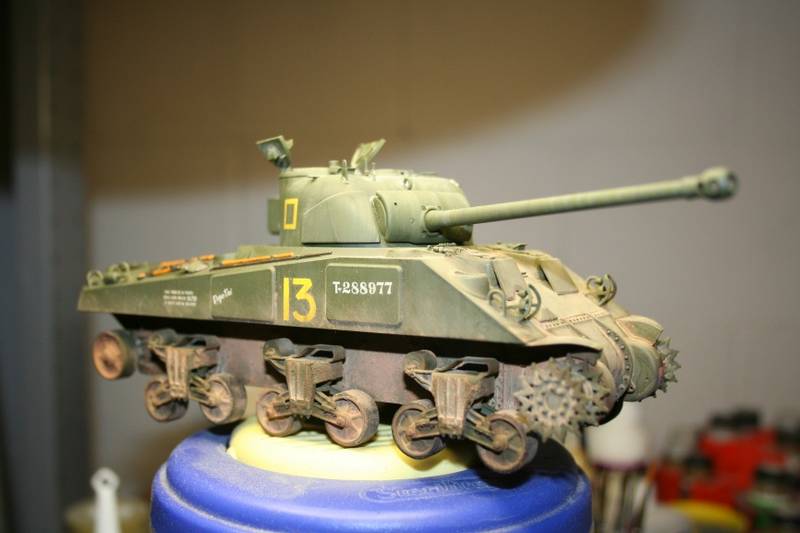
Phil, Gary, Thanks. This kit was intimidating to me when I read the instructions. Well let me say looked at the instructions, they are in Japanese I believe. The only error I made was when building the trucks. I failed to look at a small diagram showing the correct installation of parts B9 & B2. This caused me to curse whoever designed the kit. Once I figured it out it was smooth sailing. This truly was a very enjoyable build, everything fit as advertised. I would buy another Tasca Sherman anytime.

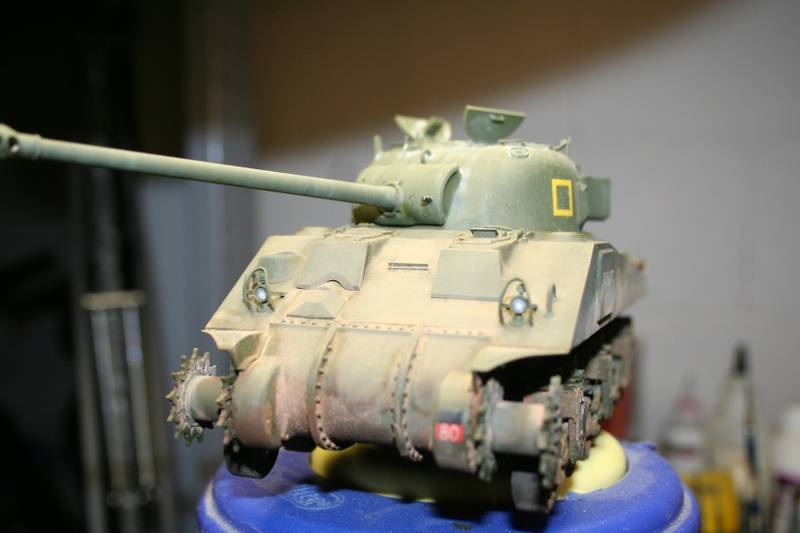
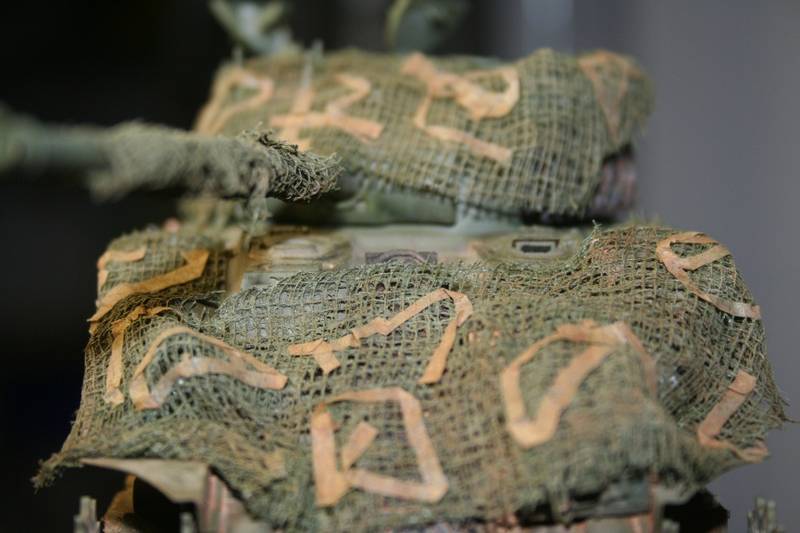
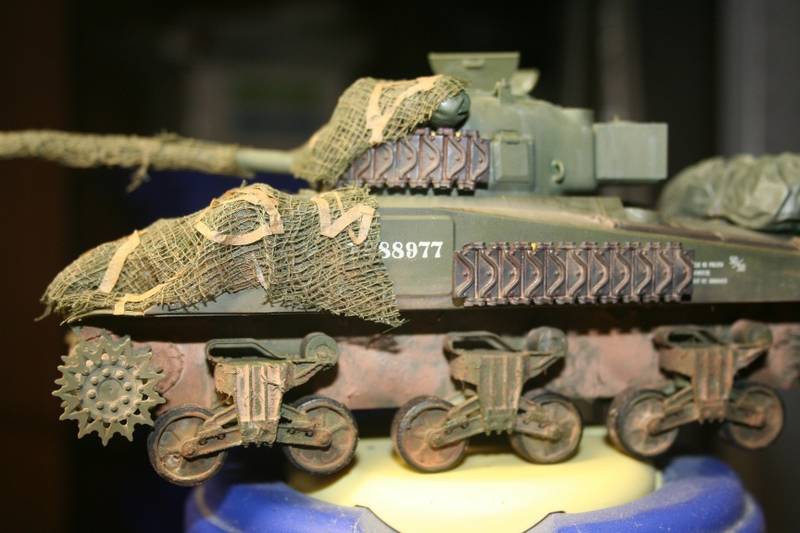
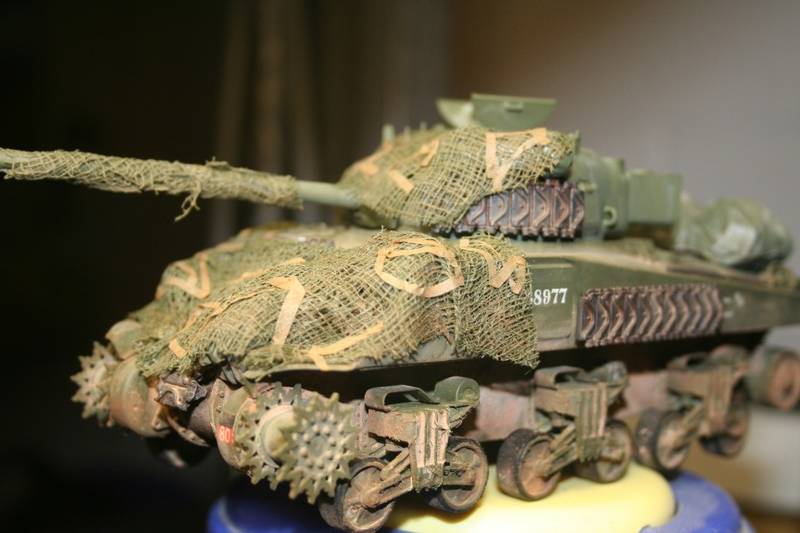
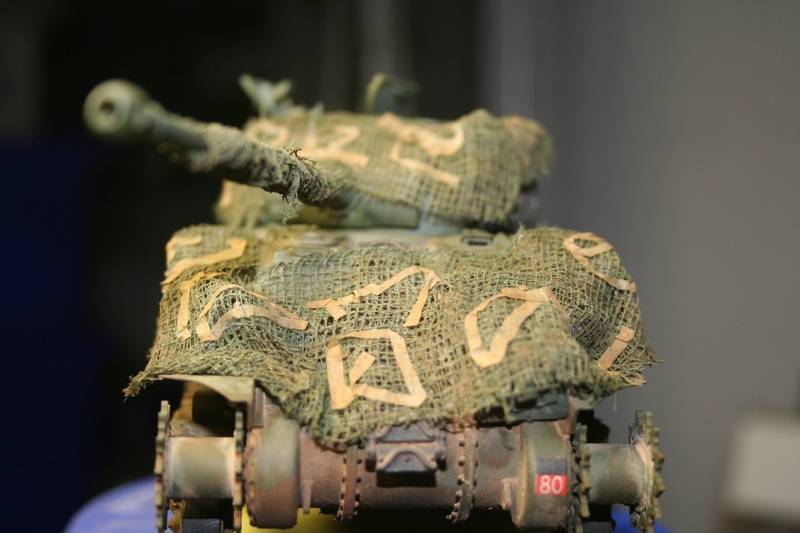
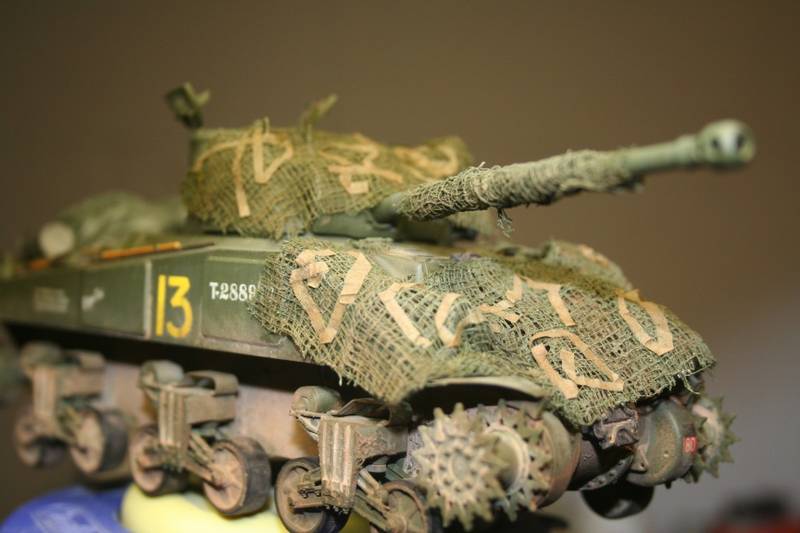
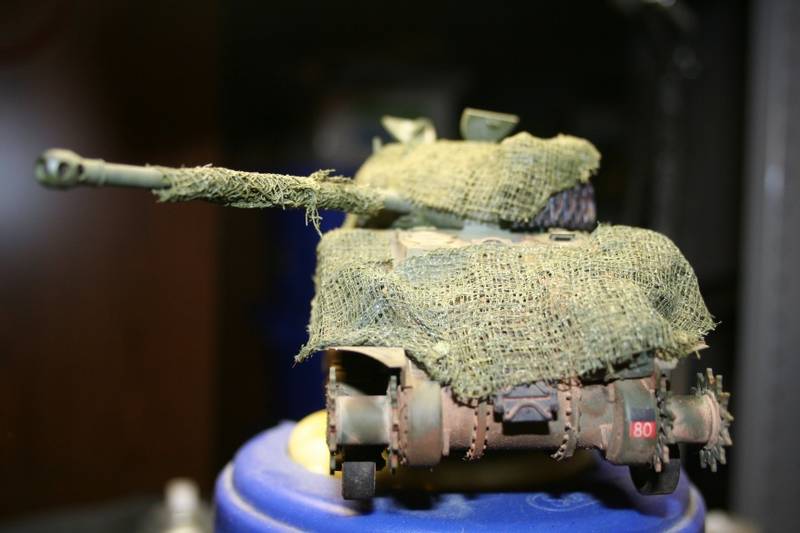
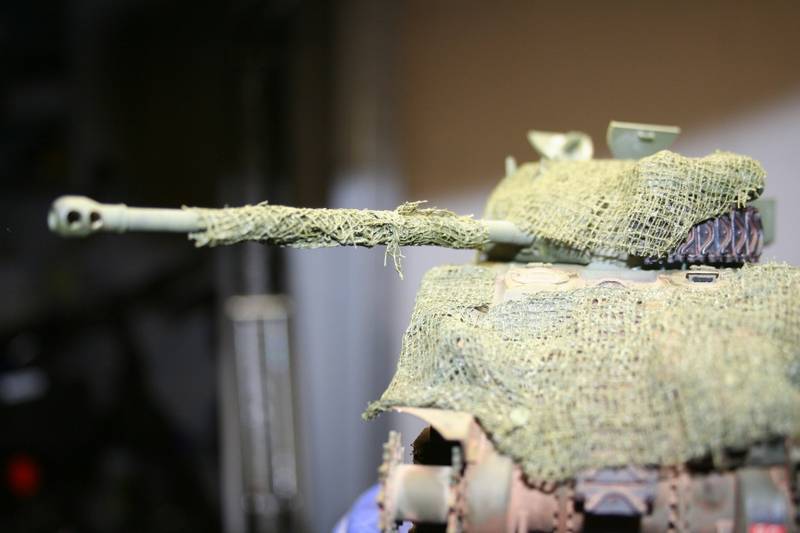
Well this is where things take a turn. I'm not sure I'm happy with the next part of the process. I wanted to show a Firefly with a camo net draped over the front hull and turret. I used cheesecloth. This I painted Olive Green, soaked in 50/50 white glue/water. Patted dry and placed on the vehicle. The next steps will be to place strips of a material to simulate burlap strips randomly into the netting. Then weather the netting. What do you think? I have to show more wear and tear on the netting, this will come.


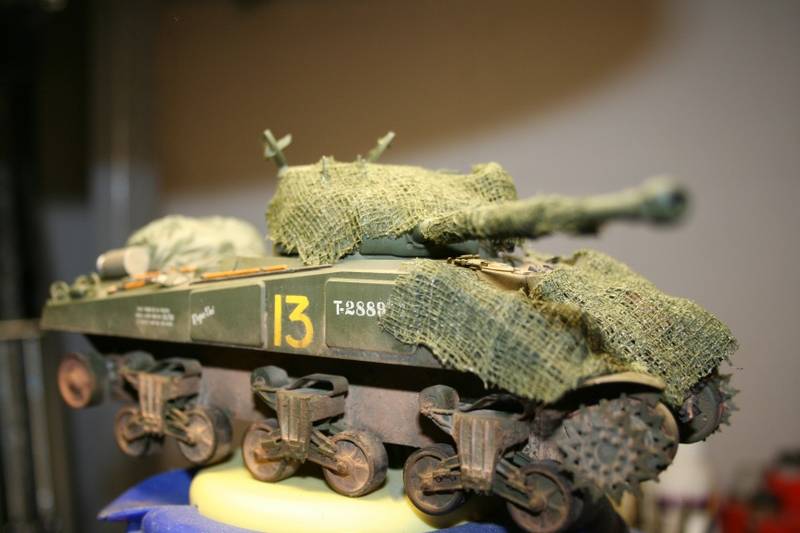
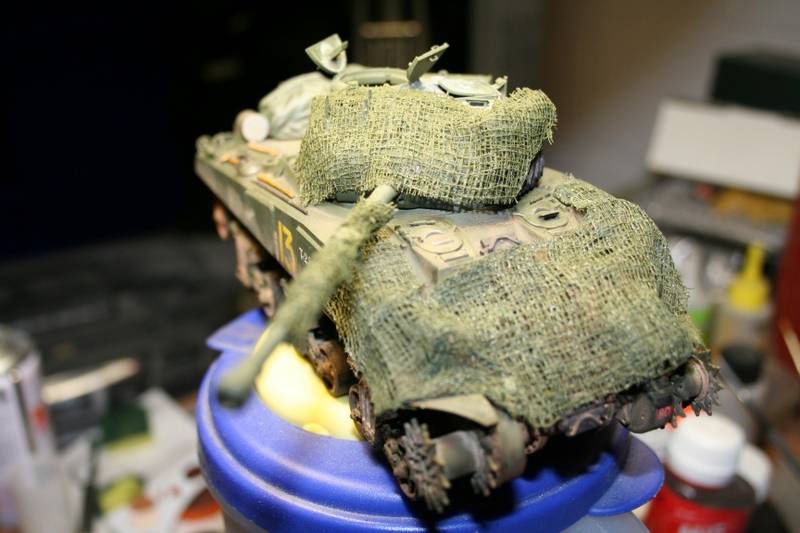
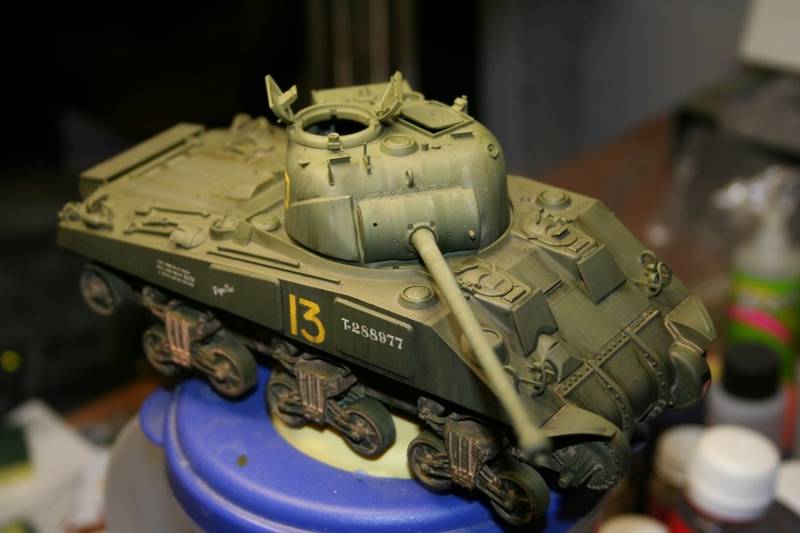
I also added at this point the spare track sections to the front hull, turret, and left hull side. I also added stowage to the front hull and engine deck. The track sections were painted with a Tamiya blue/black basecoat, then weathered slightly with RustAll.
fireontheway
Visit this Community
Pennsylvania, United States
Joined: May 17, 2006
KitMaker: 370 posts
Armorama: 368 posts
Posted: Sunday, June 15, 2008 - 03:30 AM UTC
Well here she is as of today. The cloth/burlap strips are teabags soaked, dryed out and cut into strips. They are soked in 50/50 whiteglue solution. I tried looking up potos of these style of nets but with only 1 good example. It was very hard to get them in place. So considering wear and tear, there as close as I can get. The net has about 3 filters applied, 1 additional color filter added to the strips. Then Mig pigement and thinner applied as a paint. Topped off with Tamiyas weathering pastels. I also painted the Commanders hatch pads.


Hekler
Visit this Community
Kyyv, Ukraine / Україна
Joined: April 13, 2008
KitMaker: 8 posts
Armorama: 7 posts
Posted: Sunday, June 15, 2008 - 03:35 AM UTC
Looks Great!
stoney
Visit this Community
British Columbia, Canada
Joined: October 16, 2006
KitMaker: 480 posts
Armorama: 399 posts
Posted: Sunday, June 15, 2008 - 04:55 AM UTC
Looks really good, I might make a sugestion to add some dust/dirt to the netting on the nose of the tank? might make it blend in a bit more, but honestly It looks really good. way to go.
fireontheway
Visit this Community
Pennsylvania, United States
Joined: May 17, 2006
KitMaker: 370 posts
Armorama: 368 posts
Posted: Sunday, June 15, 2008 - 11:18 AM UTC
Thanks Leonid & Eric. Eric I did add Mig Pigments to the front with Mig thinner. I tried them dry but I couldn't get them to spread evenly. I applied Tamiya weathering pastels also. It's still a work in progress, so I'll work at it. I was going to use AFV Club T48 tracks, but they are proving to be a pain in the @$%^. Work goes on.
whiteeagle
Visit this Community
Wojewodztwo Slaskie, Poland
Joined: February 24, 2008
KitMaker: 299 posts
Armorama: 281 posts
Posted: Sunday, June 15, 2008 - 11:30 AM UTC
Hello

I see, that you have uploaded these photos
Good work, interesting solution of masking

Adam
WRichter
Visit this Community
Georgia, United States
Joined: December 01, 2007
KitMaker: 39 posts
Armorama: 37 posts
Posted: Sunday, June 15, 2008 - 01:47 PM UTC
The netting ads a whole new demension. Did you make/or buy this?

Looks really good
fireontheway
Visit this Community
Pennsylvania, United States
Joined: May 17, 2006
KitMaker: 370 posts
Armorama: 368 posts
Posted: Sunday, June 15, 2008 - 10:57 PM UTC
Adam, yes I was able to, but I couldn't have done it without yours and others help. It is quite simple, which was what was really frustrating me. Thanks again.
Wes, I made the netting from cheescloth, and a dried out, cut up teabag. It is shown with heavy weathering, and it still requires more. I am also still working on the stowage. I am trying to decide on an Ultracast figure for the vehicle and whether to replace the AM tracks I just purchased.
exer
Visit this Community
Dublin, Ireland
Joined: November 27, 2004
KitMaker: 6,048 posts
Armorama: 4,619 posts
Posted: Sunday, June 15, 2008 - 11:51 PM UTC
I've always been put off adding so much netting to a model because it covers up so much of the detail. I know that's why it was done- to break up the outline.
there is an article on making the hessian tape over on ML
http://www.missing-lynx.com/articles/britain/emhess/hessian.htm
fireontheway
Visit this Community
Pennsylvania, United States
Joined: May 17, 2006
KitMaker: 370 posts
Armorama: 368 posts
Posted: Monday, June 16, 2008 - 10:06 AM UTC
Pat, I appreciate the article link very much. I to hate to waste the detail underneath but its not so much for me about the techniques being seen, as it is for as realistic as "I" can make the vehicle look. I have seen these vehicles before and I thought it would be neat to try. You always see Shermans, how could I make mine a little different was my thought. Its not over yet.
whittman181
Visit this Community
Massachusetts, United States
Joined: December 30, 2006
KitMaker: 646 posts
Armorama: 473 posts
Posted: Monday, June 16, 2008 - 10:28 AM UTC
She's coming along great I've been reluctant to put out the cash for this one but your's looks so nice I'll shell out the money Thanks for sharing and the netting came out great Bob
fireontheway
Visit this Community
Pennsylvania, United States
Joined: May 17, 2006
KitMaker: 370 posts
Armorama: 368 posts
Posted: Monday, June 16, 2008 - 10:56 AM UTC
Bob, Thanks alot. You will not be disappointed with this kit. It went together before I knew it. Just be careful during the truck assembly. "Look" at the instruction "diagrams" closely. It truly was a great OOB build, I am seriously thinking of the other Tasca Shermans. If I can be of any help during your build let me know.
whittman181
Visit this Community
Massachusetts, United States
Joined: December 30, 2006
KitMaker: 646 posts
Armorama: 473 posts
Posted: Monday, June 16, 2008 - 03:01 PM UTC
Thanks Tim, I'll certainly ask if I need to and I hope if you do get the other Shermans you post them. Thanks again Bob
AlanL
Visit this Community
England - East Anglia, United Kingdom
Joined: August 12, 2005
KitMaker: 14,499 posts
Armorama: 11,675 posts
Posted: Monday, June 16, 2008 - 10:23 PM UTC
Hi Tim,

Nce work on the Sherman so far. On the burlap would there be any way of threading it through the netting a bit, it looks to laid on top me thinks, but the concept is good and netting at such a scale is always very hard.

Keep up the good work.

AL
fireontheway
Visit this Community
Pennsylvania, United States
Joined: May 17, 2006
KitMaker: 370 posts
Armorama: 368 posts
Posted: Monday, June 16, 2008 - 10:59 PM UTC
Alan, I agree. I have been trying to think of a way. I could remove what I have put down already, or perhaps paint lines simulating a weave. I know from the link provided earlier when I do this again I will weave it into the netting. What I think will help will be if I pull the cheesecloth apart slightly first, before I lay it into place. I'll keep you posted.
AlanL
Visit this Community
England - East Anglia, United Kingdom
Joined: August 12, 2005
KitMaker: 14,499 posts
Armorama: 11,675 posts
Posted: Tuesday, June 17, 2008 - 12:40 AM UTC
Hi Tim,

Good luck. sounds like that might work. I like the tea bag idea I have an unlimited supply of those

Al
 _GOTOTOP