I am building this kit out-of-box with the addition of a set of Fruil tracks. This will be the first Sherman that I've ever built which is part of the reason I'm doing it mostly out-of-box. I have two Dragon Shermans in my stash for a later time.
 Building this kit will accomplish two things for me.
1. Completion of a group build
2. It will be the load on my future dragon wagon build.
My initial impression of the kit is good. Although this kit is old (instructions are copy righted 2001 and the lower hull has 1981 stamped in it), it is a quality kit. The lack of detail in this kit as compared to some of the newer kits is overwhelmingly obvious.
The instructions have 17 steps (plus an additional step for decal application).
Here is what I have got done so far:
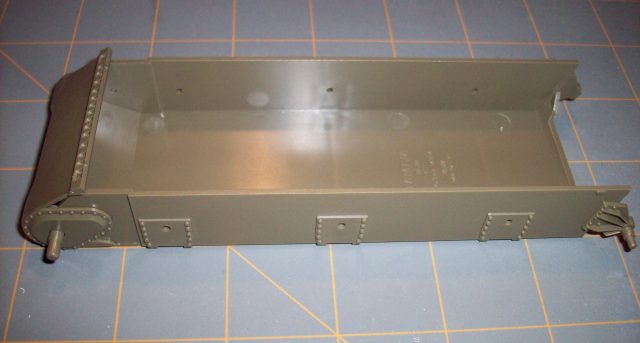
Step 1 (Lower hull assembly)- Completed.....There is a gap where the front transmission cover does not rest flush on the hull. This gap is also shown on the kit instructions. I don't understand why it is there. Hopefully, it won't be visible when construction is completed.
Step 2 (Assembly of suspension)-Skipped till later
Step 3 (Assembly of Drive Sprockets)-Skipped till later
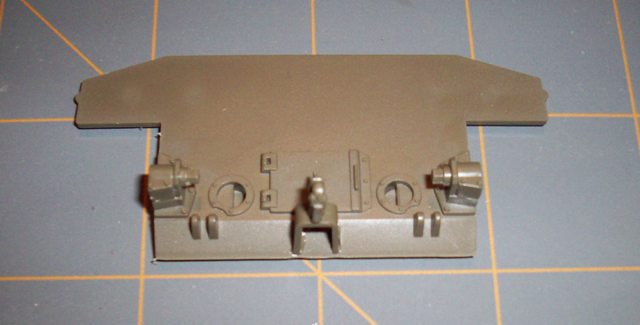
Step 4 (Lower hull assembly continuted)- Here I have completed the rear hull bulkhead but I have left off parts B22 and B23 (exhausts pipes) until later.
Step 5 (Assembly of the underside of upper hull)- Skipped till later
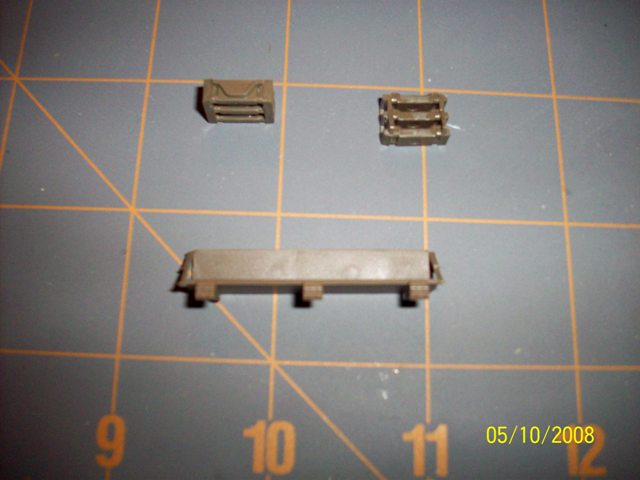
Step 6 (Assembly of spare track block storage racks and assembly of rear bulkhead storage shelf)- In this step, I have completed the assembly of two rear bulkhead spare track block storage racks and the rear bulkhead storage shelf. I have left off the gun cleaning rods that are supposed to go on the underside of the storage shelf. The detail of the track blocks and storage racks are very disappointing and is a point of the kit that someone could really fix up with a little scratchbuilding.
Well, I made a little more progress on my Tamiya 1/35th M4A3 105mm tonight.
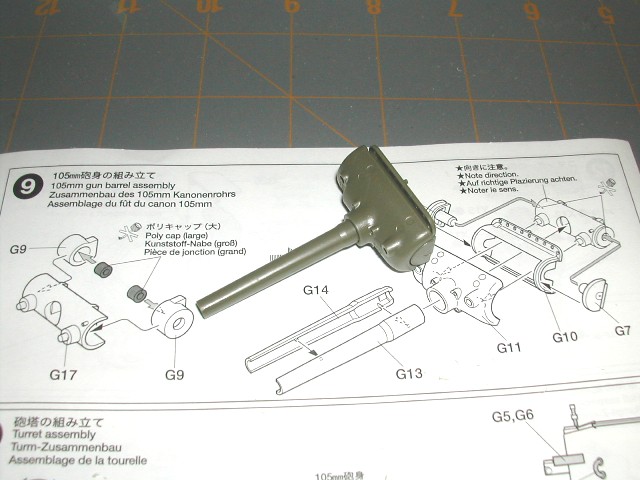
Step 9- Assembly of the gun barrel and mantlet.
There was nothing out of the ordinary on this step. There were not any problems and a I don't have any recommendations for improvement.
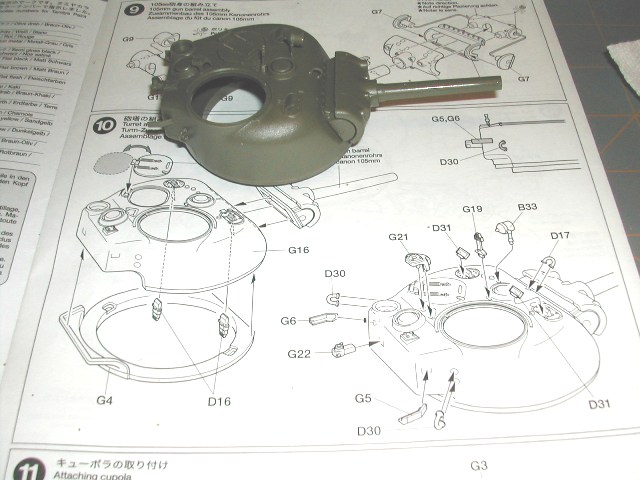
Step 10- Assembly of the turret and installation of the 105mm gun assembly.
There wasn't anything out of the ordinary here either. I did have somewhat of a difficult time getting parts D30, G5, G6 and G22 properly positioned. There are very faint indentions on the upper turret body that are supposed to be guides for the installation of the parts. But, the parts slid around easily while I was trying to line them up with the locating indentions. In the end, I was successful.
I have a nother small update tonight.
Step 11- Assembly of .50 cal machine gun and completion of turret details installation
Assembly of .50 cal:
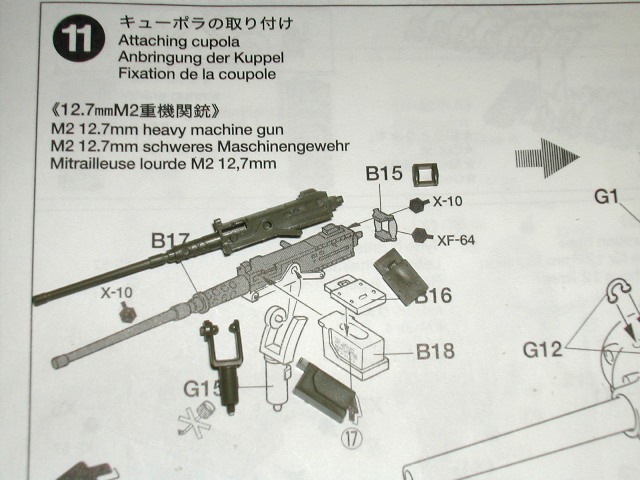
The mold lines on the parts for the M2 .50 cal were heavier than what I've had to deal with on the last few models that I've built. It took a bit of time to clean the parts up. This mainly the result of going slowly in order to not damage the detail on the machine gun.
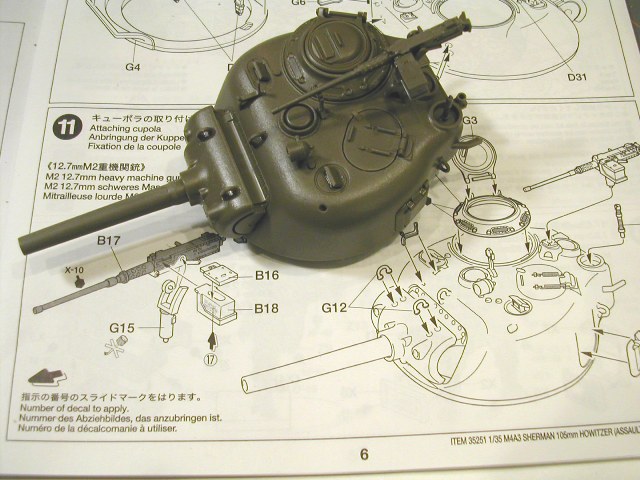
Installation of additional turret details/fittings:

Installation of the remaining turret fittings was mostly trouble free. It was a bit of a challenge cleaning the mold seems off of parts G12 (lifting rings). The seams were not large but removing what was there was difficult because of the tiny size of the parts and the odd angles that I had to work at to get my xacto blade at a proper angle to remove the seams.
This photo show the completed turret as it appears at the end of Step 11
Step 12- Step 12 is the assembly and installation of the commander figure in the turret. I am skipping this step. This Sherman is going to be cargo on a Dragon Wagon so the commander figure is not being used.
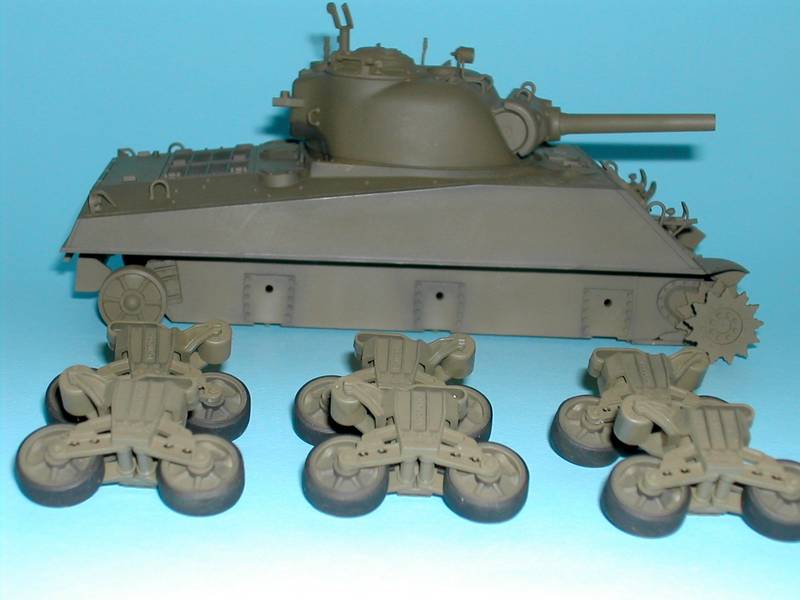
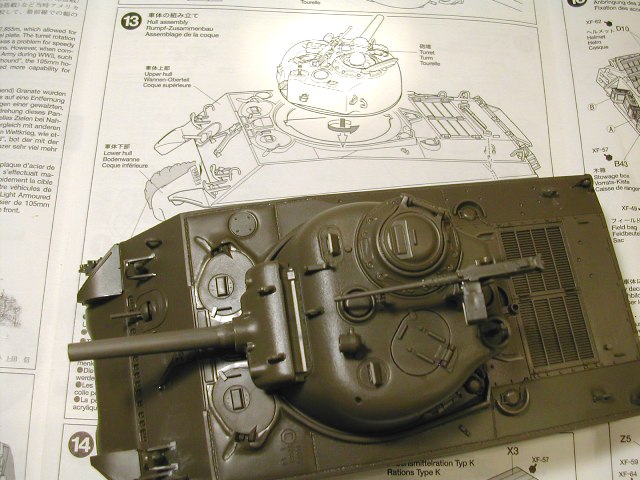
Step 13-This step is attaching the completed upper hull to the completed lower hull. However, I have to complete some sub-steps from Steps 1 through 8. I placed the upper hull and the lower hull together for a couple of quick pictures.
A summary of what will transpire for the remainder of the build:
1. Painting and assembly of the suspension system
2. Priming of the model
3. Application of pre-shade, base coat and shading coats
4. Painting and detailing of pioneer tools and additional hull/turret details
5. Assembly and finishing of tracks. I can't decide if I want to use kit tracks or a set of Fruils that I have.
6. Application of gloss coat, decals, gloss coat
7. Application of flat coat
8. Final application of weathering, pastels, etc.
UPDATE 14 JUN 08
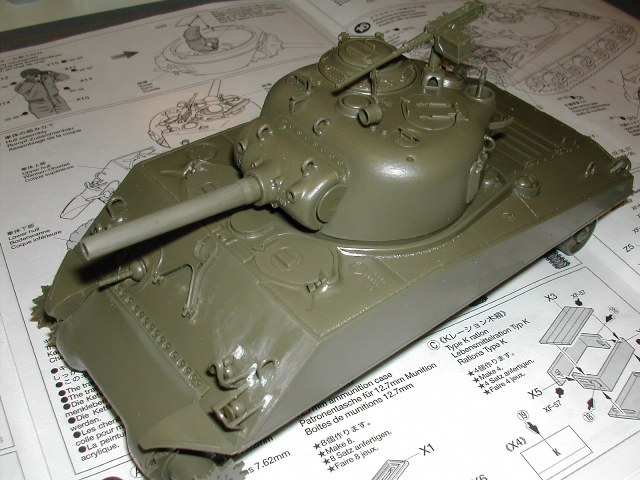
I have a very brief update tonight. I have applied a pre-shade of flat black and sprayed the base coat of Model Master olive drab.
After the base coat was shot, I assembled the suspension components. I will let this dry overnight and hopefully shoot it again tomorrow with a lightened shade of the base coat.