_GOTOBOTTOM
Armor/AFV: Axis - WWII
Armor and ground forces of the Axis forces during World War II.
Hosted by Darren Baker
DML Marder III Ausf.M
c5flies
Visit this Community
California, United States
Joined: October 21, 2007
KitMaker: 3,684 posts
Armorama: 2,938 posts
Posted: Monday, August 11, 2008 - 07:40 PM UTC


As a follow-up to my in-box review I'll begin this build log to check the fit and finish.

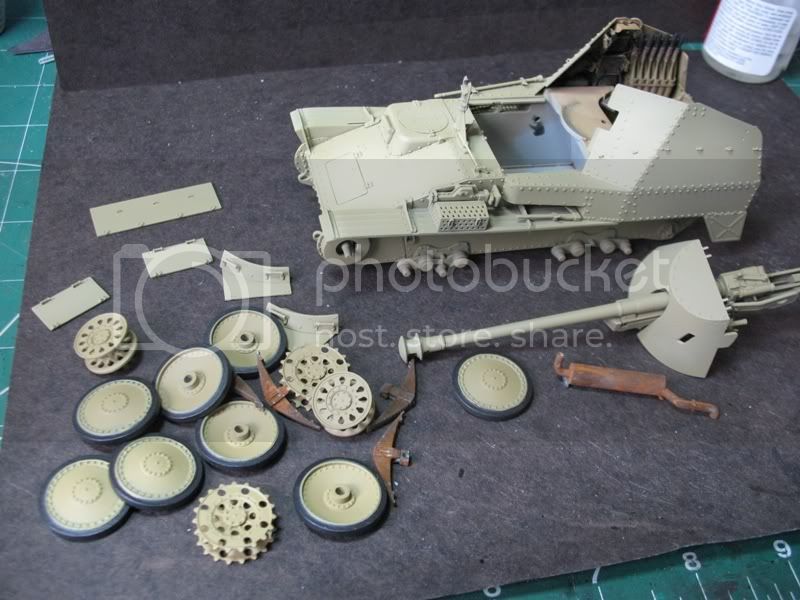
The first 6 steps, which deal with the lower hull/running gear and interior, are nearly identical to the DML Flakpanzer. The differences are the hull, of course, style of sprockets/idlers and the rear engine bulkhead. I'll basically start off with step 7, if you wish to see what's involved with the previous steps check out the Flakpanzer build.

Once again, I want to depict the slight bend in the fenders, so first up was to clean the straight fender guide line off the hull. A little scraping with the knife, a bit of sanding and we're done.


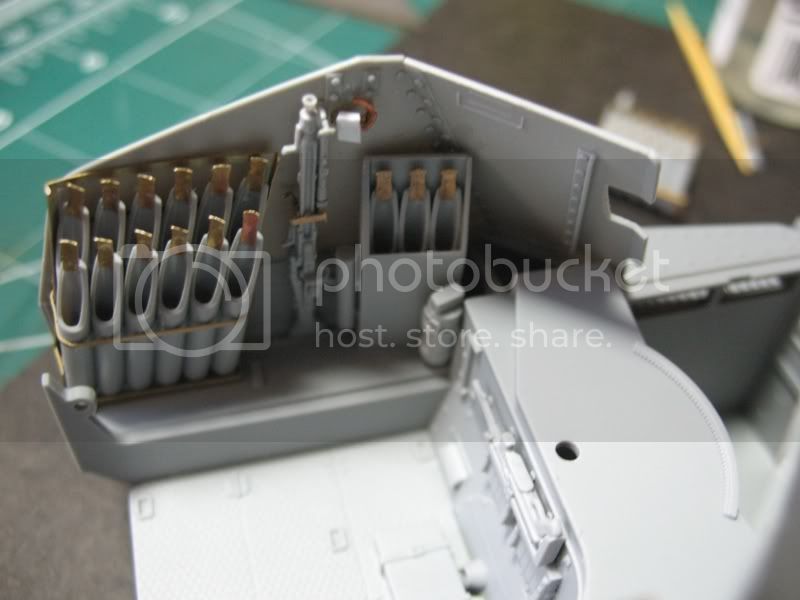
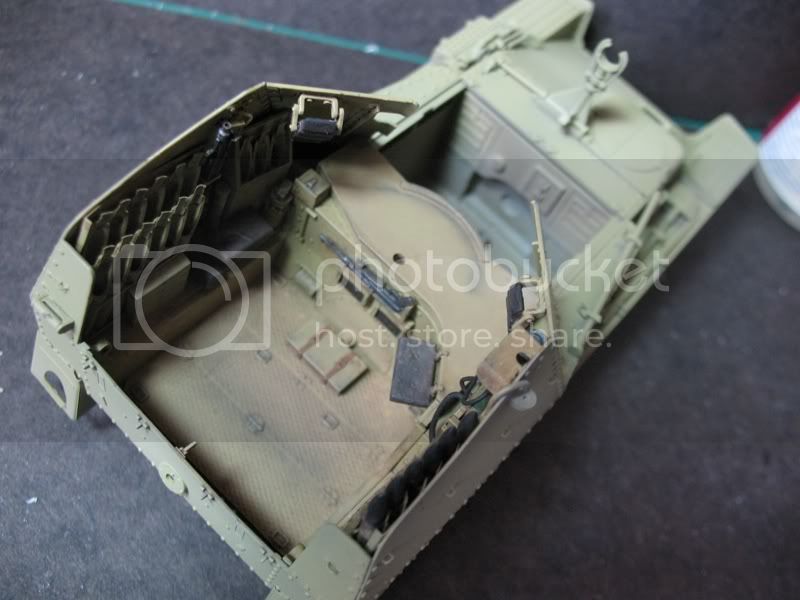
I'm keeping all the hatches closed so the interior is being saved for something in the future. I did use the driver/engine compartment bulkhead to give a little more rigidity to the hull, and give the engine hatches a bit more to rest on. The rear engine bulkhead is slightly different on the Marder with 2 heater vents which are positionable.


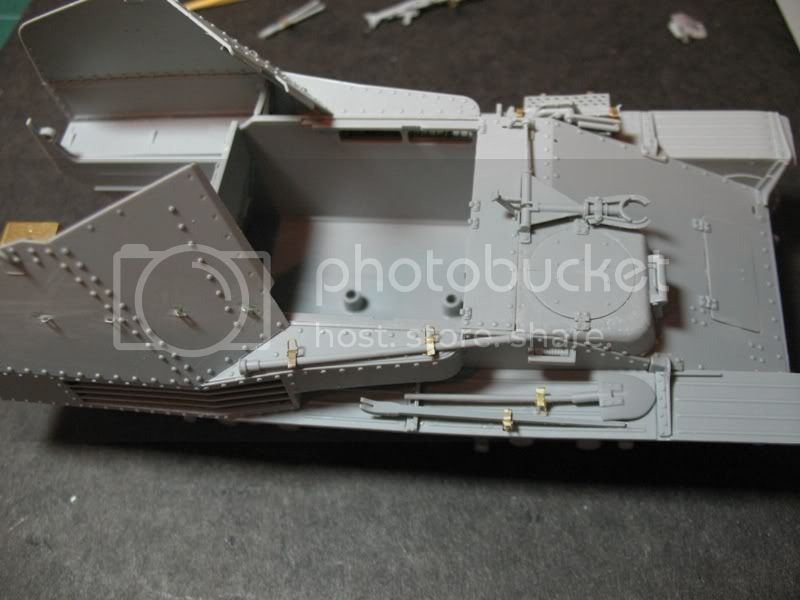
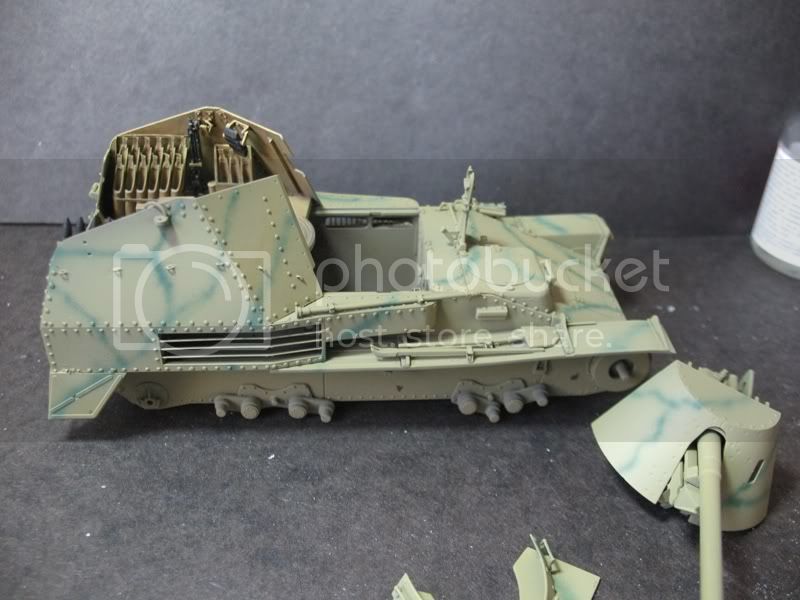
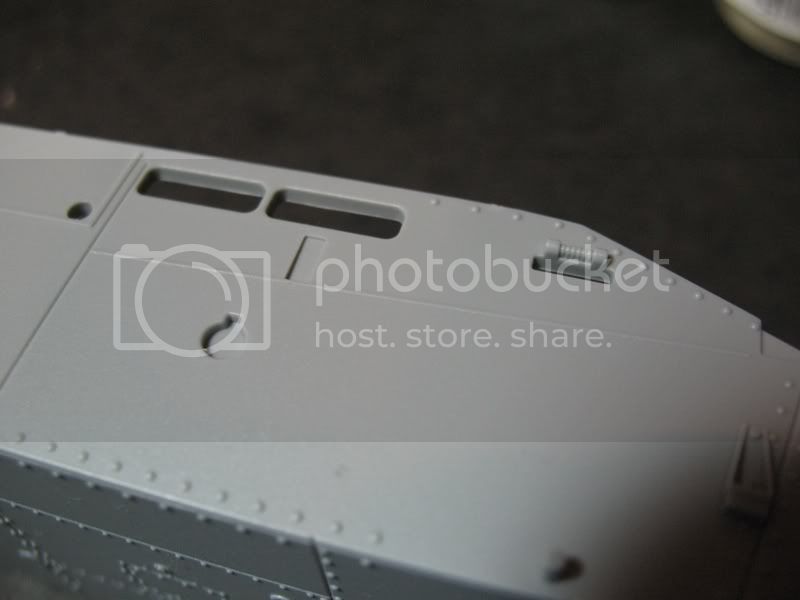
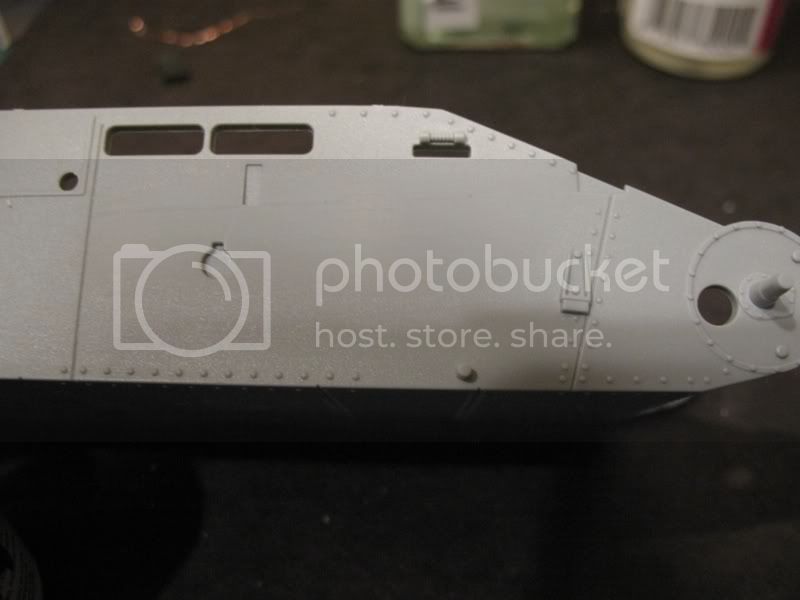
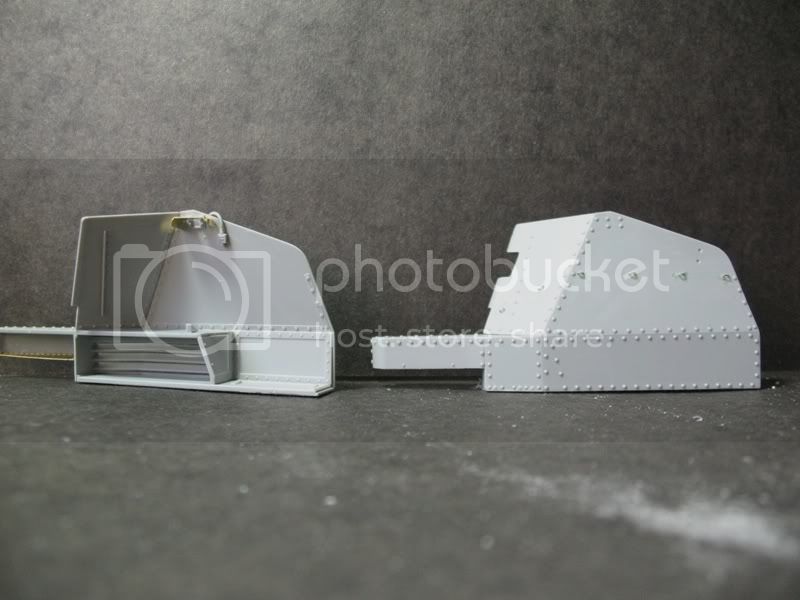
Steps 7&8 concentrate on the upper hull with the casemate sides and fenders. The 'eyes' for the camo wire on the casemate sides are molded closed, which I'm not thrilled with. These were shaved off and I made wire loops instead. Other then that, all went smoothly, I even got the 2 bends on the radio rain shield this time!


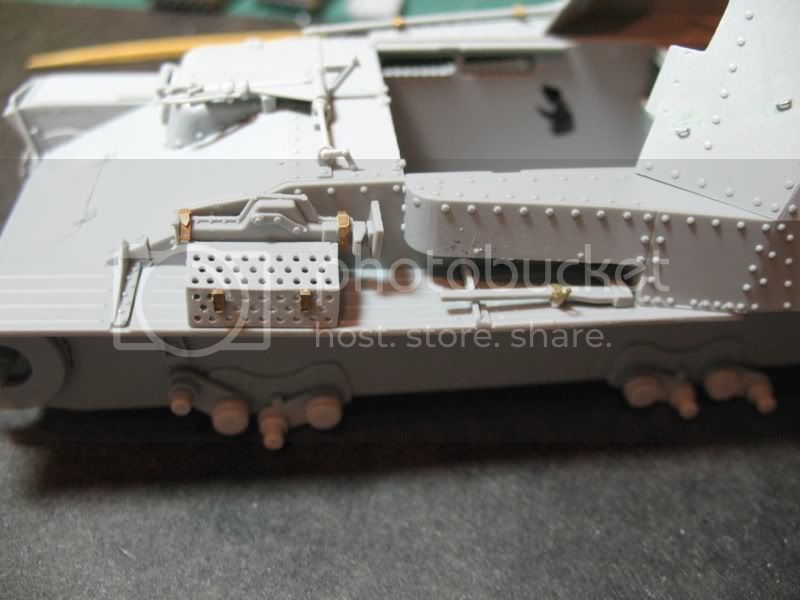
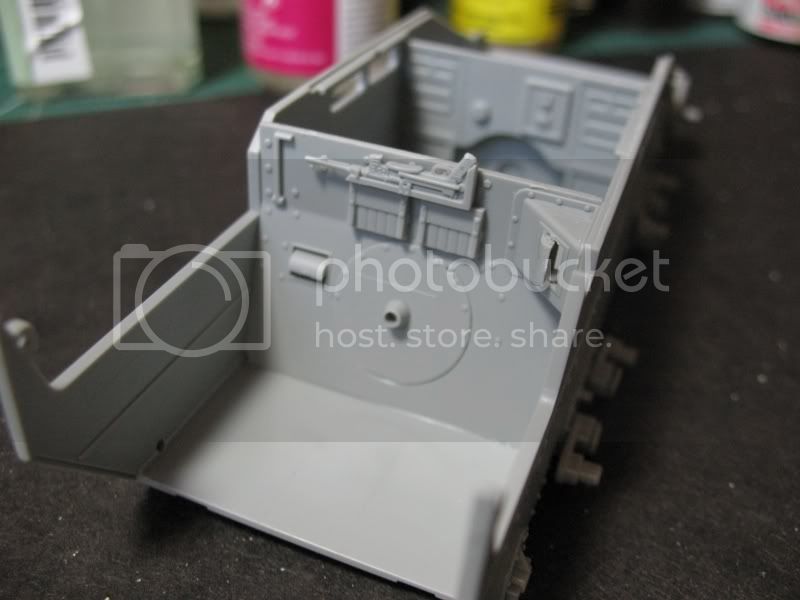
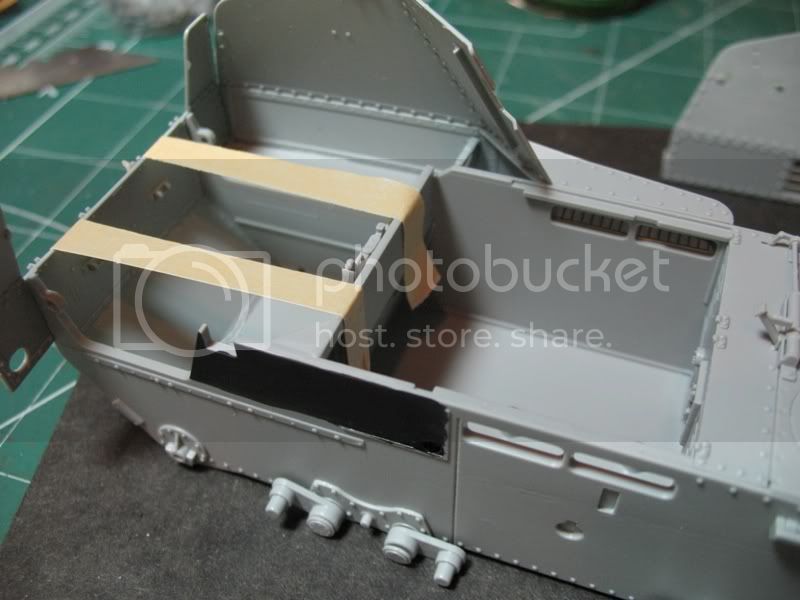
The area behind the louvers can be a bit tough to paint when all assembled, so a quick coat of black was given in that area first. The fighting compartment sides have locating lines but there is still a good amount of play. Since it's difficult to judge exactly were the sides should mount I taped the rear section in place to get everything aligned.


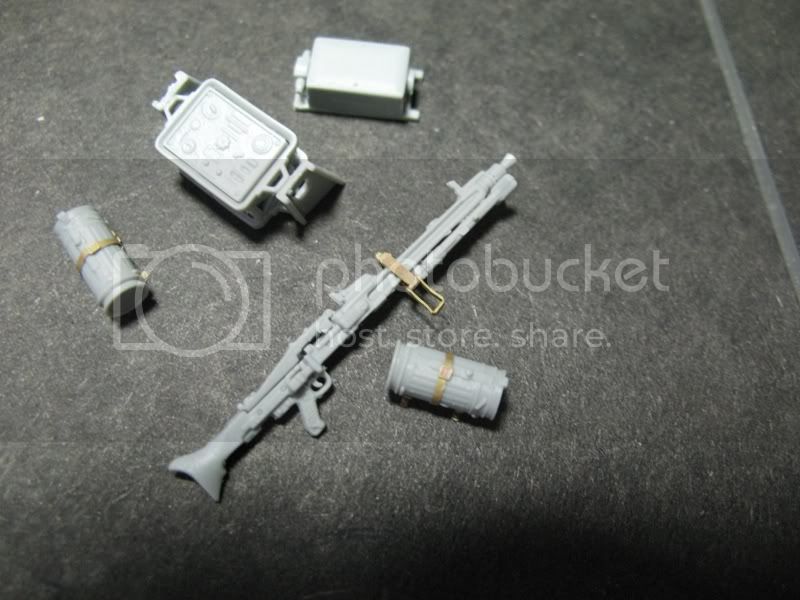
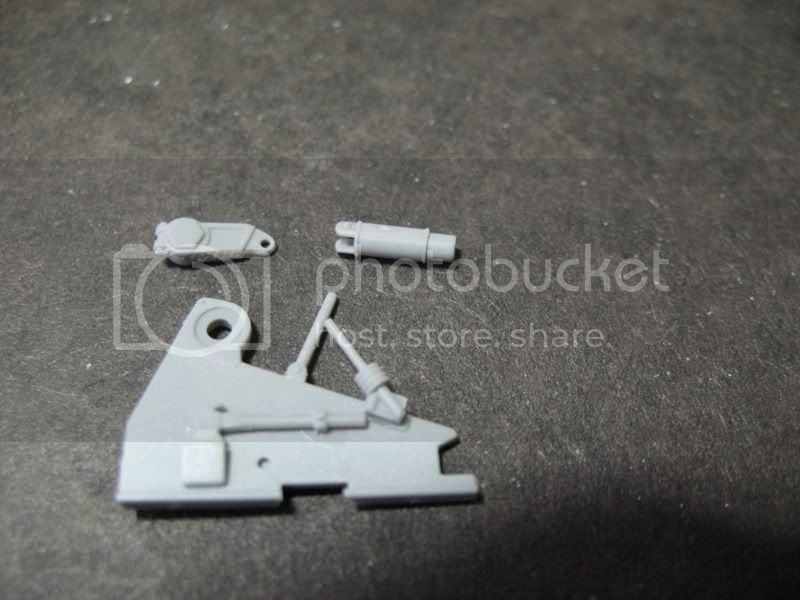
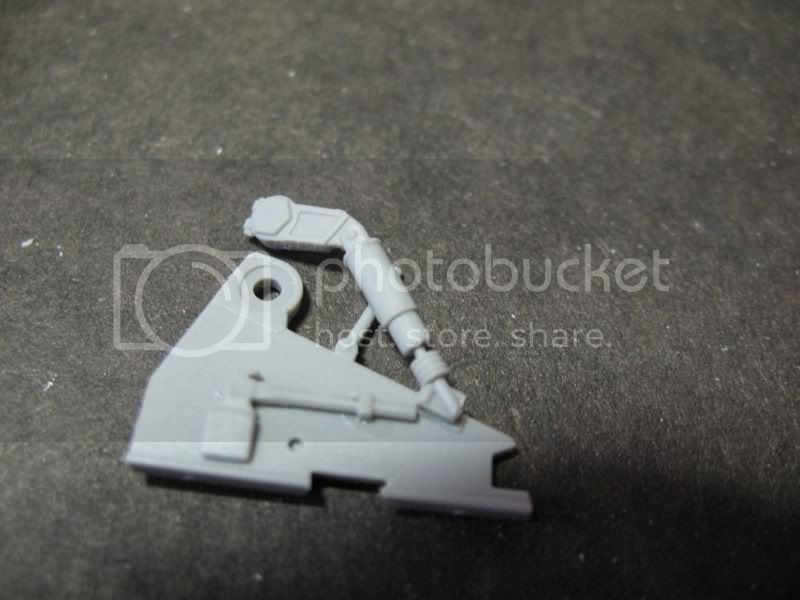
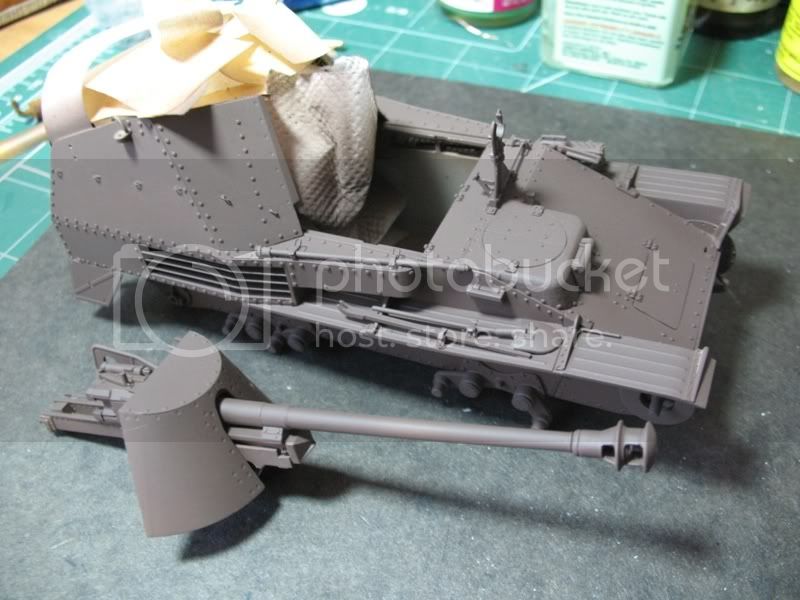
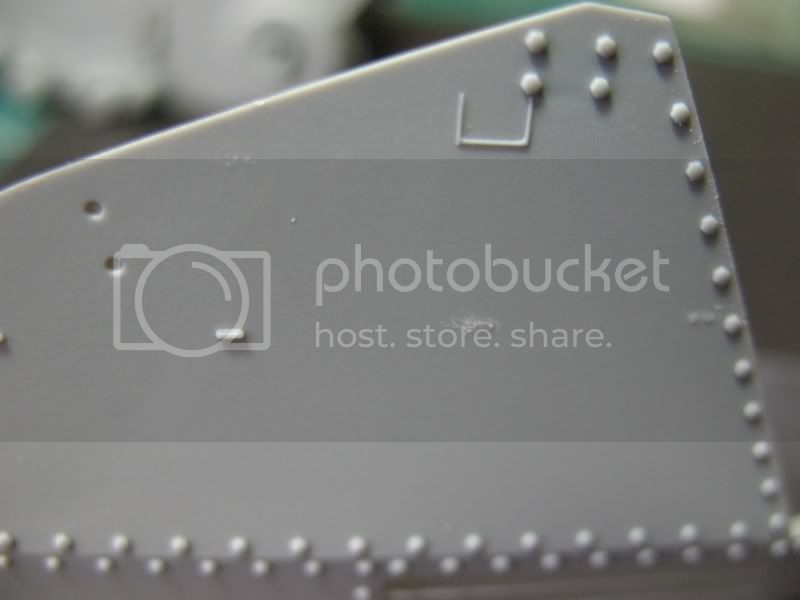
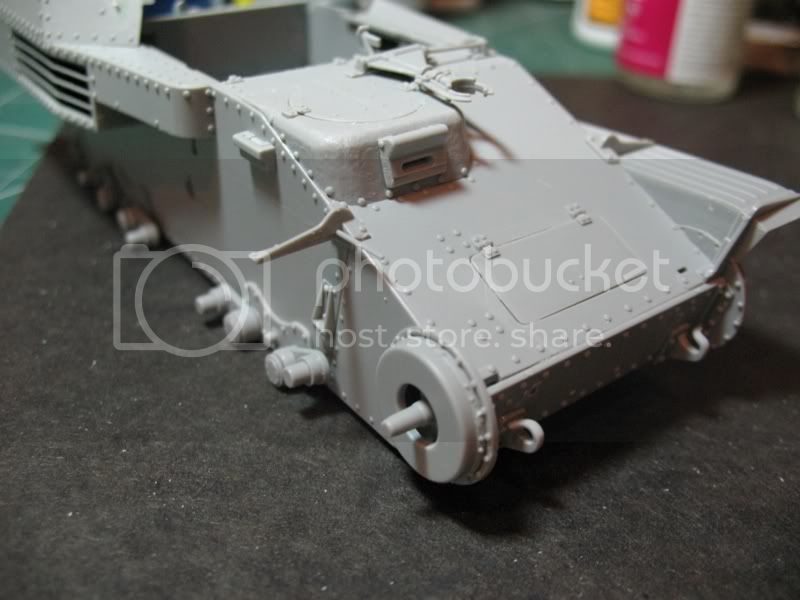
The drivers hood has a slight seam that needs a quick scrape with the knife tip, then I use a little liquid glue to blend the cast pattern in. If you happen to scrape it too smooth, you can try letting the glue set for awhile and press some medium sandpaper on it to give some texture. The travel lock snaps in place, though I recommend a spot of glue at the end of the build. Leave it loose for now if the travel lock will be engaged as it may need to be moved when sliding the barrel through.

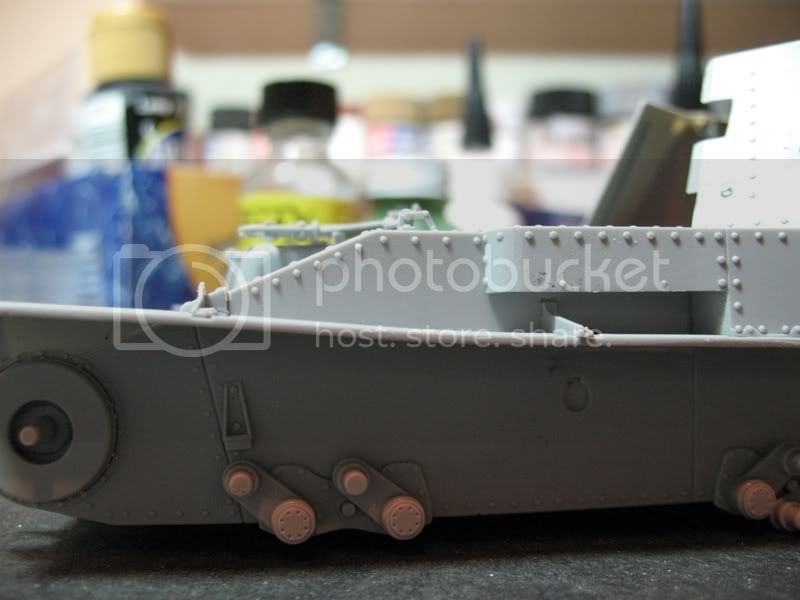
Next up are the fenders, I glued the center support in place first, and gave the fenders a slight bend before installing. The front edge was thinned by scraping the bottom side with my knife, giving a better scaled appearance and making it easier to add some damage.

I start glueing at the center support working towards the front. Then the rear section gets fastened, making sure the fender is holding it's shape. The rear support is added and finally the front support. Notice the slight indention at the hull for the rear support, this can be filled with a little putty after the fenders have set up and the outer end of the support filed smooth


That's where it sits at this point, thanks for looking
jimz66
Visit this Community
Connecticut, United States
Joined: December 15, 2006
KitMaker: 1,165 posts
Armorama: 1,105 posts
Posted: Wednesday, August 13, 2008 - 09:12 AM UTC
This one should be a nice match for your last project James. Off to a fast start. Do me a favor if you can chime in on my Tiger 111, and see what you think as I go along. I could use all the feedback I can get. Thanks.
panamadan
Visit this Community
Minnesota, United States
Joined: July 20, 2004
KitMaker: 1,513 posts
Armorama: 1,449 posts
Posted: Wednesday, August 13, 2008 - 12:58 PM UTC
Great start! I'm watching to see how this stacks up to Tamiya's kit. Dan
biffa
Visit this Community
Tennessee, United States
Joined: September 07, 2005
KitMaker: 881 posts
Armorama: 826 posts
Posted: Wednesday, August 13, 2008 - 02:17 PM UTC
Great start James im looking forward to see how this one goes together i love these spg's and although i have the tamiya one built on the shelf i will most likely do this one down the line,, i will be tagging along

Ron.
c5flies
Visit this Community
California, United States
Joined: October 21, 2007
KitMaker: 3,684 posts
Armorama: 2,938 posts
Posted: Wednesday, August 13, 2008 - 02:39 PM UTC
Jim, thanks for checking in! Yeah, the beginning went fairly quick, it all seemed so familiar Without doing the interior sped things up drastically too. I found your build log, you need to get that build log icon

Hi Dan, I don't have the Tamiya kit, but from what I've read it's a great kit. There are even back date kits to portray an initial model, and of course detail sets like the Eduard add everything you could want

Ron, great to see you here. This would be a nice compliment to the Tamiya kit showing the differences between initial and later versions. Not much difference, but still would be cool. Honest opinion, if you saw the Flakpanzer build, what are the main things I need to improve on?

Thanks for looking, guys
Plasticbattle
#003
Visit this Community
Donegal, Ireland
Joined: May 14, 2002
KitMaker: 9,763 posts
Armorama: 7,444 posts
Posted: Wednesday, August 13, 2008 - 06:42 PM UTC
Hi James. Great start ... will be following this build with interest. Cant get enough of these 38t models.
Do you brush paint the black inside the lourves, or use some sort of pen/marker? What paint do you use, as Ive never had much luck brush painting directly onto the plastic! Cheers.
wbill76
Visit this Community
Texas, United States
Joined: May 02, 2006
KitMaker: 5,425 posts
Armorama: 4,659 posts
Posted: Thursday, August 14, 2008 - 08:27 AM UTC
Off to a good start with this one James, looking forward to seeing it progress.
PantherF
Visit this Community
Indiana, United States
Joined: June 10, 2005
KitMaker: 6,188 posts
Armorama: 5,960 posts
Posted: Thursday, August 14, 2008 - 08:34 AM UTC
Off to a great start! The texture around the drivers hatch looks pretty good, huh?
c5flies
Visit this Community
California, United States
Joined: October 21, 2007
KitMaker: 3,684 posts
Armorama: 2,938 posts
Posted: Thursday, August 14, 2008 - 02:09 PM UTC
Frank, I brush painted with Tamiya flat black, which I never have luck with either. A magic marker is a much better idea, I didn't think of doing that. With the Flakpanzer I just sprayed in there and with the exhaust pipe not much can be seen. With no exhaust running through there on this kit, this was more of a preventive measure.

Definately can not get enough of the 38(t)'s, with the kits available from Tristar and the way DML is pumping them out, I'll be a happy camper for quite a while!

Bill, always a pleasure to see you here, let me know how I'm doing!

Hi Jeff! The texture is well done on the casting, but as I mentioned that fine mold line needs attention or it will stick out like a sore thumb when finished. I still think the rear edge of the hood stands too proud, though I do not have a definitive reference photo clear enough to tell. I tried grinding it a bit thinner but that wasn't one of my brighter moves Better to leave it as is! We'll see what DML does with the welded hood.


Speaking of the cast drivers hood, anybody have the Tristar Flakpanzer that can check how it fits? I'm curious and have not picked that kit up yet.

Thanks for looking everybody!
Plasticbattle
#003
Visit this Community
Donegal, Ireland
Joined: May 14, 2002
KitMaker: 9,763 posts
Armorama: 7,444 posts
Posted: Thursday, August 14, 2008 - 06:43 PM UTC

Quoted Text

Speaking of the cast drivers hood, anybody have the Tristar Flakpanzer that can check how it fits? I'm curious and have not picked that kit up yet.


Hi James. If you check in the blog section of Planet Armor, there is a complete build of the flakpanzer there by Lawerence Quah. Im at work now and don´t have a link for it. Can´t recall any fit problem though. If you don´t find what you want, let me know. I have the Tristar kit, and can do a test fit for you.
jimz66
Visit this Community
Connecticut, United States
Joined: December 15, 2006
KitMaker: 1,165 posts
Armorama: 1,105 posts
Posted: Friday, August 15, 2008 - 08:23 AM UTC
James looking great. Keep it coming. Thanks for finding mine.
c5flies
Visit this Community
California, United States
Joined: October 21, 2007
KitMaker: 3,684 posts
Armorama: 2,938 posts
Posted: Friday, August 15, 2008 - 01:39 PM UTC
Thanks Frank, it looks like Tristars is flush, as far as I can tell from Lawrences' photos. I'm still under the impression, from my reference photos, that there was a slight reveal at the rearmost part of the hood. So I'm going to hold, at this point in time, that DML is too much and Tristar not enough. Though, if by some obscure chance I am correct, Tristars would be easier to raise than trying to lower the DML one.

Jim, I had great intentions to get much farther then I did, but that best laid plan thing got me again! And now that I know where your build is I'll most assuredly keep checking your progress, can you believe I have not built a Tiger yet!
jimz66
Visit this Community
Connecticut, United States
Joined: December 15, 2006
KitMaker: 1,165 posts
Armorama: 1,105 posts
Posted: Monday, August 18, 2008 - 08:37 AM UTC
Well, what the heck are you waiting for. Get on those Tigers, they're great!!!!!!!!!!

Just kidding. Can't wait to see your progress. I'll have some soon. I PROMISE!
c5flies
Visit this Community
California, United States
Joined: October 21, 2007
KitMaker: 3,684 posts
Armorama: 2,938 posts
Posted: Monday, August 25, 2008 - 04:44 PM UTC
Steps 9 and 10 keep you busy building the 'smaller' items for the casemate and getting the pioneer tools ready. The radio components, gas mask cylinders, periscopes and the MG get assembled. With all the PE included it would be nice to have the radio brackets in PE, something I hope Dragon includes in the future. The ammo tubes and frames went together pretty easily, with just one 'cut' line missing (circled in black) and one leg too long (circled in red) per frame. This style frame may be unique to the initial Marder III due to the exhaust running on the inside, even the pictures on the back of the box show the later style Marder III frames. The front strap has etch lines, which makes it more difficult to curve the piece, as it wants to give a sharp bend instead. Something to watch out for.

The 27 PE tabs for the ammo tubes are portrayed completely flat, and should have a slight indentation towards the bottom along with the curve to fit the tube. To do this I first attached the tab to a piece of masking tape and 'rolled' it around one of the shells that fit in the ammo tubes. Right above the shell casing it's narrower which also gave the indention that I was looking for.


The pioneer tools only come without clamps, so the PE ones will have to be used and, unlike the Flakpanzer, these actually go together. I opted for the Griffon Model ones, though I did assemble a couple of the DML ones. Part K14 for the jack isn't shown on the instructions, and with the way the shovel and axe sit on the fenders a small block will need to be added under the clamp to make up the space. The pry bar looks odd to me, and I cut a section off to shorten it, still doesn't look right and may switch it out. The grouser box comes in styrene and PE, as is usual with DML, and this time I tried out the styrene one. I did use the PE clasps for it, and think it looks pretty good for plastic.


Steps 11 and 12 gets the casemate started, adding the bits and pieces previously assembled. I added some wiring to the radio, not accurate of course, but for a first time I just want to see if it adds any interest to the finished model. Some parts are just posed as I'm to the point that some interior painting will need to be done before continuing. I also glued some tissue paper to the crew seats to see if it will add some texture.


Thanks for looking, all comments welcome
marsiascout
Visit this Community
Noord-Brabant, Netherlands
Joined: March 24, 2008
KitMaker: 1,247 posts
Armorama: 913 posts
Posted: Tuesday, August 26, 2008 - 03:01 AM UTC
That looks cool! You surely added a lot of detail to it.

Lars
210cav
Visit this Community
Virginia, United States
Joined: February 05, 2002
KitMaker: 6,149 posts
Armorama: 4,573 posts
Posted: Tuesday, August 26, 2008 - 08:44 AM UTC
James-- great detail, she is looking very nice!
DJ
wbill76
Visit this Community
Texas, United States
Joined: May 02, 2006
KitMaker: 5,425 posts
Armorama: 4,659 posts
Posted: Tuesday, August 26, 2008 - 12:24 PM UTC
Coming along nicely James! It's good that DML included the back part of the clasps for the PaK rounds, but why they didn't include the front strap and buckle part while at it is a little bit of a mystery.
kevinb120
Visit this Community
Virginia, United States
Joined: May 09, 2006
KitMaker: 1,349 posts
Armorama: 1,267 posts
Posted: Tuesday, August 26, 2008 - 12:36 PM UTC

Quoted Text

Hi James. Great start ... will be following this build with interest. Cant get enough of these 38t models.


Ditto! I love all things 38(t) series.

I'll be watching this one
c5flies
Visit this Community
California, United States
Joined: October 21, 2007
KitMaker: 3,684 posts
Armorama: 2,938 posts
Posted: Tuesday, August 26, 2008 - 01:25 PM UTC
Lars, DJ, Bill and Kevin........thanks, guys, always nice to hear encouragement.

Criticism is good, too, so don't be shy


Quoted Text

Coming along nicely James! It's good that DML included the back part of the clasps for the PaK rounds, but why they didn't include the front strap and buckle part while at it is a little bit of a mystery.


Totally agree, Bill. I noticed the absence of the restraining straps while doing the review, and during the build have used PE that was not really necessary, yet lack other details where it would be more appreciated. Alas, there's always room for aftermarket!
jimz66
Visit this Community
Connecticut, United States
Joined: December 15, 2006
KitMaker: 1,165 posts
Armorama: 1,105 posts
Posted: Friday, August 29, 2008 - 09:14 AM UTC
That interior is looking sweet James. Keep it coming. Hope to see more progress by the next time I get in here, time in the Library will be short starting now. The college starts on Tuesday. Good luck.
f1matt
Visit this Community
Manitoba, Canada
Joined: August 13, 2006
KitMaker: 1,021 posts
Armorama: 805 posts
Posted: Sunday, August 31, 2008 - 08:04 PM UTC
Very nice James. These Dragon kits are just overflowing in detail.

-Matt
Plasticbattle
#003
Visit this Community
Donegal, Ireland
Joined: May 14, 2002
KitMaker: 9,763 posts
Armorama: 7,444 posts
Posted: Sunday, August 31, 2008 - 08:59 PM UTC
Good progress James. The fighting area is starting to look nice and busy


Quoted Text

Coming along nicely James! It's good that DML included the back part of the clasps for the PaK rounds, but why they didn't include the front strap and buckle part while at it is a little bit of a mystery.


These can also be made quite easily .... and they´ll actually look better than their etched alternatives. Get a rectangual/squared profile in the size you want the clasps, and wrap some thin metal wire around tightly. Pull out the profile and your left with a spring type piece. Each spring will be a clasp ... cut with a knife. Use some lead foil ... even tape ... and fix as straps .... both open and closed examples... viola.
Any of the times Ive seen this done ... the results are far better than the etch as they look more natural. The problem with etch is they are all too perfect. Hopefully you understand what I mean ... I can scan an image if you need this explained further.
wbill76
Visit this Community
Texas, United States
Joined: May 02, 2006
KitMaker: 5,425 posts
Armorama: 4,659 posts
Posted: Monday, September 01, 2008 - 06:28 AM UTC
That's a neat little tip Frank! This type were leather belts with buckles though, not the normal type of metal retaining clips, so if displayed "empty" they would need some sag/slack to represent that properly.
c5flies
Visit this Community
California, United States
Joined: October 21, 2007
KitMaker: 3,684 posts
Armorama: 2,938 posts
Posted: Monday, September 01, 2008 - 07:43 AM UTC
Thanks Matt and Frank

Great idea Frank, if I'm understanding you correctly, the square wire part will be the buckle and then just add the straps? Fasten 1 strap to the 'buckle' and either thread the other through or leave dangling. I'll definately try that out on another build, as this one is not turning out anywhere near good enough to warrant the extra effort.
c5flies
Visit this Community
California, United States
Joined: October 21, 2007
KitMaker: 3,684 posts
Armorama: 2,938 posts
Posted: Saturday, September 13, 2008 - 11:36 AM UTC
Not many in progress pics on the gun build as it was straight forward. The PAK included was released a few years ago by DML, and though it's done well, it's noticeable how the injection process has improved over the years.

At first I wasn't going to use the mudguards as the overall look doesn't thrill me, but since this will most likely be the only opportunity to have them portrayed, I decided to use them. And once they were on they looked pretty cool. The inside of the gun shield has 4 pin marks which at first I thought would need to be filled, on closer inspection these were taken care of by Dragon and only needed a slight sanding, they surprised me there!

A base coat of Rotbraun was applied, followed by Dunkelgelb and camo in Olivegrun. Future is drying now and awaiting decals, more to come soon.

Remember not to glue the muzzle brake if the travel lock will be used, and no glue here so the gun can elevate.......


With a coat of Rotbraun......


Most of the pieces awaiting assembly after the Dunkelgelb.......


And with the camo applied.......


Thanks for looking

 _GOTOTOP