_GOTOBOTTOM
Armor/AFV: British Armor
Discuss all types of British Armor of all eras.
Hosted by Darren Baker
Universal Carrier with wading screens
exer
Visit this Community
Dublin, Ireland
Joined: November 27, 2004
KitMaker: 6,048 posts
Armorama: 4,619 posts
Posted: Thursday, September 04, 2008 - 11:58 PM UTC

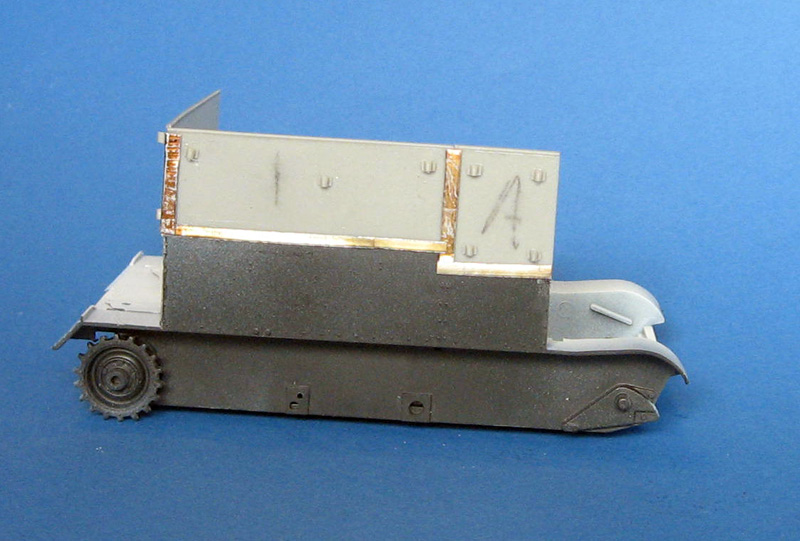
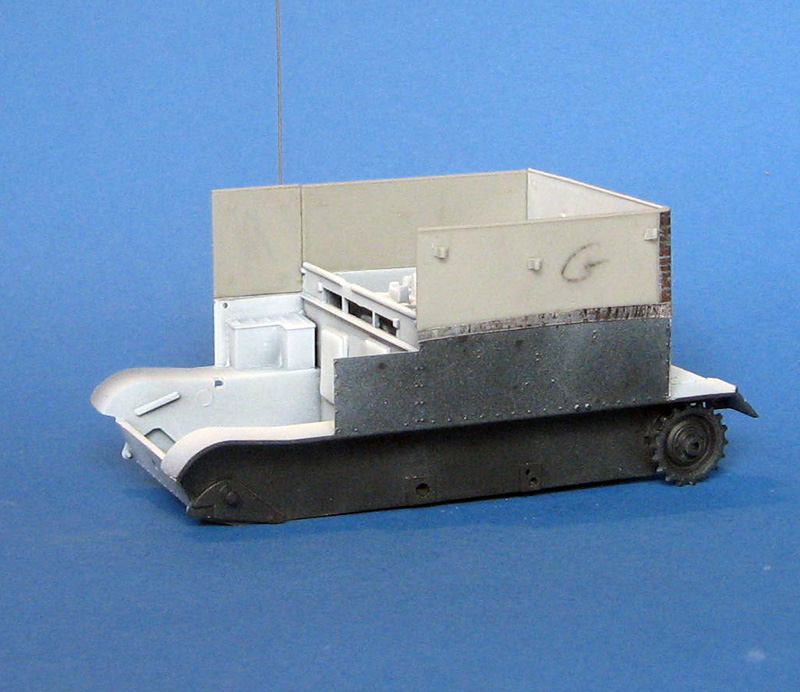
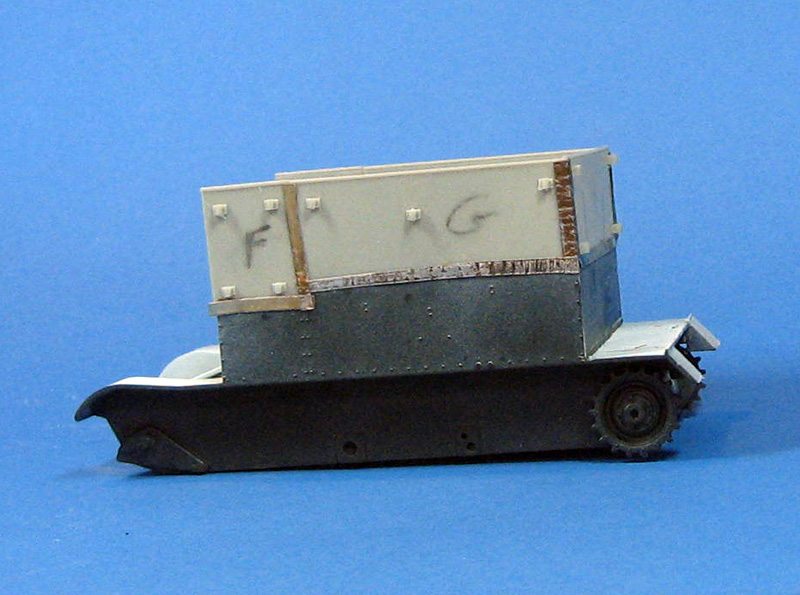
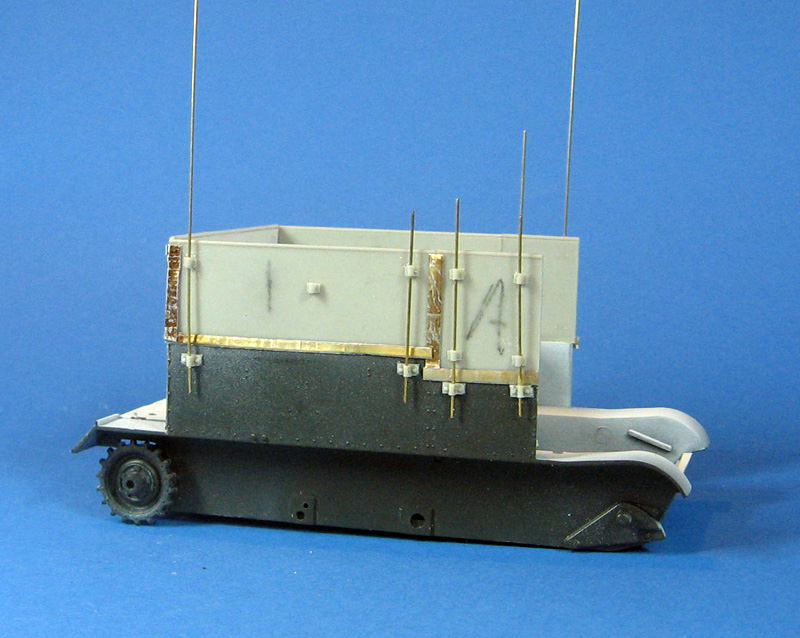
Following on from my review of the Resicast Deep Wading Screens for the Universal carrier; http://armorama.kitmaker.net/review/3443

I decided to do a full build blog of both the carrier and the screens set.

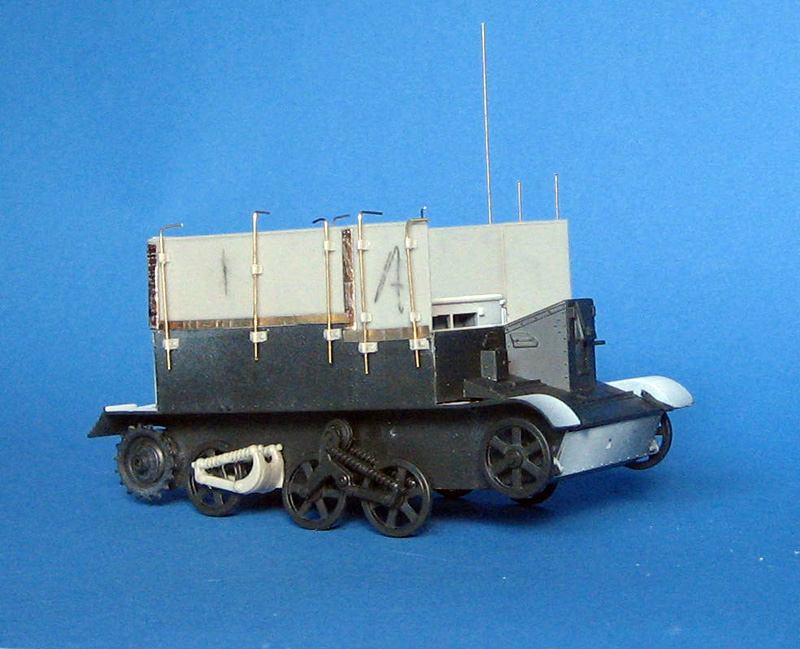
There are some photos up on the Imperial War Museum website of carriers wearing the screens including one in Burma but I decide to base my model on this one:


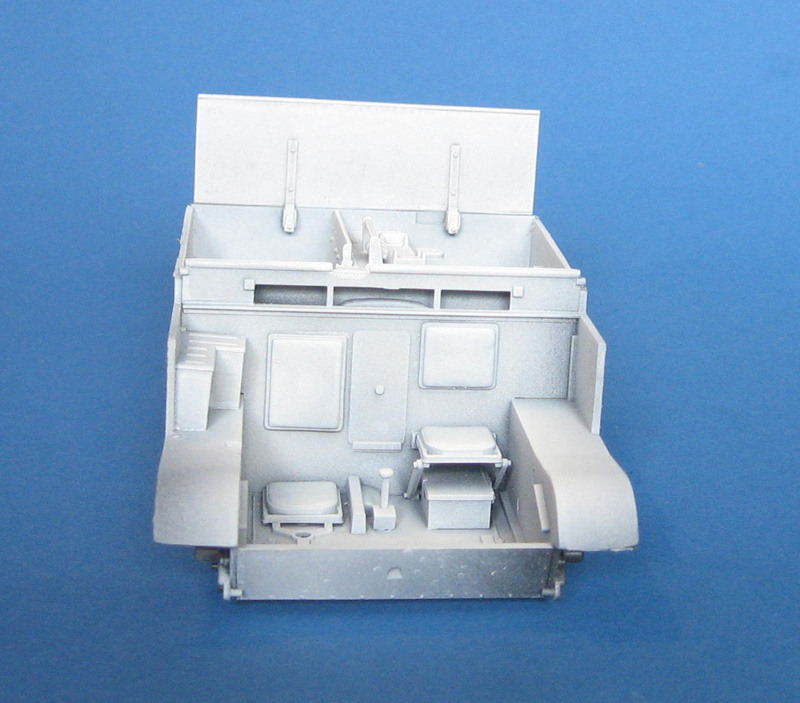
Because firstly it has a Fifty Cal MG mounted and secondly I can use the resicast overloaded suspension parts and other bits and pieces from this carrier stowage set

http://armorama.kitmaker.net/review/3364
exer
Visit this Community
Dublin, Ireland
Joined: November 27, 2004
KitMaker: 6,048 posts
Armorama: 4,619 posts
Posted: Friday, September 05, 2008 - 01:07 AM UTC
I won't go over the review again except to say that I pencilled the part identifications on after removing the pour plugs to avoid confusion during the build.


To avoid resin dust I dip my razor saw in water which makes the dust clump up on the blade and fall away in the water when dipped again.

As this Blog began as a review of the Resicast Screens set I didn't take any photos of the carrier build up to the point where I began to add the screens.

The Tamiya kit is ancient and said to be inaccurate. How inaccurate I don't know but when I asked Jordan Baker, who backdated the kit to an earlier version over on ML and happens to own a real one, for a snag list he said he wouldn't know where to begin. Inaccuracies aside it goes together like most Tamiya kits with no fit problems whatsoever.
exer
Visit this Community
Dublin, Ireland
Joined: November 27, 2004
KitMaker: 6,048 posts
Armorama: 4,619 posts
Posted: Friday, September 05, 2008 - 01:18 AM UTC
The resicast instructions say to begin by fitting the rear panel first. Ideally this should be done before it's glued in place as mine was so I used my razor saw to cut the part away and attach the screen and brackets, but before adding any of the panels the rounded protection rail has to be removed from the top of all the kit walls.

I reattached it to the carrier and then primed the inside using a can of Citadel Skull white. I prefer to prime in white as i think it works as a kind of pre highlighting. I'll build up the interior with washes of British OD and I don't want the final colour to be too dark.


You can see how thick the kit walls are in the photo. Once the rear panel is attached I just worked my way around the kit adding one panel at a time.


The joins on the real carriers were sealed with bostik tape, to simulate this Resicast advise using foil, paper or milliput. I chose to use foil so I treated my dog to some fancy dogfood in a thick foil container and after washing it cut some strips off. I smoothed it out with a spoon but it retained some texture which looked okay to me. I used CA glue to attach it to the kit


210cav
Visit this Community
Virginia, United States
Joined: February 05, 2002
KitMaker: 6,149 posts
Armorama: 4,573 posts
Posted: Friday, September 05, 2008 - 02:45 AM UTC
Pat-- fascinating build. Looks good.
DJ
AlanL
Visit this Community
England - East Anglia, United Kingdom
Joined: August 12, 2005
KitMaker: 14,499 posts
Armorama: 11,675 posts
Posted: Friday, September 05, 2008 - 07:29 AM UTC


Al
exer
Visit this Community
Dublin, Ireland
Joined: November 27, 2004
KitMaker: 6,048 posts
Armorama: 4,619 posts
Posted: Friday, September 05, 2008 - 08:27 AM UTC

Quoted Text


Al


I should say Al, that it was seeing your Universal Carrier builds here on Armorama that made me want to tackle the subject myself.
panamadan
Visit this Community
Minnesota, United States
Joined: July 20, 2004
KitMaker: 1,513 posts
Armorama: 1,449 posts
Posted: Friday, September 05, 2008 - 02:52 PM UTC
Another Bren Gun Carrier! Dan
AlanL
Visit this Community
England - East Anglia, United Kingdom
Joined: August 12, 2005
KitMaker: 14,499 posts
Armorama: 11,675 posts
Posted: Friday, September 05, 2008 - 06:35 PM UTC

Quoted Text

Another Bren Gun Carrier! Dan


Aren't they great


Pat, nice choice of subject, there are good possibilities with the one screen down. The .50 cal in this one will make it something different.

Are you doing the posing crew?

Al
exer
Visit this Community
Dublin, Ireland
Joined: November 27, 2004
KitMaker: 6,048 posts
Armorama: 4,619 posts
Posted: Friday, September 05, 2008 - 10:38 PM UTC

Quoted Text

Are you doing the posing crew?


I'm not going for the exact poses but yes I hope to have the same number of figures-oops! -just counted them, there are 14 so maybe not quite that many
AlanL
Visit this Community
England - East Anglia, United Kingdom
Joined: August 12, 2005
KitMaker: 14,499 posts
Armorama: 11,675 posts
Posted: Friday, September 05, 2008 - 10:59 PM UTC

Quoted Text


Quoted Text

Are you doing the posing crew?


I'm not going for the exact poses but yes I hope to have the same number of figures-oops! -just counted them, there are 14 so maybe not quite that many


14 - recorded in print too

It's a good little scene as it stands. Nice selection of uniforms, should look great. Any idea what the white thing on the '50 cal is?

Al
exer
Visit this Community
Dublin, Ireland
Joined: November 27, 2004
KitMaker: 6,048 posts
Armorama: 4,619 posts
Posted: Friday, September 05, 2008 - 11:35 PM UTC


Fitting the rods and brackets turned out to be quite simple. I glued the brackets onto the brass rod, applied a spot of CA glue to the back of the brackets and then threaded the rod through the drilled brackets on the panel while holding the bracket away from the surface. When it was in the correct position I let it touch the panel.


I worked my way around the model but I didn't fit any of the front brackets yet as I'm modelling the carrier with the front screens removed. I know the brackets still need to be fitted but I'll figure that out later. I went on to fit the suspension. The IWM photo shows the carrier sitting back on its suspension so I used the resicast suspension pieces from the carrier stowage set


panamadan
Visit this Community
Minnesota, United States
Joined: July 20, 2004
KitMaker: 1,513 posts
Armorama: 1,449 posts
Posted: Saturday, September 06, 2008 - 01:46 AM UTC
Formations .50 cal looks like it would fit the bill here. Dan
AlanL
Visit this Community
England - East Anglia, United Kingdom
Joined: August 12, 2005
KitMaker: 14,499 posts
Armorama: 11,675 posts
Posted: Thursday, September 25, 2008 - 09:13 AM UTC
Hi Pat,

Nice work, it's coming along well.

Al
 _GOTOTOP