_GOTOBOTTOM
Armor/AFV
For discussions on tanks, artillery, jeeps, etc.
REVIEW
LionRoar Zundapp KS750
wbill76
Visit this Community
Texas, United States
Joined: May 02, 2006
KitMaker: 5,425 posts
Armorama: 4,659 posts
Posted: Sunday, September 07, 2008 - 08:05 AM UTC
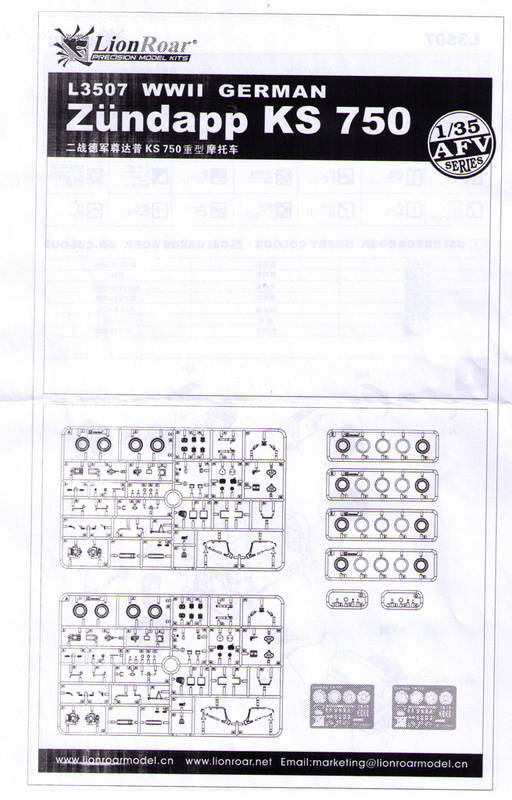
Lion Roar has provided a "pre-production" sample for review and comment by the users here at Armorama. This "First Look" contains detailed sprue shots and complete instructions for the upcoming release of the 1/35 kit # L3507 WWII German Zundapp KS750 motorcycle. All Armorama users are invited to comment and provide feedback on the kit before it is released to the public.

Link to Item


This thread will also be used by one of our Contributors to post in a WIP assembly of the kit in question, so watch this space!

If you have comments or questions please post them here.

Thanks!
wbill76
Visit this Community
Texas, United States
Joined: May 02, 2006
KitMaker: 5,425 posts
Armorama: 4,659 posts
Posted: Monday, September 08, 2008 - 04:12 AM UTC
bump
CMOT
Staff MemberEditor-in-Chief
ARMORAMA
Visit this Community
England - South West, United Kingdom
Joined: May 14, 2006
KitMaker: 10,954 posts
Armorama: 8,571 posts
Posted: Monday, September 08, 2008 - 04:44 AM UTC
Bill as you have taken the pictures what was your opinion of the tires? I ask as they seem to be the hardest parts to replicate accurately. I also note a large number of very finely moulded parts, how hard do you feel it will be to remove from the sprue without damage.
wbill76
Visit this Community
Texas, United States
Joined: May 02, 2006
KitMaker: 5,425 posts
Armorama: 4,659 posts
Posted: Monday, September 08, 2008 - 06:58 AM UTC

Quoted Text

Bill as you have taken the pictures what was your opinion of the tires? I ask as they seem to be the hardest parts to replicate accurately. I also note a large number of very finely moulded parts, how hard do you feel it will be to remove from the sprue without damage.


Vast majority of the parts are connected via smal "nodes' that facilitate using sprue cutters to remove and then clean up or trim down as necessary. Delicate parts are arranged on the sprues in a way that makes them easier to access the connection points for removal, so if care is exercised, there shouldn't be a problem even with the smaller items.

As for the tires, the "slice" approach seems to have taken a page from DML to create high detail tread patterns and, depending on how they build up, ought to be pretty impressive. The set also includes what I can only describe as "off road" tires but not sure how accurate they are in terms of use...the instructions don't point to them, only to the "slice" tires so can't comment on that with any degree of certainty.
210cav
Visit this Community
Virginia, United States
Joined: February 05, 2002
KitMaker: 6,149 posts
Armorama: 4,573 posts
Posted: Monday, September 08, 2008 - 07:04 AM UTC
Interesting...should prove to be of value in a diorama
lespauljames
Visit this Community
England - South West, United Kingdom
Joined: January 06, 2007
KitMaker: 3,661 posts
Armorama: 2,764 posts
Posted: Wednesday, September 17, 2008 - 04:38 AM UTC
Hello
The Zundapp ks750 was a Motorcycle used by the Germans in the second world war,
extensively used by many branches of the military, the ks750 is more recognised when it is paired with a sidecar, this build log will follow my progress through Lion Roar's Zundapp ks750 Motorcycle.

First Impressions
when i opened the box on arrival the one thing that struck me was the smallness and detail of the parts in this kit, the handlebars in particulat are pretty spectacular!
Lion Roar really have moulding down to a T here as will be evident as time progresses.
Step One

Step one deals with the construction of the engine


if you compare Bills build tho this picture you will see that he has mistakenly attached part A68 and A69 on the wrong sides and now has a little overhang on the sides of his piston housings.
There is a Wing nut to be added Labled PE 18, effecively thies piece does not exist , the PE frets go up to PE 16,
PE 7 however is a set of 2 Wingnuts, and after scanning through the instructions i have to conclude that PE 7 is in fact the Mysterious PE 18!


so far the kit has gone together with minimal effort.

EDIT
Apologies, after mulling it over in my head for a bit and examining the cylinder heads, i realided that the piping connections were too low, so after replacing A 68 and A 69 on to the instructed parts all was eventually well
Lion Roar can Remedy this by clarifying the instructions here a little better.

lespauljames
Visit this Community
England - South West, United Kingdom
Joined: January 06, 2007
KitMaker: 3,661 posts
Armorama: 2,764 posts
Posted: Thursday, September 18, 2008 - 08:28 AM UTC
hello, sorry for the bad pics here, by the time i got back from college the sun was going down

so far the only difficulty i have had was lining up the suspention arms, but this kit is fairly delicate so some tricky bits are to be expected, so far there are no detail issues:) it a greatt little bike


lespauljames
Visit this Community
England - South West, United Kingdom
Joined: January 06, 2007
KitMaker: 3,661 posts
Armorama: 2,764 posts
Posted: Thursday, September 18, 2008 - 11:13 AM UTC
small update,

parts A25 and A26 are labled both as aA25 in the instructions when they are actually 2 different pieces, these parts are the bikers footrests?!
bill_c
Staff MemberCampaigns Administrator
MODEL SHIPWRIGHTS
Visit this Community
New Jersey, United States
Joined: January 09, 2008
KitMaker: 10,553 posts
Armorama: 8,109 posts
Posted: Thursday, September 18, 2008 - 11:19 AM UTC

Quoted Text

If you compare Bills build tho this picture you will see that he has mistakenly attached part A68 and A69 on the wrong sides and now has a little overhang on the sides of his piston housings.


Jimmy, I agonized over that step (which follows the instructions, BTW). I think that LR is attempting to capture the "offset" of the Zuendapp cylinder heads. I looked at several real bikes, but this one shows it well:

http://svsm.org/gallery/Zundapp_motocycle/IMGP6987

I think frankly it's a mistake in the design and that NEITHER your solution (matching up the heads) nor mine (allowing an obvious offset) is satisfactory. But I would like to hear from others on this.
lespauljames
Visit this Community
England - South West, United Kingdom
Joined: January 06, 2007
KitMaker: 3,661 posts
Armorama: 2,764 posts
Posted: Thursday, September 18, 2008 - 12:24 PM UTC
hmm, i apologise, although its a minimal mistake, im sure a soloution can or will be found,
does your instructions follow the mistakes in the instructions i have found, ie A25 and A26
alanmac
Visit this Community
United Kingdom
Joined: February 25, 2007
KitMaker: 3,033 posts
Armorama: 2,953 posts
Posted: Thursday, September 18, 2008 - 01:06 PM UTC
Hi

Not sure what you are talking about as regards "off set."

The engine is a horizontally opposed twin cylinder design, just like a BMW. If looking down on the engine from above the cylinder heads are offset. One sits forward of the other, otherwise the conrods connecting the pistons would be trying to share the same connection point on the crankshaft. When you first get on a bike like this, and it's the same with the Moto Guzzi V twins it seems a little strange because your foot etc is closer to one cylinder than the other, but you soon get use to it and not give it another thought.

Here is a line drawing of the BMW engine and you can make out the two cylinder heads are staggered as in the Zundapp.

http://www.geocities.com/knut_brauteset/boxer.gif

Alan
alanmac
Visit this Community
United Kingdom
Joined: February 25, 2007
KitMaker: 3,033 posts
Armorama: 2,953 posts
Posted: Thursday, September 18, 2008 - 02:06 PM UTC
On looking at the pictures and reading through again I think I see what you mean. The cylinder heads themselves have been glued on the wrong sides, stuck to the wrong barrels, thus the inlet is now in the exhaust pipes position.

Of course the right way up is to have the gap at the top for the spark plug, so that part is pretty obvious but unless you study the engine you'll not know which cylinder head goes on which side. The larger of the two finned areas go to the front. This is no doubt because this is where the hot exhaust gases are coming out of the barrels and as such need a greater cooling area, whilst the side connected to the carb's is bringing in petrol /air mixture and therefore is not getting as hot.

It needs a way that ensures when building the kit you can't fit them on the wrong sides. Two different sized or shape locating studs would do the trick.

Alan
bill_c
Staff MemberCampaigns Administrator
MODEL SHIPWRIGHTS
Visit this Community
New Jersey, United States
Joined: January 09, 2008
KitMaker: 10,553 posts
Armorama: 8,109 posts
Posted: Friday, September 19, 2008 - 04:16 AM UTC
After looking at the Jimmy's version and mine, I have no clarity on which is correct. I suspect that LR needs to look at this carefully and make sure the instructions are corrrect. I have gone back and forth looking at my build and his, and can't come to a definitive conclusion (though I still think my build comes closer to the real version).
alanmac
Visit this Community
United Kingdom
Joined: February 25, 2007
KitMaker: 3,033 posts
Armorama: 2,953 posts
Posted: Friday, September 19, 2008 - 05:39 AM UTC
Hi Bill

I've gone back and looked at your close up pictures of the models engine build. I can see clearly the cylinder heads are stuck on back to front. They should finish flush with the front of the barrels and the exhaust outlet. Yours are back slightly showing the flat top of the barrel part of the kit which would be covered completely by the cylinder head.

If you look at the kit and the actual engine you'll see the finned area of the cylinder head where the exhaust valves would live etc. is slightly larger than the side which the inlet valve lives. The larger, although its not apparent it's that much bigger unless you study it, goes towards the front of the bike.

I have to say it's something easily done and nothing to be ashamed or feel bad about. I'm sure I'll do many more c*ck ups in my builds.

It all looks very nice. Thanks for the build you two.

All the best.

Alan
c5flies
Visit this Community
California, United States
Joined: October 21, 2007
KitMaker: 3,684 posts
Armorama: 2,938 posts
Posted: Friday, September 19, 2008 - 05:50 AM UTC

Quoted Text

Hi Bill


If you look at the kit and the actual engine you'll see the finned area of the cylinder head where the exhaust valves would live etc. is slightly larger than the side which the inlet valve lives. The larger, although its not apparent it's that much bigger unless you study it, goes towards the from of the bike.


Alan


I noticed that too, Alan, though at first glance I thought both heads were molded the same and the bolt pattern would be incorrect. Closer inspection does show that they're molded correctly, good eyes on that one Alan!
lespauljames
Visit this Community
England - South West, United Kingdom
Joined: January 06, 2007
KitMaker: 3,661 posts
Armorama: 2,764 posts
Posted: Friday, September 19, 2008 - 07:18 AM UTC
if the suns out here tomoorow there will vbe some piccys for you, so far there have been no other errors, most have been on the instructions so far.
bill_c
Staff MemberCampaigns Administrator
MODEL SHIPWRIGHTS
Visit this Community
New Jersey, United States
Joined: January 09, 2008
KitMaker: 10,553 posts
Armorama: 8,109 posts
Posted: Friday, September 19, 2008 - 09:11 AM UTC
Yes, it does appear then that the instructions are incorrect.

Now, correcting this will be a bear and a half....
lespauljames
Visit this Community
England - South West, United Kingdom
Joined: January 06, 2007
KitMaker: 3,661 posts
Armorama: 2,764 posts
Posted: Sunday, September 28, 2008 - 04:07 AM UTC
Well what a week, i have had little time to progresss with any modells lately for the moment, im going to focus on the bike, here, wich has not much to go, but i apologise for being slow, college has reall piled the heat on!
when the bike is done it will be back tot he bedford super detail!


wbill76
Visit this Community
Texas, United States
Joined: May 02, 2006
KitMaker: 5,425 posts
Armorama: 4,659 posts
Posted: Sunday, September 28, 2008 - 05:35 AM UTC
Jimmy,

Have you been able to confirm if the LR kit contains sufficient parts to build 2 full bikes? When I was taking the pics of the sprues it seemed like that was the case but couldn't be sure. Now that you've got this one nearly built up, are there in fact 2 full bikes in this particular kit?
lespauljames
Visit this Community
England - South West, United Kingdom
Joined: January 06, 2007
KitMaker: 3,661 posts
Armorama: 2,764 posts
Posted: Sunday, September 28, 2008 - 05:42 AM UTC
there are certainly 2 kits in the pack Bill,
and so far it is a brilliant build, 2 kits = Mega value!!
bill_c
Staff MemberCampaigns Administrator
MODEL SHIPWRIGHTS
Visit this Community
New Jersey, United States
Joined: January 09, 2008
KitMaker: 10,553 posts
Armorama: 8,109 posts
Posted: Monday, September 29, 2008 - 05:04 AM UTC
Hey, wait a minute!! I only got ONE kit in my stash!!!

Just kidding. I got the two stowage carts to tow behind.

Am waiting on some DAK gruengelb paint to finish mine. And will need to scrape up some motorcycle license plate decals.
 _GOTOTOP