_GOTOBOTTOM
Armor/AFV
For discussions on tanks, artillery, jeeps, etc.
REVIEW
LionRoar Zundapp KS750 with Sidecar
wbill76
Visit this Community
Texas, United States
Joined: May 02, 2006
KitMaker: 5,425 posts
Armorama: 4,659 posts
Posted: Sunday, September 07, 2008 - 08:10 AM UTC
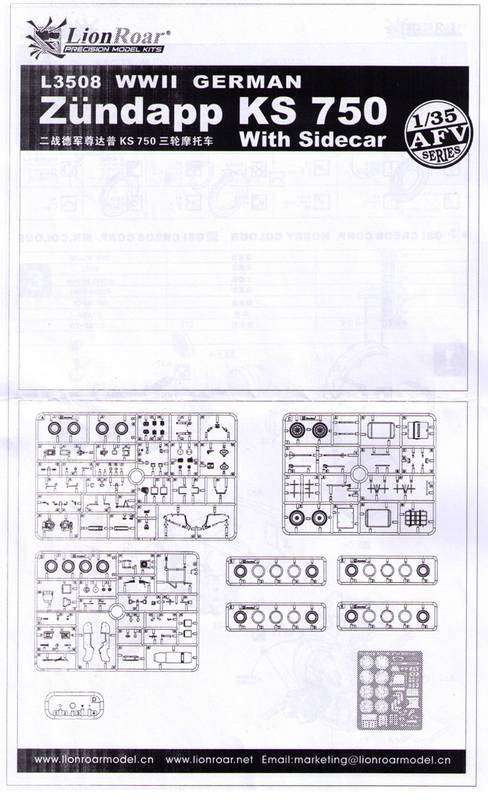
Lion Roar has provided a "pre-production" sample for review and comment by the users here at Armorama. This "First Look" contains detailed sprue shots and complete instructions for the upcoming release of the 1/35 kit # L3508 WWII German Zundapp KS750 with Sidecar motorcycle combination. All Armorama users are invited to comment and provide feedback on the kit before it is released to the public.

Link to Item


This thread will also be used by one of our Contributors to post in a WIP assembly of the kit in question, so watch this space!

If you have comments or questions please post them here.

Thanks!
alanmac
Visit this Community
United Kingdom
Joined: February 25, 2007
KitMaker: 3,033 posts
Armorama: 2,953 posts
Posted: Sunday, September 07, 2008 - 08:43 AM UTC
Hi Bill

Thanks to you and Lion Roar for posting these images. Based on the pictures I'd have to say this is the best 1/35 scale motorcycle kit on the market. The fins on the cylinder heads alone are outstanding, such fine detail superbly done.

At first look I was surprised at the amount of plastic compared to brass involved within the kit. If they continue to produce kits of this standard we will be spoilt for choice on suppliers of outstanding models.

Great first impression, look forward to seeing the built up kit and the comments on how well it goes together.

Thanks

Alan

Now I've got a nice set of BMW and Zundapp motorcyle kits from Tamiya and Italeri to sell if anybody's interested in them
wbill76
Visit this Community
Texas, United States
Joined: May 02, 2006
KitMaker: 5,425 posts
Armorama: 4,659 posts
Posted: Monday, September 08, 2008 - 04:13 AM UTC
Alan,

Have to agree, the level of molding is very high, both in quality and detail.
bill_c
Staff MemberCampaigns Administrator
MODEL SHIPWRIGHTS
Visit this Community
New Jersey, United States
Joined: January 09, 2008
KitMaker: 10,553 posts
Armorama: 8,109 posts
Posted: Sunday, September 14, 2008 - 06:27 AM UTC
Build Log: Zündapp KS 750 by Lion Roar

Bill Plunk asked me to take over the reins of this carriage and move the process forward with a build of the model. My overall impression of the parts was favorable, with no obvious flash, etc. But once I got rolling on the engine assembly, I found some areas of concern. Still, this is a pre-production sample, and some of the problems I encountered may be fixed before the kit is on-sale to the general public.

That Zündapp was in bikes at all was a strange twist of fate, since the company started out making explosive detonators in 1917. The firm name is one of those usual German contractions of something much longer: Zünder- (“detonator”) und Apparatebau G.m.b.H). After the end of WW I, the bottom fell out of that market, so the company looked at other ideas, including motorcycles. Theirs was the first closed-case engine, and the K in KS 750 stands for “Kardanantrieb” or “universal joint drive.” It was an innovation that led other German firms like BMW to a drive shaft technology while English and American bikes followed the chain drive route. But I digress.

Overall

This kit takes a huge leap in improving the quality and detailing of 1/35th scale motorcyles. It is not for the beginner modeler, since the photo etched brass is usually integral to the assembly and not an alternative. The PE came with a plastic film on both sides, which protected the smaller parts but required some care when removing. The molding is crisp, with a minimum amount of seam lines, but the knock-out holes and ejector pins are among the worst I’ve ever seen. I don’t know if that’s because this is a pre-production sample, or if Lion Roar needs to improve QA at the factory. Yet even keeping in mind some of the problems, this is a kit I would purchase myself for other diorama uses, and would give it a 90% if I were doing an in-box review.

The Engine

The build starts with the engine block, and the biggest problem starting out was the amount and ferocity of ejector pin marks. The block will not go together without quite a bit of clean-up, and since the parts are small, it makes for some eye strain. The two blocks are molded in four parts with the seam going right down the top of the cooling fins, making filling and sanding almost impossible. But the level of detailing is very high, including three pieces of PE brass that add ignition wiring and a “butterfly” twist cap for the spout where the crankcase oil goes in.

The engine design is oddball enough that the kit looks like it goes together wrong: the outer cylinder heads seem to be off-center when joined to the base, and I was tempted to reverse the order of the parts until I looked at the original (see photo below). Lion Roar has attempted to capture that offset, though I think the base of their cylinders is too large.


(Notice in the photo above how the oil filler seems to be just a nut instead of any easy access).


One disappointment is the 2 PE spark plug cables which seem to attach between the cylinder heads with no particular logic other than the end of their length. In reality, the wires attach to a small rod or spark plug housing. Definitely an oversight on the part of the kit designers. But LR has captured well the curved kick starter. The RS 750 had both straight and curved kick starter arms. The company has also included two versions of the cylinder heads, one rough (shown), the other with a smooth cap (not included in this build).


bill_c
Staff MemberCampaigns Administrator
MODEL SHIPWRIGHTS
Visit this Community
New Jersey, United States
Joined: January 09, 2008
KitMaker: 10,553 posts
Armorama: 8,109 posts
Posted: Sunday, September 14, 2008 - 06:33 AM UTC
Wheels

The kit really jumps to the head of the motorcyle kit pack with the tires. Most kits use clunky styrene moldings of the tire treads (including the recent and pricey Master Box release). But Lion Roar has taken a page from Dragon’s playbook and molded their wheels/tires in 5 "slices." The result is a surprisingly realistic tread pattern for a kit in this scale.

One caution, though, is LR fails to clearly explain how the components go together: again, counter to intution, you place the sharper, outer edges away from the part next to it, allowing for four tread grooves.


Unlike other kits I’ve seen, you have no styrene fallback with this one when it comes to the wheel spokes: you simply must use the PE upgrade. I applaud that decision, since the results speak for themselves.


The PE parts are very delicate, and should only be attempted by experienced modelers. The directions say to bend them, which left me no real clue as to how that should be done. My solution was to affix the PE to the outer halves of the wheels with CA glue, and when dry, to press outward on both extremely carefully with a hobby knife handle. Too much pressure will distort the “trueing” of the spokes or break them. You want the outer rims of the PE spoke galaxies to meet the styrene brake assemblies (A48 & 49 and B6 & 7) and hubs (A50-51 & B8).

Front Fork

Putting together the front fork is one of those exercises to test the mettle and steadiness of your hands, since it means getting the two fork halves to line up with the headlight/speedometer, fork divider, fender and axle. I was surprised how well it went together, with a minimum of hassle. I would recommend putting this assembly aside when finished and allowing the glue to harden the welds, but would also check back frequently to make sure the “true” of the alignment holds.

Desmoquattro
Visit this Community
New Brunswick, Canada
Joined: September 10, 2008
KitMaker: 235 posts
Armorama: 168 posts
Posted: Sunday, September 14, 2008 - 09:03 AM UTC
Very nice detail.

I would suggest ditching the PE spark plug leads in favour of a piece of wire with a small sheath for the plug cap. The PE lead looks too delicate. I use some miniature insulated wire from Top Studio - it's a single strand with insulation, stripping away the insulation save for a small piece to represent the plug cap would look pretty good in this scale. Wire could also be used to represent the control cables.
lespauljames
Visit this Community
England - South West, United Kingdom
Joined: January 06, 2007
KitMaker: 3,661 posts
Armorama: 2,764 posts
Posted: Sunday, September 14, 2008 - 09:11 AM UTC
Jason i can tell you that this is a OOB build!!

Bill, so far are there any problems with the kit fit wise,
when i get my pop at the standalone version i'll double check everything,
so far it looks like a fairly good representation of the engine at the moment
CMOT
Staff MemberEditor-in-Chief
ARMORAMA
Visit this Community
England - South West, United Kingdom
Joined: May 14, 2006
KitMaker: 10,954 posts
Armorama: 8,571 posts
Posted: Sunday, September 14, 2008 - 09:28 AM UTC
Very well explained Bill and a nice level of detail keep up the great work.
wbill76
Visit this Community
Texas, United States
Joined: May 02, 2006
KitMaker: 5,425 posts
Armorama: 4,659 posts
Posted: Sunday, September 14, 2008 - 09:47 AM UTC

Quoted Text

Very nice detail.

I would suggest ditching the PE spark plug leads in favour of a piece of wire with a small sheath for the plug cap. The PE lead looks too delicate. I use some miniature insulated wire from Top Studio - it's a single strand with insulation, stripping away the insulation save for a small piece to represent the plug cap would look pretty good in this scale. Wire could also be used to represent the control cables.


Jason,

A very valid point and one that it's good to call attention to. The purpose of this particular build-up is to allow the users (and Bill) to see how the potential kit would build up OOB with the materials provided in the kit. Bill has been specifically instructed not to do any scratch-building or add-ons (a real challenge for him if you've seen his other projects! ) so that everyone can see the good/bad/ugly such as the case may be of this pre-production kit. Feel free to continue to comment though, that's what LR wants out of this thread.
Abydos
Visit this Community
New York, United States
Joined: August 11, 2005
KitMaker: 231 posts
Armorama: 225 posts
Posted: Sunday, September 14, 2008 - 10:58 AM UTC
Looks great so far, i have to agree with everyone here the degree of modeling so gotten alot better with the help of these aftermarket detail kits. i for one use lion roar kits all the time on my stuff. from the wing nut assemblies to the machine gun mounts. i fine they bring life and substance into the kit . Well i am definetly going to follow this thread................
lespauljames
Visit this Community
England - South West, United Kingdom
Joined: January 06, 2007
KitMaker: 3,661 posts
Armorama: 2,764 posts
Posted: Sunday, September 14, 2008 - 11:15 AM UTC
i have a few resources that will help me and Bill in our builds, and here that are for all to see
some are restorations, one has a colour chart if you look hard enought, one is a fantasatic collection of Zundapp and B.m.w pictures,
the list has evolved slightly over a week,

im afraid they are gonna be copy and paste jobs
http://svsm.org/gallery/Zundapp_motocycle
http://www.olive-drab.com/idphoto/id_photos_ks750.php3
http://www.beemergarage.com/R75only.html
http://www.wehrmachtsgespann.de/zuendappenglisch/index.htm
http://members.chello.nl/m.kiestra/
http://en.wikipedia.org/wiki/Z%C3%BCndapp
http://www.flickr.com/photos/wgrabar/2792268699/
http://www.bluemooncycle.com/vin_historicbikes/historic_KS750/historic_ks750.htm


thats the most i can find at the moment

Desmoquattro
Visit this Community
New Brunswick, Canada
Joined: September 10, 2008
KitMaker: 235 posts
Armorama: 168 posts
Posted: Sunday, September 14, 2008 - 12:55 PM UTC
My post is actually a suggestion to LR as much as to builders; including some wiring in the kit and instructions on how to install it would be a nice addition you don't usually see. If they provided some of the miniature insulated wire I mentioned instead of the PE wiring bit I think they'd be golden.
Plasticbattle
#003
Visit this Community
Donegal, Ireland
Joined: May 14, 2002
KitMaker: 9,763 posts
Armorama: 7,444 posts
Posted: Sunday, September 14, 2008 - 10:22 PM UTC

Quoted Text

but the knock-out holes and ejector pins are among the worst I’ve ever seen.


Worth pointing out .... but this is really a sign of pre-production.
When proper optimisation of the tooling and the process is sorted out ... maybe even making some final adjustments to the tooling ... these are possible to reduce. As this is a test shot .... QA is probably not even involved yet.
Interesting build so far Bill. Those wheels look excellent!
bill_c
Staff MemberCampaigns Administrator
MODEL SHIPWRIGHTS
Visit this Community
New Jersey, United States
Joined: January 09, 2008
KitMaker: 10,553 posts
Armorama: 8,109 posts
Posted: Monday, September 15, 2008 - 05:14 AM UTC
Thank you all for your support and comments. As Bill_P points out, I am under orders (in good military fashion) to build this baby OOB. I have made only 2 exceptions to that: replacing a part of the gear shift A19 that was either absent from the sprue (or lost in removing it), and the PE shovel bracket, which was waaay too long (I used it to attach the sidecar fender to the tubular frame, since the PE for that was waaaay too short).

Jimmy, your real life photos are excellent. Note how details on the surviving bikes differ in some substantial ways. For example, the foreward support strut for the front mud guard is mounted inside in one version and outside (looping over the top) in another. I simply haven't seen enough historical photos of the bike to know if this is a production variation or because of liberties taken by restorers.

Speaking of production, Frank, your comments are quite valid. I simply don't know what improvements Lion Roar will make in this model between now and final production. I just want to point out all the problems I encounter, since I'm basically just another consumer looking to make this kit shine.
bill_c
Staff MemberCampaigns Administrator
MODEL SHIPWRIGHTS
Visit this Community
New Jersey, United States
Joined: January 09, 2008
KitMaker: 10,553 posts
Armorama: 8,109 posts
Posted: Monday, September 15, 2008 - 05:15 AM UTC
Frame Assembly

Once the engine is complete, it’s time to drop it into the frame assembly. The fit is overall good, though there were some issues with the seat frame (A8) cleanly joining the frame halves (A63 & 64). Another issue is poor instruction in placing the PE. For example, one lever (PE 15) is simply placed wrong in the diagram; it should be to the LEFT of the drive shaft (not right as shown in the instruction sheet) AND at a 45 degree down angle. PE 14 is an orphan, since I can’t find its real life equivalent on any photos. Some suggestions from you lurkers would be appreciated.


The rest of the main part of the bike goes together very well, and looks tremendous.


There are a few parts that are unused (presumably for the version w/o the sidecar and bonus features). I did not do a series of step-by-step photos because, well, it simply went together so well, I couldn’t come up with a logical stopping point. There was a moment of anguish getting the front fork to align properly with the various pivot points, but nothing that really through me.


The PE with the front license plate is something of a challenge, because it is unclear from photos how much space should be there between the front mud guard and the bottom of the plate. I chose more room instead of less to highlight the delicacy of the PE plate and mounting brackets.


There IS, however, one major flaw in the assembly process at this point: the instructions simply fail to show the attachment of the back gear assembly. I believe the parts are B36 & B37, but the sidecar assembly won’t line up unless one or both of these parts are present. I’m looking over the real life photos, but there is no clear answer so far. I will “fiddle” with the two styrene parts to see if one or both are needed.


Lion Roar really needs to address this before the final release of this otherwise excellent kit.
bill_c
Staff MemberCampaigns Administrator
MODEL SHIPWRIGHTS
Visit this Community
New Jersey, United States
Joined: January 09, 2008
KitMaker: 10,553 posts
Armorama: 8,109 posts
Posted: Monday, September 15, 2008 - 10:29 AM UTC
The Sidecar

The Wehrmacht used motorcycles for couriers, but also liked them for reconnaissance roles. Adding a sidecar with a MG34 machine gun gave these bikes (and the BMW R75) a little sting, since the gun could fire 900 rounds per minute of 7.9 mm ammunition, though the round magazine attached maxed out at 50 rounds. Frankly, I can’t imagine driving into a firefight in the sidecar of one of these bikes blasting away like Arnold Schwarzenegger in “Terminator 2,” but I’m sure they could help in offering covering fire if supported by infantry, half-tracks or the Sd.Kfz. 222, for example.

The sidecar assembly is very clean, with a minimum of filling and sanding (mostly the nose portion). The detailing is quite good, complete with wooden flooring and a tire pump mounted behind the seat; diorama possibilities come to mind with a flat tire scenario (see photo below for how the pump was accessed).


One problem at this point are the four knock-out holes on the floor of the sidecar that really need to be filled in unless you’re going to put a canvas cover over the opening (see photo #4 below).


Another thing not explained by the instructions is whether the sidecar seat assembly rests on the two pins molded into the floor (giving a small clearance between seat and floor), or should slide onto the pins (there are two holes molded into the bottom of the seat) with no clearance. Common sense and the “feel” of the kit lead me to have the seat rest on the two pins rather than slide onto them, but I have no evidence to support that decision from the photographs I’ve looked at.


Two problems with the PE for the sidecar are the bracket attaching the fender to the tubular frame and the one holding the small shovel. Both seem to be the wrong side (the former is too short and the latter too long). I used the shovel bracket to join the fender to the frame and scratch-built one for the shovel. This goes against Bill_P's orders about no scratching, but the PE for attaching the sidecar fender to the tube frame was simply not going to work, and the shovel bracket would've been so loose that the damn thing would've fallen out when the bike went over the first rut in the road.


[b]Jerry Can[b]

Lion Roar has also included a superb jerry can complete with PE seam. The problem, though, is the seam won’t align properly unless you remove one of the plastic pins on the inside of one of the jerry can halves (part B14). That’s a disappointing oversight on an otherwise excellent detail. But once you clip off the offending pin The can is right up there with Tasca’s for sharpness in the molding.


The biggest problem with the jerry can is that it seems to be hanging onto the side of the vehicle without anything to secure it. I have not found any photos showing the bike with a jerry can so I am unsure how it was fastened. Anyone have a period photo or a renovated bike with jerry can?
c5flies
Visit this Community
California, United States
Joined: October 21, 2007
KitMaker: 3,684 posts
Armorama: 2,938 posts
Posted: Monday, September 15, 2008 - 04:44 PM UTC
Very nice write up so far, Bill.

I'm not at all familiar with this bike but is part 14 a foot brake? From the review photos that's the only thing I can come up with. I'm not real keen on the wingnut for the oil fill and as mentioned earlier the plug wire, couple of things Lionroar can improve.

I take it that the wheels don't turn, very difficult to paint the tires, especially the rear one?

Keep up the great work.
Jamesite
Visit this Community
United Kingdom
Joined: December 05, 2006
KitMaker: 2,208 posts
Armorama: 2,152 posts
Posted: Monday, September 15, 2008 - 11:45 PM UTC
This looks like a lovely kit I must say.

Some of the PE work is not for the faint-hearted though! I don't fancy assembling those PE clasps on the stowage bins.

Hats of to Lionroar:

1. For producing an excellent kit with great attention to detail
2. For running it by 'real' modellers first to gather opinion and suggestions.

Hopefully they will take the pointers Bill has come up with on board and improve what looks to be an already excellent kit.

James
bill_c
Staff MemberCampaigns Administrator
MODEL SHIPWRIGHTS
Visit this Community
New Jersey, United States
Joined: January 09, 2008
KitMaker: 10,553 posts
Armorama: 8,109 posts
Posted: Tuesday, September 16, 2008 - 04:00 AM UTC

Quoted Text

I'm not at all familiar with this bike but is part 14 a foot brake? From the review photos that's the only thing I can come up with. I'm not real keen on the wingnut for the oil fill and as mentioned earlier the plug wire, couple of things Lionroar can improve.


James_B, your guess is as good as mine. PE is clearly NOT the way to go for spark plug wires. It's one reason I don't like PE chain: two-dimentional. Fortunately, there are many AM chains around, including those from Tiger.

Quoted Text

I take it that the wheels don't turn, very difficult to paint the tires, especially the rear one?

Sadly, no. I have left off the spare tire for that reason, but it's impossible to assemble the bike itself without the tires being glued on. The sidecar tire could be left off, though it would make lining up the mud guard a bit tricky in my estimation.

And thanks, James_M, for the kind words. I'm having a ball building this little gem, and will likely order one or two for dios when it hits the market.
bill_c
Staff MemberCampaigns Administrator
MODEL SHIPWRIGHTS
Visit this Community
New Jersey, United States
Joined: January 09, 2008
KitMaker: 10,553 posts
Armorama: 8,109 posts
Posted: Friday, September 19, 2008 - 04:12 AM UTC
The Finished Bike


The final assembly involves joining the sidecar to the motorcycle and adding the MG 34 and three map cases. The mystery parts shown above do, in fact, belong on the rear axle as confirmed by photos of the real bike. The fit is a little tricky, since the sidecar attaches to the body with a small pin on the frame and two delicate support rods that have to line up perfectly. I suggest putting the body on some kind of jig or support and then gradually lining up the sidecar.


The MG 35 has some incredible detail, and is assembled from 4 parts: the barrel, lock and stock, the breach cover (which could be assembled open for loading, since the interior detailing is present), the collapsed front bipod, and the 50-round magazine. The barrel includes an opening, unlike most MG 34s included in almost all kits.


The map cases are quite good, though I decided to fill in the backs, since the hollow construction would show. The cases include PE latches. The PE sheet has padlocks that presumably are for these latches, though the instructions are mute on this point.


This was a fun build and I thoroughly enjoyed it. I am looking forward to adding some brake cables and better sparkplug leads, then painting it in a DAK camo to use in an sPA 501 Tiger/Pz. III diorama I’m planning.

Bonus Round, Dude!!!

I don’t know if Lion Roar plans on issuing the kit with the two trailers included in this review copy, but if so, then this kit is even a better value than I thought.


Trailer #1:


Trailer #2:


PE Detailing:


The two trailers have excellent detailing, though the tires are nowhere as nice as those on the bike. That’s a small price to pay for a bonus that gives diorama builders more tools for creating realism. These motorcycles were equipped with two kinds of trailer hitch to pull along the extra gear on campaign, and the kit includes bonus tires. The usual method of carrying the tires was to tie one or two atop the spare. That’s not a viable option in my opinion, since it shows the extra tires as inferior to the detailed tread of the spare (not to mention the gorgeous PE spokes). See below:

bill_c
Staff MemberCampaigns Administrator
MODEL SHIPWRIGHTS
Visit this Community
New Jersey, United States
Joined: January 09, 2008
KitMaker: 10,553 posts
Armorama: 8,109 posts
Posted: Friday, September 19, 2008 - 04:13 AM UTC
Conclusion

Simply put, this is a major improvement over the existing bike kits in 1/35th.

Certainly it beats the heck out of the old Tamiya kit, even with a $25+ Royal Model upgrade (the only thing better about the RM upgrade is that it includes inner spacers for the wheels which insure the PE is properly stretched). Although I have not handled the Master Box BMW R75 kit reviewed here by Martin Ciszewicz (https://armorama.kitmaker.net/review/3313), it does not appear to have PE wheel spokes and the other nice touches Lion Roar has included. Not knowing the price, though, of this kit once it comes to market, I can't comment on which is the better value.

Some of the outstanding issues include the placement of the cylinder heads. As noted in the review of the Zündapp KS 750 w/o sidecar by my colleague Jimmy C. (https://armorama.kitmaker.net/forums/124855&page=1), there is some disagreement about the proper placement of the heads and the amount of “offset.” The kit either has the part placement wrong or the results are inconsistent with the real bike.

There are also some PE parts unaccounted for, including padlocks (presumably for the map cases?). I have already addressed the absense in the assembly instructions for joining the sidecare to the rear axle of the bike, and Jason Cormier has pointed out that the PE spark plug cables are simply not doing the job. LR could easily address this problem by including a tiny strand of brass wire with the kit.

But even if this kit were issued as is, I would definitely purchase others (perhaps a whole recce troop of bike supporting an Sd.Kfz. 222?). I applaud Lion Roar and thank Armorama for giving me the opportunity to review this kit.
c5flies
Visit this Community
California, United States
Joined: October 21, 2007
KitMaker: 3,684 posts
Armorama: 2,938 posts
Posted: Friday, September 19, 2008 - 04:28 AM UTC
Great build log, Bill, but I don't see any exhaust pipes.


lespauljames
Visit this Community
England - South West, United Kingdom
Joined: January 06, 2007
KitMaker: 3,661 posts
Armorama: 2,764 posts
Posted: Friday, September 19, 2008 - 05:11 AM UTC
a agree, the exhauste fits into the holes on the front of the cylinders, and attatches to the spall pipe on the left hand side.
bill_c
Staff MemberCampaigns Administrator
MODEL SHIPWRIGHTS
Visit this Community
New Jersey, United States
Joined: January 09, 2008
KitMaker: 10,553 posts
Armorama: 8,109 posts
Posted: Friday, September 19, 2008 - 09:05 AM UTC

Quoted Text

Great build log, Bill, but I don't see any exhaust pipes.


%$&#ing $#@& all you guys know is how to harass a poor reviewer.....

Seriously, I either missed A60 or it's not in the instructions (which are presently MIA in the stash after Hurricane Hannah blew through NJ and left my basement "moist." Here is the corrected part installed, though the fit ain't great (could be from a late application):

c5flies
Visit this Community
California, United States
Joined: October 21, 2007
KitMaker: 3,684 posts
Armorama: 2,938 posts
Posted: Friday, September 19, 2008 - 09:32 AM UTC

Quoted Text


%$&#ing $#@& all you guys know is how to harass a poor reviewer.....


Sorry Bill, I was afraid LionRoar somehow omitted this!
 _GOTOTOP