_GOTOBOTTOM
Armor/AFV: IDF [Israeli Defense Forces]
Armor and AFVs of the IDF army from 1947-today.
Hosted by Darren Baker
AFV Club 1967 Israeli Centurion WIP
panzerkampfw
Visit this Community
Busan, Korea / 대한민국
Joined: June 11, 2006
KitMaker: 171 posts
Armorama: 164 posts
Posted: Thursday, September 11, 2008 - 04:47 AM UTC
There is still tons of work I have to do on this guy, but, I'll upload my work so far. There are still things i need to glue on and need to find, the antenna on the turret is broken off and I need to glue that on along with other random things.

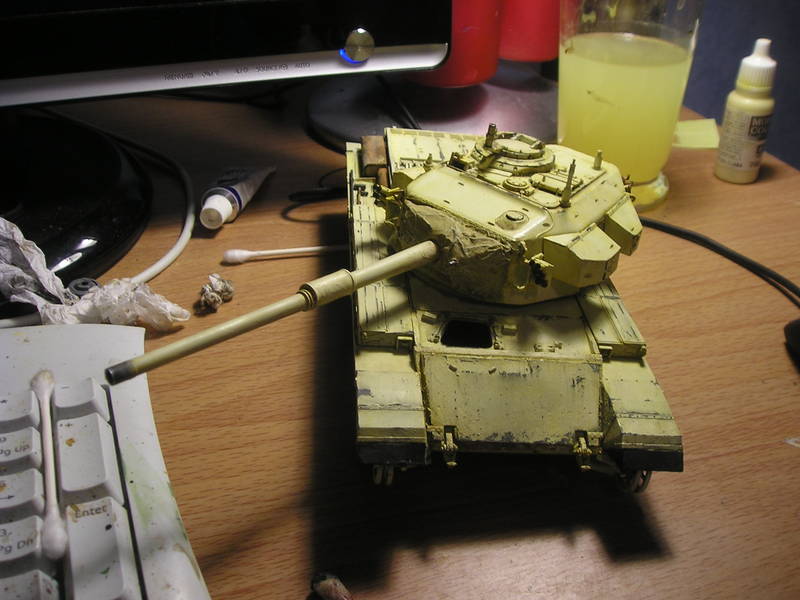
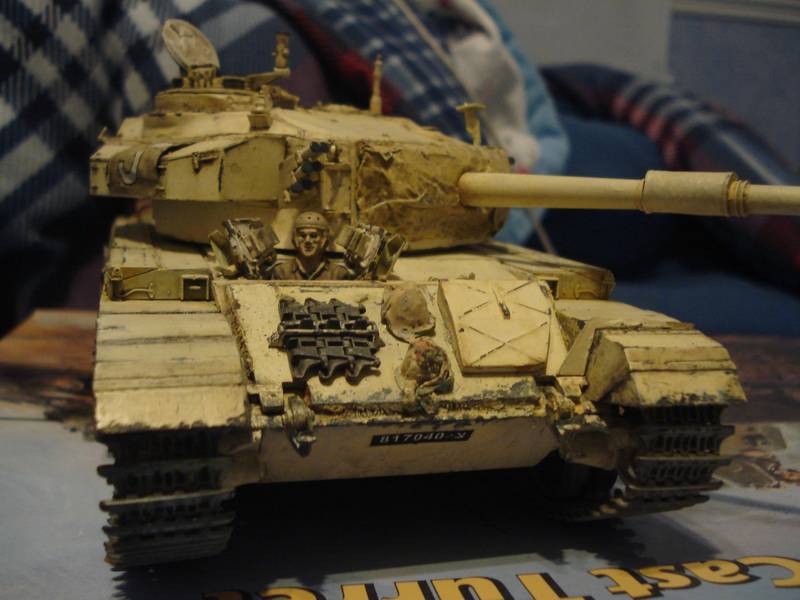
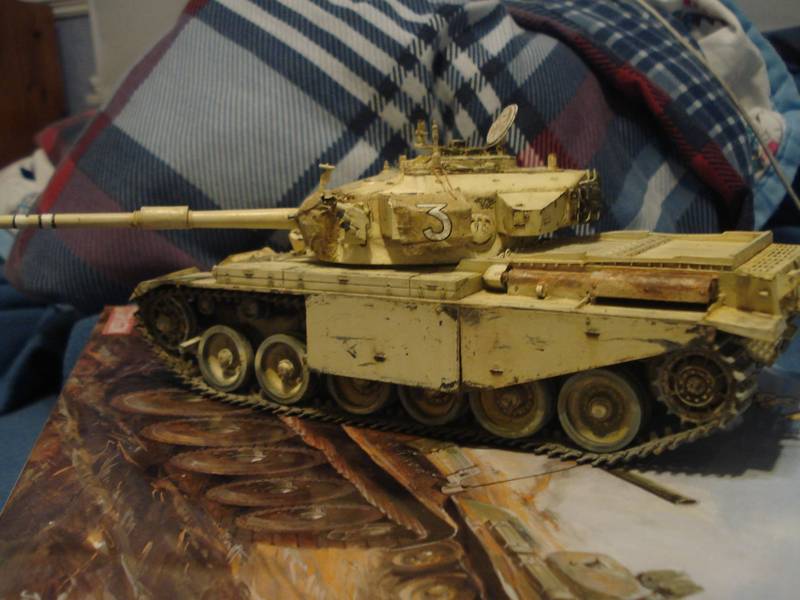
I just wanted to make a really ratty centurion, hence the chipping and discoloration. This is just a fun project and I don't really care if the colors of the tank are accurate or not, again, just going for the ratty worn down sunbleached centurion look .

The weathering was done with washes and artist oils...
I'm waiting on Blacken it so i can do my fruil tracks in a really weathered manner. The AFV tracks were sheer garbage and IMHO they are so terrible they want you to buy the individual tracks, along with the mantel... my mantel is made from scratch.. not spending anymore money, id rather make it anyways


vertigo
Visit this Community
Dublin, Ireland
Joined: November 11, 2004
KitMaker: 388 posts
Armorama: 113 posts
Posted: Thursday, September 11, 2008 - 05:06 AM UTC
It's looking good, very worn out. How would you rate the quality of the kit overall, despite the tracks?
panzerkampfw
Visit this Community
Busan, Korea / 대한민국
Joined: June 11, 2006
KitMaker: 171 posts
Armorama: 164 posts
Posted: Thursday, September 11, 2008 - 05:18 AM UTC

Quoted Text

It's looking good, very worn out. How would you rate the quality of the kit overall, despite the tracks?


Ummmm its the not the easiest kit to build... the turret didnt fit together at all.... i had to sand a lot and use a ton of mr surfacer.. the hull went together clunky... but it went together... it certainly didnt go together well.. but i like the way it looks now... being build up
tjkelly
Visit this Community
Maryland, United States
Joined: May 04, 2007
KitMaker: 1,132 posts
Armorama: 1,123 posts
Posted: Thursday, September 11, 2008 - 07:27 AM UTC
Looks pretty good Patrick, despite the wrestling you've overcome with the kit not fitting together well. Like your exhaust pipes and mufflers, came out well. Just about there, can see that light at the end of the tunnel!

Cheers -
Tim
210cav
Visit this Community
Virginia, United States
Joined: February 05, 2002
KitMaker: 6,149 posts
Armorama: 4,573 posts
Posted: Thursday, September 11, 2008 - 08:46 AM UTC
Patrick-- very nice work. The weathering is well done as is the chipping effect.
DJ
panzerkampfw
Visit this Community
Busan, Korea / 대한민국
Joined: June 11, 2006
KitMaker: 171 posts
Armorama: 164 posts
Posted: Thursday, September 11, 2008 - 03:46 PM UTC
little bit more work was done today, I put the wheels on, however, i havent started weathering any of the bottom part of the kit. So it does look a bit different from the rest..... the wheels need to be touched up since the paint is all over the place and some of the rollers are off... i stuck the metal tracks on to see how they would look... they look alright to me .. they have yet to be touched.. just showing a little bit more progress... also you will see a lot of yellow on the turret in random places, i have yet to work that oil paint into the base color... it will come

if the admin could move this tread to the constructive area of the forums that would be splendid.


chefchris
Visit this Community
North Carolina, United States
Joined: February 06, 2006
KitMaker: 1,544 posts
Armorama: 1,464 posts
Posted: Thursday, September 11, 2008 - 03:55 PM UTC
It looks like you left off the headlights on the glacis...... will you be adding them?

Chris
18Bravo
Visit this Community
Colorado, United States
Joined: January 20, 2005
KitMaker: 7,219 posts
Armorama: 6,097 posts
Posted: Thursday, September 11, 2008 - 04:06 PM UTC
It's looking very good. There a two things that might make it even better. Your mantlet cover would look more prototypical if you add the stiffeners to the top. They can be done with strips of masking tape stuck to the top of the cover and painted to match the rest of the cover. I can send you photos if you don't have any of that area.
The other thing is the front fender. In '67, the IDF had not yet begun adding rubber extensions to the front fender. The whole thing should be painted in your base color. Those "extensions" are actually part of the original fender. The kit was designed to leave them off for the cut back Australian version.
panzerkampfw
Visit this Community
Busan, Korea / 대한민국
Joined: June 11, 2006
KitMaker: 171 posts
Armorama: 164 posts
Posted: Thursday, September 11, 2008 - 05:04 PM UTC

Quoted Text

It's looking very good. There a two things that might make it even better. Your mantlet cover would look more prototypical if you add the stiffeners to the top. They can be done with strips of masking tape stuck to the top of the cover and painted to match the rest of the cover. I can send you photos if you don't have any of that area.
The other thing is the front fender. In '67, the IDF had not yet begun adding rubber extensions to the front fender. The whole thing should be painted in your base color. Those "extensions" are actually part of the original fender. The kit was designed to leave them off for the cut back Australian version.


noted... good tip on the stiffeners.. i tried putting them on but couldnt find a decent way, ill see what i can do ...
alright fenders in the base coat it is ... thanks for the tip

and yes .. ill be adding the headlamps i think .... they arent really removable eh ? I should have a look aroudn for them... i think i may have misplaced them... i still have quite a lot to do ... i was thinking about laying the extra metal tracks on the glacis .... strapped in with a scratched holder ....... i dont know ..
18Bravo
Visit this Community
Colorado, United States
Joined: January 20, 2005
KitMaker: 7,219 posts
Armorama: 6,097 posts
Posted: Friday, September 12, 2008 - 03:03 PM UTC
I received your PM. Here's the pic you need. Use masking tape. You can add white glue to keep the stiffeners in place, which I did not. One is starting to peel off, but it HAS been thirteen years. Note the uneven spacing, which is prototypical. They are spaced wider apart on the right of the cover.

For the spare track links you can use parts already supplied in the AFV Club kit. They'll look much better than these from Tamiya. By the way, if you can''t find the hooded headlights, I'll send you a pair.

panzerkampfw
Visit this Community
Busan, Korea / 대한민국
Joined: June 11, 2006
KitMaker: 171 posts
Armorama: 164 posts
Posted: Friday, September 12, 2008 - 05:17 PM UTC
ok, ive put the stiffeners on... ill wait until tomorrow to paint them... i am all done work on the turret... except putting the MG in place

does anyone have any pictures of the centurions with the H shaped white paint on the top of their turrets ? or was this even relevant to what i am modeling ?

what color would the antennae be on the turret ? base color ?

if you can help me , let me know
18Bravo
Visit this Community
Colorado, United States
Joined: January 20, 2005
KitMaker: 7,219 posts
Armorama: 6,097 posts
Posted: Friday, September 12, 2008 - 05:59 PM UTC

Quoted Text

does anyone have any pictures of the centurions with the H shaped white paint on the top of their turrets ? or was this even relevant to what i am modeling ?

what color would the antennae be on the turret ? base color ?


Yes, I do, and no, it's not relevant, although that version makes an interesting model in its own right.

Antenna base is sand with black antenna.

panzerkampfw
Visit this Community
Busan, Korea / 대한민국
Joined: June 11, 2006
KitMaker: 171 posts
Armorama: 164 posts
Posted: Sunday, September 14, 2008 - 01:58 PM UTC
ok so i did some more work today on today. Work is almost complete on the turret.. almost there... i added decals to a tarpaulin like sheet... this is how the decals are displayed in the instructions... so i just went with it ... i need to add another decal to the left side on the front storage box. Also, the decals will be laying flat the storage boxes rather than just floating there like it is now. Should be done with the turret in the coming days.. then ill need to finish the body.

I also added the stiffeners to the mantel.... they are hard to see becuase my camera is just awful.

here is some more pictures ... note that my camera is terrible and the color is off .. but oh well .


panzerkampfw
Visit this Community
Busan, Korea / 대한민국
Joined: June 11, 2006
KitMaker: 171 posts
Armorama: 164 posts
Posted: Wednesday, September 17, 2008 - 02:14 PM UTC
little update.... have the tracks weathered with blacken it and the road wheels done...starting to put pieces on the front of the tank now .. still a lot of work to do ..

no i can assure you this picture wasnt taken with a disposable camera... its just awful

Removed by original poster on 10/12/08 - 22:35:22 (GMT).
panzerkampfw
Visit this Community
Busan, Korea / 대한민국
Joined: June 11, 2006
KitMaker: 171 posts
Armorama: 164 posts
Posted: Sunday, October 12, 2008 - 11:38 AM UTC
update, hull is nearly complete , just need to add some small details. camera is much improved so you can actually see what this thing looks like . criticism is welcome and comments


newfish
Visit this Community
England - West Midlands, United Kingdom
Joined: June 23, 2008
KitMaker: 2,329 posts
Armorama: 2,110 posts
Posted: Friday, December 26, 2008 - 02:50 PM UTC
great centurion! the weathering and the chipping !

one thing the tanl comanders eyes should have less black and more white =]

youve got the colours the wrong way round

never the less great centurion!


 _GOTOTOP