_GOTOBOTTOM
Armor/AFV: Allied - WWII
Armor and ground forces of the Allied forces during World War II.
Hosted by Darren Baker
Bronco Model's Staghound III Build Log
jimbrae
Visit this Community
Provincia de Lugo, Spain / Espaņa
Joined: April 23, 2003
KitMaker: 12,927 posts
Armorama: 9,486 posts
Posted: Sunday, September 28, 2008 - 11:52 PM UTC
Following on from my Review of Bronco Model's Staghound III, here's the beginning of a Build-Log.

The Review can be seen: Staghound III Review (LINK)

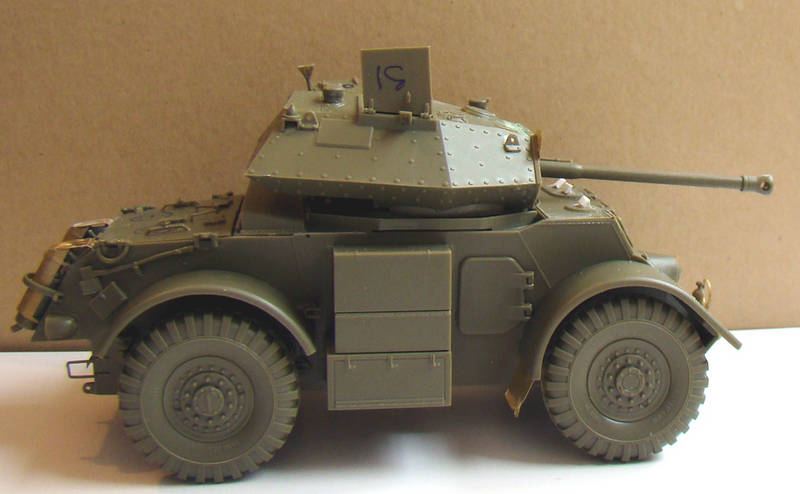
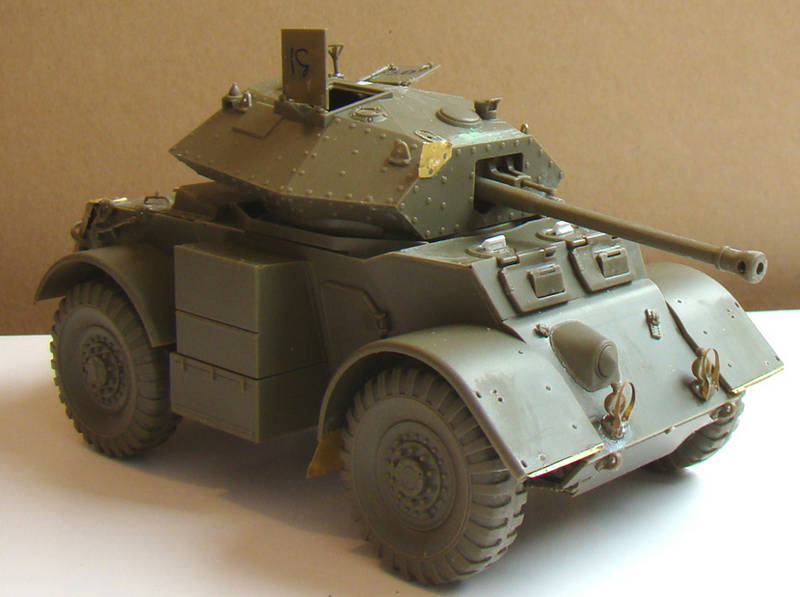
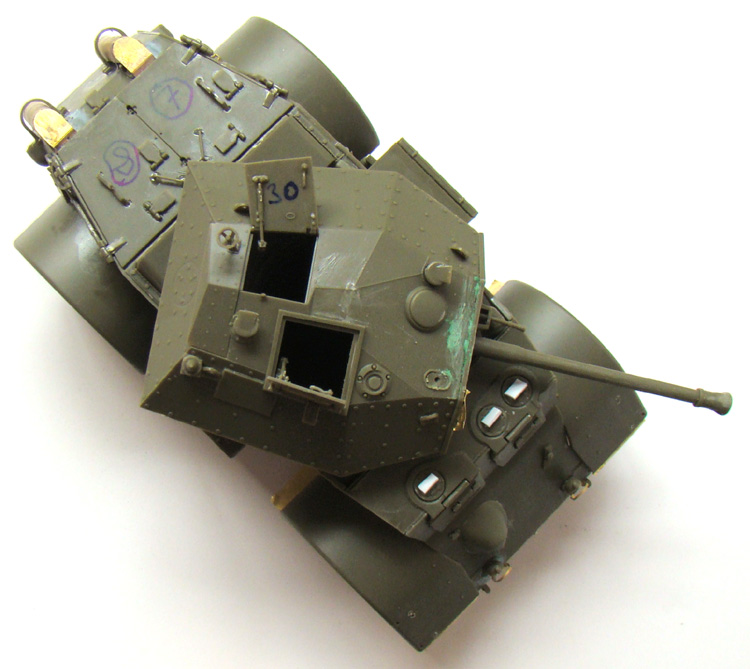
When I did the Review, I built the Turret and used a half-built Staghound I hull to give a brief idea of the arrangements.

I strongly recommended as well, that unlike the instructions in the Staghound I, the build sequence is much more logical. Typically, it's quite a complex kit and the easiest way to build it (due to the large number of TINY parts) is to break it down into a series of sub-assemblies.

First Stages...

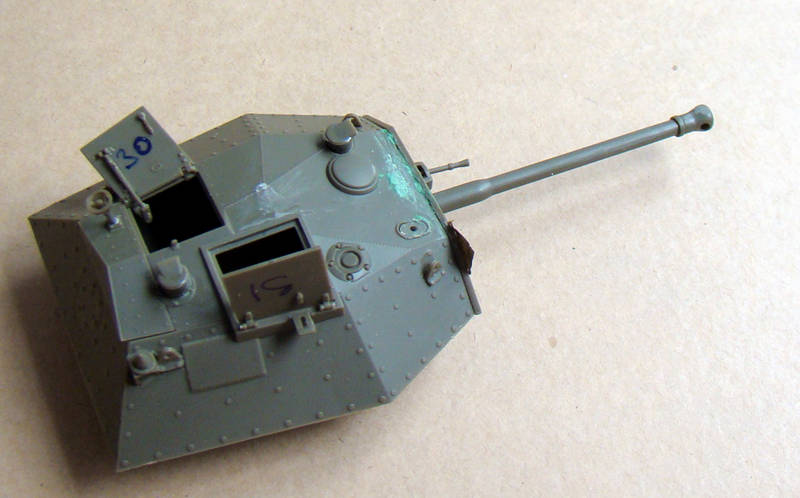
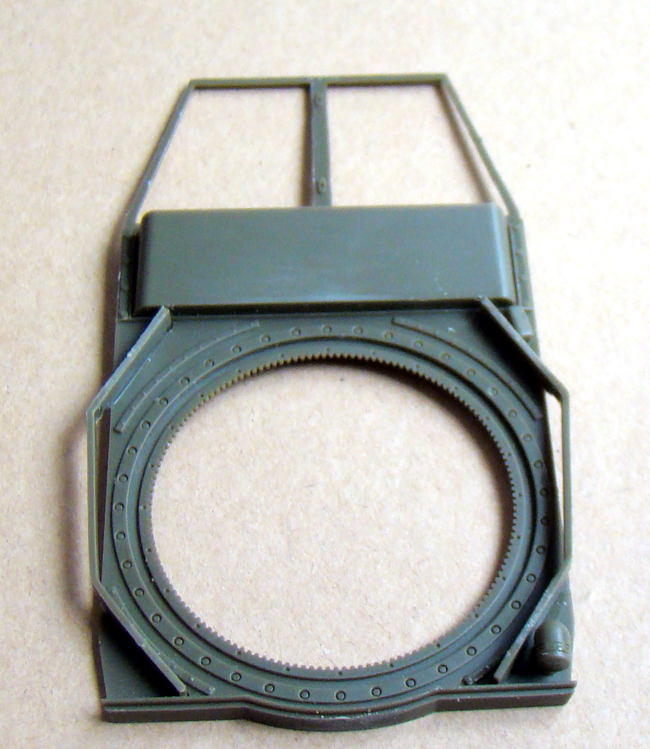
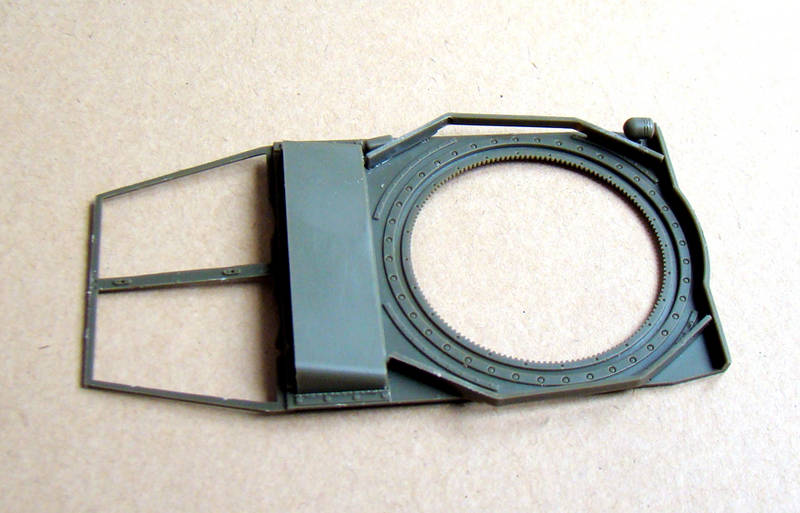
I had already built the (modified) Crusader Turret for the review. As i'm going to be putting crew in the hatches, I left out the breech mechanism for the 75mm gun. Here's the turret with only a bit of cleaning -up to do:


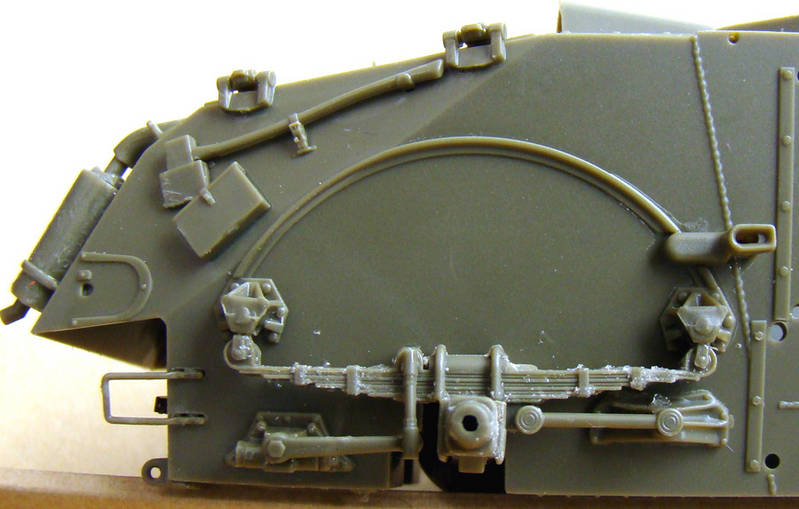
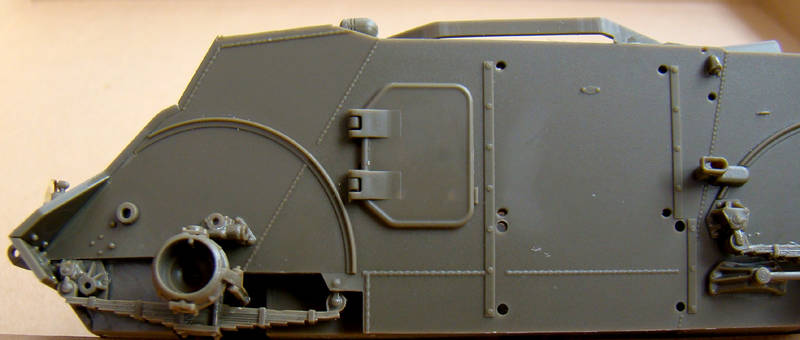
I then moved onto the basic hull shape and added the drive shafts and the leaf springs:


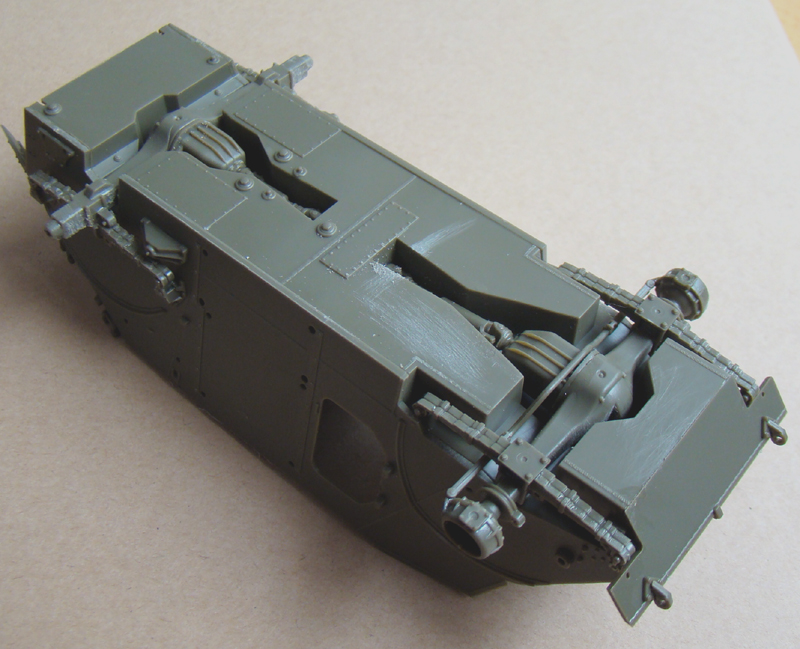
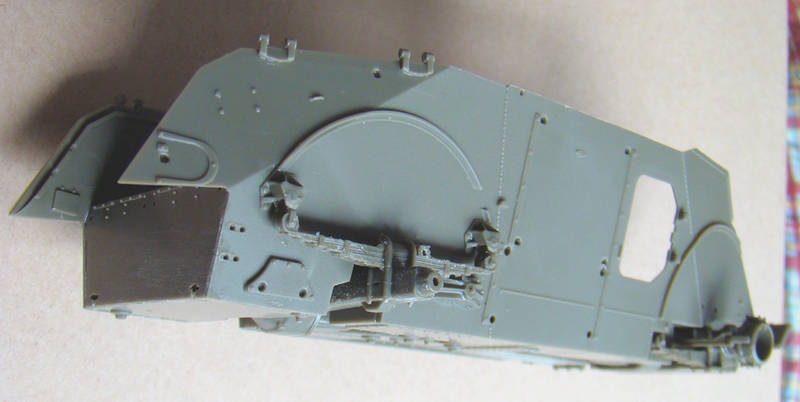
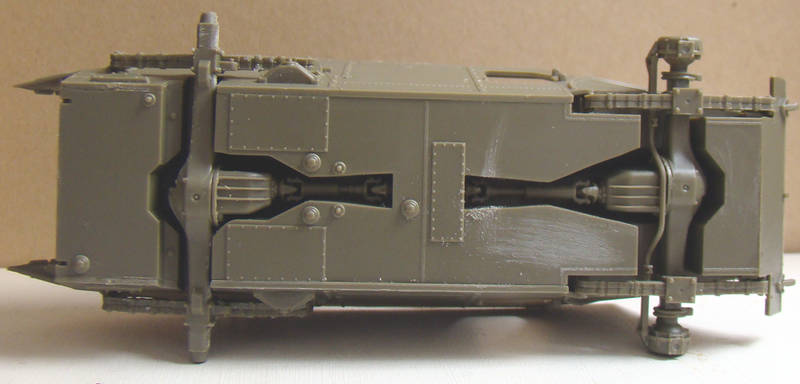
The quality of engineering of the kit is so good that no fit problems were encountered. My only gripe concerns the Leaf-Springs. Each of these is moulded in two parts which, no matter how much care you align them with, still have a seam in the middle. Rather than using putty, I used the Mig Productions acrylic paste as filler. It's NOT a perfect solution but as the springs won't show TOO much, i'm not that worried...

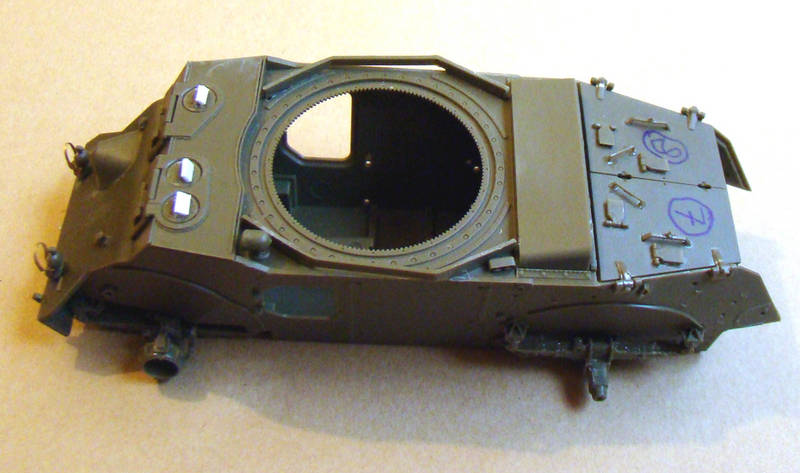
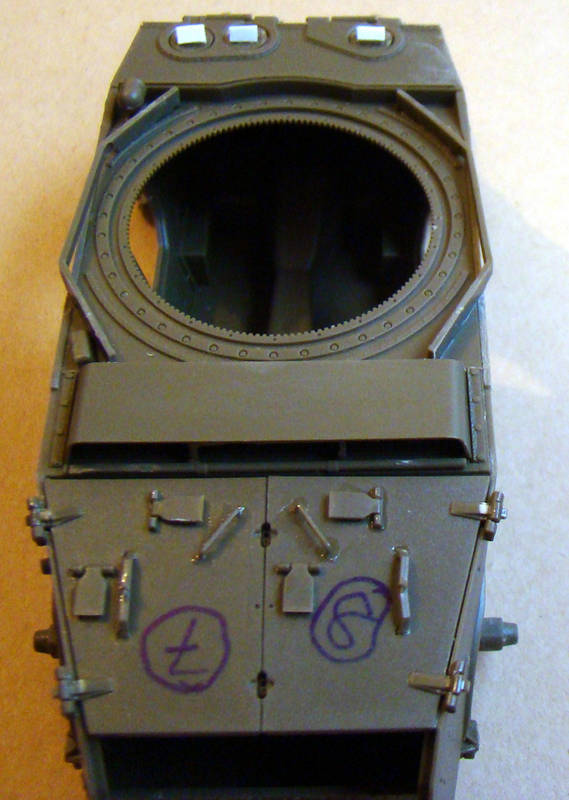
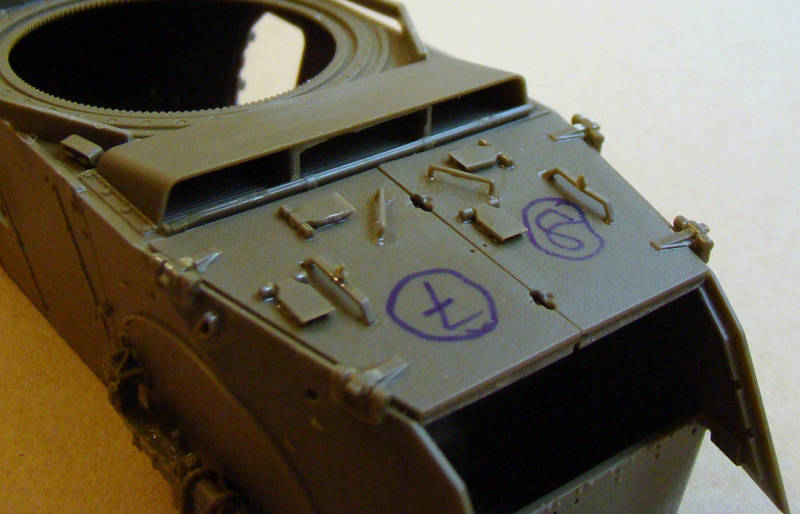
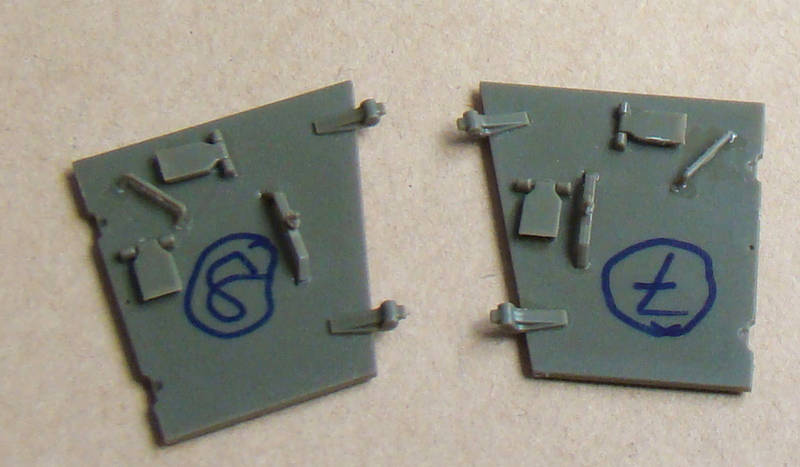
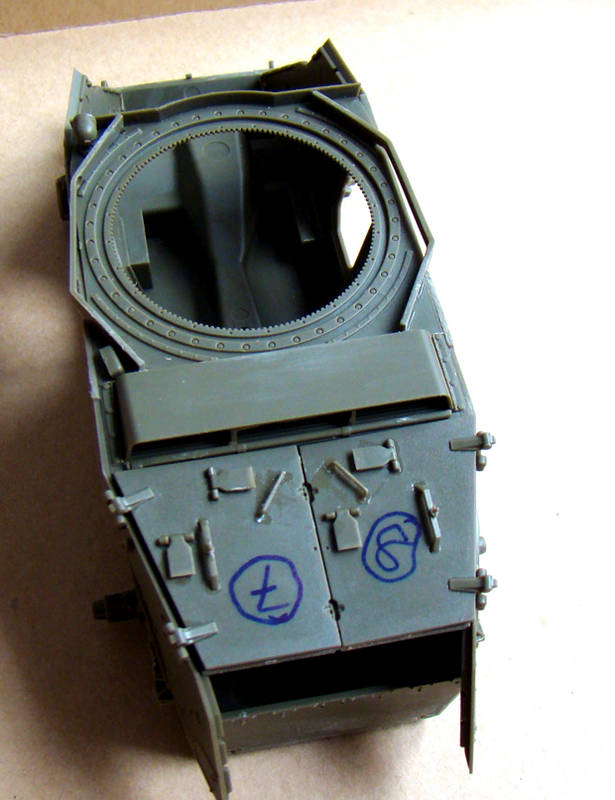
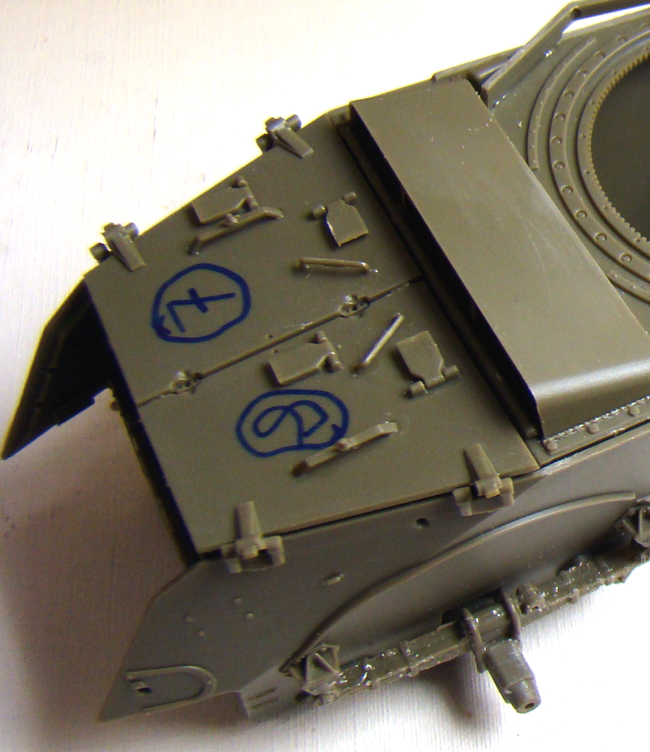
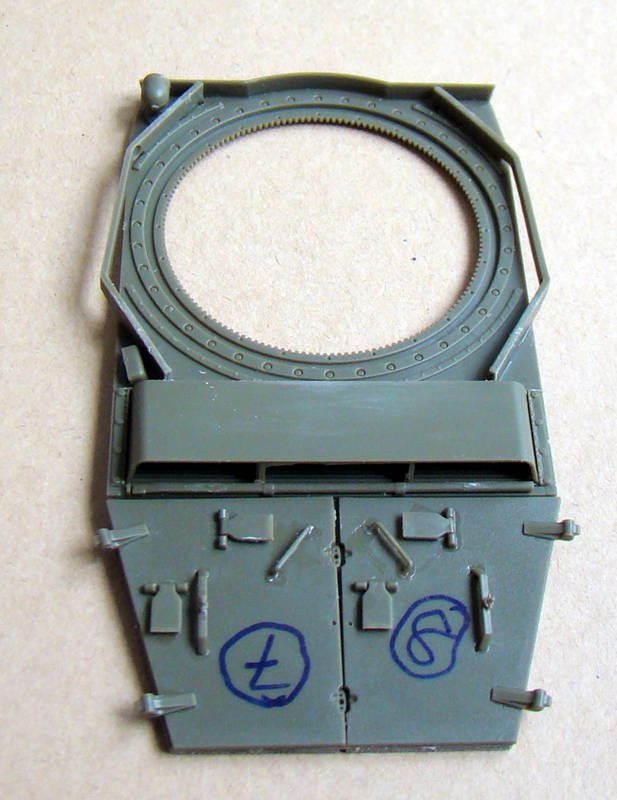
Putting the hull and sub-frame aside, I built on the Engine hatches - no it ISN'T graffiti, it's just easier to mark up these according to the instructions:


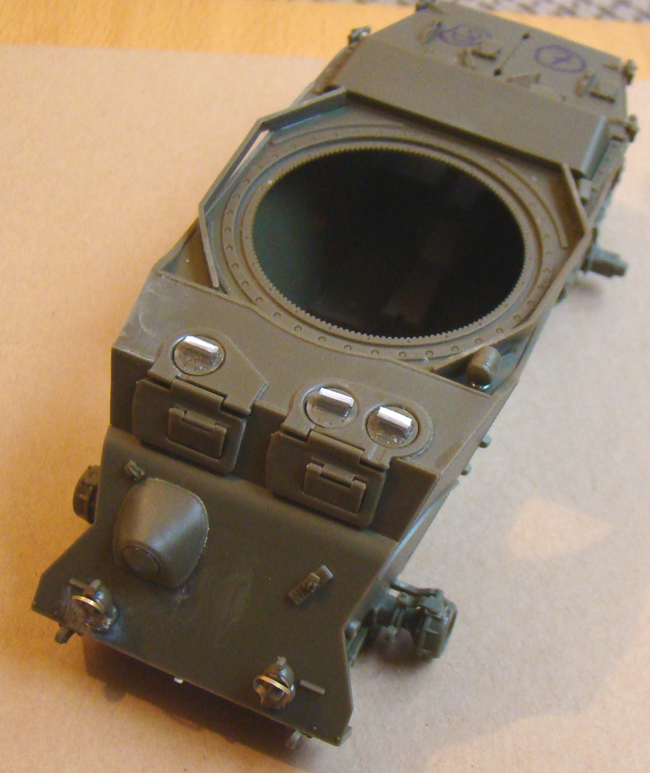
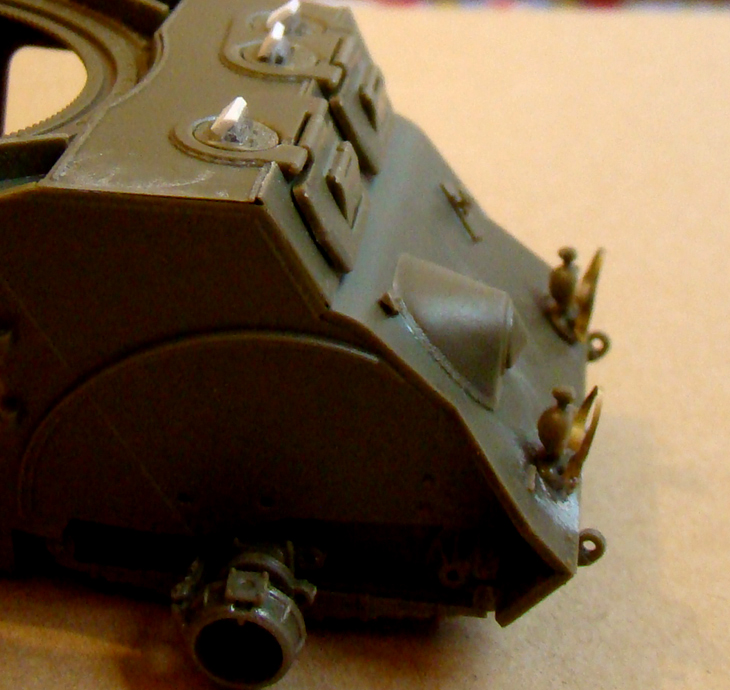
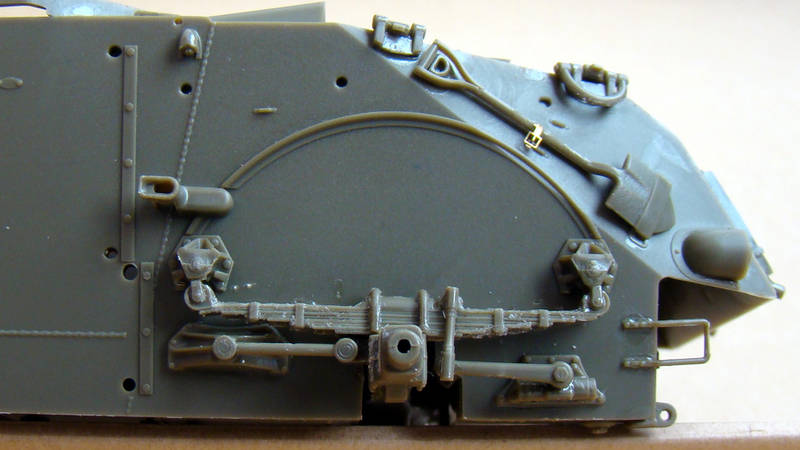
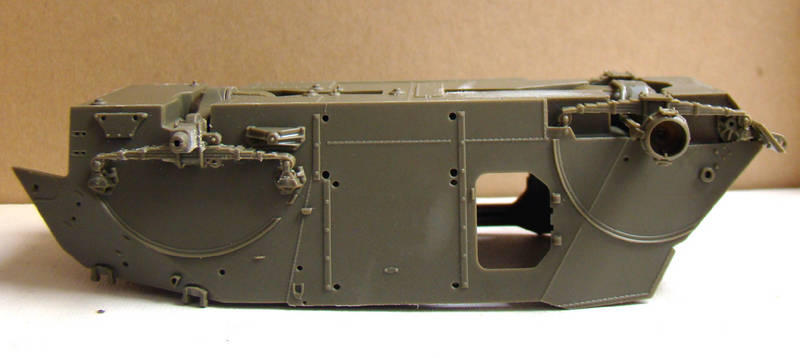
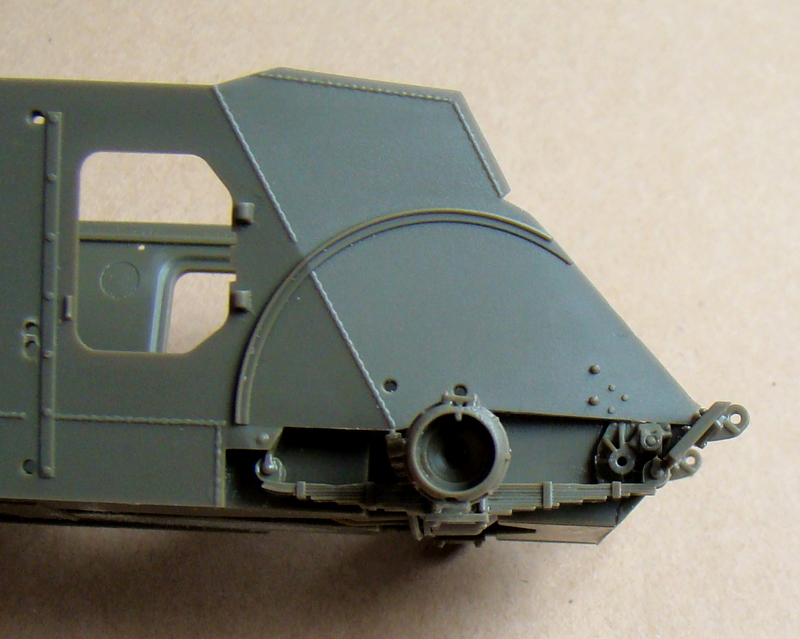
Putting these aside, I added the detail to the top deck. This consists of two, angled brackets - probably to close-off the shot-trap under the turret. A siren is also to be added and the curved rear-intake above the engine grille:


The Engine hatches in place (but not glued yet):


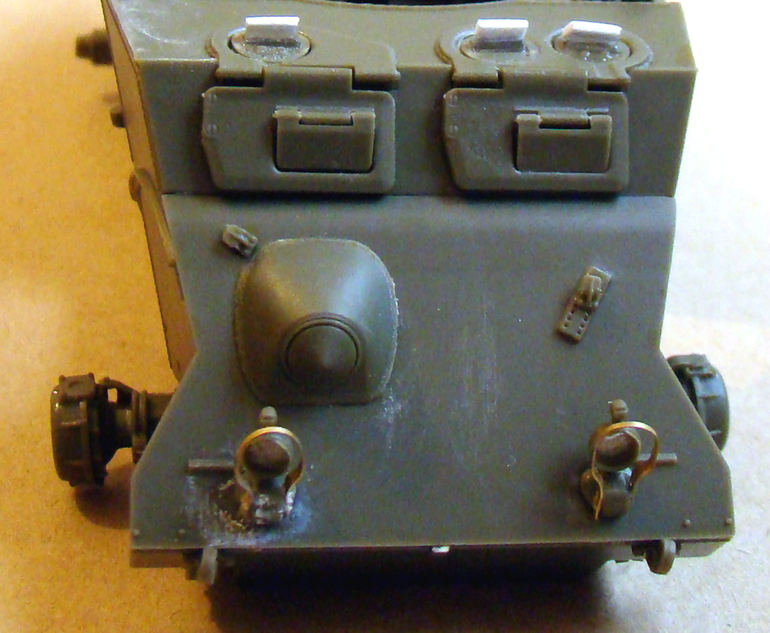
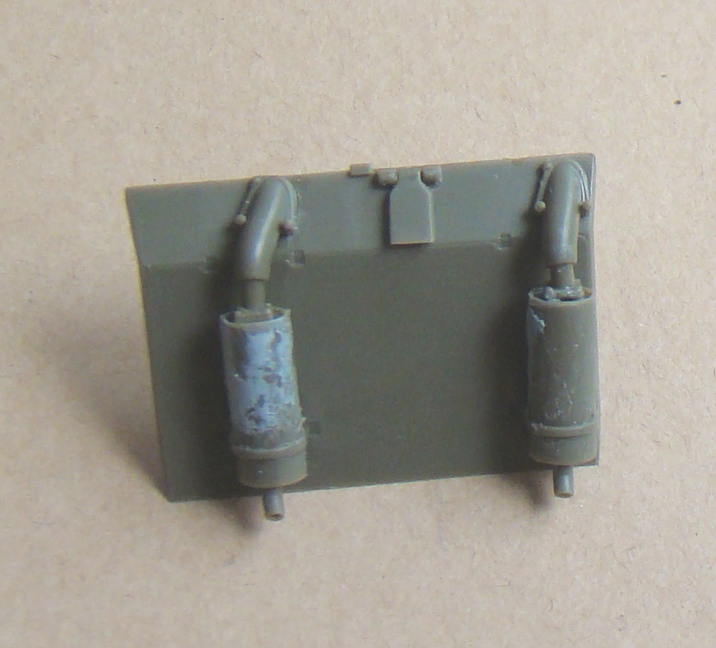
Finally, another sub-assembly, the rear exhausts on the rear plate. These DO need a bit of filler to get rid of the join seam. I'm not too bothered as there will be a PE cover on top of them..:


More to come...
Henk
Visit this Community
England - South West, United Kingdom
Joined: August 07, 2004
KitMaker: 6,391 posts
Armorama: 4,258 posts
Posted: Monday, September 29, 2008 - 12:25 AM UTC
Jim swaps the keyboard for the workbench, at last...
This should be good, the quite frankly rather ugly (I'm being polite here... ) and ungainly Staghound has been growing on me. I may just be tempted to indulge. I'll be following your blog with interest Jim.

jimbrae
Visit this Community
Provincia de Lugo, Spain / Espaņa
Joined: April 23, 2003
KitMaker: 12,927 posts
Armorama: 9,486 posts
Posted: Monday, September 29, 2008 - 07:13 AM UTC

Quoted Text

This should be good, the quite frankly rather ugly (I'm being polite here... ) and ungainly Staghound has been growing on me.


Ugly? Never Ungainly with that Crusader turret - just possibly....
jimbrae
Visit this Community
Provincia de Lugo, Spain / Espaņa
Joined: April 23, 2003
KitMaker: 12,927 posts
Armorama: 9,486 posts
Posted: Tuesday, September 30, 2008 - 06:21 AM UTC
More pictures tomorrow - the light's fading here and I prefer to shoot in natural light whenever possible...

Front Glacis is done and glued in place as are the front visors and the front periscopes - despite losing two of the three armored covers as a sacrifice to the Parquet God...

Next, the many torsion bars and the wheels....
jimbrae
Visit this Community
Provincia de Lugo, Spain / Espaņa
Joined: April 23, 2003
KitMaker: 12,927 posts
Armorama: 9,486 posts
Posted: Tuesday, September 30, 2008 - 08:33 PM UTC


Henk
Visit this Community
England - South West, United Kingdom
Joined: August 07, 2004
KitMaker: 6,391 posts
Armorama: 4,258 posts
Posted: Friday, October 03, 2008 - 12:12 AM UTC
Jim,
you left the entrance door off, will you display that open? Which begs the question, is it going on a diorama or such??

Henk
jimbrae
Visit this Community
Provincia de Lugo, Spain / Espaņa
Joined: April 23, 2003
KitMaker: 12,927 posts
Armorama: 9,486 posts
Posted: Friday, October 03, 2008 - 01:09 AM UTC
The side doors are getting put in the closed position. I haven't started on the detailing on the hulls yet as the next step will be finishing the suspension and then the hull details - I have to think of doing a Former for the rear exhaust covers:


Part # 2 has to be curved to fit round the rear exhausts - once again application of heat from a lighter and it should bend nicely.

On that subject, I noticed that DML have copied Bronco by including a plastic former for lightguards in their M4a1 DV.... Imitation is the sincerest form of flattery?
jimbrae
Visit this Community
Provincia de Lugo, Spain / Espaņa
Joined: April 23, 2003
KitMaker: 12,927 posts
Armorama: 9,486 posts
Posted: Sunday, October 05, 2008 - 01:59 AM UTC
Continuing from the previous post on the PE covers for the exhausts:


Some of the hull detail has been finished with the addition of the pioneer tools, side hatches and the suspension more or less finished:


Plasticbattle
#003
Visit this Community
Donegal, Ireland
Joined: May 14, 2002
KitMaker: 9,763 posts
Armorama: 7,444 posts
Posted: Sunday, October 05, 2008 - 03:08 AM UTC
Hello Jim. I made some comments on my blog about the type of plastic used. When sanding its very "sticky" ... almost like a high rubber/synthetic rubber content in the mix. It may ease moulding and make for sharper details, but its not very pleasent cleaning it up afterwards around details. I can see around some details like the springs there appears to something similar. Whats your feelings on this ... compared to the plastic from other suppliers?
jimbrae
Visit this Community
Provincia de Lugo, Spain / Espaņa
Joined: April 23, 2003
KitMaker: 12,927 posts
Armorama: 9,486 posts
Posted: Sunday, October 05, 2008 - 05:07 AM UTC
Frank, VERY good point - yes the detail is extremely sharp, but it's almost as if you have to develop a different technique for dealing with this particular 'mix' of styrene...

I suppose i'm getting used to it now, this will be my third Staghound and until you mentioned it, I'd forgotten about it's characteristics. Yep, high rubber/synthetic rubber content seems to sum-it up nicely!
jimbrae
Visit this Community
Provincia de Lugo, Spain / Espaņa
Joined: April 23, 2003
KitMaker: 12,927 posts
Armorama: 9,486 posts
Posted: Sunday, October 05, 2008 - 11:53 PM UTC
99% Finished:


wbill76
Visit this Community
Texas, United States
Joined: May 02, 2006
KitMaker: 5,425 posts
Armorama: 4,659 posts
Posted: Monday, October 06, 2008 - 07:20 AM UTC
Nice work Jim. Don't forget to drill out the Besa muzzle before painting.
 _GOTOTOP