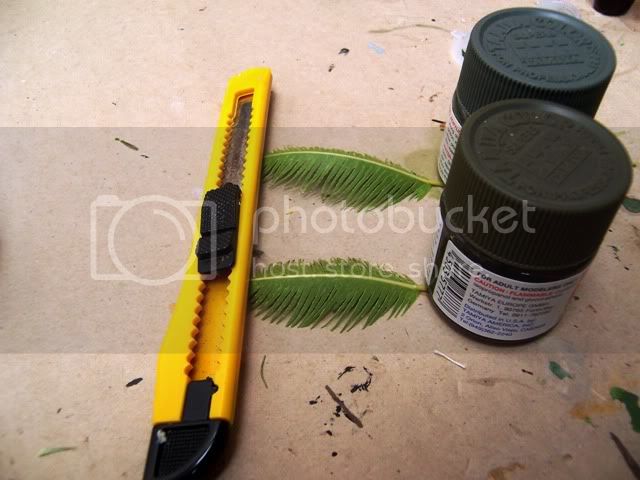
I've made some palm trees before. I've also seen others make palm trees before. But, they still seam to be quite a difficult piece of flora to model convincingly. I know there are already some existing techniques 'out there', but I'm sure one more won't hurt. Maybe, just maybe this technique may result in a fantastic looking palm tree with an easy-to-follow tutorial to go with it. Thats what I'm hoping for anyway.
Trunk
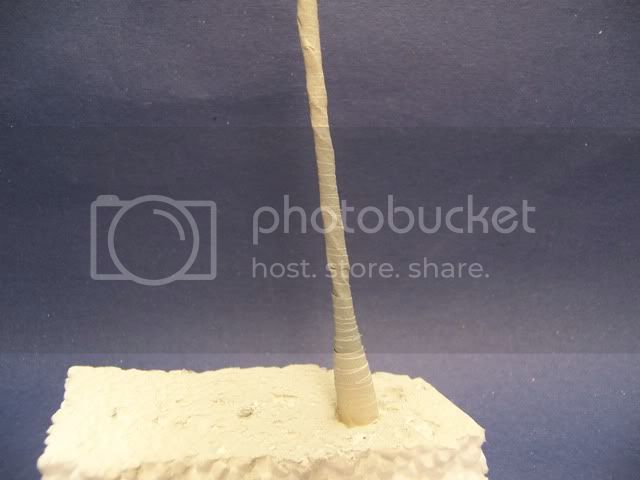
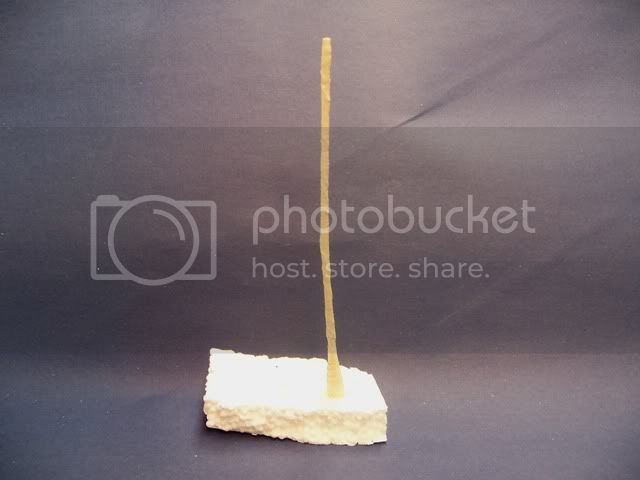
The trunk structure is replicated using a bamboo skewer about 20cm long. The skewer was soaked in hot water and then bent slightly to give the impression of a heavy canopy. The skewer was then wrapped in masking tape, different areas of the trunk were given a different thickness according to my observations of real palms in nature. Please note, this will not be the final texture! The masking tape is used only to build up thickness at different parts of the trunk.
Fronds
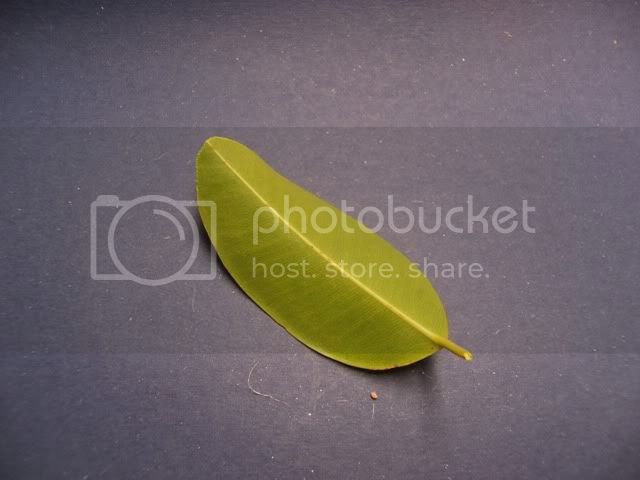
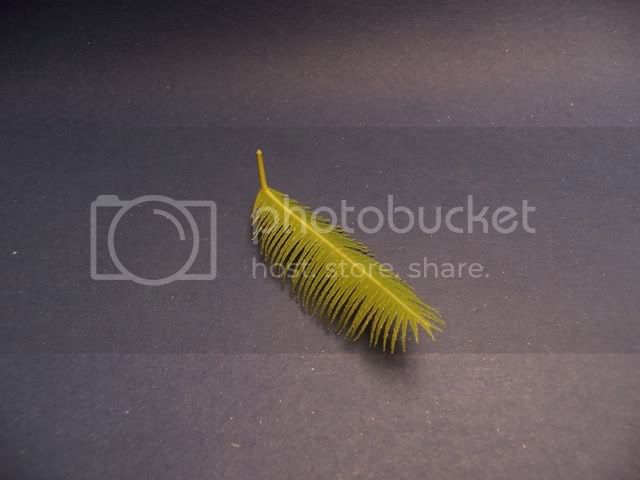
Please watch as I magically turn this ficus benjamina leaf into a stunning replica of a palm tree frond! My technique to make individual 'blades' will be quite different to the traditional snip-strip approach.
Coconuts/seeds
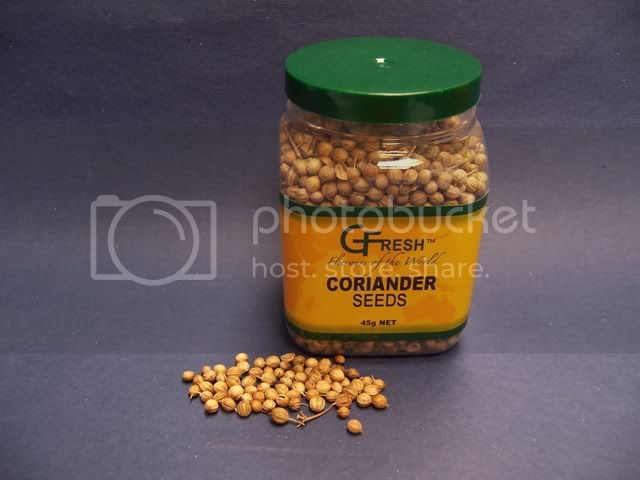
To replicate coconuts or other similar palm seeds, coriander seeds are the perfect material to use.
I hope that you will find this thread interesting as I explain how I make palm trees in 1:35 scale. Any questions or comments, I would love to here your thoughts!
Chas
Hosted by Darren Baker
1:35 Palm trees tutorial
youngc
Western Australia, Australia
Joined: June 05, 2007
KitMaker: 2,166 posts
Armorama: 1,080 posts
Joined: June 05, 2007
KitMaker: 2,166 posts
Armorama: 1,080 posts
Posted: Saturday, October 11, 2008 - 05:11 AM UTC
1969
England - East Midlands, United Kingdom
Joined: December 16, 2005
KitMaker: 2,864 posts
Armorama: 303 posts
Joined: December 16, 2005
KitMaker: 2,864 posts
Armorama: 303 posts
Posted: Saturday, October 11, 2008 - 06:43 AM UTC
Well im intrigued mate and looking forward to following this one and maybe learning something new.
Steve
Steve
tsitsosdera
Attica, Greece / Ελλάδα
Joined: September 29, 2005
KitMaker: 30 posts
Armorama: 21 posts
Joined: September 29, 2005
KitMaker: 30 posts
Armorama: 21 posts
Posted: Saturday, October 11, 2008 - 07:20 AM UTC
Very curious to see the outcome of this technique also how are you going to prevent the leave from drying and getting wrapped.
slodder
North Carolina, United States
Joined: February 22, 2002
KitMaker: 11,718 posts
Armorama: 7,138 posts
Joined: February 22, 2002
KitMaker: 11,718 posts
Armorama: 7,138 posts
Posted: Saturday, October 11, 2008 - 09:57 AM UTC
You have my attention. This looks intriguing.
Feature I suggest.
Feature I suggest.
Posted: Saturday, October 11, 2008 - 10:21 AM UTC
Quoted Text
You have my attention. This looks intriguing.
Feature I suggest.
I second that Scott
this looks like it has the making of a good feature, and should not be allowed to disappear into forum oblivion
cheers
Keith
roudeleiw
Luxembourg
Joined: January 19, 2004
KitMaker: 2,406 posts
Armorama: 2,224 posts
Joined: January 19, 2004
KitMaker: 2,406 posts
Armorama: 2,224 posts
Posted: Saturday, October 11, 2008 - 07:45 PM UTC
This technique is defintely a No-no for me! Relax , this is no critique. I'm highly allergic against ficus, so i am not allowed to touch the leaves
I laughed when i saw the coriander-coconuts, good idea!
I will follow it with interested noneless.
Cheers
Claude
I laughed when i saw the coriander-coconuts, good idea!
I will follow it with interested noneless.
Cheers
Claude
youngc
Western Australia, Australia
Joined: June 05, 2007
KitMaker: 2,166 posts
Armorama: 1,080 posts
Joined: June 05, 2007
KitMaker: 2,166 posts
Armorama: 1,080 posts
Posted: Saturday, October 11, 2008 - 08:42 PM UTC
Thanks guys. I'm most happy to do a feature if everything turns out ok
Trunk
Wrap some string around the trunk in a pattern similar to this to simulate the growth rings (sorry I'm not a botanist so I can't tell you the correct name!):
Apply glue thinned with water to the trunk. Wrap a single ply piece of tissue paper around the trunk like so and tear off the excess.
Fronds
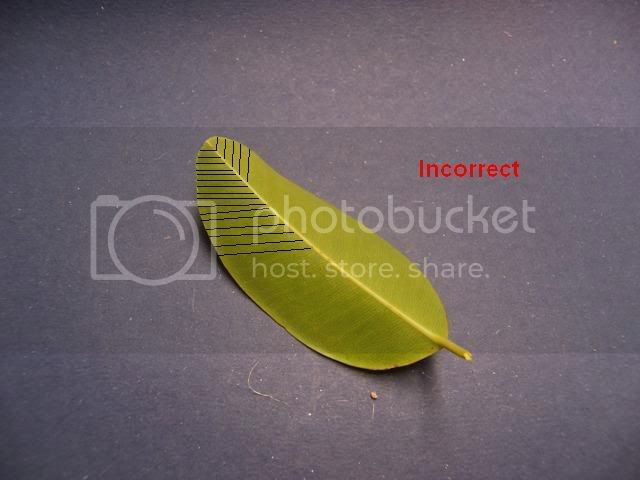
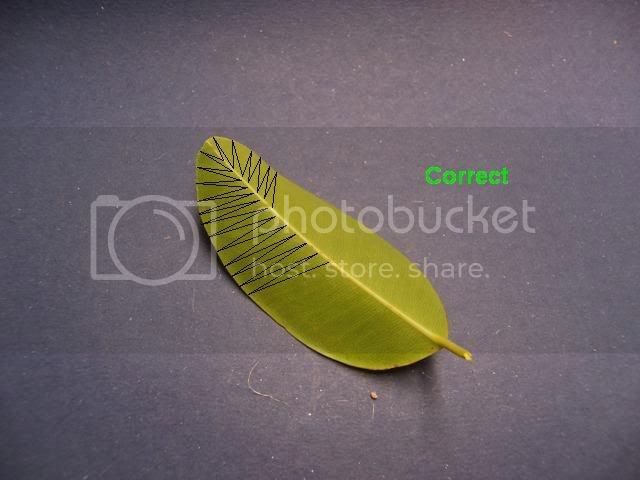
Once the leaves are picked, cut the strands immediately. These diagrams illustrate the correct and incorrect way to cut the strands.
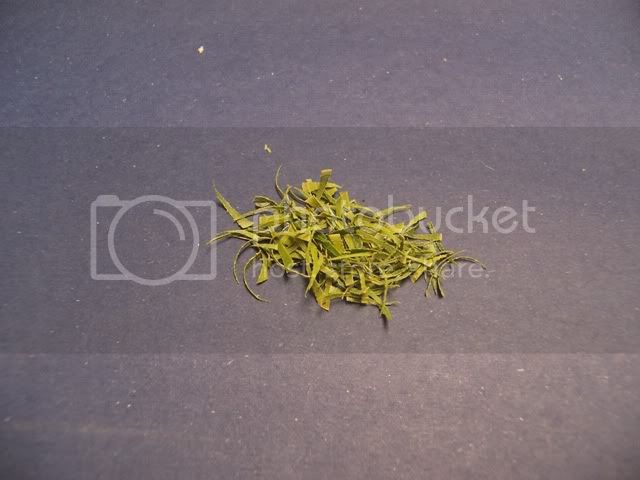
After cutting correctly, you should be left with small cuttings like these. Don't throw these away as they can come in handy for making other tropical plants or grasses. ficus benjamina leaves are very waxy and do not curl up very much at all. BUT, after painting they will curl slightly, and this adds to the realism. ficus benjamina trees are common household pot plants, you should be able to find one at your local garden centre or in nature if you happen to live in a tropical region.
To represent dead growth, use static grass or cut up hemp rope and glue it to the top of the trunk. I suggest spraying the fibres with hairspray to give added strength to support the fronds.
Claude that is a shame you are allergic to ficus. You can always use tracing paper as I've heard it is a good alternative for making fronds. You might not get the natural look though.
Chas
guygantic
Antwerpen, Belgium
Joined: August 19, 2006
KitMaker: 7,084 posts
Armorama: 970 posts
Joined: August 19, 2006
KitMaker: 7,084 posts
Armorama: 970 posts
Posted: Saturday, October 11, 2008 - 10:02 PM UTC
Hi there Chas ! Now that's what I call an interesting topic !
Using ficus leaves is quite original, you can't beat the real thing ! But won't they shrink as they will dry ? Can you give them the "bow" without breaking (do you know what I mean) ? Will you airbrush them ?
You cut them the right way, I'm looking forward to the results.
The trunks look good, I know the technique but it wasn't the appearance for a palm tree in Tunesia, so I used ******* rope. Wrong bet ! Never use rope guys, my advice !
I'm sure you will make them stand out Chas, go for it ! In a couple of months I'll give it another shot, making palm trees in another convincing way.
I'm hooked up here my friend ! G.
roudeleiw
Luxembourg
Joined: January 19, 2004
KitMaker: 2,406 posts
Armorama: 2,224 posts
Joined: January 19, 2004
KitMaker: 2,406 posts
Armorama: 2,224 posts
Posted: Saturday, October 11, 2008 - 11:10 PM UTC
Chas, thanks.
Are you sure that the ficus doesn't dry after a certain time and loses the wax effect?
Claude
Are you sure that the ficus doesn't dry after a certain time and loses the wax effect?
Claude
youngc
Western Australia, Australia
Joined: June 05, 2007
KitMaker: 2,166 posts
Armorama: 1,080 posts
Joined: June 05, 2007
KitMaker: 2,166 posts
Armorama: 1,080 posts
Posted: Sunday, October 12, 2008 - 12:50 AM UTC
Quoted Text
Using ficus leaves is quite original, you can't beat the real thing ! But won't they shrink as they will dry ? Can you give them the "bow" without breaking (do you know what I mean) ? Will you airbrush them ?
You cut them the right way, I'm looking forward to the results.
Quoted Text
Chas, thanks.
Are you sure that the ficus doesn't dry after a certain time and loses the wax effect?
Claude
I'm certain that they retain their shape! I used ficus leaves in my Starcevich diorama to produce the palm tree, and that is almost a year old and still the leaves retain their shape. Actually, the idea to use ficus benjamina leaves came from Santiago Tre (csago). He and I have been discussing different techniques and we both agree that these leaves represent the best looking palm fronds.
Trunk
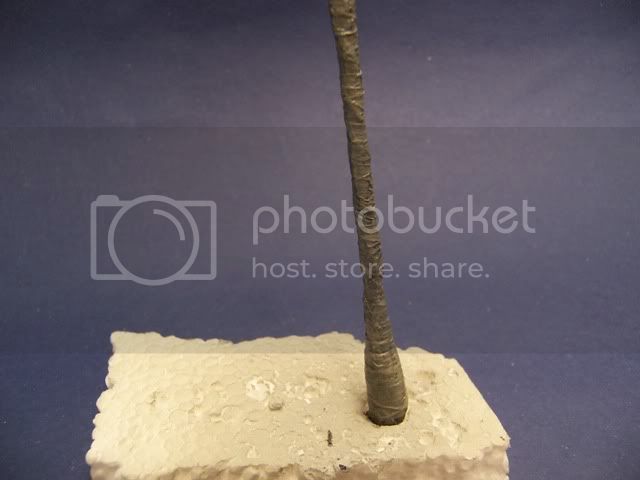
The next stage is painting! First, the trunk was given a complete drybrush of Tamiya acrylic black, then a coat of grey, then the rings were highlighted with deck tan.
Dead growth was painted using a variety of Humbrol enamel red, orange and brown.
Coconuts/seeds
Coriander seeds glued.
...and painted.
Fronds
Once the fronds are cut, they were painted using a variety of greens, yellows and browns to gain a realistic colour. I used simple Humbrol enamels (drybrushed) for the job, but any brand would do. I have used acrylic paints before which also work well. It is now time to begin attaching the fronds to the trunk.
A healthy tree would have anything between 15-25 fronds, so as you can see I still have a fair way to go.
Chas
1969
England - East Midlands, United Kingdom
Joined: December 16, 2005
KitMaker: 2,864 posts
Armorama: 303 posts
Joined: December 16, 2005
KitMaker: 2,864 posts
Armorama: 303 posts
Posted: Sunday, October 12, 2008 - 05:58 AM UTC
Nice results so far Mate,i love the use of the Ficus,no photo-etch is going to beat nature . Do you add any preservative like glucos etc to the leaves ?
Steve
Steve
youngc
Western Australia, Australia
Joined: June 05, 2007
KitMaker: 2,166 posts
Armorama: 1,080 posts
Joined: June 05, 2007
KitMaker: 2,166 posts
Armorama: 1,080 posts
Posted: Sunday, October 12, 2008 - 12:28 PM UTC
Hi Steve,
Glad you like them. I havn't added and glycerine or anything as the leaves are so waxy it would never be absorbed
Chas
Glad you like them. I havn't added and glycerine or anything as the leaves are so waxy it would never be absorbed
Chas
youngc
Western Australia, Australia
Joined: June 05, 2007
KitMaker: 2,166 posts
Armorama: 1,080 posts
Joined: June 05, 2007
KitMaker: 2,166 posts
Armorama: 1,080 posts
Posted: Monday, October 13, 2008 - 01:58 AM UTC
Fronds
If you want to have a little control over the shape of the fronds, leave them a while before painting and they will get a natural curve. Keep both ends under weight and the centre should bend upwards.
Here is some more progress, added a few more fronds. I am working from the bottom up.
Chas
If you want to have a little control over the shape of the fronds, leave them a while before painting and they will get a natural curve. Keep both ends under weight and the centre should bend upwards.
Here is some more progress, added a few more fronds. I am working from the bottom up.
Chas
keenan
Indiana, United States
Joined: October 16, 2002
KitMaker: 5,272 posts
Armorama: 2,844 posts
Joined: October 16, 2002
KitMaker: 5,272 posts
Armorama: 2,844 posts
Posted: Monday, October 13, 2008 - 02:59 AM UTC
Wow, very nice. I think I will try some with tracing or typing paper.
Thanks for the blog.
Shaun
Thanks for the blog.
Shaun
barbacanosa
Baleares, Spain / España
Joined: August 09, 2005
KitMaker: 296 posts
Armorama: 250 posts
Joined: August 09, 2005
KitMaker: 296 posts
Armorama: 250 posts
Posted: Monday, October 13, 2008 - 05:06 AM UTC
A tutorial to take into account too.
simple and realistic.
congratulations
Domi
youngc
Western Australia, Australia
Joined: June 05, 2007
KitMaker: 2,166 posts
Armorama: 1,080 posts
Joined: June 05, 2007
KitMaker: 2,166 posts
Armorama: 1,080 posts
Posted: Tuesday, October 14, 2008 - 12:36 AM UTC
Thankyou Shaun and Domi, your feedback is appreciated,
Well, the bugger is all finished, enjoy.
Time taken to complete: approx 2.5 hours
Cost: approx $1
Chas
Well, the bugger is all finished, enjoy.
Time taken to complete: approx 2.5 hours
Cost: approx $1
Chas
Ascaria
Wroclaw, Poland
Joined: February 01, 2008
KitMaker: 253 posts
Armorama: 103 posts
Joined: February 01, 2008
KitMaker: 253 posts
Armorama: 103 posts
Posted: Tuesday, October 14, 2008 - 01:01 AM UTC
Great job, very nice palm tree, almost perfect, simple way of bulding and very low cost Congratulations
troubble27
New Jersey, United States
Joined: October 10, 2003
KitMaker: 783 posts
Armorama: 637 posts
Joined: October 10, 2003
KitMaker: 783 posts
Armorama: 637 posts
Posted: Tuesday, October 14, 2008 - 02:14 AM UTC
Wow, I like it! One of the best palm trees I have ever seen! Great tutorial! Someone should make this one into a feature!
youngc
Western Australia, Australia
Joined: June 05, 2007
KitMaker: 2,166 posts
Armorama: 1,080 posts
Joined: June 05, 2007
KitMaker: 2,166 posts
Armorama: 1,080 posts
Posted: Tuesday, October 14, 2008 - 04:18 AM UTC
Thanks Wojtek, I hope that one day I can produce the 'perfect' palm!
Gary, I'm glad you like the tutorial. In fact, Scott Lodder has offered to publish it as a feature.
Hope it helps,
Chas
Gary, I'm glad you like the tutorial. In fact, Scott Lodder has offered to publish it as a feature.
Hope it helps,
Chas
1969
England - East Midlands, United Kingdom
Joined: December 16, 2005
KitMaker: 2,864 posts
Armorama: 303 posts
Joined: December 16, 2005
KitMaker: 2,864 posts
Armorama: 303 posts
Posted: Tuesday, October 14, 2008 - 05:47 AM UTC
Exellent result Chas,well done mate .
Steve
Steve
MarcosGarcia
Sao Paulo, Brazil
Joined: August 27, 2004
KitMaker: 140 posts
Armorama: 108 posts
Joined: August 27, 2004
KitMaker: 140 posts
Armorama: 108 posts
Posted: Wednesday, October 15, 2008 - 03:05 AM UTC
Very nice work
EasyOff
Massachusetts, United States
Joined: January 20, 2005
KitMaker: 926 posts
Armorama: 356 posts
Joined: January 20, 2005
KitMaker: 926 posts
Armorama: 356 posts
Posted: Wednesday, October 15, 2008 - 03:17 AM UTC
Pretty Sharp! Very nice.
youngc
Western Australia, Australia
Joined: June 05, 2007
KitMaker: 2,166 posts
Armorama: 1,080 posts
Joined: June 05, 2007
KitMaker: 2,166 posts
Armorama: 1,080 posts
Posted: Thursday, October 16, 2008 - 01:58 AM UTC
Thankyou Steve, Marcos and JBoilard.
Perhaps you will see this tree again, plus a few of its friends 'in situ' on one of my planned dioramas.
Chas
Perhaps you will see this tree again, plus a few of its friends 'in situ' on one of my planned dioramas.
Chas
BoogalooJ
Ontario, Canada
Joined: July 18, 2005
KitMaker: 230 posts
Armorama: 105 posts
Joined: July 18, 2005
KitMaker: 230 posts
Armorama: 105 posts
Posted: Thursday, October 16, 2008 - 03:18 AM UTC
That is an excellent palm tree and a fantastic step by step. This really has to be made into a feature!
Jamie
Jamie
liberator
Luzon, Philippines
Joined: May 15, 2004
KitMaker: 1,086 posts
Armorama: 783 posts
Joined: May 15, 2004
KitMaker: 1,086 posts
Armorama: 783 posts
Posted: Thursday, October 16, 2008 - 01:52 PM UTC
hi chas, that's the closest to the real coconut tree. thanks for sharing. ed