Thanks Roy. You are right.In these pics I have begun the weathering process by adding white glue and sprinkling a mix of paprika(spice),bird grit, and crushed up parsley onto the wet glue to simulate heavy mud. This will look convincing under paint.
Ill also be mixing up my own concoction to add as lighter mud to blend things a bit..
Hosted by Darren Baker
Build-Dragon M4A1(76mm)W
JimMrr
Ontario, Canada
Joined: January 03, 2007
KitMaker: 1,505 posts
Armorama: 382 posts
Joined: January 03, 2007
KitMaker: 1,505 posts
Armorama: 382 posts
Posted: Thursday, December 18, 2008 - 09:52 AM UTC
JimMrr
Ontario, Canada
Joined: January 03, 2007
KitMaker: 1,505 posts
Armorama: 382 posts
Joined: January 03, 2007
KitMaker: 1,505 posts
Armorama: 382 posts
Posted: Friday, December 19, 2008 - 03:06 AM UTC
I also use a mud mix of plaster,water,fine (bird) gravel, acrylic earth paint,white glue and static grass ( believe it or not beard trimmings work too) this is added and then excess is chipped away when dry. Over this a coat of flat black paint is applied. I have now started on the track runs ...bleahhh!
JimMrr
Ontario, Canada
Joined: January 03, 2007
KitMaker: 1,505 posts
Armorama: 382 posts
Joined: January 03, 2007
KitMaker: 1,505 posts
Armorama: 382 posts
Posted: Friday, December 19, 2008 - 10:08 AM UTC
I am now ready for the tracks. These can be very frustrating and boring...but they look great when finished
the track sections are broken down into 3 runs of 26 each. If you look on the sprue at the rubber pads youll notice some are scuffed,some arent...I have decided to use the unscuffed ones on the bottom runs where they wont be seen. When using liquid cement the run stays flexible enough to be manipulated carefully. I have numbered the run so I dont goof and put the treads running the wrong way later.
HONEYCUT
Victoria, Australia
Joined: May 07, 2003
KitMaker: 4,002 posts
Armorama: 2,947 posts
Joined: May 07, 2003
KitMaker: 4,002 posts
Armorama: 2,947 posts
Posted: Friday, December 19, 2008 - 01:26 PM UTC
Hey Jim
You are marching along in leaps and bounds!
The work you have done to spiff the bogey housings is great, and the homemade skids really look the part.
There were most likely more of the M4A3(76)W in footage of the push into Germany, but there would definitely be M4A1(76)W also; survivors from Operation Cobra through to latest marks which had muzzle brakes etc. As for the EECs, I reckon they add that extra bit to a beaten up Sherman especially with a few of them randomly absent...
I have seen many photos of the tracks skids caked with mud; so much so that the gap underneath is packed to the gunnels! Don't forget to add some mud to the underside of the sponsons and the fenders
Good stuff
Brad
JimMrr
Ontario, Canada
Joined: January 03, 2007
KitMaker: 1,505 posts
Armorama: 382 posts
Joined: January 03, 2007
KitMaker: 1,505 posts
Armorama: 382 posts
Posted: Monday, December 22, 2008 - 02:13 AM UTC
This is good news,Brad. Now we can really knock the @#%&! out of this tank in terms of weathering. I like to take my weathering in several stages,so it doesnt get overdone.
here is one side of the tracks done what a job...........after this comes a coat of black primer ,then well touch up the mud,then more black primer.
JimMrr
Ontario, Canada
Joined: January 03, 2007
KitMaker: 1,505 posts
Armorama: 382 posts
Joined: January 03, 2007
KitMaker: 1,505 posts
Armorama: 382 posts
Posted: Tuesday, December 23, 2008 - 01:46 AM UTC
There seems to be a spacing problem at the rear idelr wheel. The track is just that much loose on the wheel. I will finishe the other side and see whether or not I need to remove the rear idler wheels and put a small spacer in under the axle to get a better fit...
JimMrr
Ontario, Canada
Joined: January 03, 2007
KitMaker: 1,505 posts
Armorama: 382 posts
Joined: January 03, 2007
KitMaker: 1,505 posts
Armorama: 382 posts
Posted: Tuesday, December 23, 2008 - 11:18 AM UTC
What I found necissary to ensure good fit of the tracks was to leave the upper and lower runs unaffixed,yet have both the idler wheel and the drivegear at the fromt fixed. This presents alot of tension on the runs,enough to bow them outward. I found that by carefully pushing them into place and glueing them was sufficient to ensure proper fit. Everything looks good now! on to the other run
JimMrr
Ontario, Canada
Joined: January 03, 2007
KitMaker: 1,505 posts
Armorama: 382 posts
Joined: January 03, 2007
KitMaker: 1,505 posts
Armorama: 382 posts
Posted: Saturday, December 27, 2008 - 08:26 AM UTC
with a parts grand total of 657 parts I have finished the running gear and lower chassis...now to give a black primercoat to this..
Posted: Saturday, December 27, 2008 - 08:55 AM UTC
Quoted Text
This is where the advantage of digital photography comes in ...I didnt even see that ejector mark on the drive wheel till I posted the pic!
See ... the benifits of sharing!!! Actually this is so true ... don´t want to even guess how many little mistakes Ive avoided just by looking at photos before (and after) publishing.
Good blog so far Jim. Very interesting ... for the rest of us who are not fluent sherman either!
JimMrr
Ontario, Canada
Joined: January 03, 2007
KitMaker: 1,505 posts
Armorama: 382 posts
Joined: January 03, 2007
KitMaker: 1,505 posts
Armorama: 382 posts
Posted: Monday, December 29, 2008 - 04:03 PM UTC
heres the finished tracks....
on to the upper hull....I can prime the lower hull with black now too..
SSJugend
California, United States
Joined: April 02, 2006
KitMaker: 123 posts
Armorama: 111 posts
Joined: April 02, 2006
KitMaker: 123 posts
Armorama: 111 posts
Posted: Monday, December 29, 2008 - 04:53 PM UTC
Its coming along good! Keep it up!!
Russ
Russ
JimMrr
Ontario, Canada
Joined: January 03, 2007
KitMaker: 1,505 posts
Armorama: 382 posts
Joined: January 03, 2007
KitMaker: 1,505 posts
Armorama: 382 posts
Posted: Thursday, January 08, 2009 - 06:51 AM UTC
Sorry for the dalay in updates guys,but kinda looking for a new job here. My wife and I are the latest victims of the credit crunch...unfortunately what happens in the US directly impacts Canada to a degree....Here is my update shots
As you can see Im working on the hull. I considered using MV lenses ,but looking at the kit headlights I changed my mind. They are clear plastic so I used adhesive foil and will mask the lenses. looks good so far. For the headlight guards I cut a trough for the photoetch legs to sit in so I got a more positive contact there. Ill post more pics as I move along guys..
Posted: Thursday, January 08, 2009 - 07:24 AM UTC
Jim nice going so far are you going to send Armorama a feature when you are done?
JimMrr
Ontario, Canada
Joined: January 03, 2007
KitMaker: 1,505 posts
Armorama: 382 posts
Joined: January 03, 2007
KitMaker: 1,505 posts
Armorama: 382 posts
Posted: Thursday, January 08, 2009 - 08:58 AM UTC
Id be honoured to,Darren. I plan to have several figures on/in the vehicle and EVENTUALLY(translation:when the cows come home) it will be included in a dio with a US army cameraman taking a pic as they roll past..
ericadeane
Michigan, United States
Joined: October 28, 2002
KitMaker: 4,021 posts
Armorama: 3,947 posts
Joined: October 28, 2002
KitMaker: 4,021 posts
Armorama: 3,947 posts
Posted: Friday, January 09, 2009 - 07:45 AM UTC
Jim: be wary of the bolt strip at the seam of the glacis and the nose. The strip was integral to the differential cover and not to the glacis. Here are some examples from Toadmans site
JimMrr
Ontario, Canada
Joined: January 03, 2007
KitMaker: 1,505 posts
Armorama: 382 posts
Joined: January 03, 2007
KitMaker: 1,505 posts
Armorama: 382 posts
Posted: Friday, January 09, 2009 - 09:37 AM UTC
Thats a very good point. Immediately after posting the last pics I went back and removed that strip (carefully) and plan on re-fitting it to correspond to your pics.Also bear in mind please that the upper hull is only dry-fitted to the lower hull in my pics. A very useful piece of info...thanks Roy
JimMrr
Ontario, Canada
Joined: January 03, 2007
KitMaker: 1,505 posts
Armorama: 382 posts
Joined: January 03, 2007
KitMaker: 1,505 posts
Armorama: 382 posts
Posted: Monday, February 02, 2009 - 09:38 AM UTC
I know its been a long time between postings,but RT has been chaotic..Iv been "downsized since my last posting on this thread and that has trown a monkeywrench in my plans ..( Id like to THANK my previouse employers for their "early retirement option" )
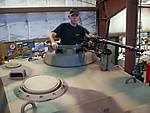
here I have begun to ensure the crew fits properly before moving ahead in construction. I had to rework the gunners right arm(including amputation of his hand) and the commander still has a bit of a divet in his butt, this will soon be remedied....the riders on back will be worked on later as Im concentrating on the armour first..
the edges of their jackets broke during shipping so I re-worked them a bit with Squadron green putty worked with a brush loaded with laquer thinner. The thinner loosens the putty so it is easier to mould into place...