Hi afv-guys...
This is my first post on the armorama site and it starts with my first use of the hairspray technique applied on the 1/48 kübelwagen from tamiya.
I got the Dragon Jagdpanther 1/35 in the stash, wich I'm planning to build, but wanted to try the hairspray technique out on a little project. So I started this morning and this is where I'm finished now.
I worked with Tamiya colors without primer. The technique worked very well for me. But next time i'll put a gloss? finish between the base color (rlm grey) and the hairspray. And I'applied too much hairspray. Lesson learned
Glued doors the wrong way corrected it later...
Constructive Feedback
For in-progress or completed build photos. Give and get contructive feedback!
Hosted by Darren Baker, Dave O'Meara
First Experiment with Hairspray and the Kübel
hellvetier
Bern, Switzerland
Joined: April 17, 2008
KitMaker: 264 posts
Armorama: 156 posts
Joined: April 17, 2008
KitMaker: 264 posts
Armorama: 156 posts
Posted: Thursday, November 27, 2008 - 11:57 AM UTC
hellvetier
Bern, Switzerland
Joined: April 17, 2008
KitMaker: 264 posts
Armorama: 156 posts
Joined: April 17, 2008
KitMaker: 264 posts
Armorama: 156 posts
Posted: Thursday, November 27, 2008 - 12:02 PM UTC
After a little progress... there isn't any wash yet... but the doors are now glued on the right side
hellvetier
Bern, Switzerland
Joined: April 17, 2008
KitMaker: 264 posts
Armorama: 156 posts
Joined: April 17, 2008
KitMaker: 264 posts
Armorama: 156 posts
Posted: Thursday, November 27, 2008 - 12:06 PM UTC
I haven't used any reference just tried the technique out. I was surprised how easy and controlable it is. Perhaps I overdone it a little but it was fun. I'm certainly using the hairspray on my bigger projects.
How do you use the hairspray technique, how do you layer the color? I used base coat-> hairspray-> top color-> gloss
Comments welcome,
greetings from Switzerland
How do you use the hairspray technique, how do you layer the color? I used base coat-> hairspray-> top color-> gloss
Comments welcome,
greetings from Switzerland
sgtreef
Oklahoma, United States
Joined: March 01, 2002
KitMaker: 6,043 posts
Armorama: 4,347 posts
Joined: March 01, 2002
KitMaker: 6,043 posts
Armorama: 4,347 posts
Posted: Thursday, November 27, 2008 - 01:57 PM UTC
Here is one way
http://www.rbadesign.net/TERRAPIN/Chipping_Paint.htm
Looks good what you have done also.
http://www.rbadesign.net/TERRAPIN/Chipping_Paint.htm
Looks good what you have done also.
hellvetier
Bern, Switzerland
Joined: April 17, 2008
KitMaker: 264 posts
Armorama: 156 posts
Joined: April 17, 2008
KitMaker: 264 posts
Armorama: 156 posts
Posted: Friday, November 28, 2008 - 03:27 AM UTC
Jeff, thanks for your link. You can never learn enough!
I added a light brown filter over the whole car...
After drying a wash to accentuate the textures...
Last thing I applied was a flat coat from with Tamiya flat...
Next step is to dust it a little bit up and drybrush the seats and cotton roof.
I added a light brown filter over the whole car...
After drying a wash to accentuate the textures...
Last thing I applied was a flat coat from with Tamiya flat...
Next step is to dust it a little bit up and drybrush the seats and cotton roof.
Desmoquattro
New Brunswick, Canada
Joined: September 10, 2008
KitMaker: 235 posts
Armorama: 168 posts
Joined: September 10, 2008
KitMaker: 235 posts
Armorama: 168 posts
Posted: Friday, November 28, 2008 - 08:16 AM UTC
Quoted Text
Here is one way
http://www.rbadesign.net/TERRAPIN/Chipping_Paint.htm
Looks good what you have done also.
That first picture is staggeringly good. Now you've gone and inspired me, and I'll spend countless hours trying to replicate his results. Damn you!
Posted: Friday, November 28, 2008 - 10:43 AM UTC
I have wondered what the major advantage of using hairspray is. As I understand it, you have to spray it on from the can, which leaves you with very little control. The hairspray goes on quite thick, and I wonder if it will swamp fine detail? If you remove certain areas, do you leave it underneath the other areas, and does this not create an uneven finish, with quite pronounced levels of paint?
I prefer (so far, I'm always open to, and looking for, new techniques.. ) the maskol method, which allows total control as to where you want the paint to peel, how much, and it does not leave an extra layer underneath where you don't remove it. Unless you wish to do so, to show rust blistering underneath the paint.
This water tower was done at a local railway show a few weeks ago (don't ask, the owner of my LHS is into trains, and I weather the occasional piece for him... ) were I did some demo painting at my LHS's table. I aplied spots of Scenic Rust the night before, and covered those with maskol, I over painted (brush, no chance to use the AB) with Vallejo, and removed the maskol when the Vallejo had dried for about 30 min. Finished with washes of various dark Vallejo colours, to simulate the rundown streaks.
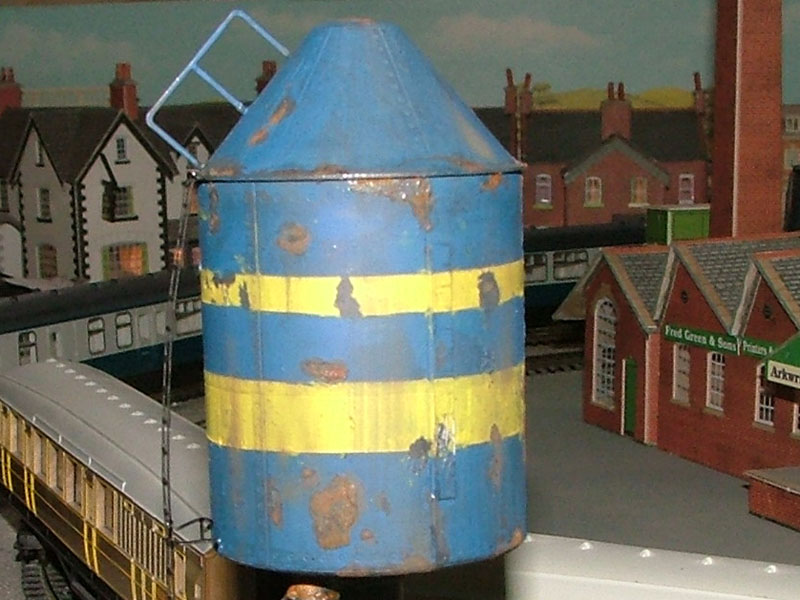
Excuse the lousy picture quality, they were taken in haste, under less than ideal conditions...
As an aside, I also painted a few railway cars as they should look. The two on the left are from bare grey and black plastic, the aggregate car on the right was a prepainted Bachmann car which I weathered. I can tell you that most railway enthusiast were rather shocked by my cavalier approach to colour selection (what do you mean, you use a green that 'looks like' Great Western Railway 1956 spec Locomotive Green.... begone.... ), as well as my taking a shiny railway car, and making it all dirty....
Interesting stuff this hairspray, thanks for sharing your work with us.
Henk
I prefer (so far, I'm always open to, and looking for, new techniques.. ) the maskol method, which allows total control as to where you want the paint to peel, how much, and it does not leave an extra layer underneath where you don't remove it. Unless you wish to do so, to show rust blistering underneath the paint.
This water tower was done at a local railway show a few weeks ago (don't ask, the owner of my LHS is into trains, and I weather the occasional piece for him... ) were I did some demo painting at my LHS's table. I aplied spots of Scenic Rust the night before, and covered those with maskol, I over painted (brush, no chance to use the AB) with Vallejo, and removed the maskol when the Vallejo had dried for about 30 min. Finished with washes of various dark Vallejo colours, to simulate the rundown streaks.
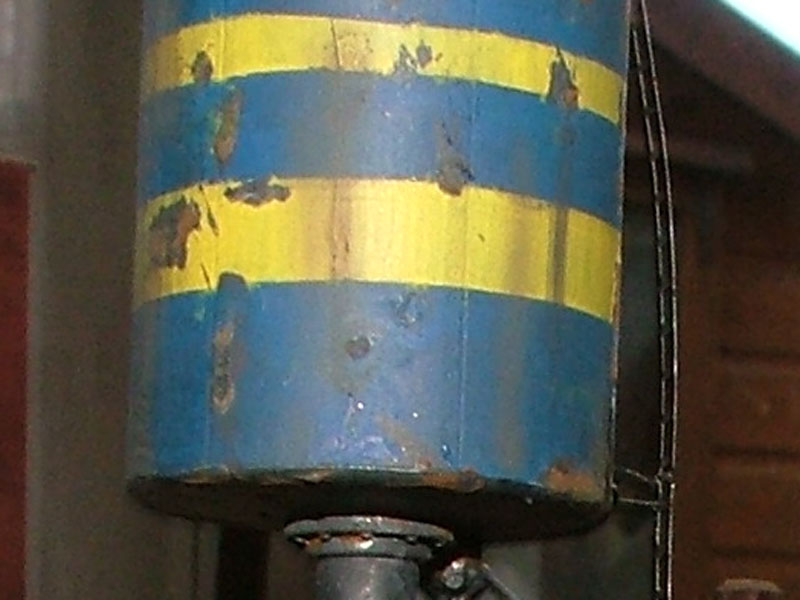
Excuse the lousy picture quality, they were taken in haste, under less than ideal conditions...
As an aside, I also painted a few railway cars as they should look. The two on the left are from bare grey and black plastic, the aggregate car on the right was a prepainted Bachmann car which I weathered. I can tell you that most railway enthusiast were rather shocked by my cavalier approach to colour selection (what do you mean, you use a green that 'looks like' Great Western Railway 1956 spec Locomotive Green.... begone.... ), as well as my taking a shiny railway car, and making it all dirty....
Interesting stuff this hairspray, thanks for sharing your work with us.
Henk
hellvetier
Bern, Switzerland
Joined: April 17, 2008
KitMaker: 264 posts
Armorama: 156 posts
Joined: April 17, 2008
KitMaker: 264 posts
Armorama: 156 posts
Posted: Sunday, November 30, 2008 - 05:26 AM UTC
A little progress on the Kübel:
Dusted it up with very diluted buff and flat earth. First time I tried to paint on some dust... comments welcome...
Drybrushed the roof canvas and seats
And painted the front window...
Next step: use of some pigments and attaching the window.
Dusted it up with very diluted buff and flat earth. First time I tried to paint on some dust... comments welcome...
Drybrushed the roof canvas and seats
And painted the front window...
Next step: use of some pigments and attaching the window.
slodder
North Carolina, United States
Joined: February 22, 2002
KitMaker: 11,718 posts
Armorama: 7,138 posts
Joined: February 22, 2002
KitMaker: 11,718 posts
Armorama: 7,138 posts
Posted: Sunday, November 30, 2008 - 06:34 AM UTC
The dusting really helped this one out. The finish looks good.
Can you putty up the gap in the front end on the Kubels right side, by the tow hook?
hellvetier
Bern, Switzerland
Joined: April 17, 2008
KitMaker: 264 posts
Armorama: 156 posts
Joined: April 17, 2008
KitMaker: 264 posts
Armorama: 156 posts
Posted: Monday, December 01, 2008 - 07:25 AM UTC
Ok, I closed the gap (thanks for the hint scott!) and attached the window and number plate.
Then I used for the first time some pigments: MIG Europe Dust and Dry Mud. I mixed them up with some water and apllied them. After a quick drying I used a brush to wipe some excesses away. The colors were applied for themselves (don't know the right expression ) and mixed.
The last step was applaying flat finish from Tamiya.
I hope you enjoyed my little experiment and thank you very much for the comments, hints and links you posted!!!